
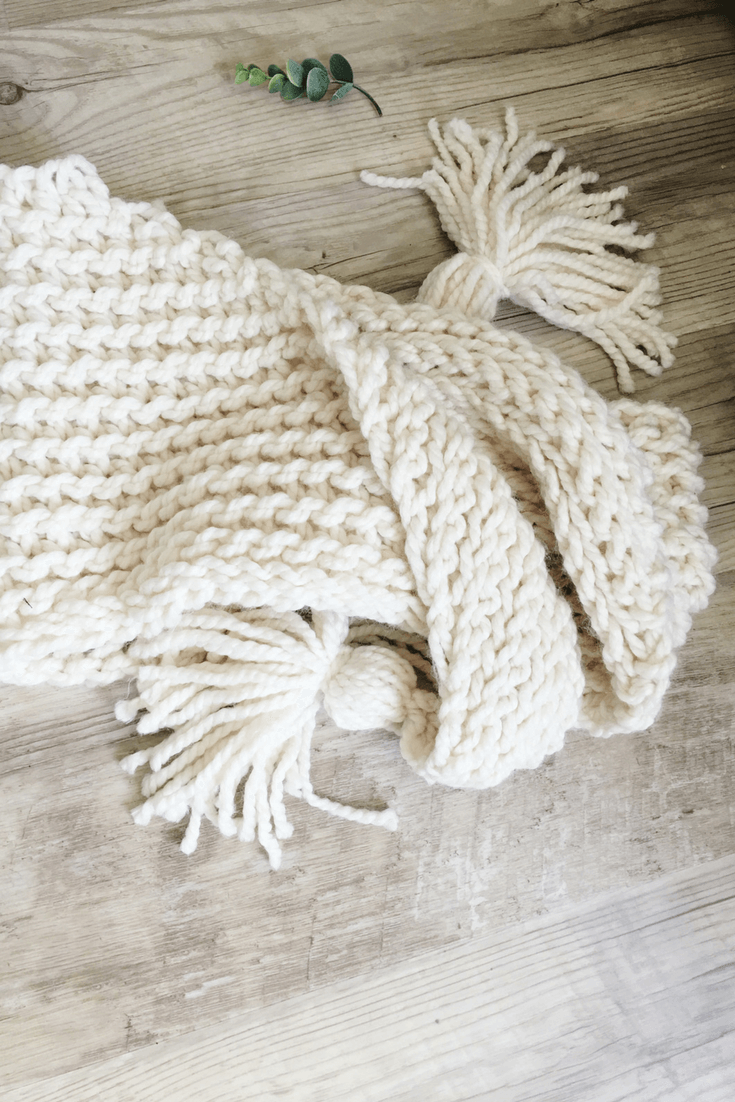
A beautifully textured crochet triangle scarf that uses 1 basic stitch. With this free crochet pattern you can make a knit look scarf even if you crochet. You'll love the modern tassels too. Scroll down for the crochet video tutorial.
I’ve been crushing on crochet triangle scarves with these huge tassels for quite a while now. Add in my obsession for knit look stitches, a new GIANT hook, and a 3-hour road trip. You get a cozy, chunky scarf, that can hide your coffee stain from this morning. Add this crochet triangle scarf to a basic “mom outfit” and you’ll instantly feel put together.
The generous size of this scarf can also be worn as a shawl.

The slip stitch in the back loop technique is the perfect texture for the crochet triangle scarf. It creates ridges that have a unique look you just want to touch. Here’s a ribbed beanie crochet pattern using the same knit look stitch.
HERE ARE A FEW TIPS FOR WORKING THIS STITCH
- Keep your tension loose. Slip Stitches are a very tight stitch. Working the stitch loosely will make it easier to insert your hook.
- Use a bigger hook. To keep your stitches loose and the edges straight, look at the recommended hook size for your yarn and double it.
- Count your stitches. This may seem obvious, but it’s really easy to miss the last stitch at the end of the rows. So check your stitch count every once in a while.
- The front loop is always the loop closest to you. The back loop is the furthest from you. Regardless if you are working the right side or wrong side of the scarf. This video tutorial will show you how to slip stitch in the back and front loops.
Materials
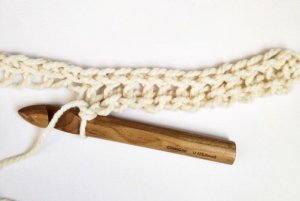
- 25mm Crochet Hook
(lightweight and great quality)
- 2 Skeins Super Bulky Weight Yarn (180-200yards): Lion Brand Wool-Ease Thick and Quick Yarn in color Fisherman (weight 6oz/106yd per skein) The Everly Hat Crochet Pattern uses the same yarn.
Finished scarf size without tassels: 48″ x 19″
Special Stitches
- (FLO) slst2tog: insert hook into FL of stitch, insert hook into FL of 2nd stitch (you will have 3 loops on the hook), YO, pull through all the loops on the hook.
- (BLO) slst2tog: insert hook into BL of stitch, insert hook into BL of 2nd stitch (you will have 3 loops on the hook), YO, pull through all the loops on the hook.
Take Note
- At the beginning of each row, the pattern reads (BLO) or (FLO). Work the entire row in the indicated loop.
- Starting at row 4 & in each row thereafter: You will slst2tog in the first 2 sts of the row & again in the last 2 sts of the row.
- Do NOT ch at the beginning of each row.
Crochet Triangle Scarf Pattern
ch 70 (the scarf will “shrink” as you start working the sl sts)
row 1. sl st in 2nd ch from hook, sl st in each ch across. do not turn (69sts)
row 2. working along opposite side of ch, sl st in each ch across. turn (69sts)
row 3. (FLO) sl st in each st across. turn (69sts)
row 4. (BLO) slst2tog, sl st across until you reach the last 2 sts, slst2tog. turn (67sts)
row 5. (FLO) slst2tog, sl st across until you reach the last 2 sts, slst2tog. turn (65sts)
row 6-36. repeat rows 4 & 5
You will have 3 sts remaining at the end of the scarf.
Break yarn & weave in ends. Attach your tassels to the top two corners of the triangle scarf. Watch this quick video tutorial to learn how to DIY Yarn Tassels.
Your new cozy scarf will go great with any outfit. I really want to wear mine while I curl up with a book & cup of coffee. Maybe I should make a blanket using this stitch too!
Simply brilliant. I totally love this esthetic. I am going to give this a try with my new Amour Clover Q hook by increasing the stitches. I would love to make a throw. You have inspired me. Many thanks!
Hi Shelley!
It’s so fun using a jumbo hook! And the quick project is a nice bonus. A throw would be beautiful! Let me know how it goes.
Stay Cozy,
Sierra
Hi ,
I am french…. and I love this scarf, do you have a french translation of this pattern ?
Thank you very much.
Françoise
notes
{FLO passer dans la boucle avant de la 1ière maille, dans la boucle avant de la 2ième et rabattre les 3 boucles en même temps} travailler tout le rang en avant
{BLO passer dans la boucle arrière de la 1ière maille, dans la boucle arrière de la 2ième et rabattre les 3 boucles en même temps} travailler tout le rang en arrière
Monter une chaine de 70 mailles,
Rang 1: faire une maille serrée dans la 2ième et dans chaque maille jusqu’à la fin de la chaine= 69M
Rang 2: Ne pas tourner, crocheter de l’autre coté de la chaine, faire 1 MS dans chaque = 69M, tourner
R3: {FLO} MS à l’avant dans chaque maille= 69M tourner
R4: {BLO passer dans la boucle arrière de la 1ière maille, dans la boucle arrière de la 2ième et rabattre les 3 boucles en même temps} MS à l’arrière dans chaque maille jusqu’aux 2 dernières à rabattre ensemble comme au début du rang = 67M tourner
R5: {FLO passer dans la boucle avant de la 1ière maille, dans la boucle avant de la 2ième et rabattre les 3 boucles en même temps} MS à l’avant dans chaque maille jusqu’au 2 dernières à rabattre ensemble = 65M
R 6-36. reprendre R 4 & 5
il reste 3mailles à la fin, couper, rentrer le fil et mettre les tassels {voir tutoriel}
j’ai fait une erreur, c’est tout en maille coulée, pas maille serrée. pardon
I’m really confused on how to do row two without turning. Is there a video?
Hi Laurie,
I don’t have a video of this step. Instead of turning to begin row 2 you will be working along the other side of the chain. For example, on row 1 if you inserted your hook under both of the loops, on row 2 you will insert your hook into the back bumps of the chain.
I hope this helps! I will add this to my video list.
I was very confused by this as well. According to the pictures she has on the pdf version of this pattern, it looks like you do still turn your work, but instead of working on the first row, you work underneath it (into the foundation chain.)
That’s what I did – turn but work into the foundation chain.
Hi
Thank you Sierra so much for this pattern. I just love it!!! Any video on the tassels yet??
Waiting… Thanks again
Hi Toby,
The video is so close to be done! I’ll leave a comment here when it’s published.
Stay Cozy,
Sierra
Thanks Sierra!!!! Scarf is almost done and I cant wait to finish it with that special touch!! Waiting…….
Hi Toby! You can view the quick video to make the tassels here.
https://www.youtube.com/watch?v=dNrIqpLv2cY
Thanks for patiently waiting!
THANK YOU SO MUCH FOR YOUR PATTERN TIME AND VIDEO!!!! I JUST LOVE IT!!
I have some bulky yarn I was wondering what to do with and my love of non straight scarves, this pattern is perfect thank you so much x
Hey Helen,
Yay! I have a few of those yarns in my stash too. Just waiting for the perfect project.
The triangle scarves are great. A fun twist on the traditional look.
Enjoy the pattern.
Sierra
How do you switch yarn when the first skein finishes? I’m having issues figuring that out.
Hello Tegan,
I just add the new skein on in the middle of a slip stitch. For example: Insert your hook, instead of yarning over, add the new yarn onto your hook, and pull through the loops. Sometimes I tie the 2 loose ends in a knot. I know this isn’t the “proper” way to add a new skein, but it works. I’ve never had a piece come undone.
I hope this helps!
When you are on rows 1 and 2, do you slip stitch the whole chain or just the FL or BL on each row?
Thanks, love this scarf so far.
Hello Tina!
There are 2 ways you can do these rows.
1. Work row 1 in the front loop of the chain and row 2 in the back loop, like you mentioned.
2. Work row 1 in both loops of the chain and row 2 in the back bumps of the chain.
I’ve found that method 1 is the easiest! I hope this helps.
Yes, it will.
Thanks so much, my daughter is going to love this scarf!
I also love your basket base tutorial.
Merci pour ce très joli modèle , Bises de France , Joëlle
You are most welcome Joelle. Thanks for stopping by!
Bonjour Joëlle,
J’aime Beaucoup ce modèle, mais ai un peu de difficultés à traduire les explications…..
Auriez-vous une traduction ?
Merci par avance de votre aide. Cordialement. Françoise
I’ve don’t have a translation of my patterns. I will keep it in mind. Thanks for the suggestion.
Sierra
Hi there! I love the look of this scarf, for a child’s size (9yrs old) how many would you chain? Also how do you make the tassels??
Hi Stephanie!
I haven’t made this pattern is a child size, but it will be so cute! I would try starting with a chain of 50. If that doesn’t work and you need to adjust the starting number, make sure a beginning chain is an even number.
I need to do a quick video of the tassels. When I get that ready I’ll let you know. The finished size is 7″ long.
If I’m using bulky yarn (5-6) would you still start with 50? I started with 70 and it’s looking short? Or how do you put it on so the scarf stays on?
With a lighter yarn weight, you could follow the pattern as written and get a smaller size. The scarf doesn’t wrap completely around. Here’s how I wear the scarf: The triangle point is in the front, then take the 2 points, with the tassels, and cross them behind your neck. Then pull the tassels forward over the top of your shoulders. The adult size measures 48″ wide at the beginning.