
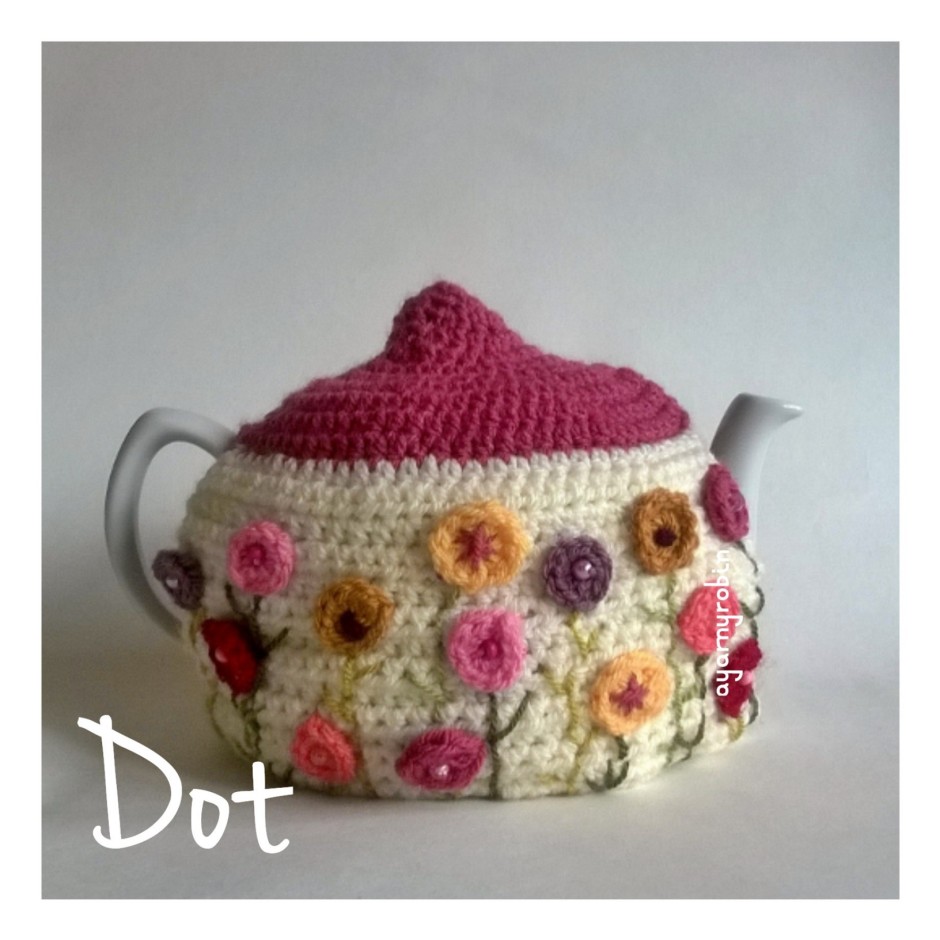

This is the third tea cosy in the Grandma collection, designed with simplicity and sweetness. The top down design means this pattern makes for a quick hook up. Ideal for beginners and sure to guarantee a perfectly sweet cosy for your teapot.  Dedicated to the inspiration that was ‘Nanna Dot’
The pattern makes a tea cosy that fits a standard 4 cup teapot.
I used less than 50g of Stylecraft special dk yarn in colourways cream and raspberry which I used as my base colours. Please note that I have used a different colour yarn in the photo tutorial below.
I also used scraps of stylecraft special dk yarn in: lipstick, saffron, meadow, fondant, gold, shrimp, lime, khaki and grape.
You will also need a darning needle, a selection of beads with a centre hole wide enough for the dk yarn to be threaded through, a pair of scissors and x4 stitch markers (or small safety pins or scraps of different colour yarn). The use of a hot glue gun is optional, flowers can either be glued into position or stitched.

Stitches used in this pattern refer to English terminology, however a conversion to US terminology is provided in brackets.
Ch – chain stitch
slst – slip stitch
hdc– half double crochet (half single crochet)
You will also need:
a 4mm crochet hook
Ok, here we go…
Using the raspberry yarn Ch 4

Join with a slst to form a ring.

Row 1: Ch1 (does not count as a st), 6hdc into ring,
finish with a slst in 1st hdc. (6hdc).

Row 2: Ch1, (does not count as a st) 2hdc in same space, 2hdc in each st around, finish with a slst in 1st hdc. (12hdc).

Row 3: Ch1 (does not count as a st), 2hdc in same space, 1hdc in next st, *2hdc in next st, 1hdc in next st* . Repeat * – * to end, finish with a slst in 1st hdc. (18hdc).
Rows 4: Ch 1 (does not count as a st), 2hdc in same space, 1hdc in next 2 sts, *2hdc in next st, 1hdc in next 2 sts*. Repeat *-* to end, finish with a slst in 1st hdc. (24hdc).
Row 5: Ch1 (does not count as st), 2hdc in same space, 1hdc in next 3 sts, *2hdc in next st, 1hdc in next 3 sts*. Repeat *-* to end, finish with a slst in 1st hdc. (30hdc).
Row 6: Ch 1 (does not count as a st), 2hdc in same space, 1hdc in next 4 sts, *2hdcin next st, 1hdc in next 4 sts*. Repeat *-* to end, finish with a slst in 1st hdc. (36hdc).
Row 7: ch1 ( does not count as a st), 1hdc in same space and in each st around, finish with a slst in 1st hdc. (36hdc).
Row 8: ch1 (does not count as a st), 2hdc in same space andin each st around, finish with a slst in 1st hdc. (72hdc).
Row 9 and 10: Repeat row 7, finish with a slst in 1st hdc. (72hdc).
 You should have something that is starting to look a bit like a flying saucer! This is a good point to check your measurements with your intended teapot. Place your hooked disc on top of your teapot. You want the edges of the circle to be approx. 1cm from the handle of the teapot.
 To mark out handle and spout holes, simply take x4 st markers (or cut short pieces of yarn in a different colour as I did) and place/ tie first marker in the st behind where you joined last row.

Counting backwards (or to the right)miss x3 sts and place/tie second marker in next st. This marks out your handle.

From this second marker count backwards (or to the right) 30sts and place 3rd marker in the next st (31st st). Return to the first marker and count forwards 30 sts (or to the left) and place 4th marker in the next st.
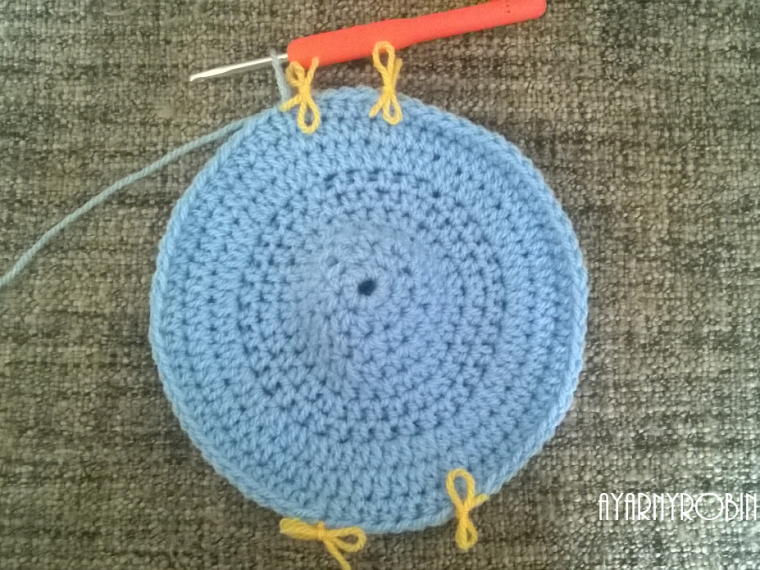
You have now marked out the handle and spout positions for your cosy. Marker 1 and 2 indicate the handle space and markers 3 and 4 indicate the spout space.
The next stage of the cosy is to construct the sides. So, for the purposes of the pattern these will be referred to as side A (between marker 1 and 4) and side B between marker 2 and 3).

Side A row 1: In Cream yarn Ch 1(does not count as a st)* 1hdc in same st and in each st along to marker/tie 4, ch1, turn*
Side A row 2: repeat Side A row 1 returning to marker/tie 1.

Repeat (side A row 1 and side A row 2), to fit the height of your teapot. I completed 15 rows in total. Fasten off.

To complete side B, join cream yarn in stitch to the left of stitch marker number 2

repeat Side A instructions between markers 2 and 3. Fasten off and sew in all loose ends.
Remove stitch markers.
Place on your teapot to check the fit.

Next, using a darning needle sew sides A and B together from the bottom of the cosy to below the spout (approx. 2 rows) and on the handle side from the bottom of the cosy to below the handle.


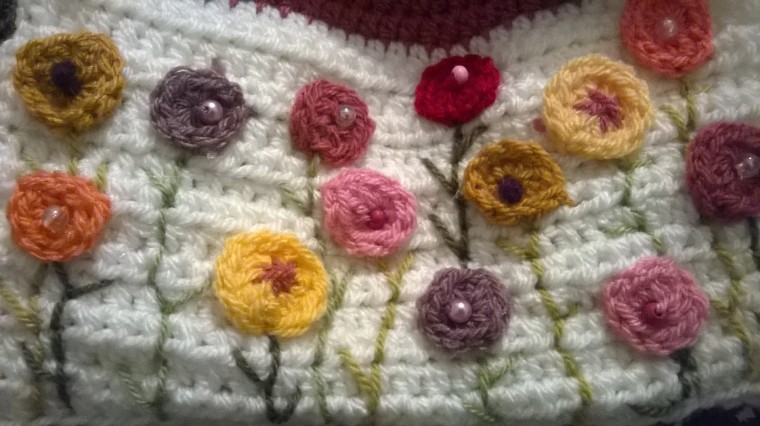
Now for the creative part… making ‘dotty little crochet flowers’. I made x4 flowers in each of the following colours:
lipstick, fondant, grape, gold, raspberry, saffron and shrimp

To make a ‘dotty little flower’ ch4, slst to 1st chain to make a ring. Ch 2 (counts as a hdc) x9 hdc into ring, slst into top of starting ch and fasten off to finish.
To create flower centres you can cross stitch the centre, add beads and create a french knot centre.
I used a cheat method to create the french knot centre by pulling a piece of yarn from the back of the flower to the front and then tying a knot x10 in the yarn in exactly the same place to make a large knot.

To finish thread the other tail of the yarn from the front to the back, so both tails are now at the back of the flower, tie to secure and trim tails short.


Secure your dotty little flowers to both sides of the cosy. You can sew them into place or secure them with hot glue! Then using green yarns sew simple stems and leaves using a back stitch to finish. I used stylecraft special DK yarn in meadow, khaki and lime.
And there you have it…a sweet dotty flower tea cosy to keep your brew warm.

xxxxx
I REALLY HOPE YOU HAVE ENJOYED MAKING THIS PATTERN AS MUCH AS I HAVE ENJOYED CREATING IT FOR YOU. IF YOU ARE NOT SURE ABOUT SOMETHING OR NOTICE ANY ERRORS PLEASE SHOUT UP. EQUALLY PLEASE FEEL FREE TO SHARE YOUR DOTTY FLOWER CREATIONS IN THE COMMENTS BELOW oron social media using the hashtags #ayarnyrobin or @yarnyrobin…I WOULD LOVE TO SEE THEM!
Grandma Dot Tea Cosy part of the Grandma Collection ©2017 designed by Nicola Florence @ayarnyrobin


Thank you for sharing your your lovely tea cosy 😊🐝🐶🕊🌻🦋
LikeLiked by 1 person
It is my absolute pleasure xx
LikeLiked by 1 person
it’s beautiful
LikeLike
Thanks…it was a pleasure to hook and to share xx
LikeLike