
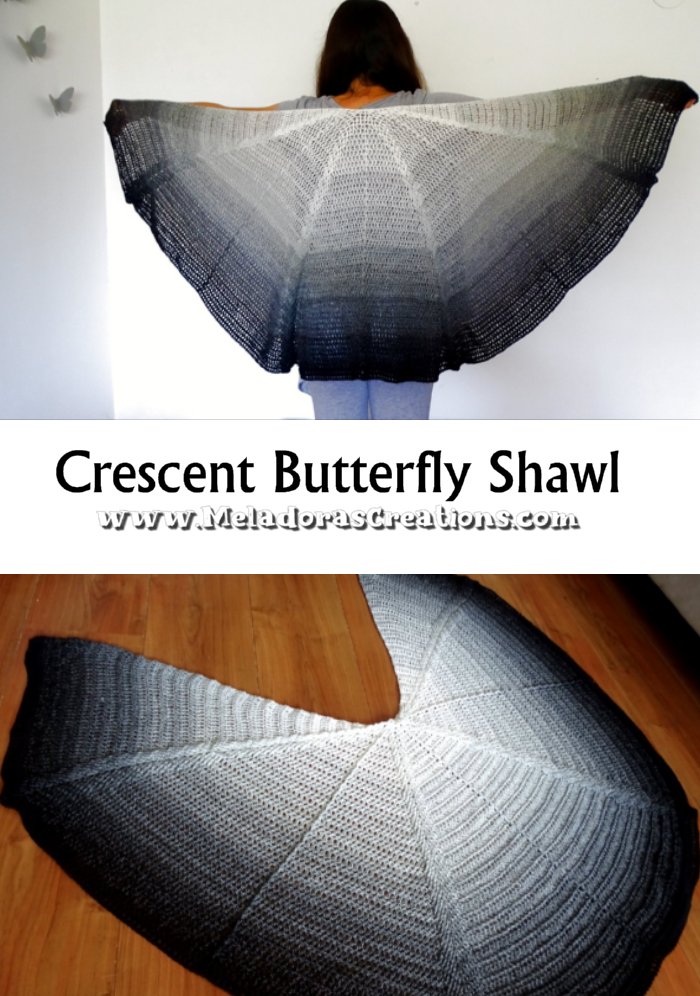
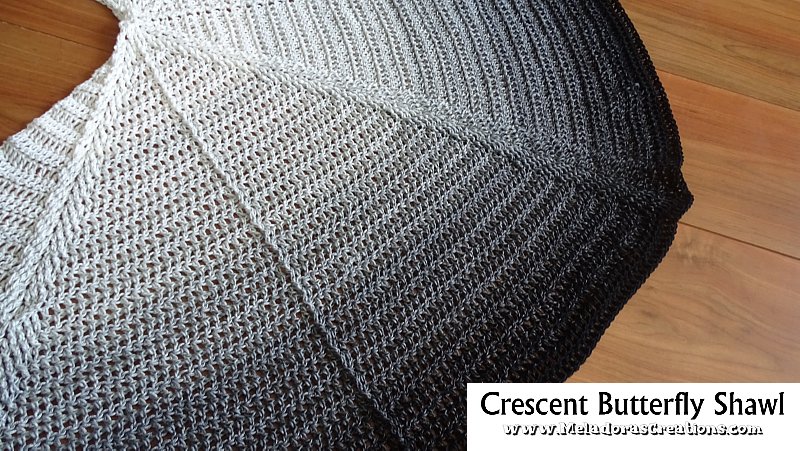
The Crescent Butterfly Shawl is the 9th butterfly shawl crocheted in the series. I’ve been waiting to use this black, gray and white 1000 meter yarn cake for just the right design and I believe I found it!
This butterfly shawl is made using an easy repeat just like all the others, though a touch is needed every 10 rows once you start your repeat row. I was limited only by the 1000 meter fingerling yarn skein but this design can reach any size you desire by just repeating the pattern repeat.
Find more crochet stitches here on my site on the category Crochet Shawls and Ponchos
I also made a page just for the Butterfly Shawls so you can go see all of them encase you’ve missed any. Butterfly Shawls
Be sure to sign up for my newsletter so you can always be update date with the free patterns I release as they come out! https://www.meladorascreations.com/sign-up-for-newsletter/
Crescent Butterfly Shawl – Free Crochet pattern
Please don’t forget to Pin this onto your favorite crochet boards!
This page contains affiliate links
For this project you will need:
HOOK: 4 mm hook or size G hook for the US
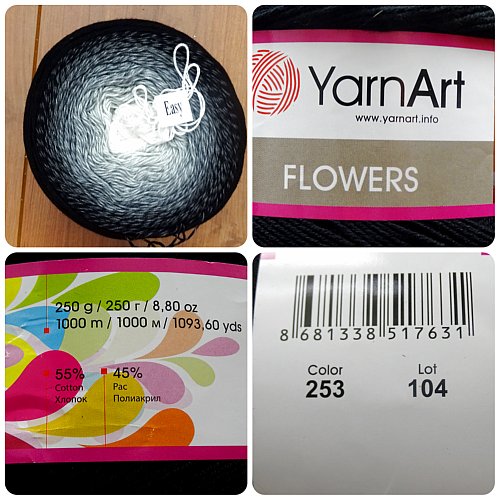
YARN: I used a 1000 meter Yarn cake from YarnArt’s “Flower” collection. #253
Content: 55% Organic Cotton 45% Anti Pilling Acrylic
- Ball Weight: 250 g (8.8 oz)
- Yarn Weight: 1 : Fingering
- Yarn Length: 1000 m (1093 yd)
Gauge and Sizing
Gauge is 2 sts per cm or 5 sts per Inch
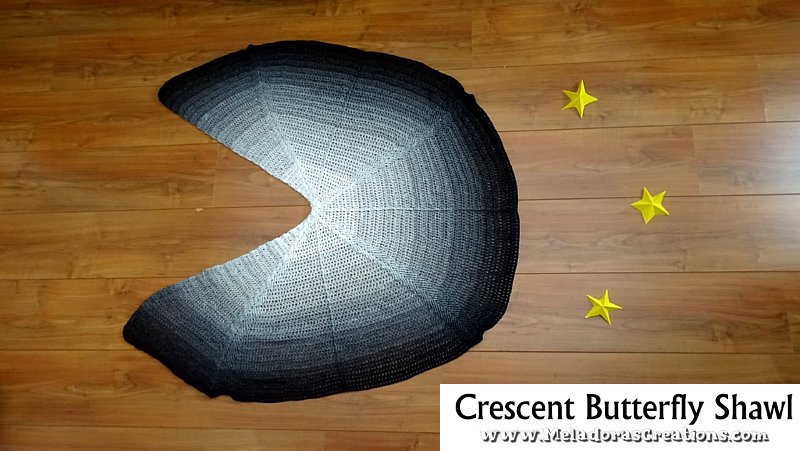
This shawl measures:
Wide – 45 inches or 107 cms
Tall – 22 inches or 55 cms
ABBREVIATIONS
(click on link to find tutorials)
ch = Chain
sl st = Slip Stitch
YO = Yarn Over
st(s) = Stitch(es)
DC = Double Crochet
FPDC = Front Post Double Crochet
BPDC = Back Post Double Crochet
beg = beginning
V st = DC 1, ch 1, DC 1 in the same stitch
Repeat what’s in between * for rest of round.
The number in the (#) will increase by one on the next row
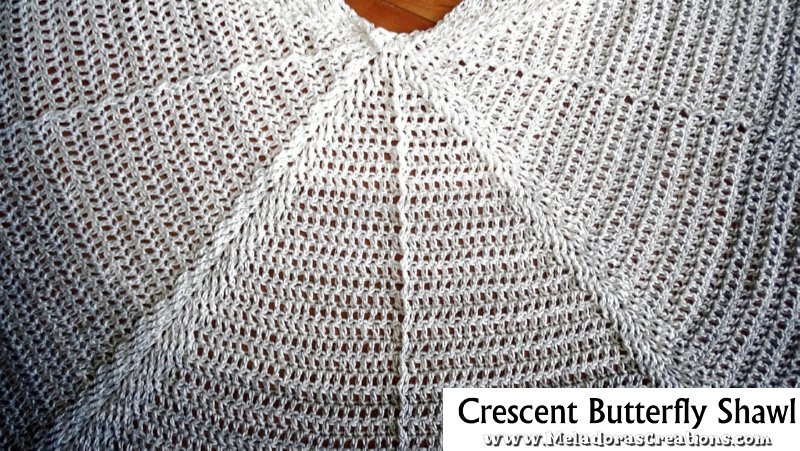

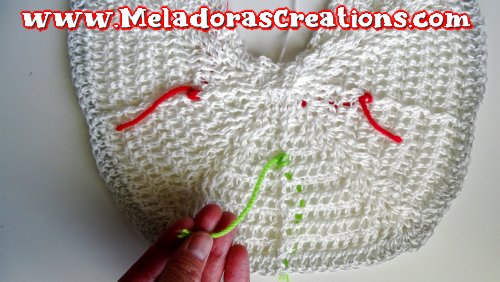
Marking this shawl
I usually add markers on the peak sections of the Butterfly shawls, but it wasn’t really needed on this one. I found I had more trouble seeing the single FPDC \ BPDC so I placed markers on those.
PDF Pattern with Pictures
You can find the PDF version of my pattern with pictures on Ravlery Or my shop on Etsy. Thank you very much for all you do to support my channel.
Or find the Ebook of all 10 Shawl patterns here
Remember to sign up for my newsletter so you can stay up to date with my free pattern releases as they come out! https://www.meladorascreations.com/sign-up-for-newsletter/
THE VIDEO TUTORIALS:
RIGHT HANDED VERSION
LEFT HANDED VERSION
If you haven’t yet, take a moment to subscribe to my videos on YouTube to have easy access to all my videos and playlist @meladora1 on YouTube
Come visit me over on my Facebook Group where I share free pattern links Daily!
To Start
Ch 3 and form a ring by sl stitching in the beg chain. Ch 2
Row 1
The Ch 2 counts as a 1st st .
DC 8 into ring. Giving you 9 sts total.
Ch 2 and Turn
Row 2
The Ch 2 counts as 1st stitch *V st in next DC, FPDC on next Post *
repeat 3 more times for row.
The end of your row should line up with you putting a DC in the top of the ending ch 2. Ch 2 and Turn.
Row 3
The Ch 2 counts as 1st stitch. We’ll be increasing using the post’s of our V sts.
*FPDC on 1st post of the V st.
V st in the ch 1 of the V st.
FPDC on the 2nd post of the V st.
FPDC on the BPDC* (This will turn your BPDC into a FPDC)
NOTE: You will only be turning this BPDC into FPDC for THIS ROW ONLY
This is just to ensure that your stitches are facing the correct direction for the rest of the shawl. Just for this one stitch in the repeat though, the rest of round 3 you do as normal. Just pay attention to the pattern to turn convert the correct stitch.
repeat for row.
So you should have 3 FPDC’s in a row then a V st as you continue.
End your row: After your last V st.
FPDC on the 2nd post of the V st.
DC in the top of the ending ch 2. Ch
Row 4
The Ch 2 counts as 1st stitch
BPDC on the post’s of the next 2 sts.
*V st in V st.
BPDC in the next 5 sts*
repeat for row.
End your row: After the last V st, BPDC in next 2 sts. Then to end row, DC in the top of the ending ch 2. Ch 2 and Turn.
Row 5
The Ch 2 counts as 1st stitch
DC in 1st FPDC of row.
*FPDC in next 2 sts. (the next 2 sts I speak of is the next FPDC and the 1st part of your V st)
V st in V st.
FPDC in next 2 sts
DC in next FPDC st
FPDC in next FPDC.
DC in next FPDC st*
repeat for row.
End your row after the last V st.
FPDC in next 2 sts.
DC in next st and DC in top of ending ch 2.
Ch 2 and Turn.
Row 6
The Ch 2 counts as 1st stitch
* Dc in next 2 sts.
BPDC in next 2 sts.
V st in V st.
BPDC in next 2 sts.
DC in next 2 sts.
BPDC on BPDC.*
repeat for row.
End your row: After your last V st of the row,
BPDC on the next 2 sts,
DC in the next 2 sts.
DC in top of ending ch 2. Ch 2 and Turn.
Row 7 beg of repeat
The Ch 2 counts as 1st stitch
* Dc in next (3) sts.
FPDC on next 2 sts.
V st in V st.
FPDC on next 2 sts.
Dc in next (3) sts.
FPDC on FPDC*
repeat for row.
End your row: After the last V st FPDC in the next 2 sts.
DC in next (3) sts.
DC in top of ending ch 2. Ch 2 and Turn.
Now we’re going to be repeating Row 7 adding 1 DC more in between your V st areas. So your 3 DC’s will be 4 DC’s before your next BPDC’s. So Let me write out Row 8 as an example of how the increase plays out on the next row.
Row 8
The Ch 2 counts as 1st stitch
* Dc in next (4) sts.
BPDC on next 2 sts.
V st in V st.
BPDC on next 2 sts.
Dc in next (4) sts.
BPDC on BPDC*
repeat for row.
End your row: After the last V st FPDC in the next 2 sts.
DC in next (4) sts.
DC in top of ending ch 2. Ch 2 and Turn.
Repeat rows 7 and 8, increasing 1 DC per section until Row 14 when you reach your first multiple of 10. So on Row 14 you should have 10 DC’s in a row before your Peak Stitches. Once you finish this row your following row will also have 10 DC’s in a row because we add an additional FPDC to our peak. So let’s do row 15 now.
Row 15
The Ch 2 counts as 1st stitch
*DC in the next 10 sts.
FPDC in next 3 sts.
V st in V st.
FPDC in next 3 sts.
DC in the next 10 sts.
FPDC on to next FPDC.*
repeat for row.
End your row: After your last V st. FPDC in next 3 sts.
DC in the next 10 sts.
DC in top of ending ch 2. Ch 2 and Turn.
Repeat row 15 adding 1 st per section like before so the next row will be 11 DC’s before your peak section.
You’ll repeat this until you reach 20 sts on row 24. For row 25 you will also do 20 DC’s in a row then add one more FPDC\BPDC to this row giving you 3 FPDCs\BPDCs in a row.
So for example:
Row 16
The Ch 2 counts as 1st stitch
*DC in the next 11 sts.
BPDC in next 3 sts.
V st in V st.
BPDC in next 3 sts.
DC in the next 11 sts.
BPDC on to next FPDC.*
repeat for row.
End your row: After your last V st. BPDC in next 3 sts.
DC in the next 11 sts.
DC in top of ending ch 2. Ch 2 and Turn.
So you’ll continue this way until you reach your next multiple of 10 which is going to be 20 DC’s in a row on Row 25.
Row 25
The Ch 2 counts as 1st stitch
*DC in the next 20 sts.
FPDC in next 3 sts.
V st in V st.
FPDC in next 3 sts.
DC in the next 20 sts.
FPDC on to next FPDC.*
repeat for row.
End your row: After your last V st. FPDC in next 3 sts.
DC in the next 20 sts.
DC in top of ending ch 2. Ch 2 and Turn.
The next row after that you will also have 20 DC’s but it’s because you’ll be adding another FPDC to the row. So you will have 4 FPDC’s before your V st.
Let’s show you what Row 26 looks like.
Row 26
The Ch 2 counts as 1st stitch
*DC in the next 20 sts.
BPDC in next 4 sts.
V st in V st.
BPDC in next 4 sts.
DC in the next 20 sts.
BPDC on to next FPDC.*
repeat for row.
End your row: After your last V st. BPDC in next 4 sts.
DC in the next 20 sts.
DC in top of ending ch 2. Ch 2 and Turn.
You will do this every time you reach a 10 mark. So again you’ll do this after a 30 and 40 DC row etc. You will have 2 rows in a row where you will have the same Multiple.
Continue the repeat of this pattern until you run out of yarn. I made it to the increase of 6 FPDC’s \ BPDC’s before I ran out of yarn.
Feel free to keep going until your pattern reaches your desired size or stop earlier for a smaller size.
This pattern is brought to you by www.meladorascreations.com
You can sell any item made from this pattern and link back to my page or videos, but you do not have permission to copy and paste my pattern anywhere online. ©Copyright 2023, All Rights Reserved
PLEASE READ BELOW!
If you’d like to see my channel stay and grow, please consider becoming a patron.
Or you could make a one time donation through PayPal. Thank you so much for your support! God Bless!