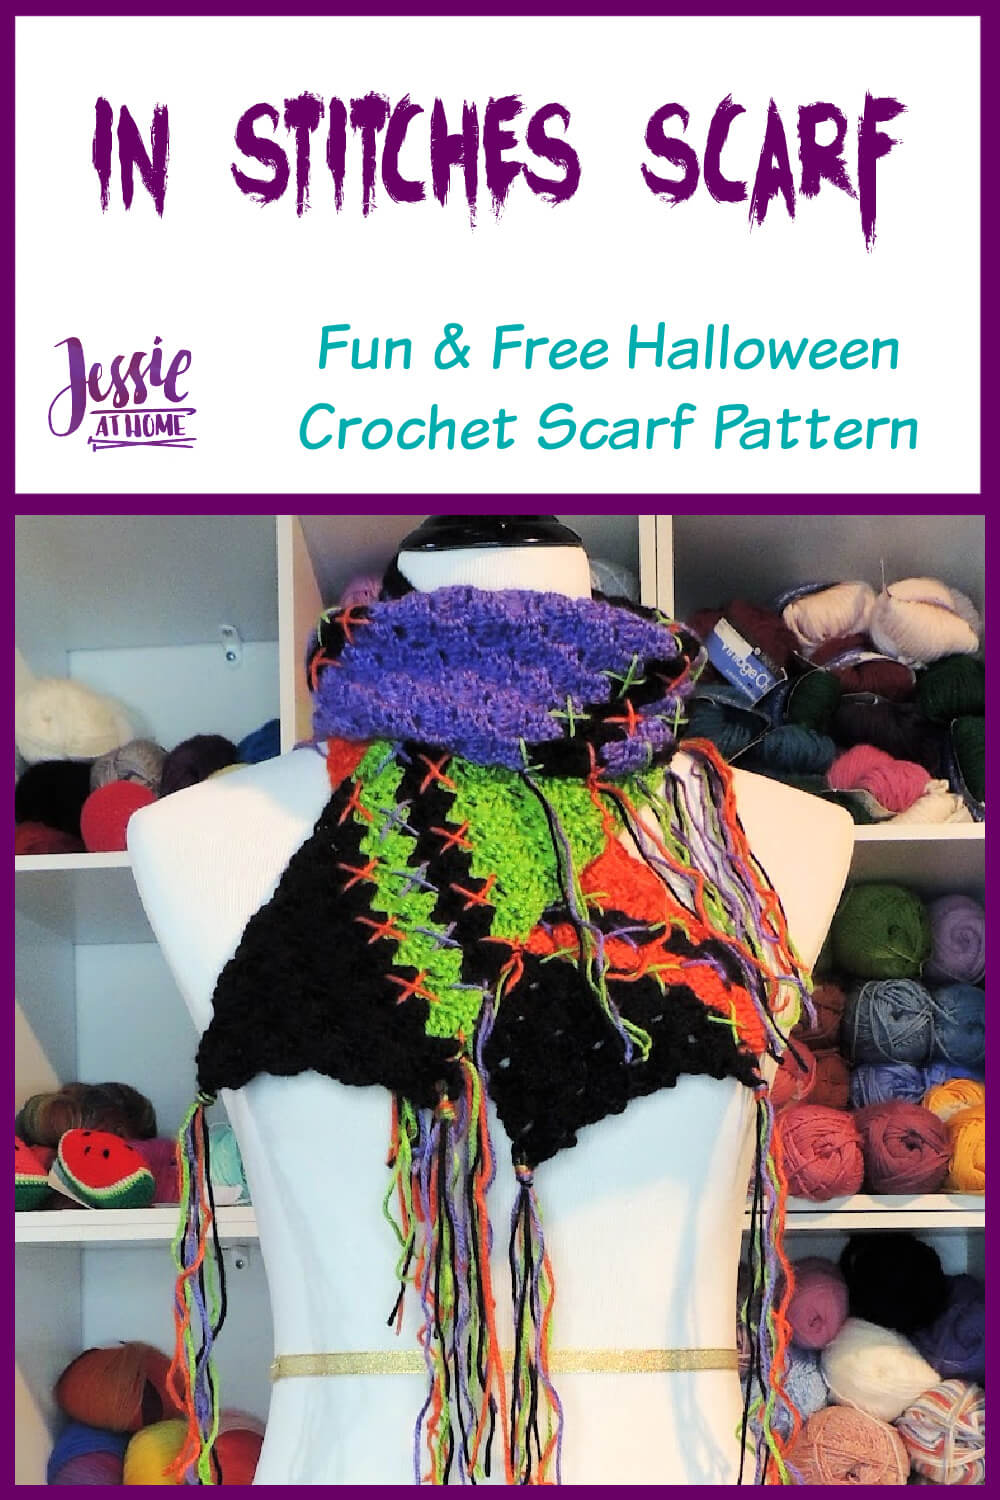
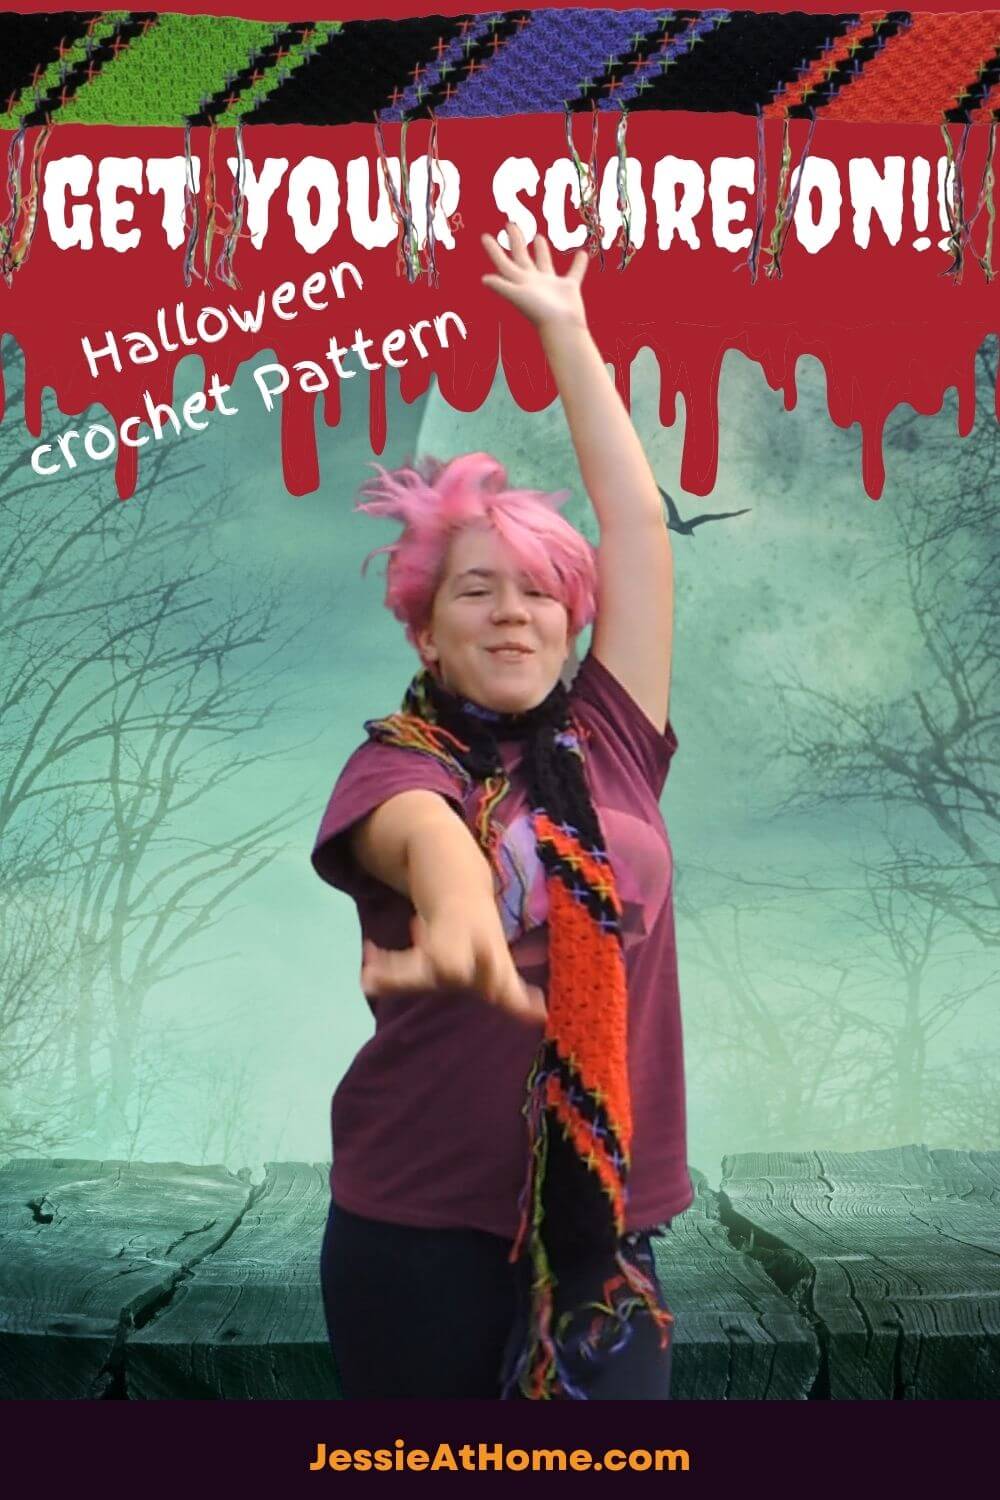
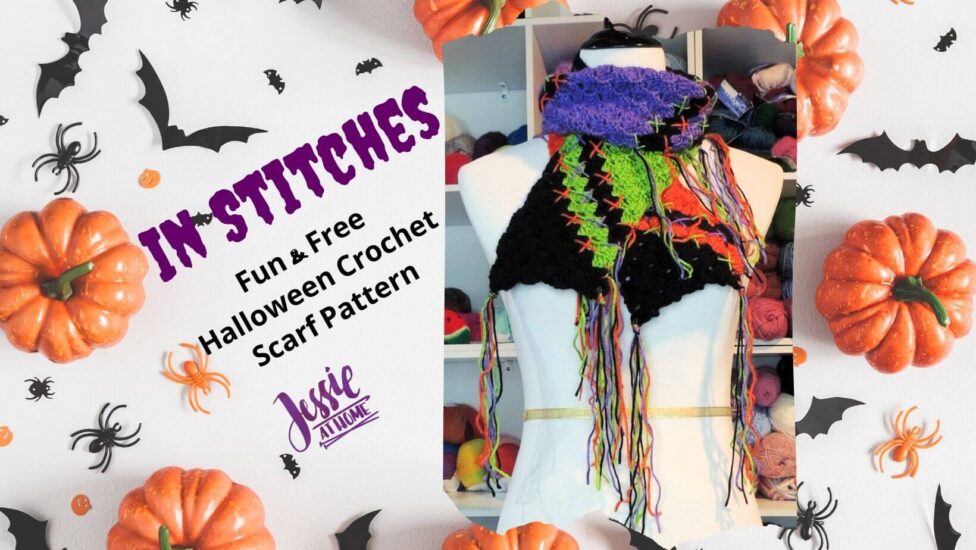
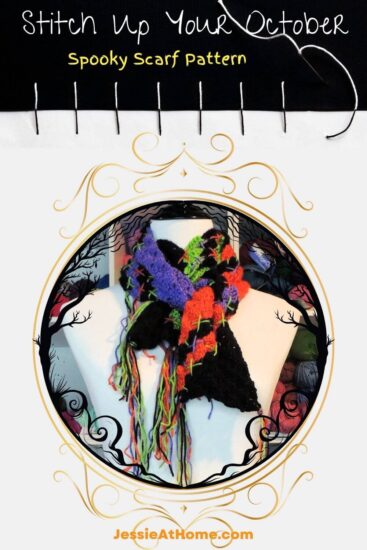
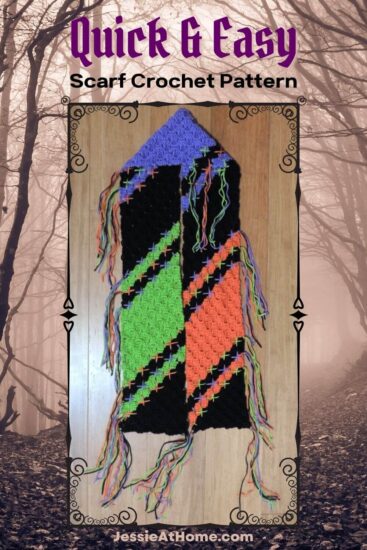
Get spooky with this free Halloween crochet pattern for the In Stitches Scarf. Stay warm and show off your Halloween spirit all October long!


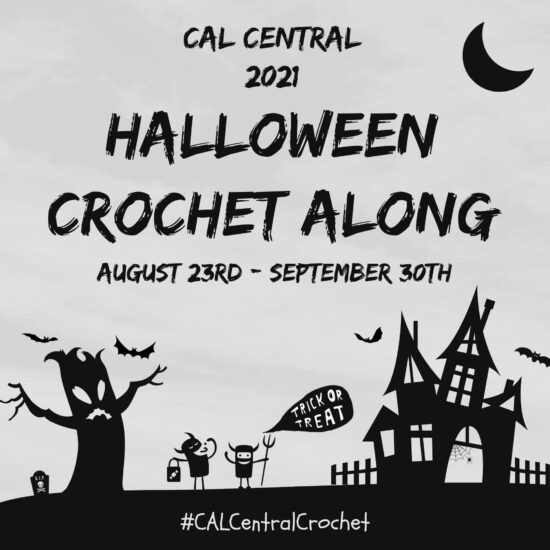
The In Stitches Scarf is part of the 2021 Halloween CAL with CAL Central Crochet.
How the 2021 Halloween CAL Works
Every Monday and Thursday from August 23 through September 30, 2021, we’ll share a free crochet pattern for a Halloween-themed project. These patterns include decorations, toys, costume elements, and more.
How To Join the 2021 Halloween CAL
- You can join in by crocheting the patterns as you have time.
- Share your progress and post pictures of your finished projects. Tag your projects and posts #CALCentralCrochet on all social media.
- If you’d like to chat with other crocheters, join the CAL Central Crochet Facebook group, or visit this thread in the CAL Central Ravelry group.
- By the end of the CAL, you’ll have up to 12 spooky Halloween projects.
Visit Underground Crafter to learn more about the prizes, enter the end-of-CAL giveaway, and to get links to each Halloween CAL pattern as it is released.
October Can Be Cold
This is the time of year when I’m never sure if I should open the windows for fresh air, or turn on the heat. Usually the heat has come on before the month is over here At Home. That’s why I love this Halloween crochet project: it can be used for more then just a Halloween costume. All of October is spooky season, and the In Stitches Scarf is a warm accessory that you can wear for the whole season.
Trick or Treat
I don’t know about you, but when I hand out candy, I like to at least be dressed with some Halloween spirit. I may not always get my full costume on, but I know this year my In Stitches Scarf will help me get my scare on. This free crochet pattern will help you get your scare on too.
I believe free patterns should be easy to follow. Actually, I believe all patterns should be easy to follow. After all, DIY is supposed to be fun, not just a way to save money. The In Stitches Scarf is a quick and easy crochet pattern which includes a great little graphic to help with sewing the stitches. Just follow the dot-to-dot image and success will be yours.
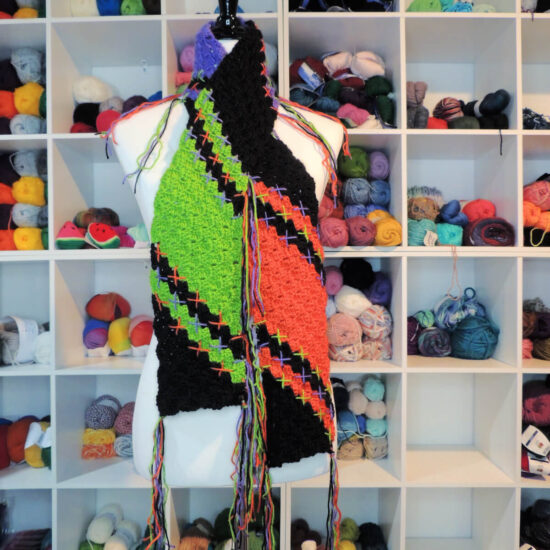
In Stitches Scarf
Halloween Crochet Scarf Pattern
Easy Skill Level
Designed by Jessie Rayot
Halloween Crochet Scarf Supplies
Size
54″ x 5″
Yarn
Herrschners Cheerful DK: (100% Anti-Pill Acrylic), Size 3 – Light/DK, (12 wpi), 273 yds / 100 g, (2.73 yds/g)
Spider 0020 – Color A: 1 skein, (195 yds / 70 g)
Parakeet 0051 – Color B : 1 skein, (70 yds / 25 g)
Purple 0017 – Color C : 1 skein, (70 yds / 25 g)
Tiger 0031 – Color D : 1 skein, (70 yds / 25 g)
Yarn Sub Ideas: WeCrochet Swish DK, WeCrochet Kindred, Lion Brand Heartland
Hook
5.0 mm (US H)
Gauge
Learn about gauge HERE
9 sts x 9 rows = 5” [12.5 cm] in pattern (Dc C2C Box St)
While this pattern will work even if your gauge is different, please keep in mind that a different gauge will change the finished size of your scarf.
Other Supplies
Stitches and Abbreviations
Click on highlighted sts for tutorials
ch – chain
dc – double crochet
sl st – slip stitch
sp(s) – space(s)
st(s) – stitch(es)
( ) – work step in parentheses in indicated stitch
[ ] – work step in brackets number of times indicated
Pattern Notes
- Read through all instructions before beginning.
- When making color changes, make the first 3 sl sts of the Row in the previous color, then make the next sl st in the new color.
- Leave a 10″ tail at the start and end of each color change, too long is better than too short.
- Row counts are at the end of each Row after the period, but only if the count has changed from the previous Row. {count here}
- Chs and sl sts are not included in Row counts unless specified.
Halloween Crochet Scarf Pattern
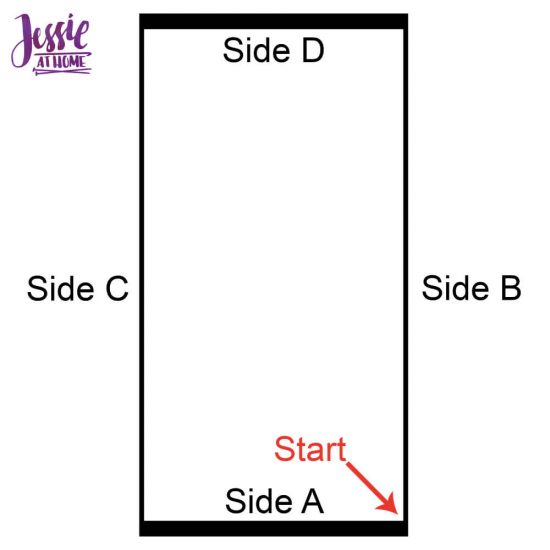
This C2C creation is made in 3 sections, starting from a corner out. First is the Double Increase section which causes both sides adjacent to the corner (Sides A & B) to grow longer, next is the Decrease/Increase section which causes one side (Side A) to stay the same length and just get taller (creating Side C), and the other side (Side B) to continue growing longer, and last is the Double Decrease section which brings both sides together by continuing to bring one side (Side C) up, and stopping growth on the other side (Side C) and bringing it over (creating Side D) to make the opposite corner from the starting corner.
Color Layout
- 10 Rows A
- 2 Rows B
- 2 Rows A
- 10 Rows B
- 2 Rows A
- 2 Rows B
- 10 Rows A
- 2 Rows C
- 2 Rows A
- 10 Rows C
- 2 Rows A
- 2 RowsC
- 10 Rows A
- 2 Rows D
- 2 Rows A
- 10 Rows D
- 2 Rows A
- 2 Rows D
- 10 Rows A
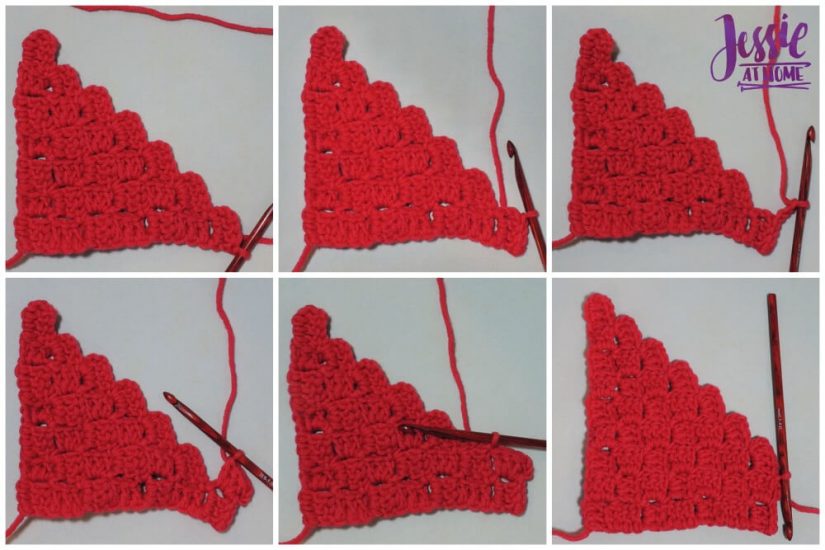
Double Increase
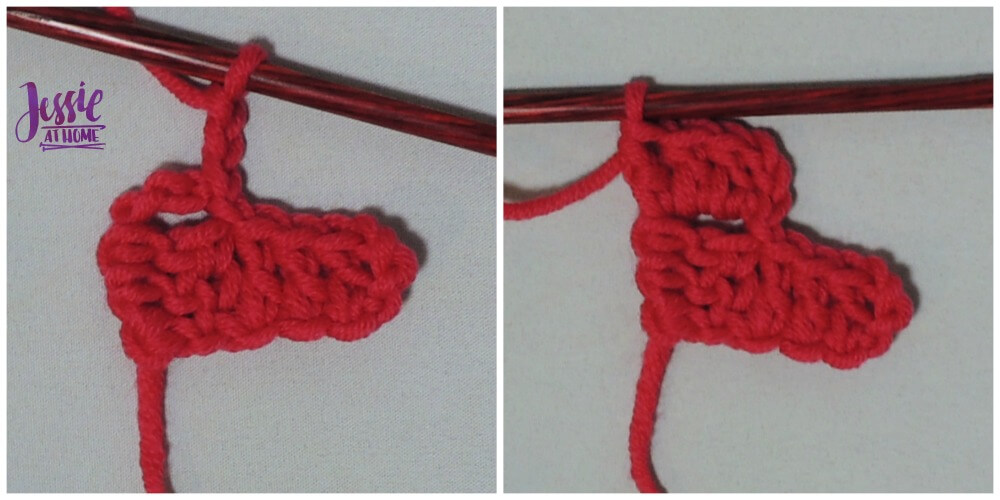
Row 1: With Color A: Ch 6, dc in 4th, 5th, and 6th (last) chs from hook. {1 box}
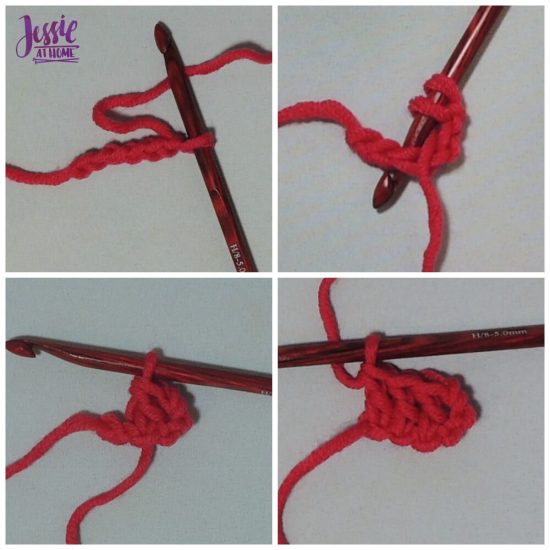
Row 2: Ch 6, turn, dc in the 4th, 5th, and 6th chs from hook, sl st into ch-3 sp of connecting square ch 3, 3 dc in same ch-3 sp. {2 boxes}
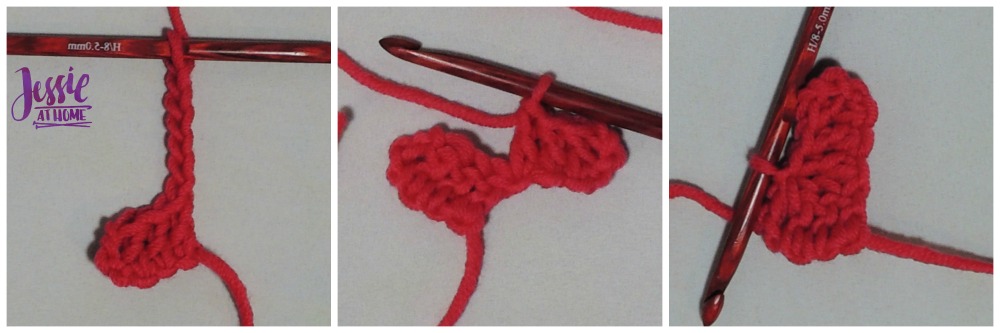
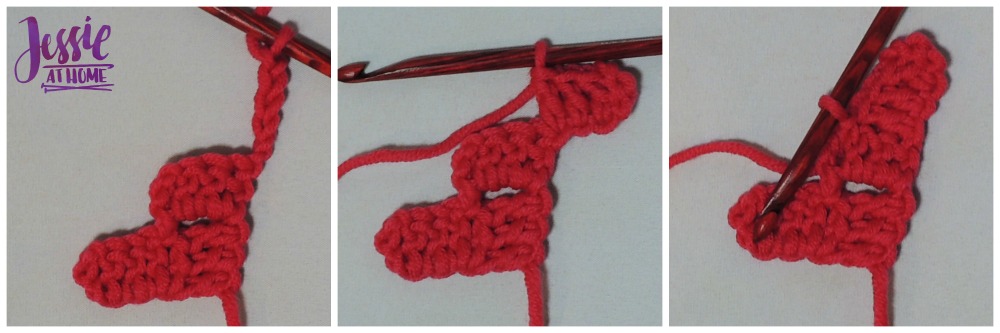
Row 3: Ch 6, turn, dc in 4th, 5th, and 6th chs from hook, sl st into ch-3 sp of connecting square ch 3, 3 dc in same ch-3 sp, sl st into ch-3 of next connecting square ch 3, 3 dc in same ch-3 sp. {3 boxes}
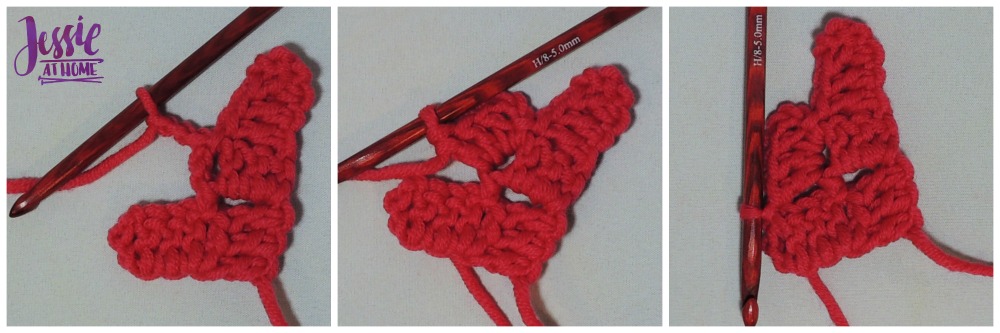
Row 4: Ch 6, turn, dc in 4th, 5th, and 6th chs from hook, sl st into ch-3 sp of connecting square, *ch 3, 3 dc in same ch-3 sp, sl st into ch-3 of next connecting square; repeat from * until one ch-3 sp remains, ch 3, 3 dc in same ch-3 sp. {3 boxes}
Rows 5-9: Repeat Row 4. {9 boxes at the end of Row 9}
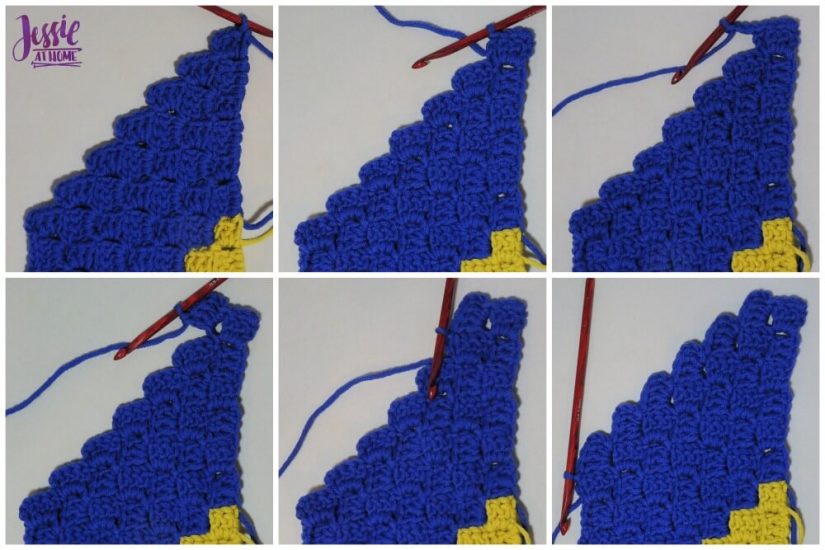
Decrease/Increase
The number of boxes in each row will remain the same throughout this section.
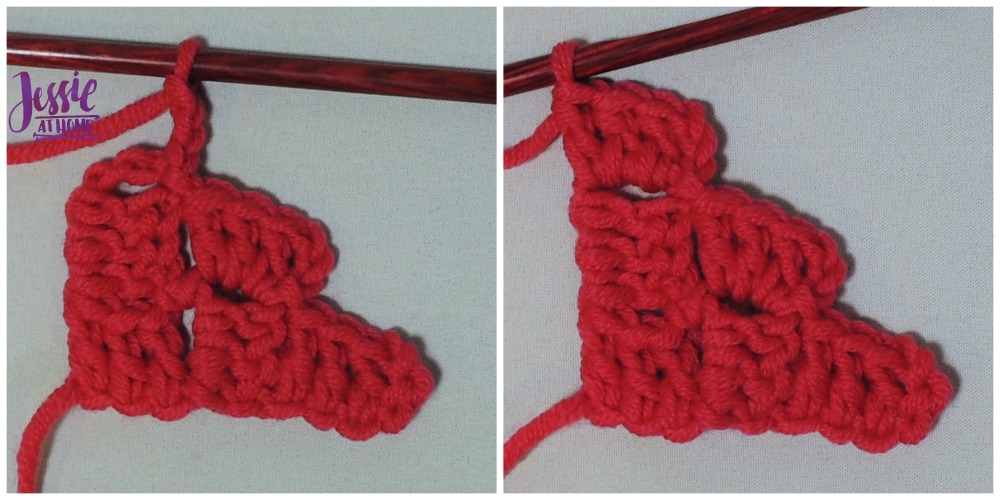
Row 1: Turn, sl st in each of 3 dc, sl st into ch-3 sp, *ch 3, 3 dc in same ch-3 sp, sl st into ch-3 of next connecting square; repeat from * until one ch-3 sp remains, ch 3, 3 dc in same ch-3 sp. (this row has a decrease at the start and an increase at the end).
Row 2: With Color B: Ch 6, turn, dc in 4th, 5th, and 6th chs from hook, sl st into ch-3 sp of connecting square, *ch 3, 3 dc in same ch-3 sp, sl st into ch-3 of next connecting square; repeat from * until one ch-3 sp remains. (this row has an increase at the start and a decrease at the end)
Repeat Rows 1 and 2 following the color layout until only 9 rows remain in the color layout.
Double Decrease
Rows 1-9: Turn, sl st in each of 3 dc, sl st into ch-3 sp, *ch 3, 3 dc in same ch-3 sp, sl st into ch-3 of next connecting square; repeat from * until one ch-3 sp remains. {Row 9 will only have one box}
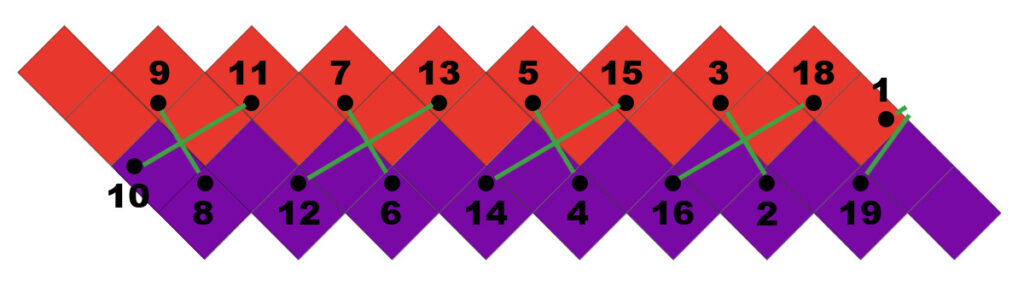
Stitches
- Follow color pattern as seen in photos or make your own.
- Cut a strand of yarn 2 yards long.
- Thread yarn into a yarn needle.
- Following Image, sew through each numbered spot starting with 1 and working numerically, sew down through the odd numbers and up through the even numbers.
- Gather the 2 ends of the stitching yarn and the 2 ends of the color changes in the middle of the stitching yarn and tie them together with the knot up against the scarf.
- Cut the 4 tied ends to 8 inches.
- Repeat at each color change.
Tassels
- Cut a 24″ strand of each of the 4 colors of yarn.
- Insert hook in a corner of the scarf, then pull the 4 strands half way through.
- Gather the 8 strands of yarn (they are doubled now) and tie them together with the knot up against the scarf.
- Cut the 4 tied ends to 8 inches.
- Repeat at each corner.
Wear or give and enjoy! BOOO!!!!
Did you enjoy what you found here at Jessie At Home? Then sign up for my newsletter and like my Facebook page, so you’ll get all the updates on new tutorials, other posts, sales, and coming events.
If you have any questions, want to share pictures of your work, or just want to chat with Jessie and other crafty individuals, than join my Facebook group.

© Copyright 2021 Jessie Rayot / Jessie At Home All my videos, patterns, charts, photos and posts are my own work, so you may not copy them in any way. If you want to share this information with someone, then share the link to this post. If you want to share on your own blog / website, then you may use the first photo in this post and link back to this post. Also, you may not give away printed copies of this post.