
Lately I’ve made some felted eyeglass cases using Noro Kureyon yarn.
Felting is an adventure I enjoy. Since I never know exactly how a crocheted item will look after felting I have to take a deep breath before I sacrifice a crocheted item to the washing machine. This adventure requires one to accept some lack of control. You may not get the exact result you expect, but if you take your time and check your progress as you go the results can be beautiful and surprising. Why not give it a try?
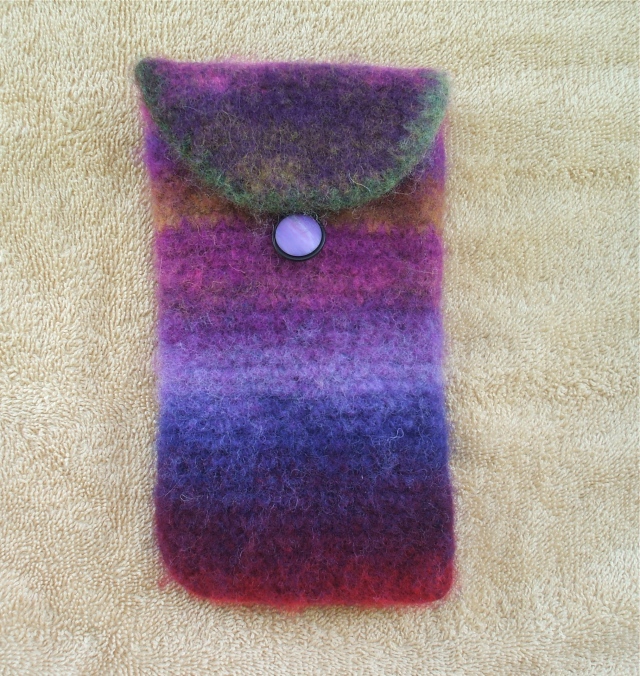
Here are my instructions to make the felted eyeglass case shown above. You will need a top loading washing machine for felting.
Felted Noro Eyeglass case
by Kathy Kelly
Materials:
1 skein Noro Kureyon (50 grams, 110 yards)
size J, 6.0 mm, crochet hook
stitch marker
oval cord elastic
button
lingerie bag
wool wash
finished size: 7” long, 4 “ wide
pre-felting size: 8” long, 5” wide
Abbreviations:
ch: chain
sc: single crochet
sc 2 tog: (single crochet 2 together) Insert hook into stitch, yarn over and pull through stitch, (2 loops remain on hook), insert hook into next stitch, yarn over and pull through stitch (3 loops on hook), yarn over and pull through all loops on hook.
Instructions for case:
case is worked in the round, do not join at ends of rounds
ch 16
First round: Starting in second ch, sc in one loop of each ch across to last ch. Make 2 sc in last ch. Turn work to continue around other side of the chain, make one sc in each free loop of the ch, ending with 2 sc in last ch.16 stitches per side (32 stitches in one round)
Place a marker in last stitch of this first round. It is easy to accidentally add stitches when going around the edges of the case. Be sure you maintain 16 stitches per side and 32 stitches in each round.
Continuing rounds:
Continue to sc around the bag, placing one sc in each sc from previous round. Do not turn and do not chain at the beginning of new rounds.
Work in this manner until case is 8” tall.
Make flap:
Row 1: sc in each of next 16 sc of previous round. TURN
Row 2: ch 1, sc in each sc of previous row (16 sc) Turn.
Rows 3 & 4: Repeat Row 2.
Row 5: ch 1, sc in first st, sc 2 tog in second st, sc in each st across until you reach the last 3 sts. Then sc 2 tog, sc in last st. (14 sts)
Rows 6-12: Repeat instructions for Row 5 seven times until you have 6 sc across.
Fasten off.
Unwind the remaining yarn until you reach a contrasting color of yarn for the edging of the flap and cut to begin there.
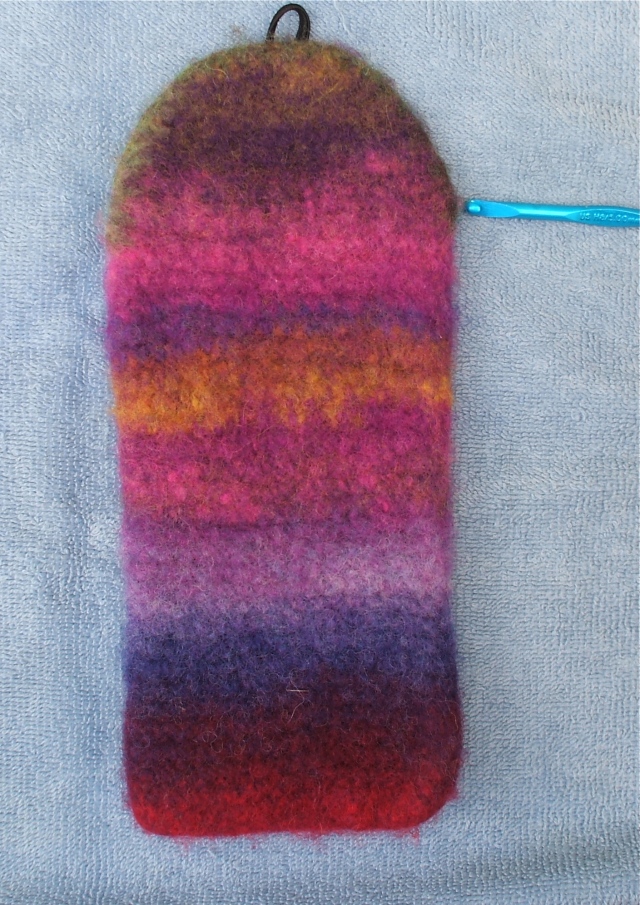
With the back of the case facing you, re-attach the contrasting color section of your yarn to the right side of flap where it extends from the main part of the case. (In photo below hook points to the section of case where you will start your stitches. Sorry, I took this photo after felting but you can see where to start the sc edging from this photo.)
Ch 1 and sc in the edge of each row until you reach the center, then sc in each of 6 sc, then continue with 1 sc in each edge row of flap until you reach the body of the case.
Fasten off and weave in ends.
Felting:
Felting Noro may take a long time so be patient. Be sure to check the progress of the felting frequently as results may vary depending on your machine.
Instructions for felting in a top load washer:
Put the case in a zippered lingerie bag. Add some tennis balls and/or a pair of jeans for friction. Set the washer on small load and hot wash/cold rinse. Add a small amount of wool wash.
After starting the wash let it run through the agitation cycle and then stop the cycle. This is 8 minutes on my washer. Pull out the bag and check the progress (checking to be sure it isn’t sticking to itself or getting creased), then reset it to wash again (without emptying the water) and continue the agitation cycle. (I did this three times). Then let the cycle finish with a cold rinse. The cold rinse seems to aid in felting. Check the progress of the case again.
If necessary, repeat the whole process with new water another time. Mine took over an hour total. The length of time needed to felt the piece will vary with water temperature. You may also add a kettle of boiling water to the wash if you wish. Handle boiling water with caution to avoid burning yourself.
If it looks like it’s not felting in the first half hour don’t panic. Mine took quite a while to start to shrink and then once it started to shrink it proceeded quickly.
When you’re done take the case and pull it into shape. You can pull out any uneven parts and pull the flap so that it makes a nice curve in front. Pin it to an ironing board, or blocking mat, and leave to dry. Using a fan in the room will speed up the drying process.
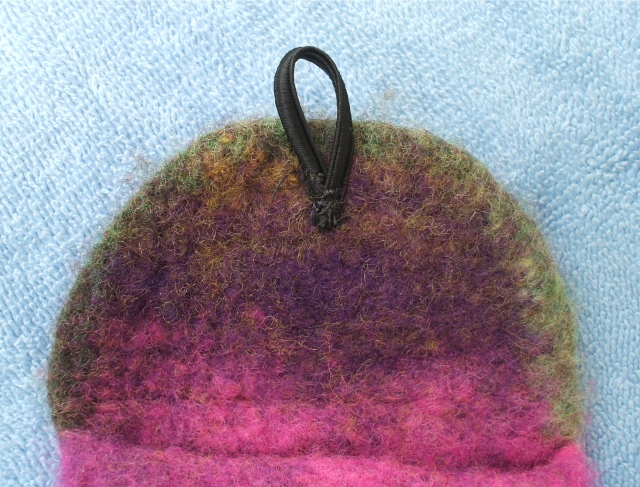
After it’s dry you can add a button to fasten. I like to use oval cord elastic to make a loop for the button closure. Cut off a length of elastic big enough to fit snugly around your button and sew this on to the back side of the flap. Sew a button onto the front of the case and you’re done.
A photo showing the underside of flap with the elastic attached.
© 2014 Kathy Kelly For your personal use, please do no copy or distribute. Feel free to link back to this blog.

wow…it has turned out beautiful 🙂 …
thanks
🙂
Lovely colours, nice and soft perfect for glasses, well done you!
Jay x
Thanks!
Pingback: Link Love for Best Crochet Patterns, Ideas and News — Crochet Concupiscence
lovelyyy……..
n prfect for glassesss
beautiful! love noro!!!