Wednesday, April 1, 2015

Crocheted Dallas Cowboy's Star Blanket

We're from Texas so of course the males in the family are in love with the Dallas Cowboys. Last year I saw a star blanket that was done in Cowboy colors and just loved it! I couldn't find a pattern so just looked around at other schemes till I found one I liked. I've made it my mission to make one for every guy in the family. So far I've made 3 and working on my 4th. A few people have asked how I did it so here's how I made it.

I didn't make the star pattern I use a basic one. Here's a link to my favorite. Beth's Little Star Afghan I  used a J hook and follow directions to make the basic star but use this color pattern. 

Navy blue for 1st 10 rows
*1 row of White
1 row of Navy Blue
1 row of White
3 rows of Heather Grey
3 rows of Navy blue
Repeat from * till desire length. 

It's that simple and the guys love it!

Want to buy the finished product??? Check out my Etsy shop at Celestially Crocheted Etsy

In Progress


Still working on it!


 Finished product!!! 


Tuesday, July 29, 2014

New Etsy Listing! Hooded Scarf Pattern

My best seller on Etsy is my hooded scarf. I almost can't keep up with orders for it in winter! It's a super simple pattern that even a beginner can do. I added the pattern for sale on my Etsy page. Hope everyone enjoys it! 

https://www.etsy.com/listing/198062887/pattern-simple-crocheted-hooded-scarf?

Monday, July 28, 2014

The Banned Stash Busting Texture Baskets

*Note from Celeste! Posting this pattern got me banned from the Facebook Group Crocheted Addicts so in honor of my first Facebook banning this is now called the banned pattern. Enjoy! :)*

I'm working on sorting out my pantry and I'm way to cheap to buy baskets. Instead I plan on using up some of the massive amount of yarn stash I have and making baskets. Hubby will be happy. My plan is to make baskets to sort everything. Unfortunately I'm picky and couldn't find any patterns I like so I made my own.


I used 2 strands of worst weight #4 yarn.  For theses in the picture I used Red Heart Super Saver in Buff. You could add another strand for even sturdier baskets or you could use chunky yarn in place of two strands.
I used a K hook.


Base
Row 1- With strands of yarn held together make a magic circle, ch 2, Dc into circle 12 times. Sl st into chain 2 (12)
Row 2- Chain 2, 2 Dc into each dc, sl st into chain 2 (24)
Row 3- Chain 2, 2 Dc into first dc, dc into next dc, *2 dc into next dc, dc into next dc, repeat from * around. Sl st into chain 2. (36)
Row 4- Chain 2, 2 Dc into first dc, dc into next 2 dc, *2 dc into next dc, dc into next 2 dc, repeat from * across. sl st into chain 2 (48)
Row 5- Chain 2, 2 Dc into first dc, dc into next 3 dc, * 2 dc into next dc, dc into the next 3 dc, repeat from * to end. Sl st into chain 2. (60)

From here you can add or subtract rows depend on how large you want the basket to be. On the larger basket I went to row 5 on the smaller basket I stopped at row 5. If you want larger follow the same trend of 2 dc, followed by an increase of Dc such as *Row 6- 2 dc, dc in next 4 dc* Row 7- 2 dc, dc in next 5 dc* follow this trend to make base as long as you want.


Sides
Row 6- Ch 2, dc in back loops of each dc from previous round, sl st into chain 2.
Row 7- Ch 2, fpdc around first dc, dc in next stitch, * fpdc around next stitch, dc in next stitch, repeat from * around. Sl st into chain 2
Repeat row 7 to desired height. For larger basket I had 7 rows of row 7. For smaller basket I had 5 rows of row 7.

Handles 
Large basket
Row 1- ch 1, sc in each stitch from previous row, sl st into ch 1.
Row 2- ch 1, sc in next 20 stitches, ch 10, skip next 10 stitches, sc in next 20 sc, ch 10 skip next 10 sc. sl st into ch1.
Row 3- ch 1 *sc in next 20 sc, work 10 sc in ch 10 space, repeat from *, sl st into ch1
Row 4- ch1, sc in each sc, sl st into ch 1 space.
Small Basket handles
Row 1- ch 1, sc in each stitch from previous row, sl st into ch1.
Row 2- ch 1, sc in next 16 stitches, ch 8, sc in next 16 stitches, ch 8, sl st into ch 1.
Row 3- ch 1,* sc in next 16 stitches, work 8 sc in ch 8 space, repeat from *, sl st into ch 1 space.
Row 4- ch 1, sc in each sc, sl st into ch 1.

Math for handles
If you decide to do larger or smaller baskets the math will need to be adjusted for handles. To adjust for handles take the number of stitches and subtract the chains for handles, then divide that number by 2. The final number will be the sc in-between handles. 60-20=40 (20 is both ch 10 spaces), 40/2=20.

And that's it! Have fun using your yarn stash! I wrote this up pretty quick so if you find a mistake please let me know. I am not a good pattern writer!


Text and images Copyright ©2014 Celeste Richmon, all rights reserved. No pattern may be reproduced or distributed — mechanically, electronically, or by any other means, including photocopying, without written permission. Finished products created with this pattern may be sold but please give me credit by linking to my blog http://mrsrichmon.blogspot.com or Etsy shop https://www.etsy.com/shop/Celestecrochetcorner .

Tuesday, July 8, 2014

From Trash to Treasure: Painted Furniture Hutch

Lots of people have asked about my Hutch I painted so here's how it was done. Since my hubby loves junk. He will pick up almost anything off the side of the road. After years of it driving me crazy I have finally decided to embrace it. He picked up the hutch off the side of the road and he fell in love with it. I was not thrilled at all. When we moved he really wanted it in the dinning room. I was picturing a nice china cabinet for the dinning but not him he wanted this! 

It's huge! His idea was to stain it and hope I liked it. He said if I didn't he would put it in his man cave but I could tell he really wanted it in the dinning room. He had so many projects that he never got started on it and I got tired of looking at it so off to Pinterest I went! Started checking out painted furniture hutches and fell in love. Hubby was not nearly as convinced and looked at me very skeptical. I think that had something to do with all the unfinished projects I have. But he was a good husband and just warned me it would involve a lot of sanding. So that lead to him buying me my first power tool! It was small and easy to use. 

First I had to wipe down and sand the whole thing! The trim I had to use a small sanding block. After the first sanding I wiped down and sanded again!  He was right lots of sanding. Hubby was awesome and renailed trim for me and then stood around looking generally concerned. 


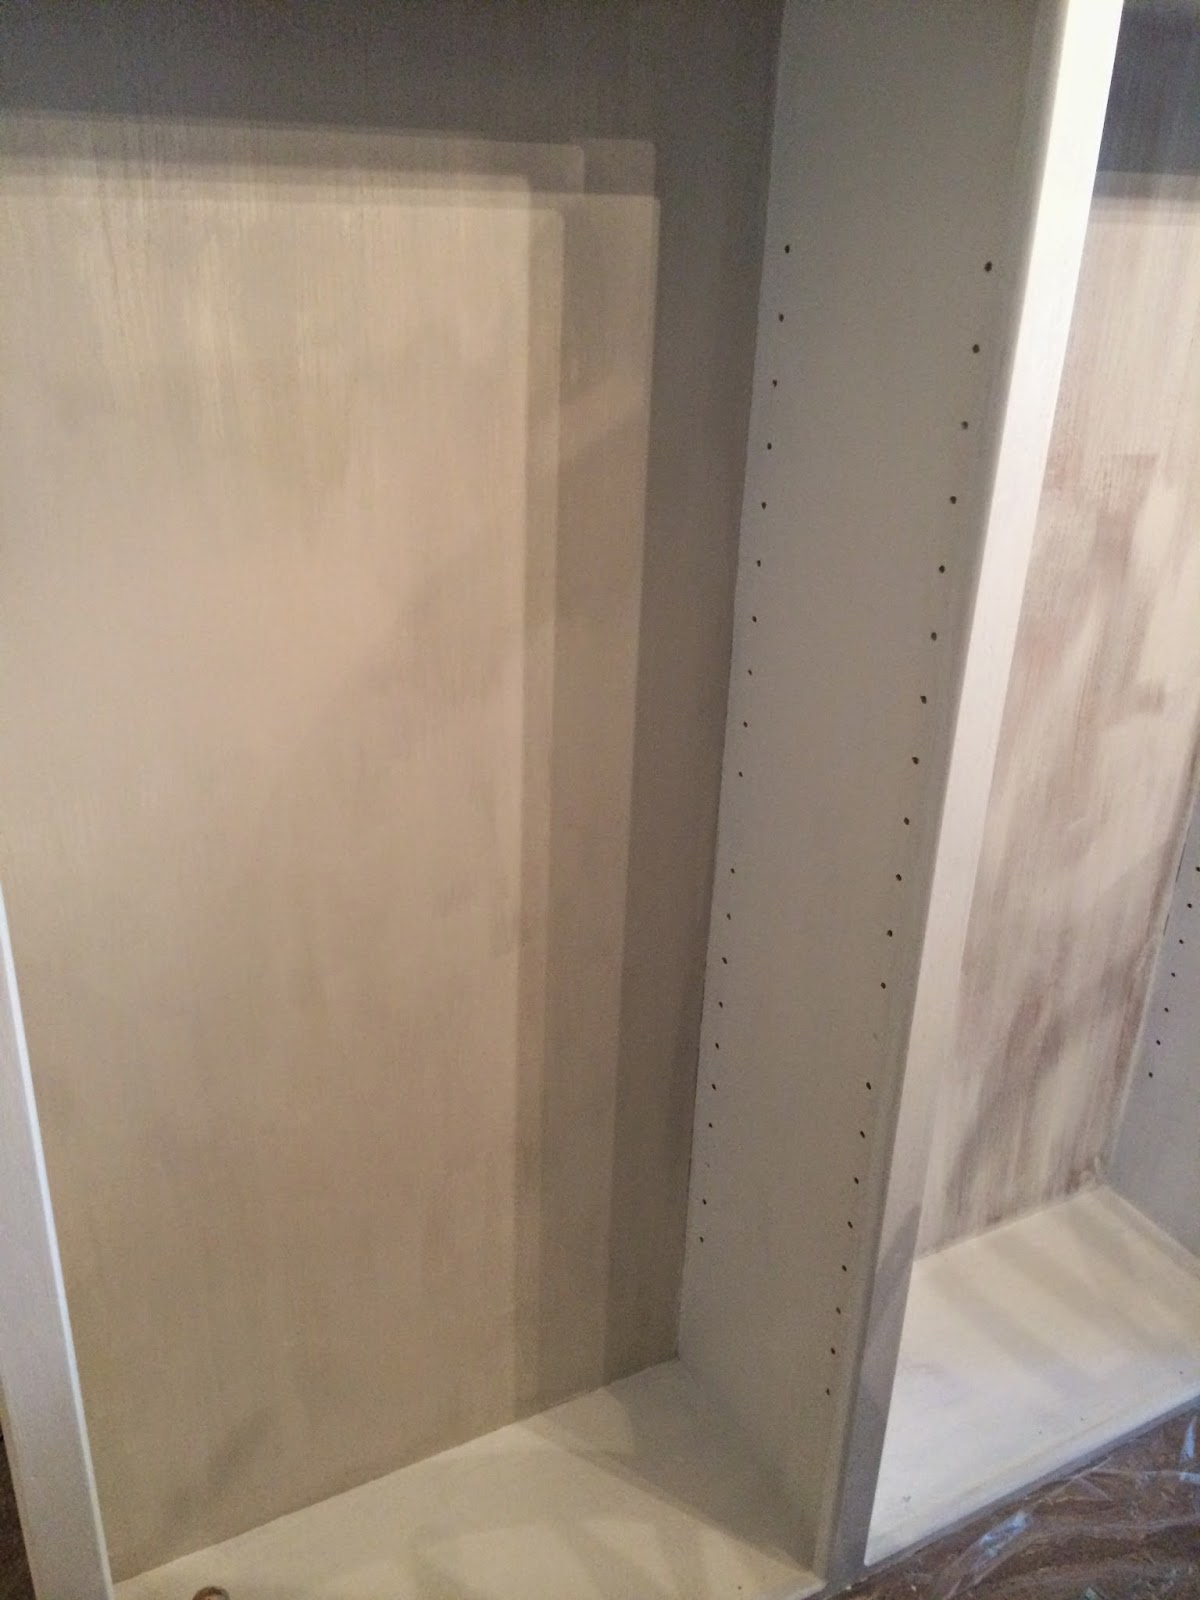
For paint I used the same paint we were using in the dinning room. Thankfully the paint included primer so I didn't need to prime it. I used 3 coats in a white semi gloss. Then I painted the back wall with the agreeable gray that I got at Sherman Williams. I love this color! 


I then used it to paint the front of the doors and drawers. When doing this I had to be sure to have a wet washcloth for drips and edging. I think that took almost as long as the whole hutch. I plan on buying new pulls in the future but at the moment I just put the same one back on. Our dinning room is in gray and white with teal, green, and blue accents. 

Hubby was right this is way better then a china cabinet and I get to pat myself on the back for a job well done! It doesn't even look like the same cabinet! 


Monday, July 7, 2014

Crocheted Camo Ripple Blanket Free Pattern

I have been working hard to finish up all my work in progress. I have also decided I'm going to crochet more gifts. Grandson's birthday is coming up so I decided to make him a bigger boy blanket. Of course it has to have camo in it! After trolling Pinterest for insperation on color and design I started with a basic ripple pattern.

Material needed:
I hook
Worst Weight Yarn, I used all Red Heart yarn in the colors Chocolate, light sage, Aran (or an off white), and Woodsy.

Ripple Pattern: 
Ch 178 
Row 1: Dc in 3rd chain from hook, dc in the next 6 ch, 3 dc in the next ch, dc in the next 6 ch, *dc3tog, dc in the next 6 ch, 3 dc in the next ch, dc in the next 6 dc. Repeat from * across ending with a dc2tog. Turn

Row: Ch 2, skip first stitch, dc in next 7 dc, 3 dc in the next dc, dc in the next 6 dc, *dc3tog , dc in the next 6 dc, 3 dc in the next dc, dc in the next 6 dc, Repeat from * across ending with a dc2tog. 

Continue Row 2 until desired length. I continued for 60 inches then work sc around the blanket for edging. 

Color pattern: Aran (or off white) 1 row, followed by 3 rows of light sage, then another row of off white, followed by 2 rows of chocolate brown, then another white, followed by 3 rows of Woodsy, then another row of off white. Repeat pattern till desired length. I ended with row of light sage followed by off white so that the ends of the blanket matched. 


Thankfully this pattern didn't take long and once you get the hang of it you don't have to keep referring back to the pattern. I did a lot of the blanket while at work.


Love the finished look! Going to make a great blanket for him to use for years to come. 

Want to buy instead of make? Check out my Etsy store. Celeste Crochet Corner

Text and images Copyright ©2014 Celeste Richmon, all rights reserved. No pattern may be reproduced or distributed — mechanically, electronically, or by any other means, including photocopying, without written permission. Finished products created with this pattern may be used for commercial sale.

House Before and After Pictures

We got the keys to our new house on May 1st and it feels like we haven't stopped working since then! Thank God for a husband who has tons of patience with his wife and even more talent. We still have a lot we want to do but it's finally feeling like a home.

Here's the front of the house before.


We have had some foundation work done and added landscaping.


The backyard was not as much fun as the front. Hubby wanted a bi-level yard since it was slopped. I was not nearly as thrilled with this idea. 


The in progress point it looked horrible and I couldn't see it ever looking better.

Hubby worked very hard and now it looks great. We still have a few things that need to be done. 

The living room is my favorite change! It was a weird dark color.
We painted it Agreeable Gray and added bright white trim. We used teal, blue, and green as accents. We also changed the chandalier. 

The kitchen we changed out the countertops, sink and backsplash.
I love the new blacksplash! I've always wanted a tile backsplash. 

And thanks to accents I have finally convinced Daniel not to tear up the other bathroom. 

I have way more before and after pictures but the kids are harassing me to get off so I'll post them later. 

Monday, July 2, 2012

My weekend surprise

My hubby is not big on presents or surprised but this weekend he did both in a big way. For the past month I have been harassing him to get a pool.We don't make big purchases without consulting the other so I've been in harassing/whining mode for weeks now to get him to agree. The first answer I got was after vacation so after vacation I went into overdrive. Then all I heard was wait a little longer. That usually means no so I was pretty bummed. 

Got up Sunday morning and wanted to go fishing. Daniel said he didn't feel like it but boy when his friend called he was up and running. I asked why he was calling before 8am and Daniel tells me "Just to check in" I didn't believe it. So when a little while later when Daniel goes outside "for a few minutes" and then drives off I hit the roof! I told the boys to go ahead and get ready and we'd just go fishing anyway. We get loaded up and Daniel and his friend return and I give him a talking too. Took boys fishing return a few hours later and Daniel tells me to come outside to check something out. I think he's probablly showing off something in the mancave so imagine my shock to see this!!! 


Come to find out he bought this days before we went on vacation and had taken it to his friend's house to hide! His reasoning was if he'd brought it home I'd want it up and it would be green when we got home. Why he waited another week he didn't say. I think he might have enjoyed my harrassing/whinning while knowing he already had one stashed somewhere. 
The kids were as excited as I was. 

Billy couldn't even wait for it to fill up. 

When asked if it worth me gripping at me that morning Daniel says yes the shocked look on my face was worth it. I think I was shocked enough I stuttered for about an hour. For a change he was right and I was wrong. LOL