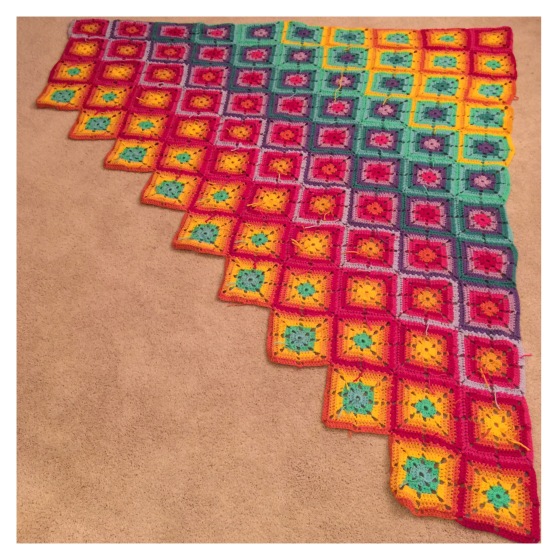
I worked on this blanket for my toddler for about 3 months after letting her pick the colors. She absolutely loves the finished blanket. Her room is getting quite an eclectic feel with so many bright colors.

I wrote down the pattern as I went, and I would like to share it here with a tutorial on how I joined the squares. (Disclaimer: I spent a lot of time on this pattern, under copyright protection and Creative Commons no one may distribute or sell this pattern or products made from it without explicit written permission by the writer.)
Frankie’s blankie pattern
Materials:
- Yarns: Red Heart Super Saver- 2 skeins each rouge, carrot, gold, glow worm, jade, Aruba sea, bright pink and lavender. Caron One Pound- one skein in lilac and one skein in white. Bernat Super Value- 2 skeins in bright yellow.
- I hook or hook needed to obtain gauge
Gauge:
- Each square measures approximately 6″, however gauge is not important on this piece. My finished project was a little large for a twin sized bed at 63″x 69″
Squares:
Using The first color, ch6, ss in first ch to join into a ring.
Round 1: Ch3 (counts as dc), 3dc into ring, ch3, (4dc into ring, ch3) 3 times, ss to top of beg ch-3. Fasten off. [4 groups of 4-dc, 4 ch-3 sp]
Round 2: Join Second color in top of t-ch of prev rnd with a ss. Ch5 (counts as dc and ch2 throughout), skip 2 dc, dc in next dc, *(2dc, ch3, 2dc) in ch-3 sp, dc in next dc, ch2, skip 2 dc, dc in next dc; rep from * twice more, (2dc, ch3, 2dc) in ch-3 sp, ss to 3rd ch of beg ch-5. Fasten off. [24 dc, 4 ch-3 corner sp, 4 ch-2 side sp]
Round 3: Join third color in top of t-ch of prev rnd with a ss. Ch5, *dc in each of next 3 dc, (2dc, ch3, 2dc) in ch-3 corner sp, dc in each of next 3 dc, ch2; rep from * twice more, dc in each of next 3 dc, (2dc, ch3, 2dc) in ch-3 corner sp, dc in each of next 2 dc, ss to 3rd ch of beg ch-5. Fasten off. [40 dc, 4 ch-3 corner sp, 4 ch-2 side sp]
Round 4: Join color four in top of t-ch of prev rnd with a ss. Ch5, *dc in each of next 5 dc, (2dc, ch3, 2dc) in ch-3 corner sp, dc in each of next 5 dc, ch2; rep from * 2 more times, dc in each of next 5 dc, (2dc, ch3, 2dc) in ch-3 corner sp, dc in each of next 4 dc, ss to 3rd ch of beg ch-5. Fasten off. [56 dc, 4 ch-3 corner sp, 4 ch-2 side sp]
Round 5: Join color five in top of t-ch of prev rnd with a ss. Ch3, dc in each st around, working 2dc in each ch-2 sp, and 3 dc in each ch-3 sp. Ss to top of beg ch-3. Fasten off and weave in ends.
I made 12 of each square through round 4, and joined them as I went with round five by crocheting half of one side, then joining every other stitch.
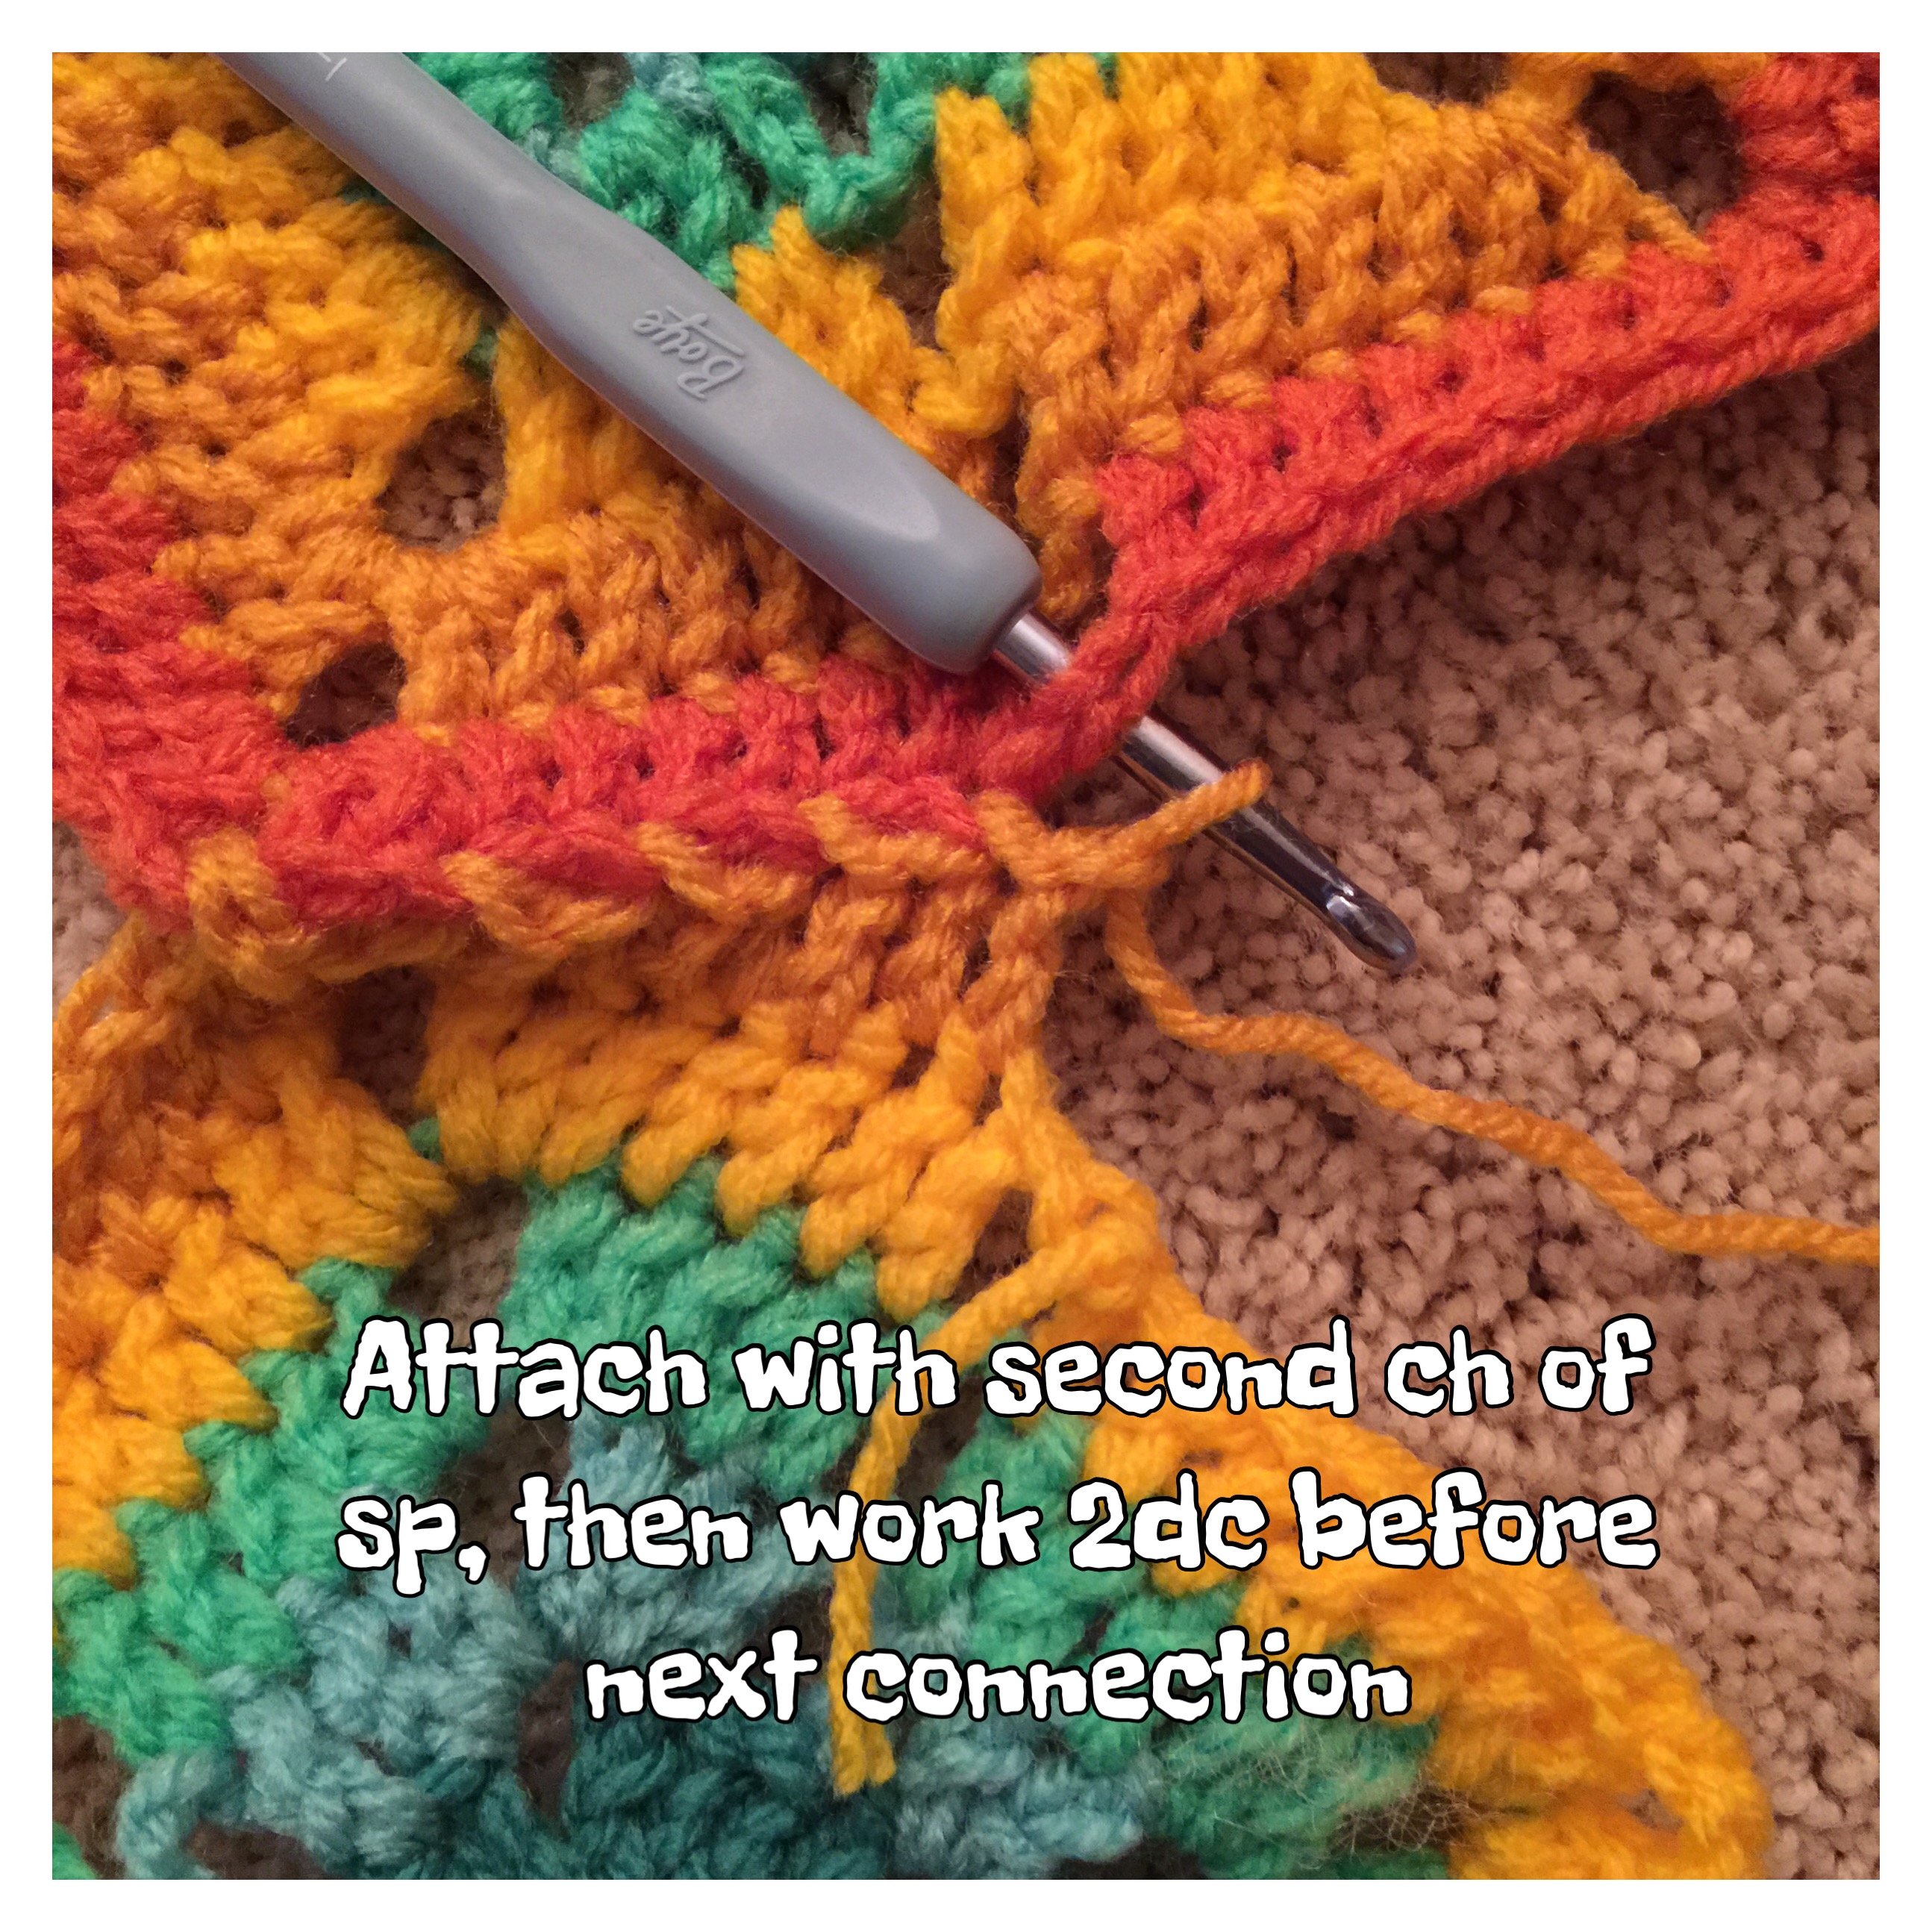
Here is a tutorial on how I joined the squares: 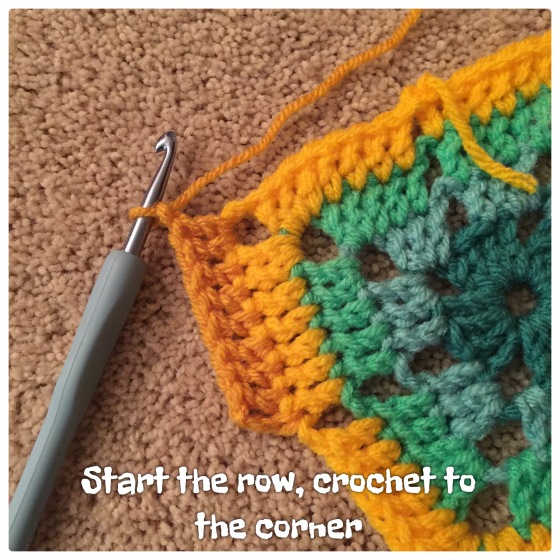


Continue in that pattern until the next corner where there are two squares to join to.

 Then continue joining the squares in that fashion until the blanket is complete. Weave in all ends then start the border.
Make 12 of each
Square 1:
- Round 1- Bright Yellow
- Round 2- Gold
- Round 3- Carrot
- Round 4- Rouge
- Round 5- Bright Pink
Square 2:
- Round 1- Glow worm
- Round 2- Bright Yellow
- Round 3- Gold
- Round 4- Carrot
- Round 5- Rouge
Square 3:
- Round 1- Aruba Sea
- Round 2- Glow Worm
- Round 3- Bright Yellow
- Round 4- Gold
- Round 5- Carrot
Square 4:
- Round 1- Jade
- Round 2- Aruba Sea
- Round 3- Glow worm
- Round 4- Bright Yellow
- Round 5- Gold
Square 5:
- Round 1- Lavender
- Round 2- Jade
- Round 3- Aruba Sea
- Round 4- Glow worm
- Round 5- Bright Yellow
Square 6:
- Round 1- Lilac
- Round 2- Lavender
- Round 3- Jade
- Round 4- Aruba Sea
- Round 5- Glow worm
Square 7:
- Round 1- Bright Pink
- Round 2- Lilac
- Round 3- Lavender
- Round 4- Jade
- Round 5- Aruba sea
Square 8:
- Round 1-Rouge
- Round 2- Bright Pink
- Round 3- Lilac
- Round 4- Lavender
- Round 5- Jade
Square 9:
- Round 1- Carrot
- Round 2- Rouge
- Round 3- Bright Pink
- Round 4- Lilac
- Round 5- Lavender
Square 10:
- Round 1- Gold
- Round 2- Carrot
- Round 3- Rouge
- Round 4- Bright Pink
- Round 5- Lilac

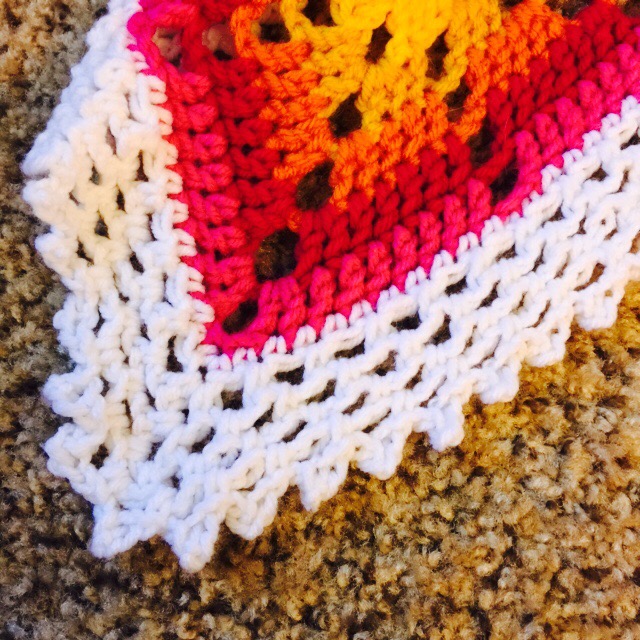
Border:
Round 1: With white, sc each stitch to corner, 2sc in corner st, sl st to beg
Round 2: ch1, sc in same st, *ch3, sk 1 st (sc next st, ch 3, sk 1 st) to corner. In corner sc, ch3, sc. Repeat from * around. Sl st to first sc, sl st to ch3 space.
Round 3: ch1, sc in same sp. *ch3, sc in next ch3 sp, to corner sp, ch3, sc in corner sp 2 times. Repeat from * around. Sl st to first sc, sl st to ch3 space.
Round 4: repeat round 3.
Round 5: ch1, sc in same sp, *ch1, picot 3, ch 1, sc in next ch3 sp. Repeat to corner, ch1, picot 3, ch1, sc in corner to turn. Repeat from * around. Sl st then finish off.