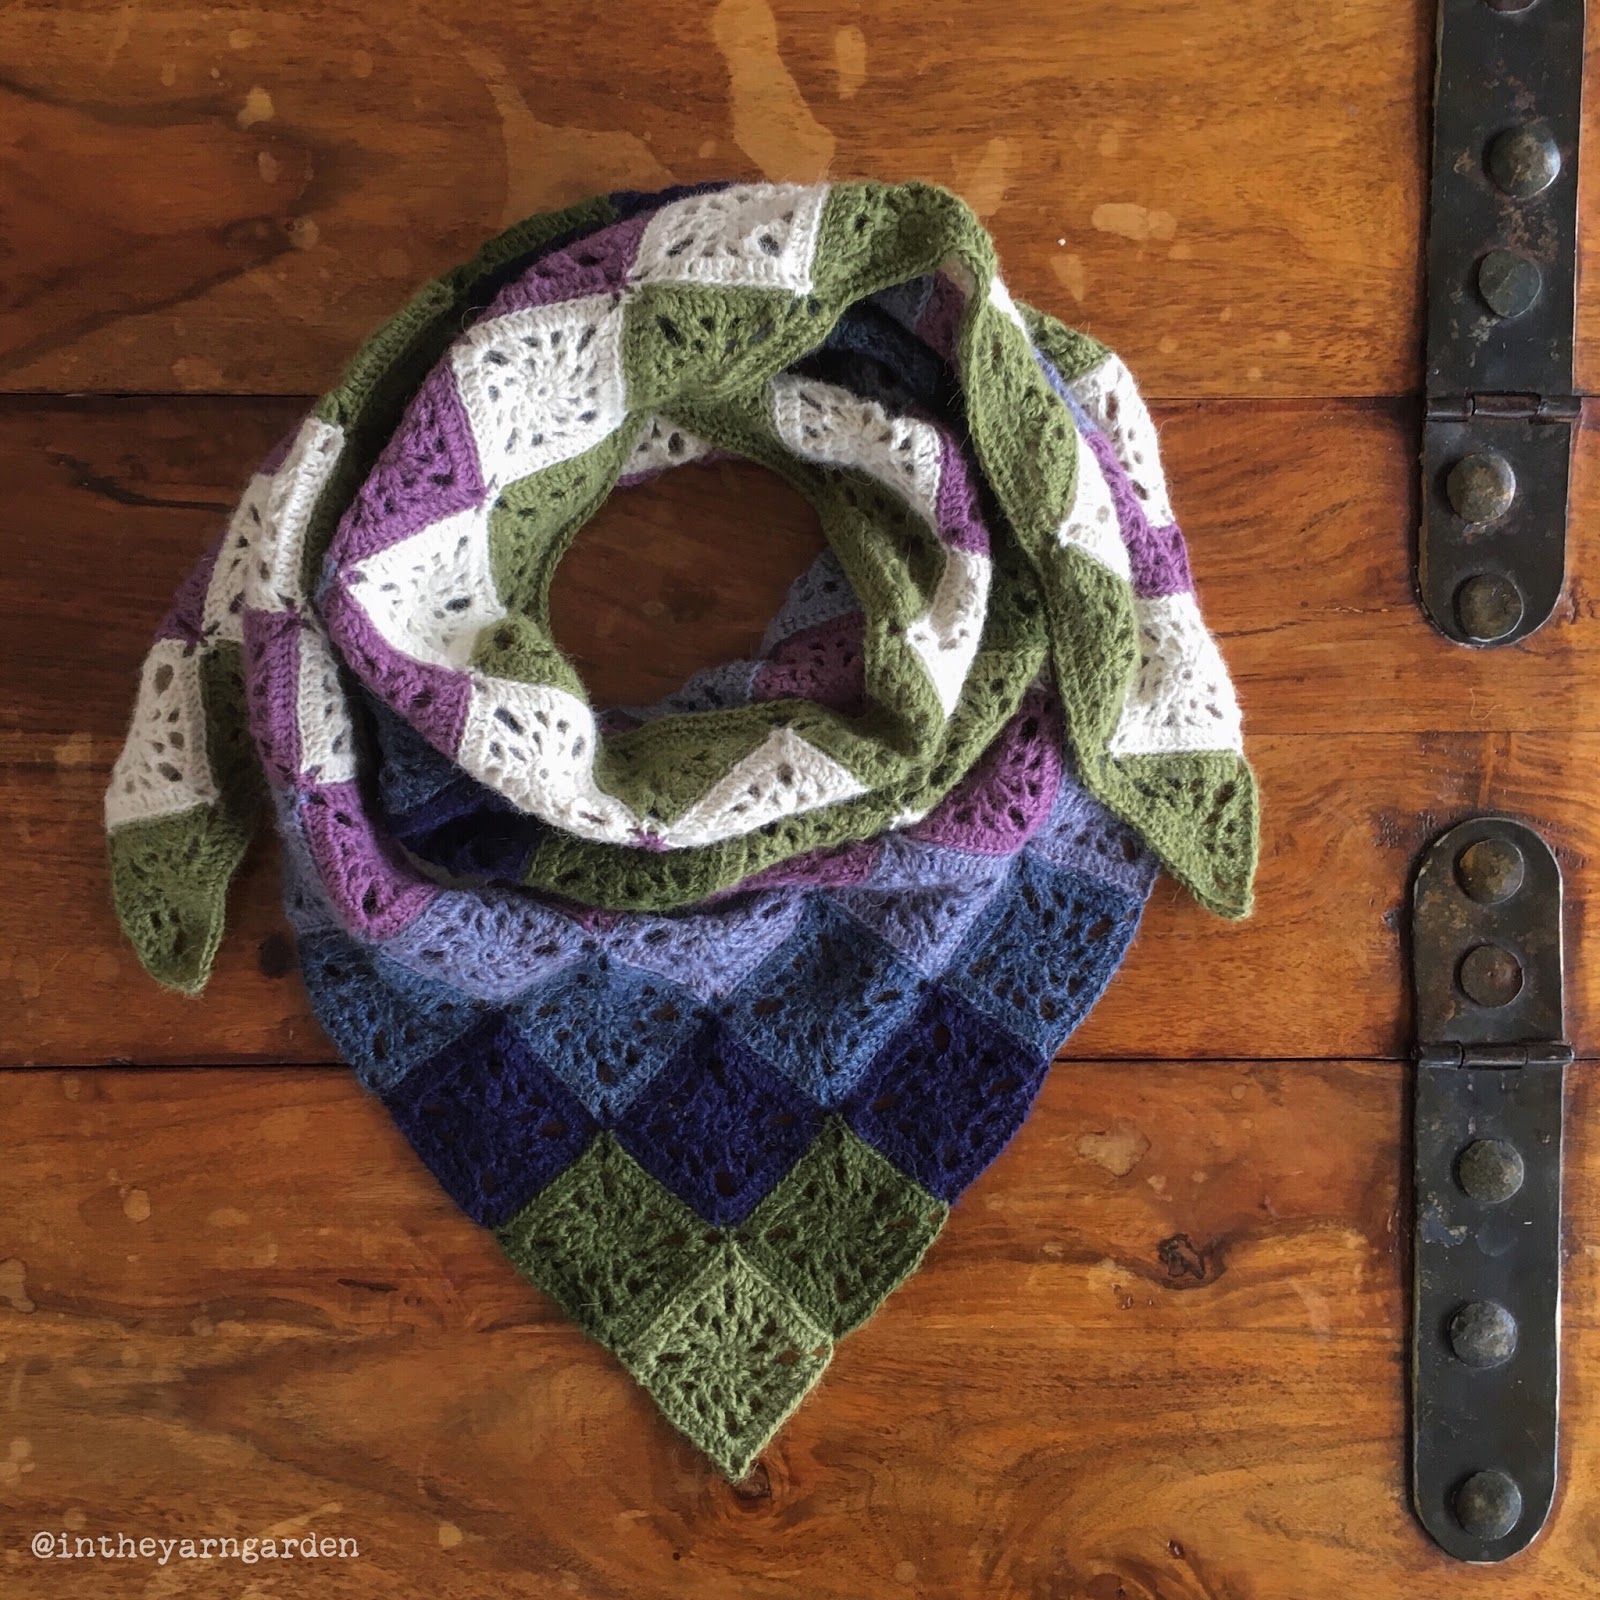
I wanted a scarf for cold spring days and this checkered crochet scarf that I came up with is already my new favorite.
I have made each square in one color but it would of course be possible to alternate the color scheme on the squares and the scarf in endless ways.
Finished size of the scarf is 130 x 65 cm but you can easily adjust the size of it by adding or removing rows.
MATERIAL
Hook: 3,0 mm.
Scissors and a needle.
Scissors and a needle.

ABBREVIATIONS, US CROCHET TERMS
st - stitch
ch - chain
sc - single crochet
hdc - half double crochet
sc - single crochet
hdc - half double crochet
dc - double crochet
blo - back loop only
sp - space
blo - back loop only
sp - space
DESCRIPTION
Squares and half squares:
The scarf is built up by 105 squares and 15 half squares. To get the same color scheme as me you will need the following amount of each color.
Squares: 9 green, 11 dark green, 13 dark blue, 15 blue, 17 purple, 19 pink, 21 natural
Half squares: 15 green
The pattern with description and diagram for the square and the half square is found in my other blog post: Sippa Granny Square pattern >>

Joining:
After you made all your squares it's time for the joining. This will go pretty quick since it is done row by row in a zig-zag pattern. Joining is done by making sc's in the blo on the wrong side of the squares. This will give an almost invisible join and flat look from the right side.
The scarf has 15 rows, where row 1 has 1 square and row 14 has 14 squares. Row 15 is the longest and is built up by the 15 half squares. Start joining at the peak of the scarf (row 1 and 2) and work your way from right to left, row by row, to the upper edge. The joining should be done with the same color as on the row of squares below the joining to get an invisible join. I have used a contrasting color for the joining in the images just to make it easier to see what it looks like.
Colors by row 1-15: green, dark green, dark blue, blue, purple, pink, natural, green, dark green, dark blue, blue, purple, pink, natural, green.
Here we go!
Place the two squares to be joined with the right side against each other (image 1).
Start by making 1 sc in the corner chains of both squares (image 2).
Make 1 sc through each of the 13 dc's along the side of the squares (BLO!) (image 3).
Finish the joining by making 1 sc in the other corner chains of the two squares (image 4).
Now your two first squares are joined. Images below shows how the result looks on the wrong side (image 5) and right side (image 6).
After you made all your squares it's time for the joining. This will go pretty quick since it is done row by row in a zig-zag pattern. Joining is done by making sc's in the blo on the wrong side of the squares. This will give an almost invisible join and flat look from the right side.
The scarf has 15 rows, where row 1 has 1 square and row 14 has 14 squares. Row 15 is the longest and is built up by the 15 half squares. Start joining at the peak of the scarf (row 1 and 2) and work your way from right to left, row by row, to the upper edge. The joining should be done with the same color as on the row of squares below the joining to get an invisible join. I have used a contrasting color for the joining in the images just to make it easier to see what it looks like.
Colors by row 1-15: green, dark green, dark blue, blue, purple, pink, natural, green, dark green, dark blue, blue, purple, pink, natural, green.
Here we go!
Place the two squares to be joined with the right side against each other (image 1).
Start by making 1 sc in the corner chains of both squares (image 2).
Make 1 sc through each of the 13 dc's along the side of the squares (BLO!) (image 3).
Finish the joining by making 1 sc in the other corner chains of the two squares (image 4).
 |
| Image 1-4 |
Now your two first squares are joined. Images below shows how the result looks on the wrong side (image 5) and right side (image 6).
Now put the next square in place (image 7) and continue to join in the same way as before (image 8).
When you have worked your way through a couple of rows your work will look as in the image below (image 9).
 |
| Image 5-8 |
When you have worked your way through a couple of rows your work will look as in the image below (image 9).
 |
| Image 9 |
After joining all the rows of squares it is time to join the half squares.
The joining is done in the same way as with the squares (image 10-13).
 |
| Image 10-13 |
Now you probably notice that the upper edge is not looking very good compared to the other two edges. Let's do something about that.
Upper edge:
Row 2:
Start again in the ch sp at the peak of the rightmost joined half square.
Make 2 sc in first ch sp to the right of the sc from last round. 1 hdc in the sc from last round continue by making 1 hdc in each dc and 2 hdc in each ch-2 sp from last round, finish the round by making 1 hdc in last sc and make 2 sc in last ch sp.
Fasten off and weave in all ends!

If you want a perfect triangle shaped scarf you will need to block the scarf, otherwise it's ready to use!
The upper edge is made out of one row of dc's and one row of hdc's. Make it in the same color as the half squares (Once again I have used a contrasting color in the images to make it easier to see the stitches).
Row 1:
Start in the ch sp at the peak of the rightmost joined half square (image 14).
Make 1 sc in first ch sp, (3 dc in next ch sp, 2 dc around next dc, 4 dc in the next 4 sc (sc's in the magic ring of the half square), 2 dc around next dc , 3 dc in next ch-3 sp , 2 dc in next ch sp , ch 2 and continue to next square, 2 dc in next ch sp) repeat as many times as half squares but omit the last 2 dc's on the last half square, end the row with a sc in the last ch sp.
 |
| Image 14-17 |
There should now be 18 dc's on each half square except for the outer ones which should have 16 dc's and 1 sc.
Start again in the ch sp at the peak of the rightmost joined half square.
Make 2 sc in first ch sp to the right of the sc from last round. 1 hdc in the sc from last round continue by making 1 hdc in each dc and 2 hdc in each ch-2 sp from last round, finish the round by making 1 hdc in last sc and make 2 sc in last ch sp.
Fasten off and weave in all ends!

If you want a perfect triangle shaped scarf you will need to block the scarf, otherwise it's ready to use!

I hope you will like your new scarf, I love mine!
If you've got questions, or find any errors in this pattern, please tell me!
It would be very nice to see your scarfs, so please tag images with #intheyarngarden or #sippacrochetscarf or feel free to leave a comment with a link to your pictures. :)
Happy crocheting!
© Copyright In the Yarn Garden 2016. All rights reserved.
Any redistribution or reproduction of part or all of the contents in any formis prohibited without permission from In the Yarn Garden.
You are though very welcome to link to this site.
You can sell items made from this pattern, please credit In the Yarn Garden as designer.
Exquisite scarf. What a lovely motif and a wonderful color scheme as well! Have a nice week! :-)
ReplyDeleteThanks! I'm happy that you like it. A nice week to you too! :)
DeleteI really like the colour combination! Thanks for sharing!
ReplyDeletehttp://soldenochedecocrochet.blogspot.com.ar/
Thank you! I'm very happy with the colors myself :) Have a nice day!
DeleteHej Lotta! Vilken fin blog! Jag såg din fina feature i sol de noches blog. Härligt kreativa och inspirerande bilder. Hälsningar från en gammal skolkamrat :)
ReplyDeleteHej Maria! Tack så mycket! :) Hoppas att allt är bra med dig.
DeleteHallo, what a wonderful scarf, thank you so much for pattern, have a nice day!Nadja
ReplyDeleteHello, what a pretty scarf, I'm going to give it a try! I like the small squares.
ReplyDeleteThank you! Happy to hear that you like it. This is one of my personal favourite. I use it so much :)
Delete