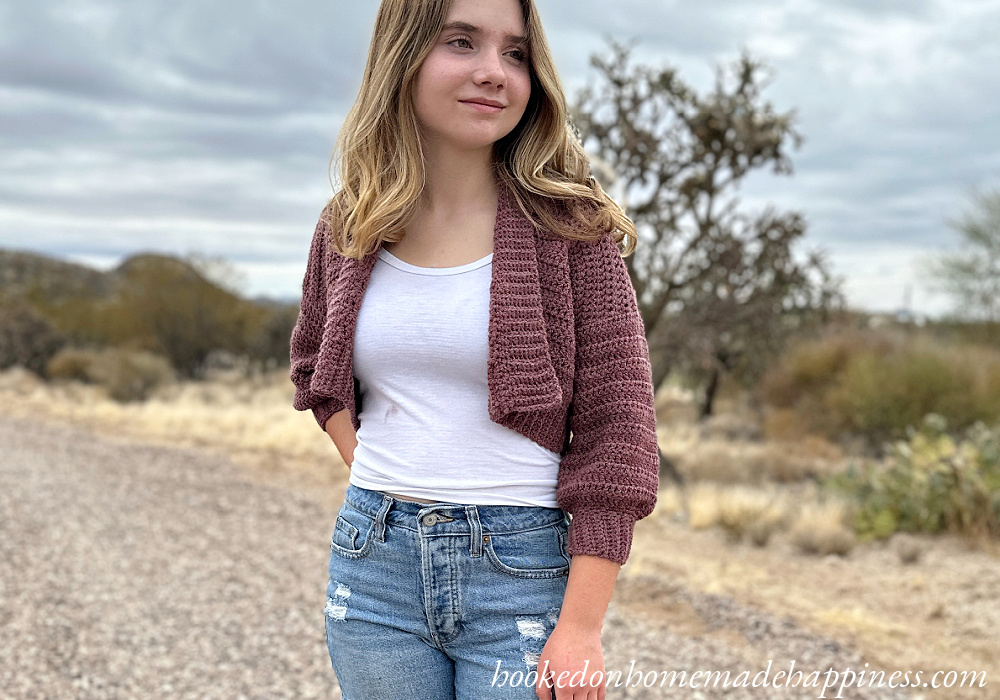
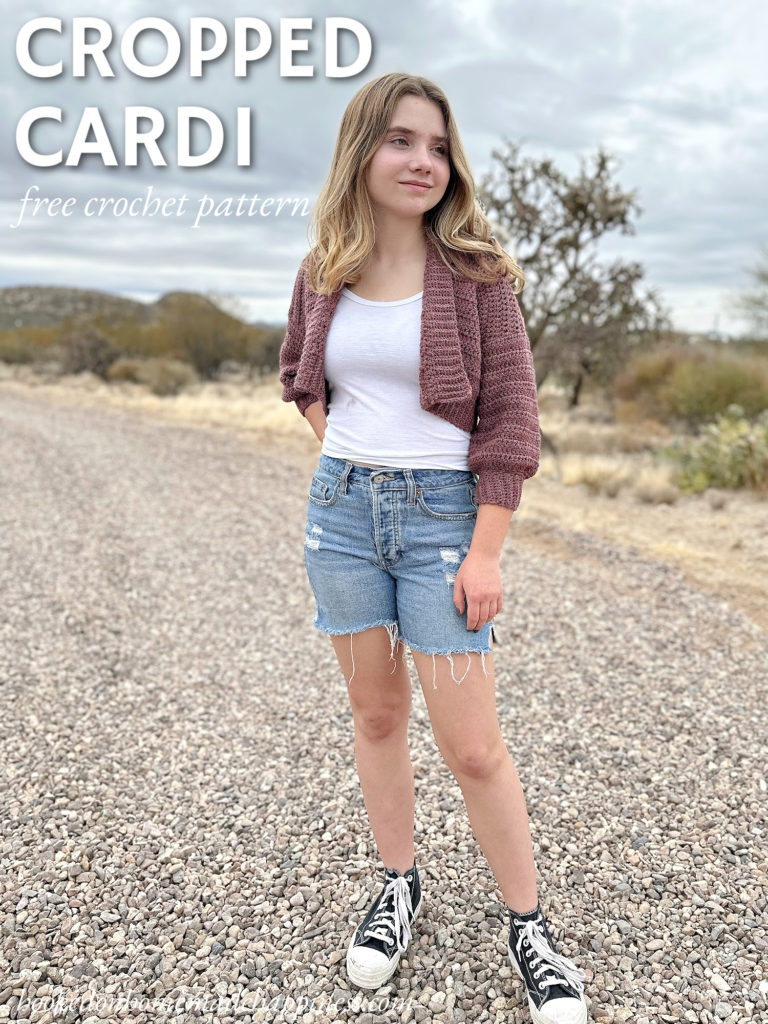
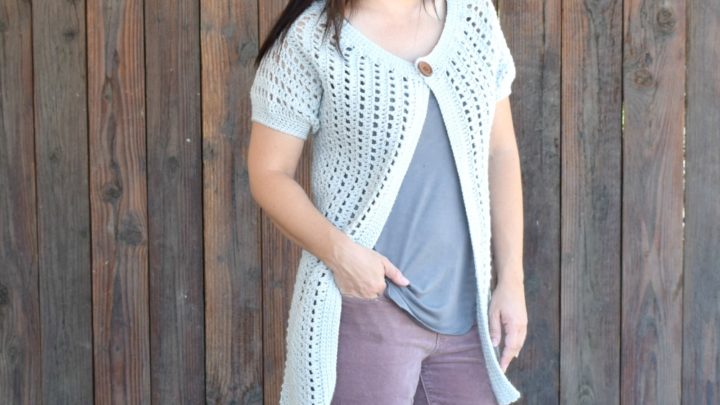
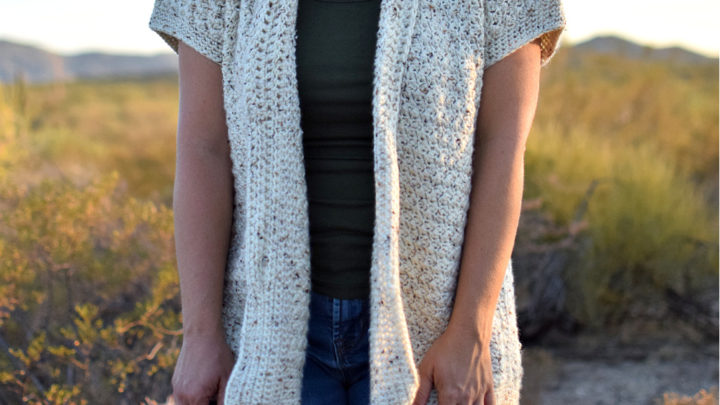
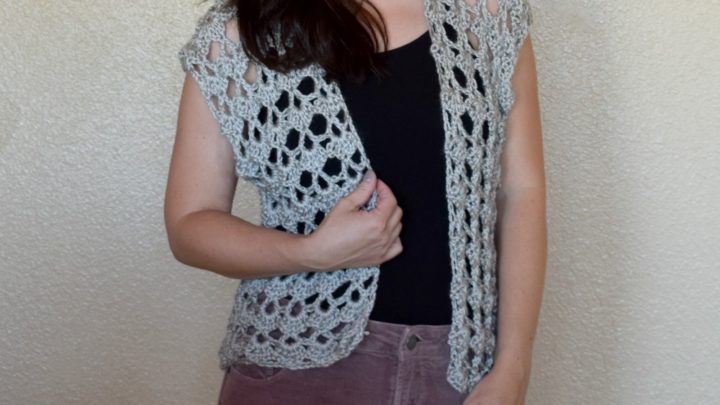
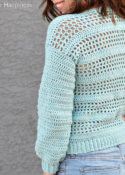
This light weight Cropped Cardi Crochet Pattern is great for summer nights when it’s not quite warm, but not cold enough for a jacket either. This pattern will show you how to easily create a cropped cardigan that is both comfortable and fashionable. With this project, you’ll be able to learn the basics of crochet and create a beautiful cardigan that will brighten any outfit. We’ll explore materials needed, the step-by-step instructions for the pattern, and helpful tips on how to make your project a success. So grab your hooks and yarn, and let’s get crocheting!
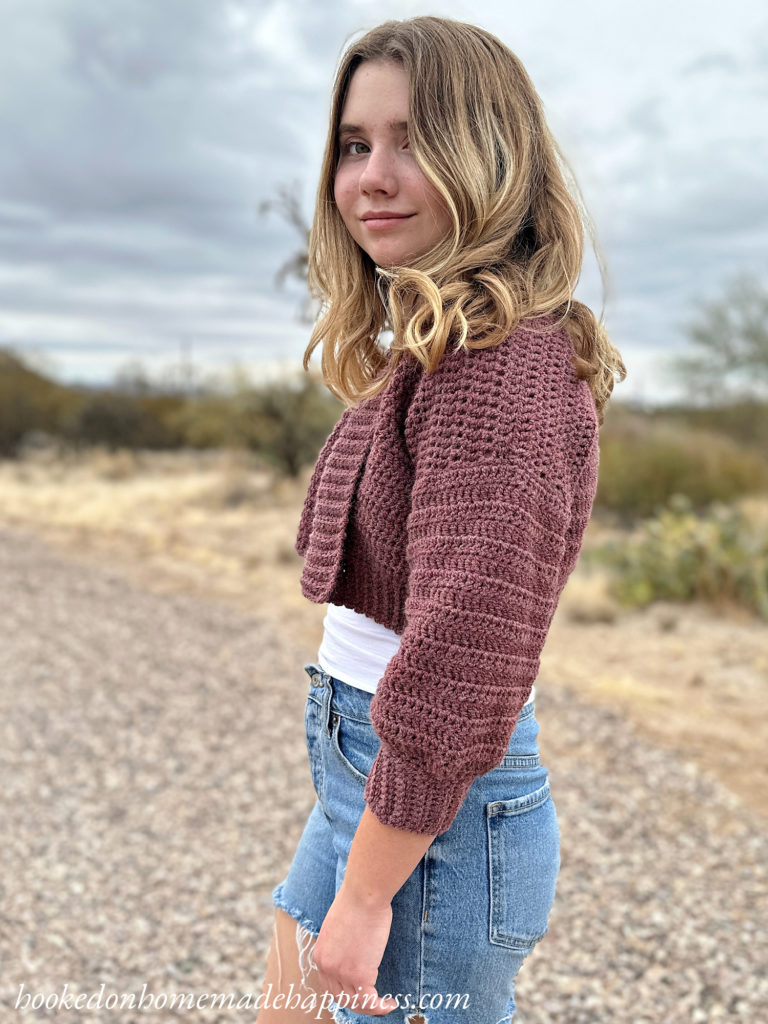
For this sweater I used WeCrochet Upcycle Alpaca Blend. It’s a soft but textured yarn that is wonderful for garments. Any worsted weight yarn (acrylic, cotton, or wool) can be used to make this simple cardi. It’s made by making 3 pieces (the back rectangle and 2 front rectangles), seaming them together, and then making the sleeves. It’s a super easy pattern consisting of all single crochet and double crochet.
click here to pin for later >>>
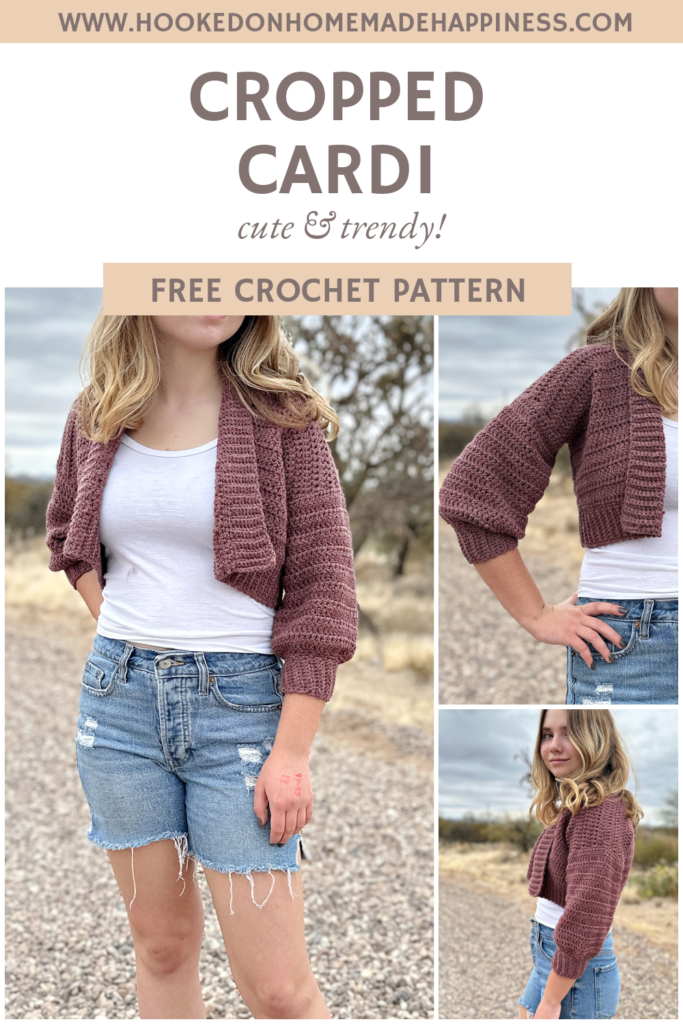
Cropped Cardi Crochet Pattern
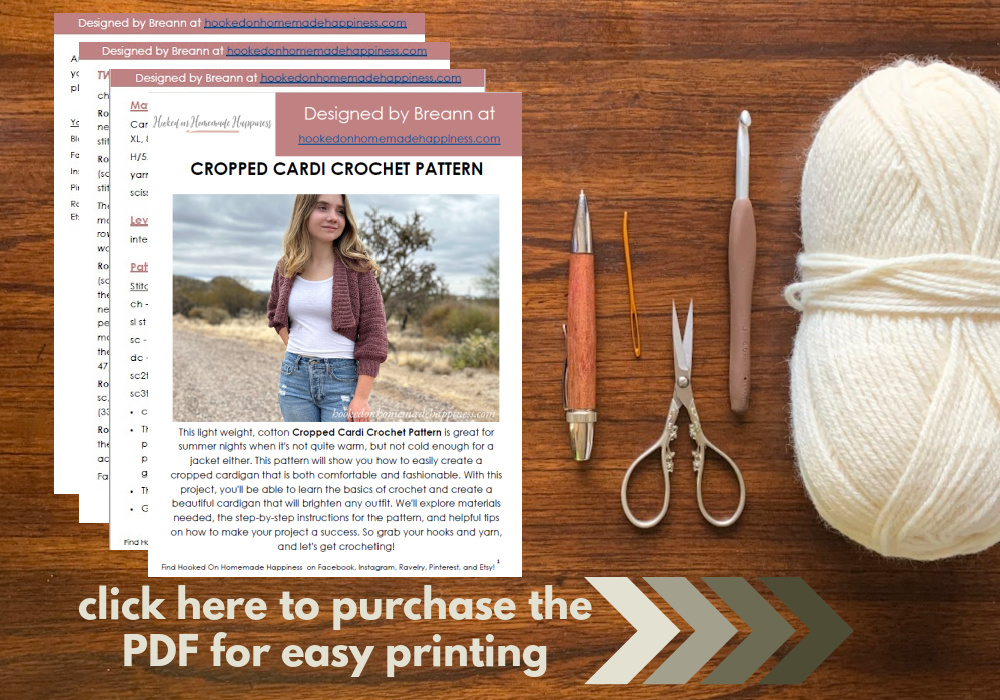
Get the free pattern below or purchase the ad-free printabler PDF in my Ravelry Shop
PIN for later HERE
Add to your Ravelry Queue HERE
Materials
WeCrochet Upcycle Alpaca Blend in Fruit Punch – ((4, 5, 6) (7, 8, 9) skeins) – or any worsted weigh yarn
H/5.0 mm hook
yarn needle
scissors
stitch markers
Level
easy+
Pattern notes & stitches to know
ch – chain
sl st – slip stitch
sc – single crochet
blo – back loop only
dc – double crochet
sc2tog – single crochet 2 together
· written in US terms
· ch 2 does not count as dc
· ch 1 does not count as sc
· This cardigan is made in 3 sections. The back and two front panels are made separately and then sewn together. The sleeves are made in joined rounds.
· The front and back panels start with the ribbing. The ribbing can be adjusted to any desired width. The number of rows can be adjusted to any desired length.
· Gauge: 13 dc x 8 rows = 4” x 4”
Sizes:
(S, M, L) (XL, 2X, 3X) – The pattern is written in these sizes consecutively. Example, when the pattern gives the end of row count ((58, 64, 70) (76, 82, 88) sc) the 58 is for S, 64 is M, 70 is L, 76 is XL, 82 is 2X, 88 is 3X.
This sweater is a classic fit with no positive ease.
Approx Finished Size:
Bust: S (34”) M (38”) L (42”) XL (46”) 2X (50”) 3X (54”)
Length: S (14”) M (14.5”) L (15”) XL (15.5”) 2X (16”) 3X (16.5”)
Armhole Width: S (6”) M (6.5”) L (7”) XL (7.5”) 2X (8”) 3X (8.5”)
Sleeve Length (from top of shoulder): S (21”) M (21.5”) L (22”) XL (22.5”) 2X (23”) 3X (23.5”)
Size Small pictured. I am 5’0” with 34” bust
CROPPED CARDI CROCHET PATTERN
BACK
ch 11 (leave a long end for sewing)
Row 1: sc in 2nd ch from the hook and in each ch across (10 sc)
Row 2: ch 1, turn, sc in first stitch, sc blo in next 8, sc in last (10)
Repeat Row 2 to Row (58, 64, 70) (76, 82, 88) – or until desired width
The ribbing is the width of the sweater, easily adjust the width by adding or taking out rows.
Now you will turn and work across the long edge of the ribbed band
Row 1: ch 1, sc evenly across working 1 sc in the end of each row ((58, 64, 70) (76, 82, 88) sc)
Row 2: ch 2 turn, dc in same stitch and in each stitch across ((58, 64, 70) (76, 82, 88) dc)
Repeat Row 2 to Row (22, 23, 24) (25, 26, 27) ((58, 64, 70) (76, 82, 88) dc)
– or until desired length
Fasten off. Leave a long end for sewing.
FRONT (make 2)
ch 11 (leave a long end for sewing)
Row 1: sc in 2nd ch from the hook and in each ch across (10 sc)
Row 2: ch 1, turn, sc in first stitch, sc blo in next 8, sc in last (10)
Repeat Row 2 to Row (26, 30, 32) (36, 38, 42) – or until approx. half the width of the back
Now you will turn and work across the long edge of the ribbed band
Row 1: ch 1, sc evenly across working 1 sc in the end of each row ((26, 30, 32) (36, 38, 42) sc)
Row 2: ch 2 turn, dc in same stitch and in each stitch across ((26, 30, 32) (36, 38, 42) dc)
Repeat Row 2 to Row (22, 23, 24) (25, 26, 27) ((26, 30, 32) (36, 38, 42) dc)
– or until desired same length as back
Fasten off. Leave a long end for sewing.
SEWING
Line up the two front pieces on top of the back. Use stitch markers to keep the shoulders sections in place. Whip stitch the shoulders closed using the long end and yarn needle.
Sew the sides closed leaving a ((6”. 6.5”. 7”) (7.5”, 8”, 8.5”)) space at the top for the armholes – or desired armhole width
Weave in all the ends. Turn right side out.
SLEEVES
Join yarn to the bottom of an armhole.
Round 1: ch 1, sc evenly around, working approx. 2 sc in the end of each row, join to first sc with sl st
Round 2: ch 2, turn, dc in each stitch around, join to first dc with sl st
Repeat Round 2 to Round ((18, 19, 20) (21, 22, 23))
Round (19, 20, 21) (22, 23, 24): ch 1, turn, sc2tog around, join to first sc with sl st
Round (20, 21, 22) (23, 24, 25): ch 1, turn, sc in each stitch around, join to first sc with sl st
CUFF
APPLIED RIBBING VIDEO TUTORIAL
Ch 11
Row 1: sc in 2nd ch from the hook and in each ch across, sl st to the last round of the sleeve (10 sc)
Row 2: sl st to the next stitch in the last round of the sleeve, turn, sc in first stitch, sc blo in next 8, sc in last stitch (10)
Row 3: ch 1, turn, sc in first stitch, sc blo in next 8, sc in last, sl st to next stitch in the last round of the sleeve (10)
Repeat row 2 & 3 until you work all the way around the sleeve. Fasten off. Leave a long end for sewing. Sew the cuff closed with a whip stitch.
Fasten off. Weave in the ends.
Repeat other sleeve.
And you’re done!! I hope you love this cute cardi 🙂
Looking for more patterns? Follow me on Facebook, Instagram, and Pinterest! Please share a pic of your finished product with me. I’d love to see it!


Is there a way to make a larger size?
Yes, you can make the starting ch longer. I increased the back about 6 ch for each size. Then you can make more rows. Hope this helps!! 🙂
Or simply try a larger hook.
I loved making this cardigan perfect for dress season. Thank you for sharing an awesome pattern love it 🙂
Thank you so much!!
I would like to say a HUGE thank you for all you share!
Aw! Thank you so much!
Thank you so much… love it so much
Yay! Thanks 🙂
I usually prefer to use a 4.5 mm hook with that same yarn, what do you think?
It will come out a little smaller. But check your gauge and it might work the same for you 🙂
Thank u so very much for this pattern! I am dying to make myself something for spring! ????
How many yards per skein?
Thanks for this pattern. I have been looking for one to buy, but none had this length on the arms. It was fun and easy to make. I made it a little longer.
Thank you!
Wow💙 Stunning pattern!!! Surely going to make it😁
Thank you so much!
HELP!! I was making this sweater for my daughter and had to stop for a bit (darn you carpal tunnel). I came back to the pattern showing the green/blue yarn and now it links to the pattern using the fruit punch colored yarn. I need the original pattern to complete this cute sweater.
The original pattern started with ribbing and went 6 rows, I believe, of front post double crochet, back post double crochet. Chain 25 or 26 (for the front panel), double crochet, and then four rows of FPDC,BPDC.
Can you please tell me how to find the pattern I was originally using. Every link to this pattern that I find shows the green/blue (shorter sleeve) cardigan, but links to this plum (longer sleeve) pattern.
Hi! I just emailed you the old pattern 🙂
Thanks so much!