
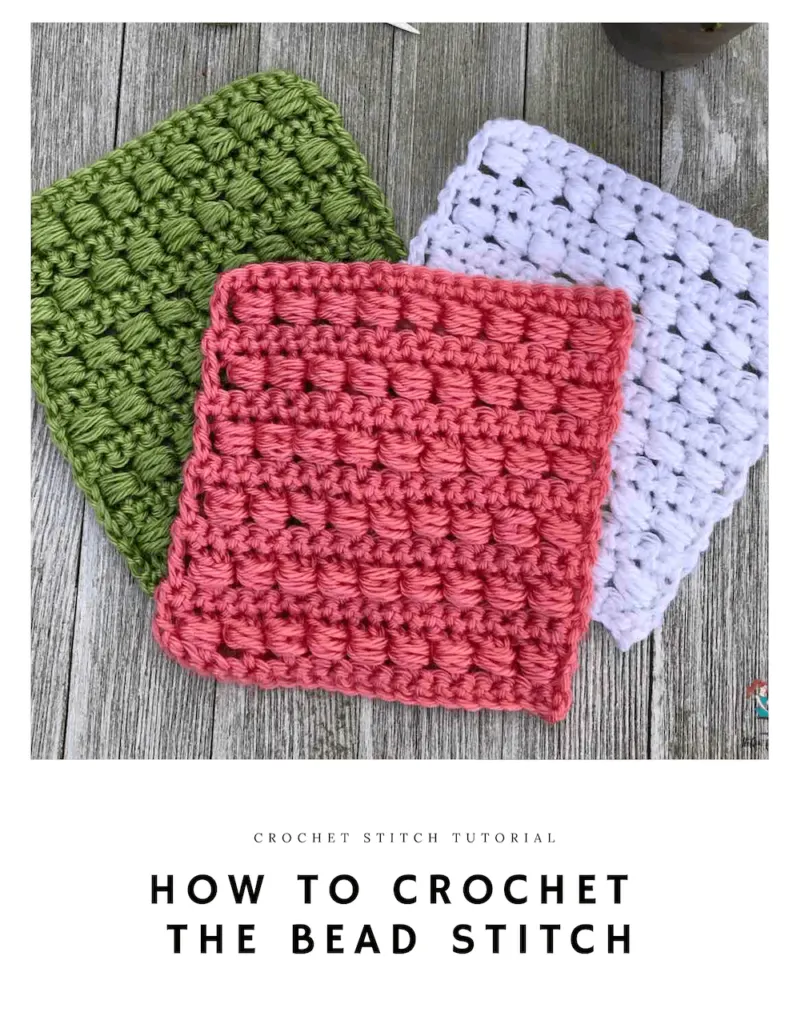
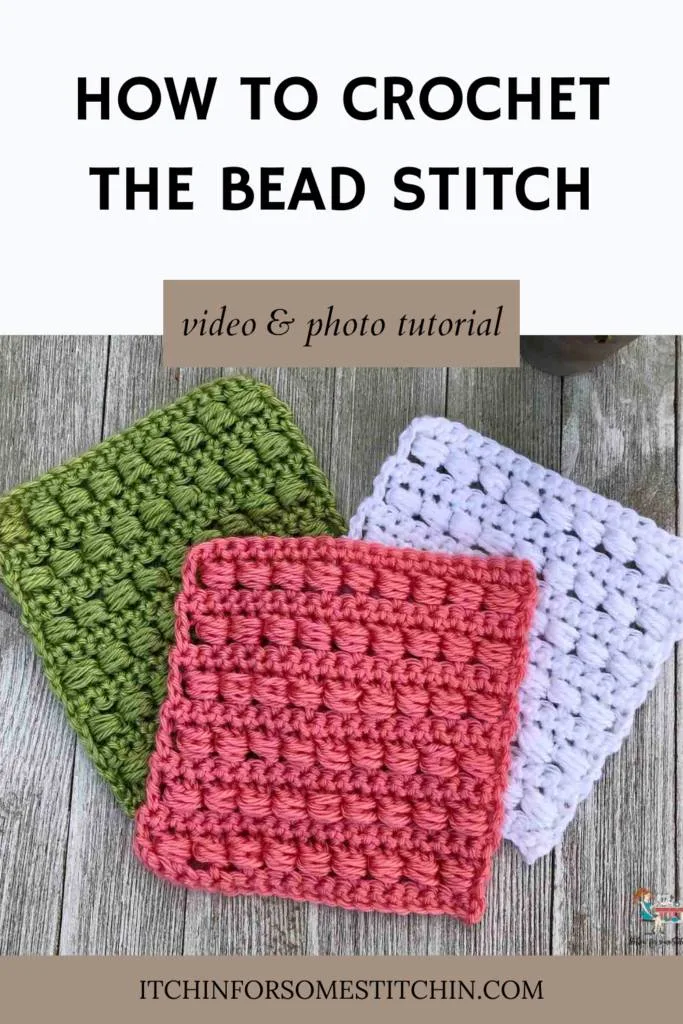
Crochet lovers are constant need of new stitch patterns to add depth and texture to their projects. The bead stitch, with its unique raised bumps resembling little tornado-like beads, offers a captivating design element. In this post, we will explore how to crochet the bead stitch, provide a step-by-step tutorial, and address common questions that may arise.
Hey there fellow crocheters!
Today I am going to share with you a tutorial on how to crochet the bead stitch.
I recently discovered this stitch and absolutely fell in love!
I used in two of my St. Patrick’s Day patterns this year and I am currently creating two more.
One for Easter and one for Spring – so keep coming back – they’ll be out soon!
I know this stitch may look a little complicated, but it’s really not!
It’s actually super simple.
Although I would not classify it as a beginner stitch, I would say that it is easy enough for crochet beginners to do.
If you can single crochet and double crochet, you can do this stitch!
What is the bead stitch?
The bead stitch is a crochet technique that creates raised, rounded clusters of stitches resembling beads.
It adds dimension and visual interest to crochet projects, making it a versatile stitch for various applications.
It is often confused with the puff stitch or bobble stitch, but these are in fact worked differently and are therefore not the same stitches.
Step-by-Step Tutorial: Crocheting the Bead Stitch
Want to see it in action?
Summary:
The bead stitch is a beautifully textured stitch that may look a bit complicated, but really isn’t! It only takes a few simple stitches worked in a specific way to create these little tornado-like stitches. So fun and easy to do!
Materials:
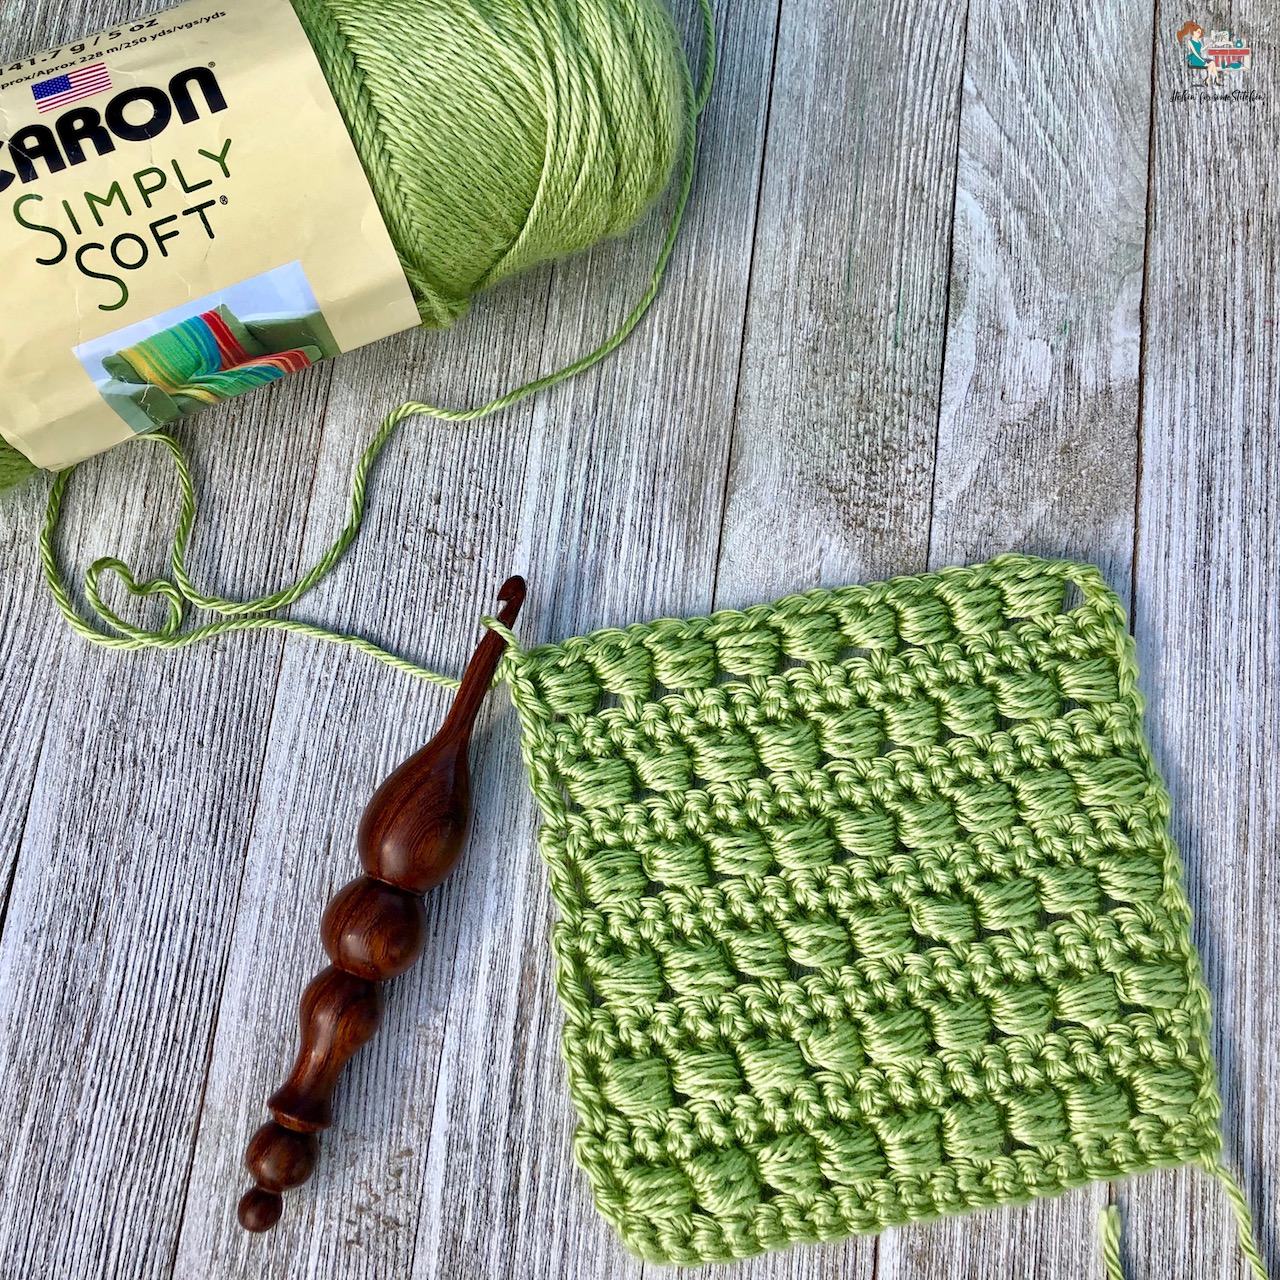
- Medium #4 worsted weight yarn
~ In this tutorial I used Caron Simply Soft color Pistachio (for the cover photo also colors White and Persimmon).
NOTE: Caron Simply Soft is absolutely one of my favorite yarns. For a full review please see Product Review: Caron Simply Soft.
- Crochet Hook size H-5.00mm (I personally love using light up hooks & will be doing a review soon)
NOTE: The wooden hook in the photo above is a wonderful ergonomic crochet hook by Nelsonwood. If you have arthritis or limited hand strength, I highly recommend them. You can see 5 Reason to Love Nelsonwood Crochet Hooks! for my full review.
- Scissors
- Tapestry needle
(Click HERE to find my favorite crochet tools & resources)
NOTE: You can use thinner or thicker yarn, just be sure to use a hook size that is appropriate for your yarn weight.
Abbreviations:
Tutorial is written in US terms.
Stitch/es (st/sts)
Bead stitch (bst) – *yarn over, insert the hook behind the previous double crochet from front to back, yarn over and pull up a loop* Repeat from * to * 2 more times (3 times total = 7 loops on the hook). Yarn over and pull through 6 loops, yarn over and pull through remaining loops on the hook.
» CLICK HERE TO VIEW TUTORIAL INSTRUCTIONS
Instructions:
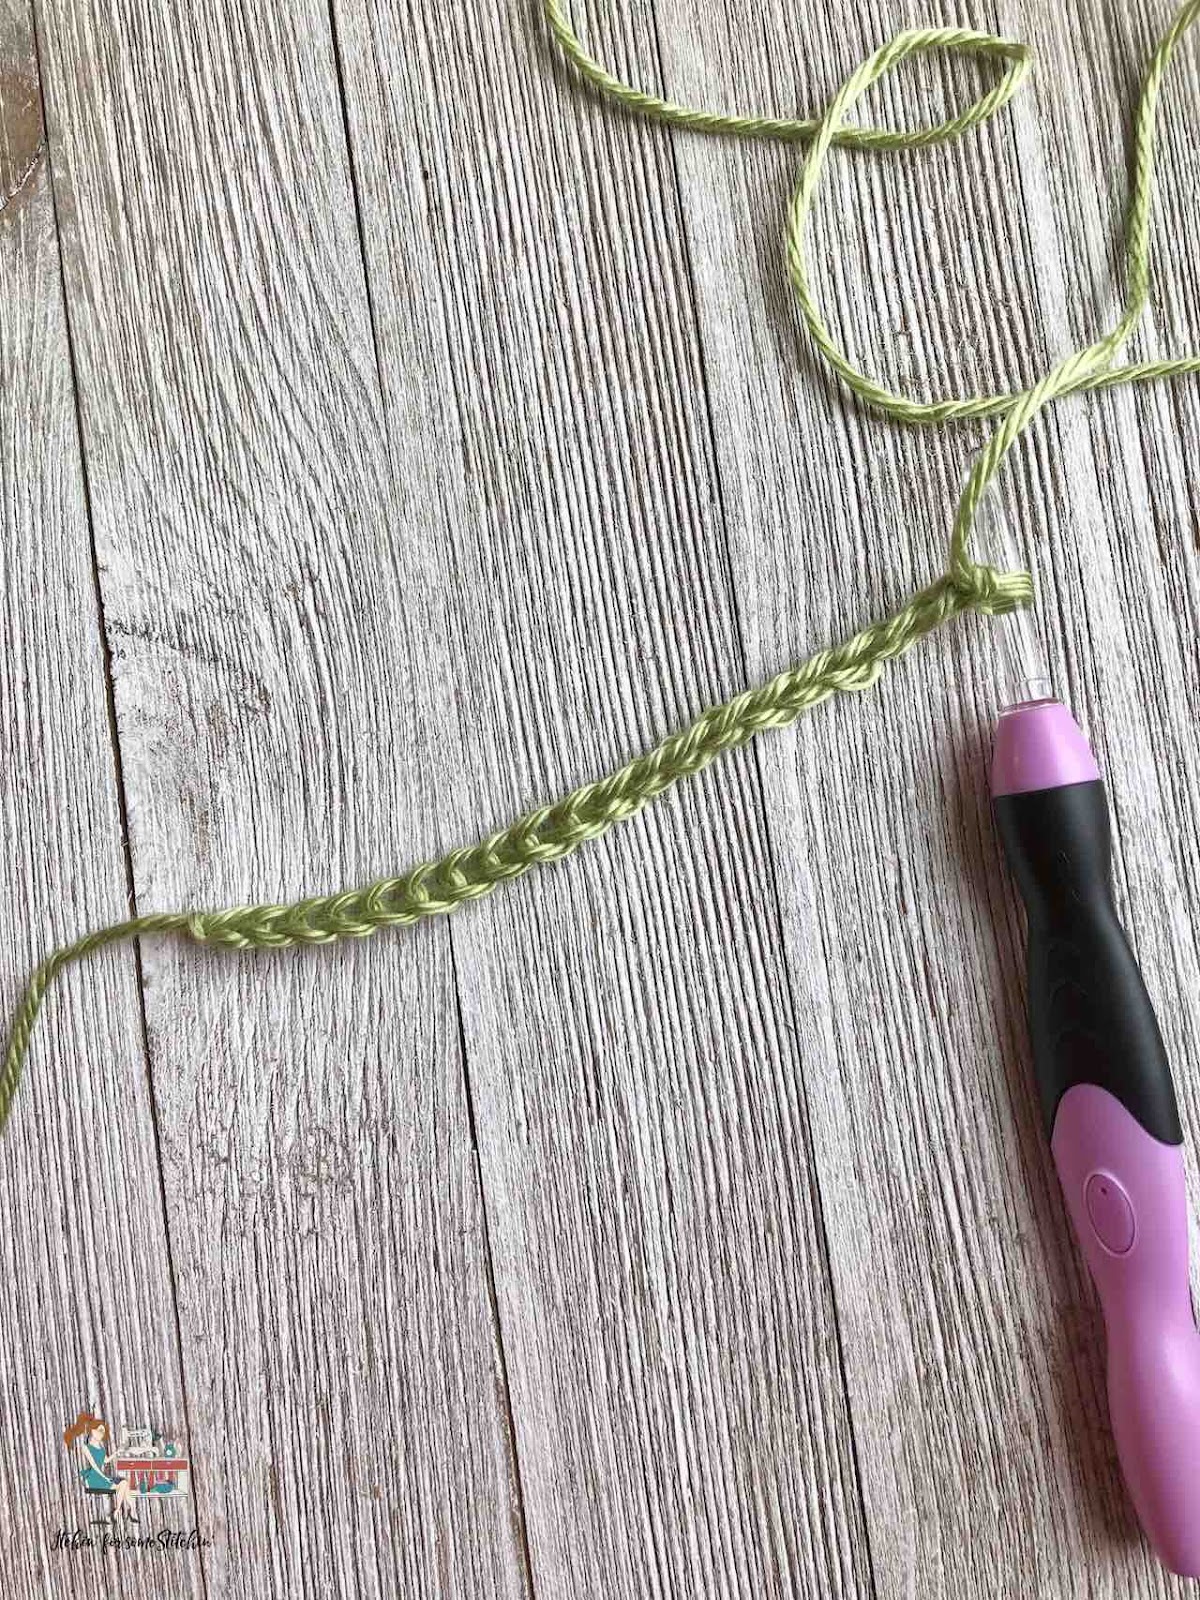
Create foundation chain.
Make a foundation chain to the length of your choice as long as the number of chains is even.
NOTE: For this tutorial I have chained 20.
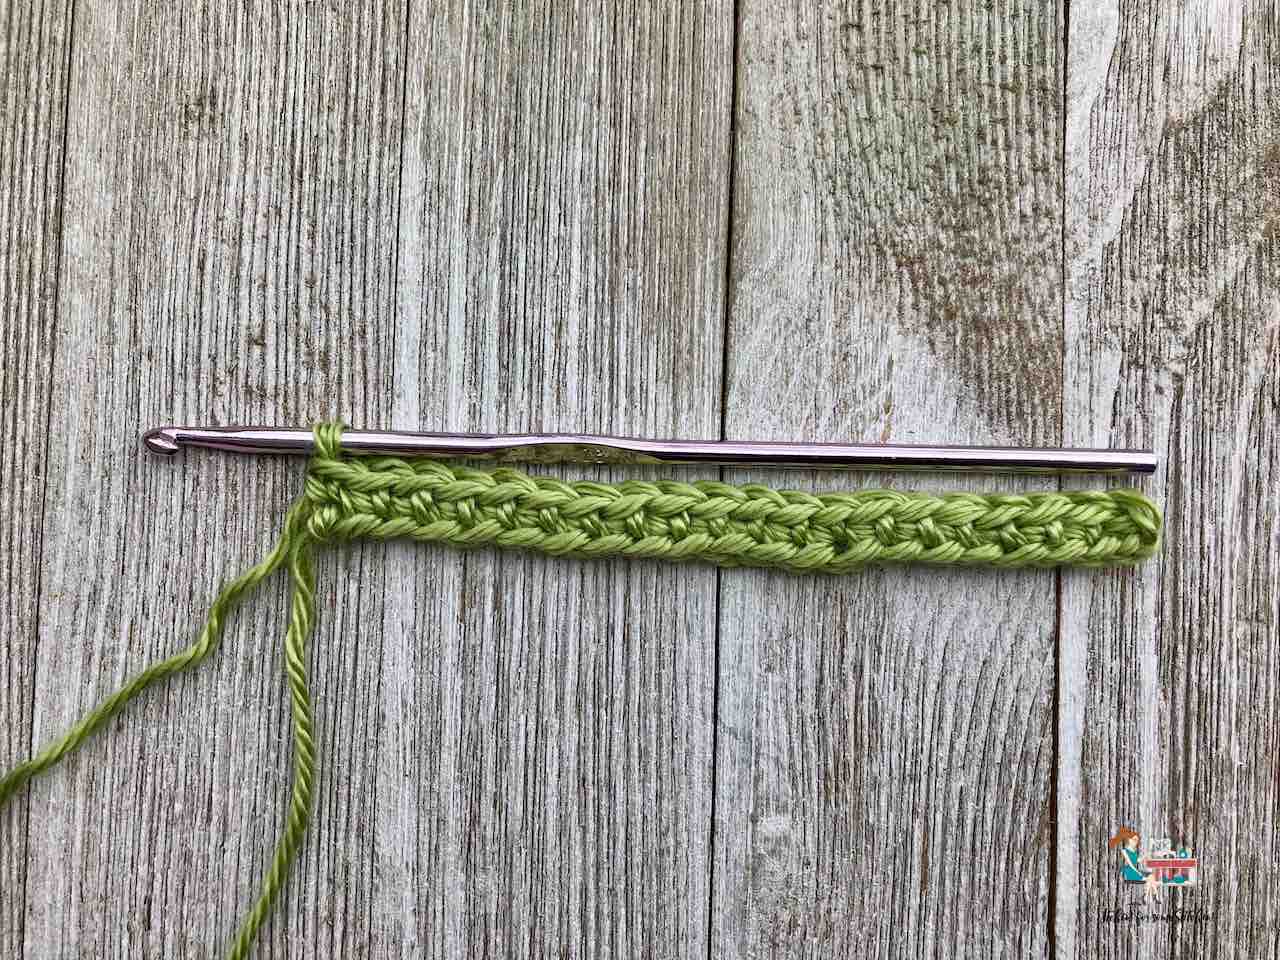
Work the first row.
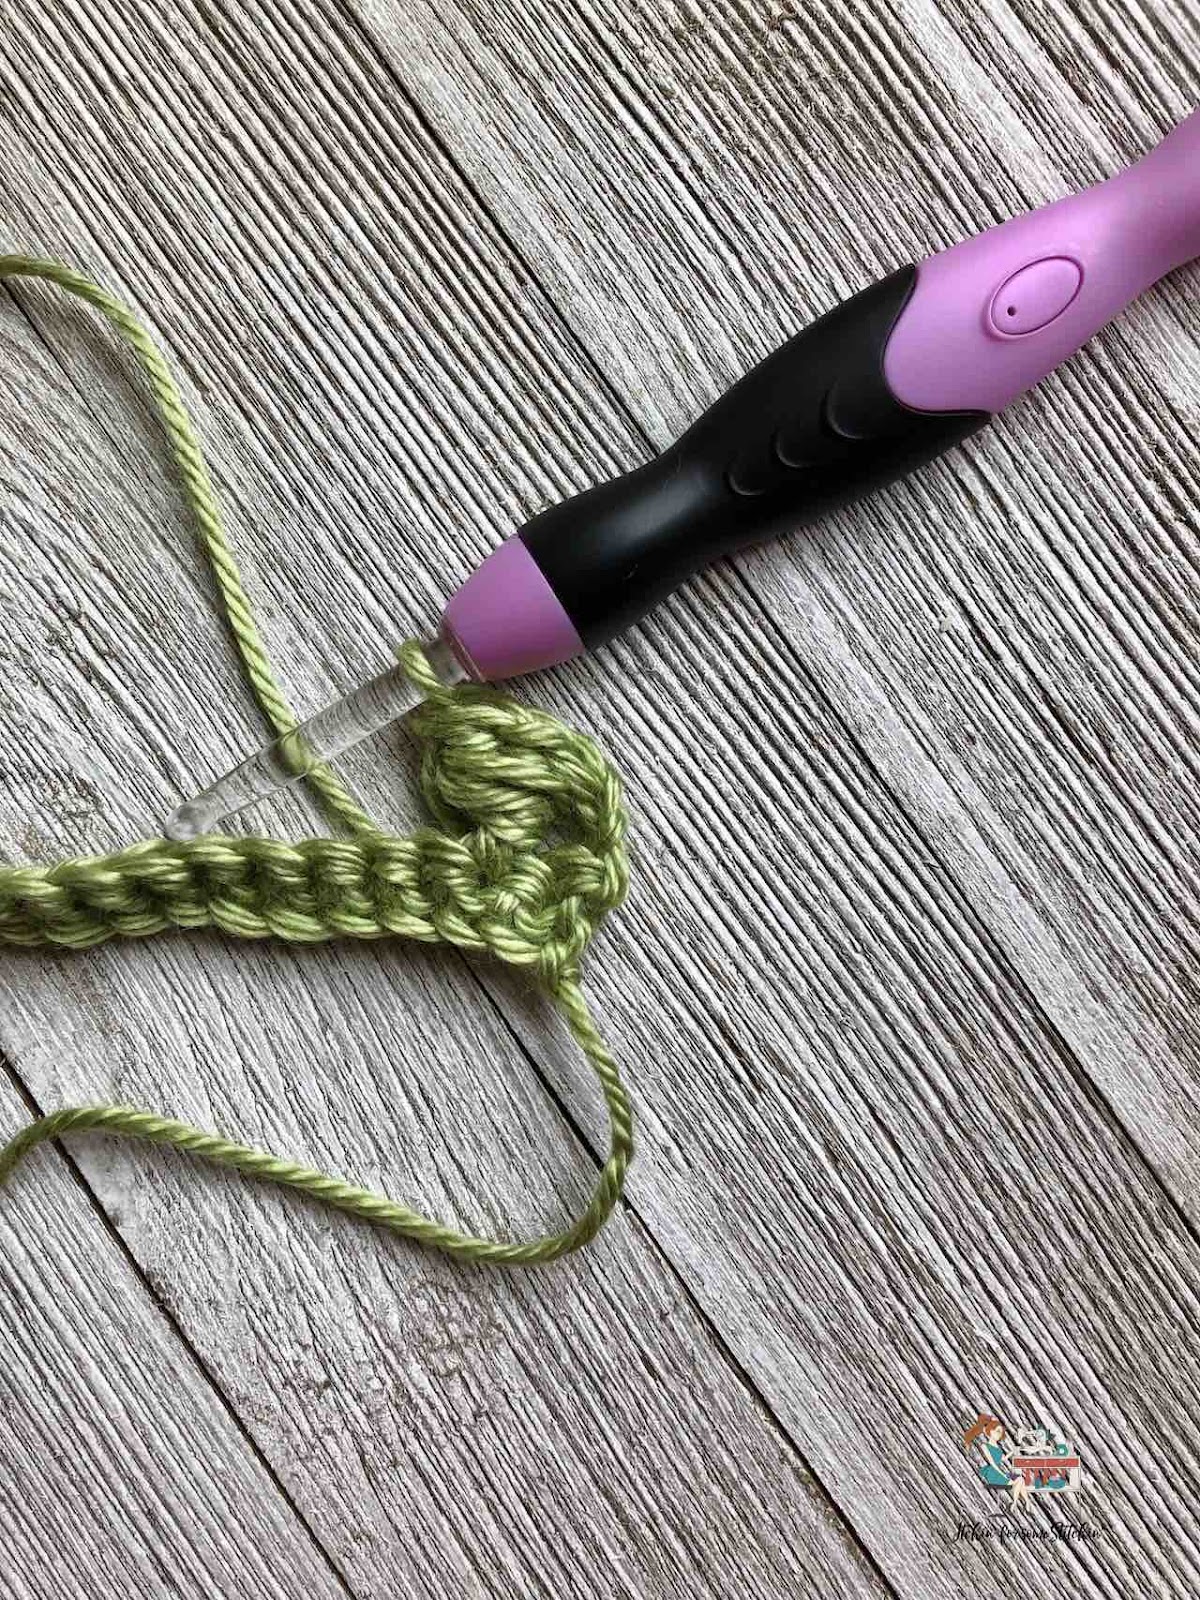
Row 1: Ch 1, sc in the 1st ch and in each ch across. (20 sts)
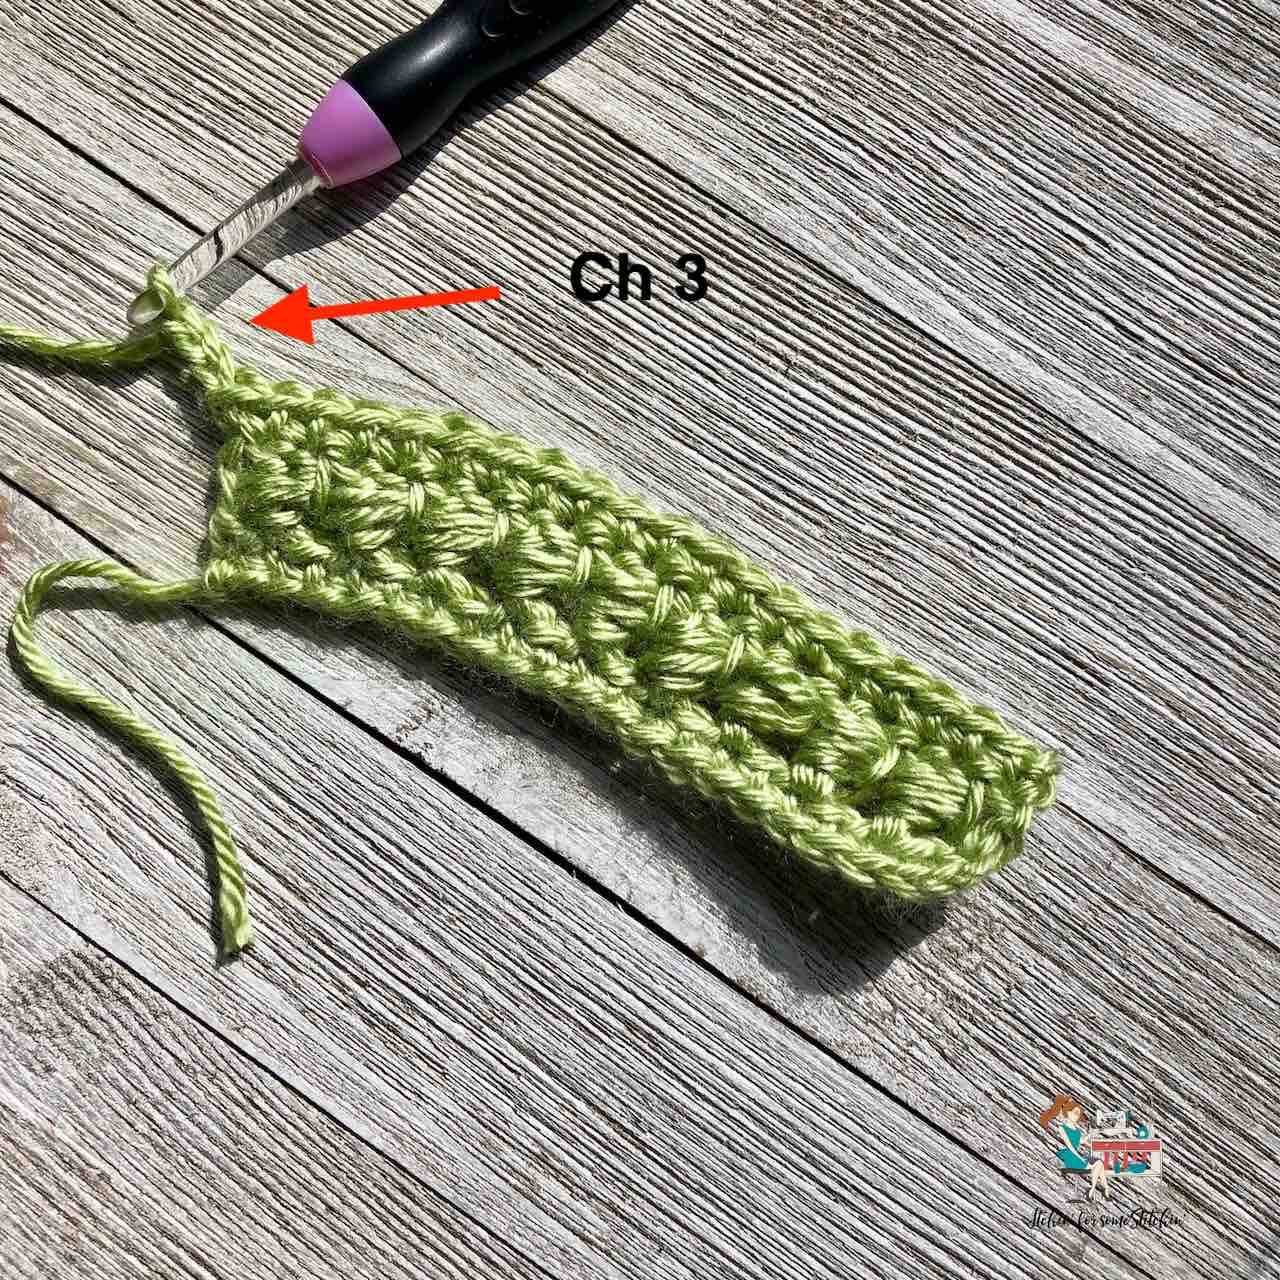
Start the second row.
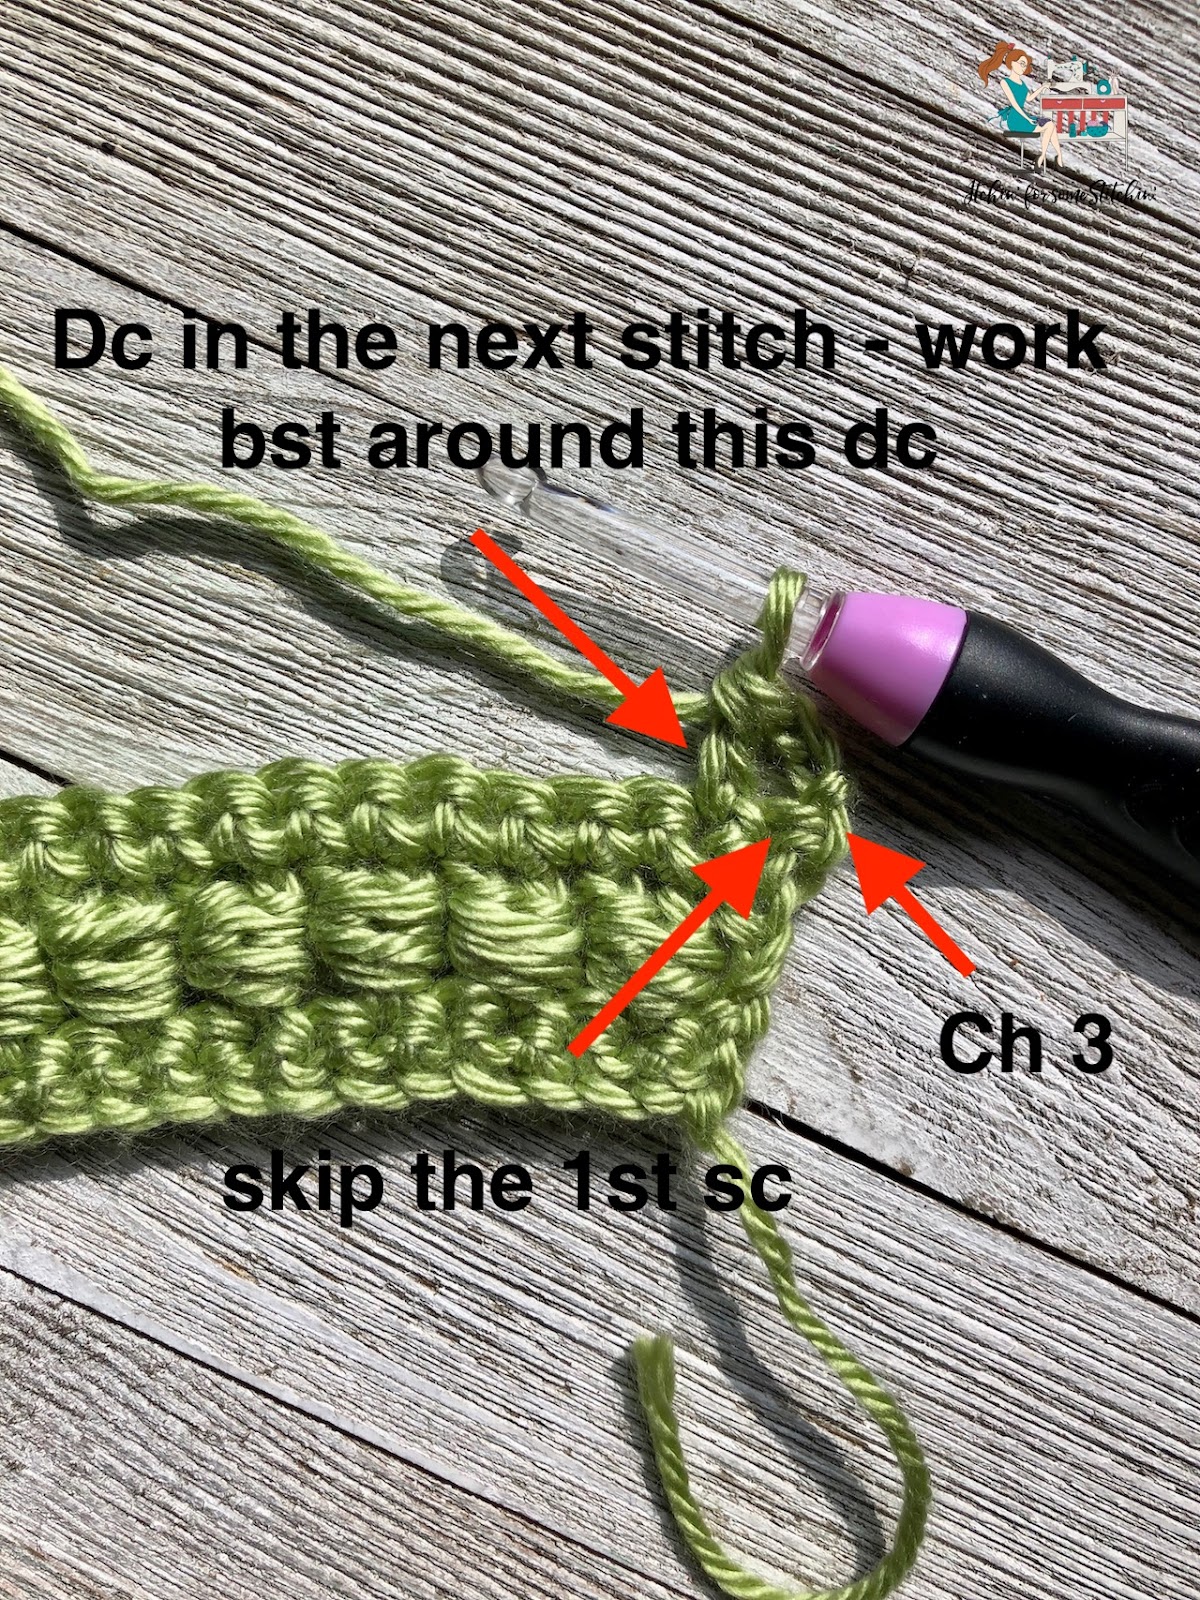
Step 1: Ch 3 for the turning chain.
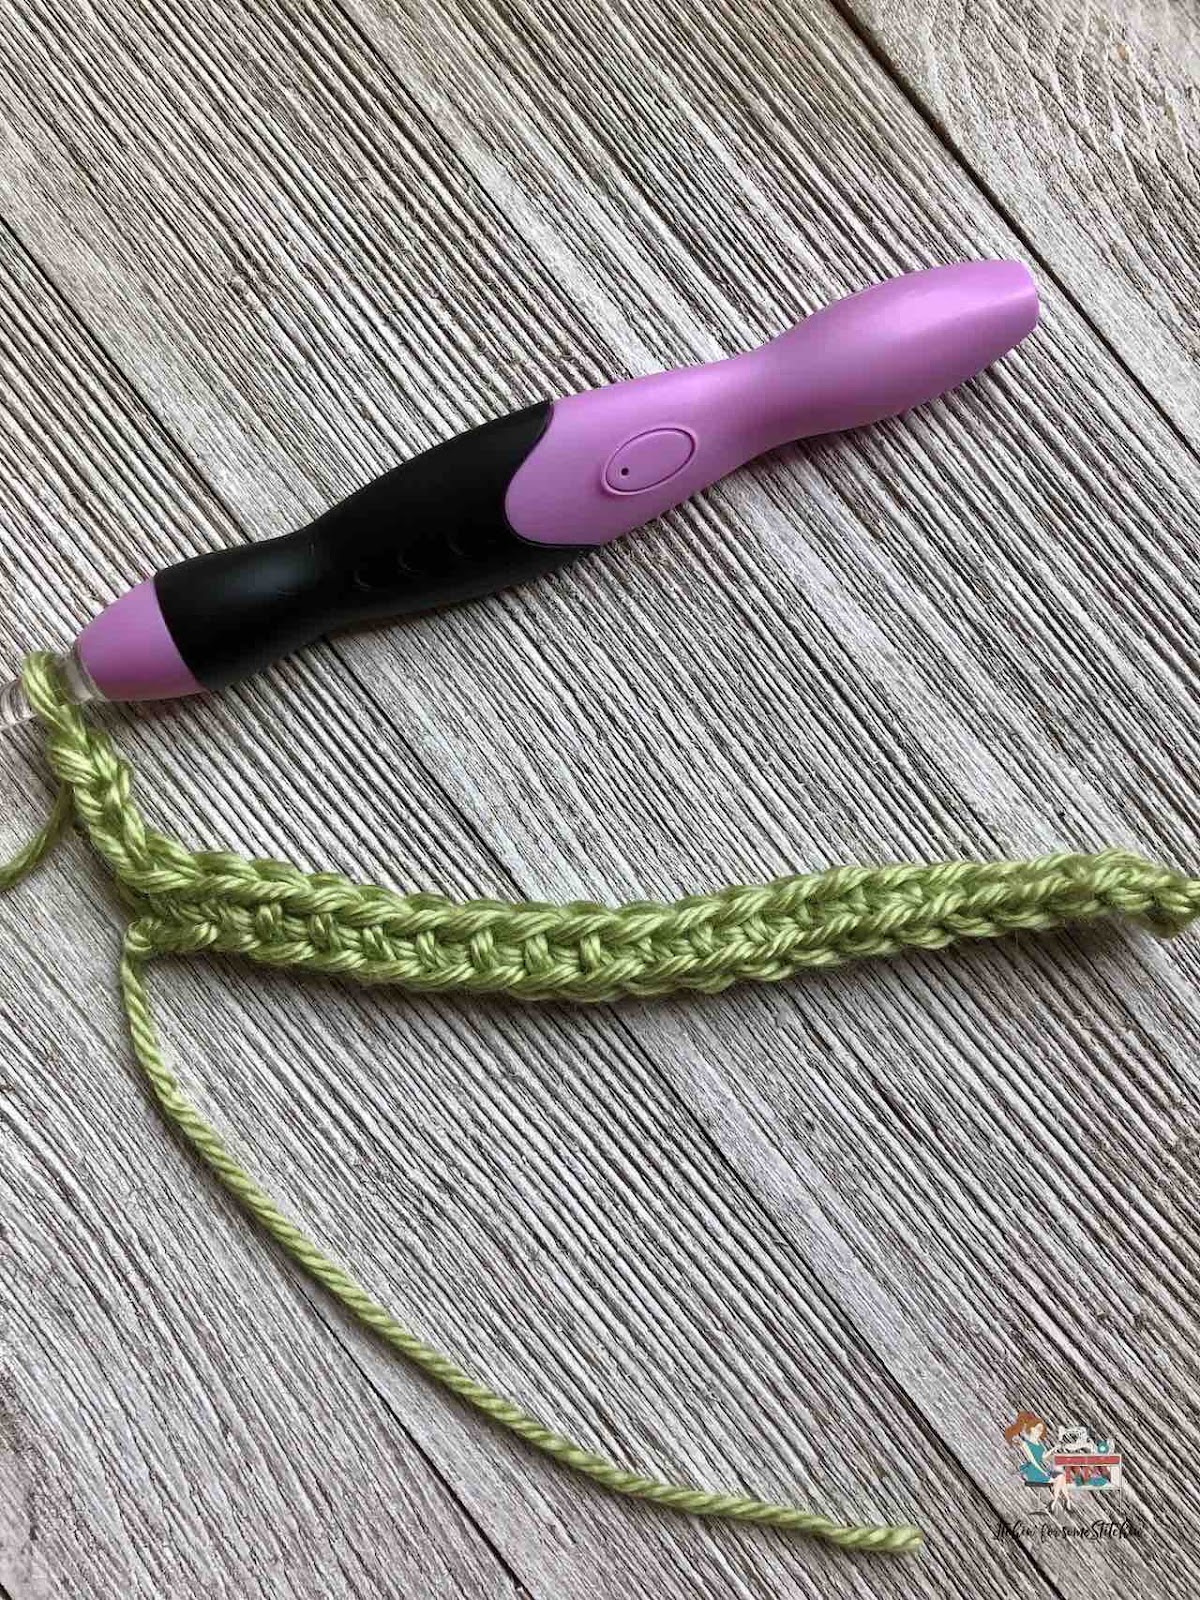
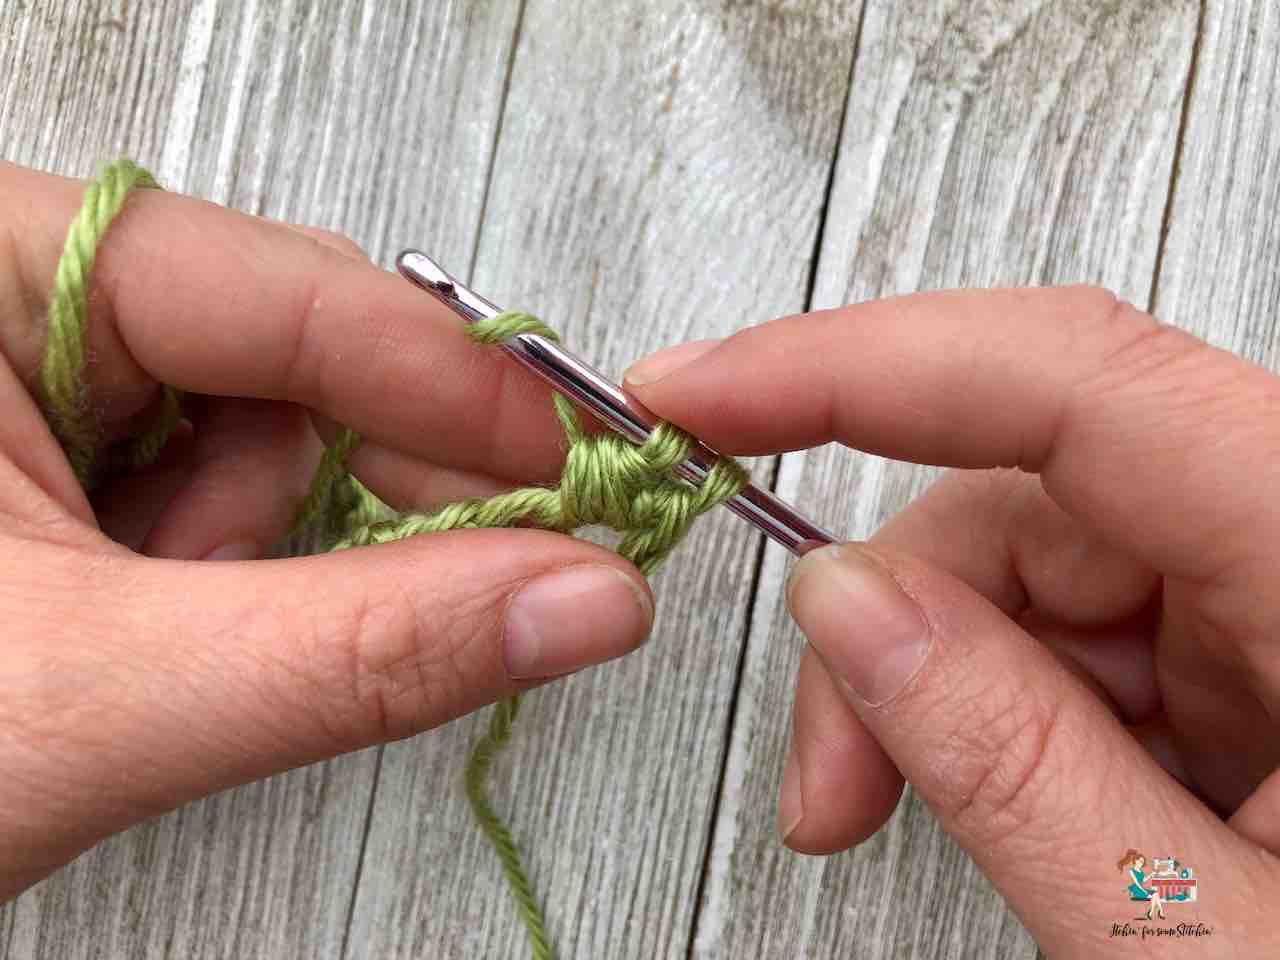
Step 2: Skip the 1st sc and work one dc in the next sc.
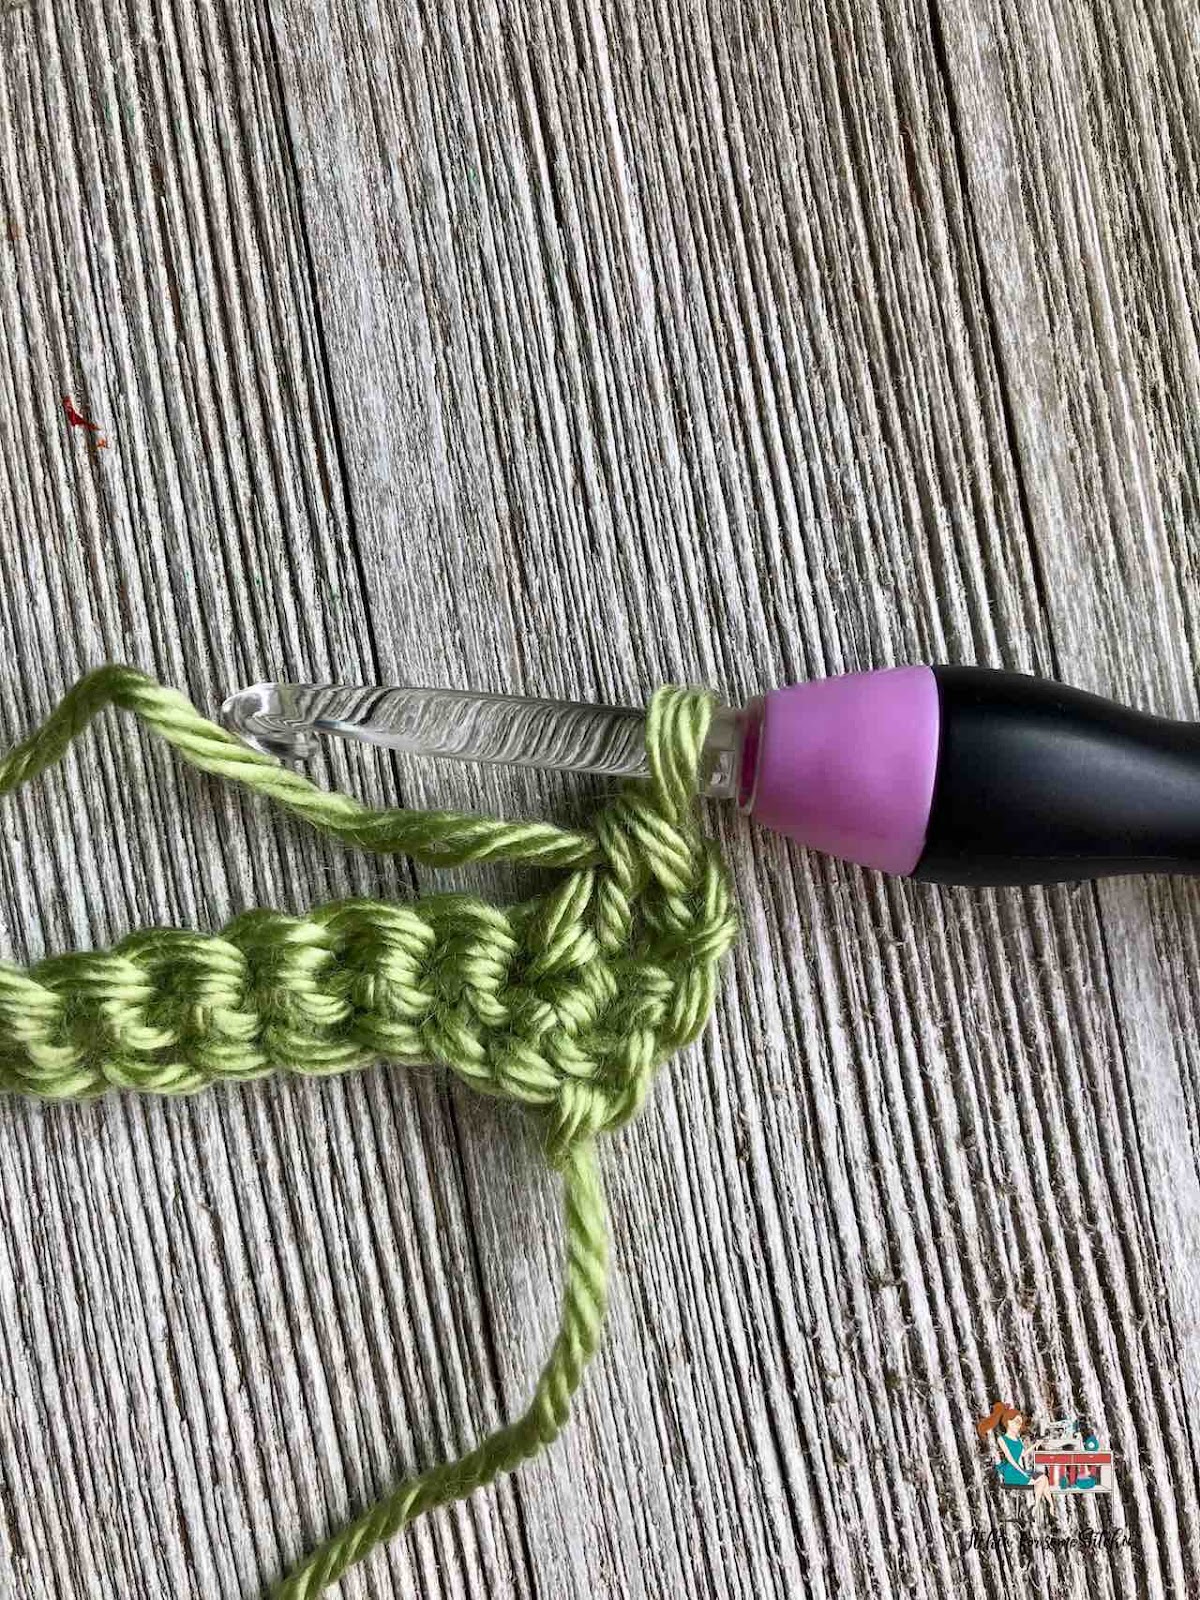
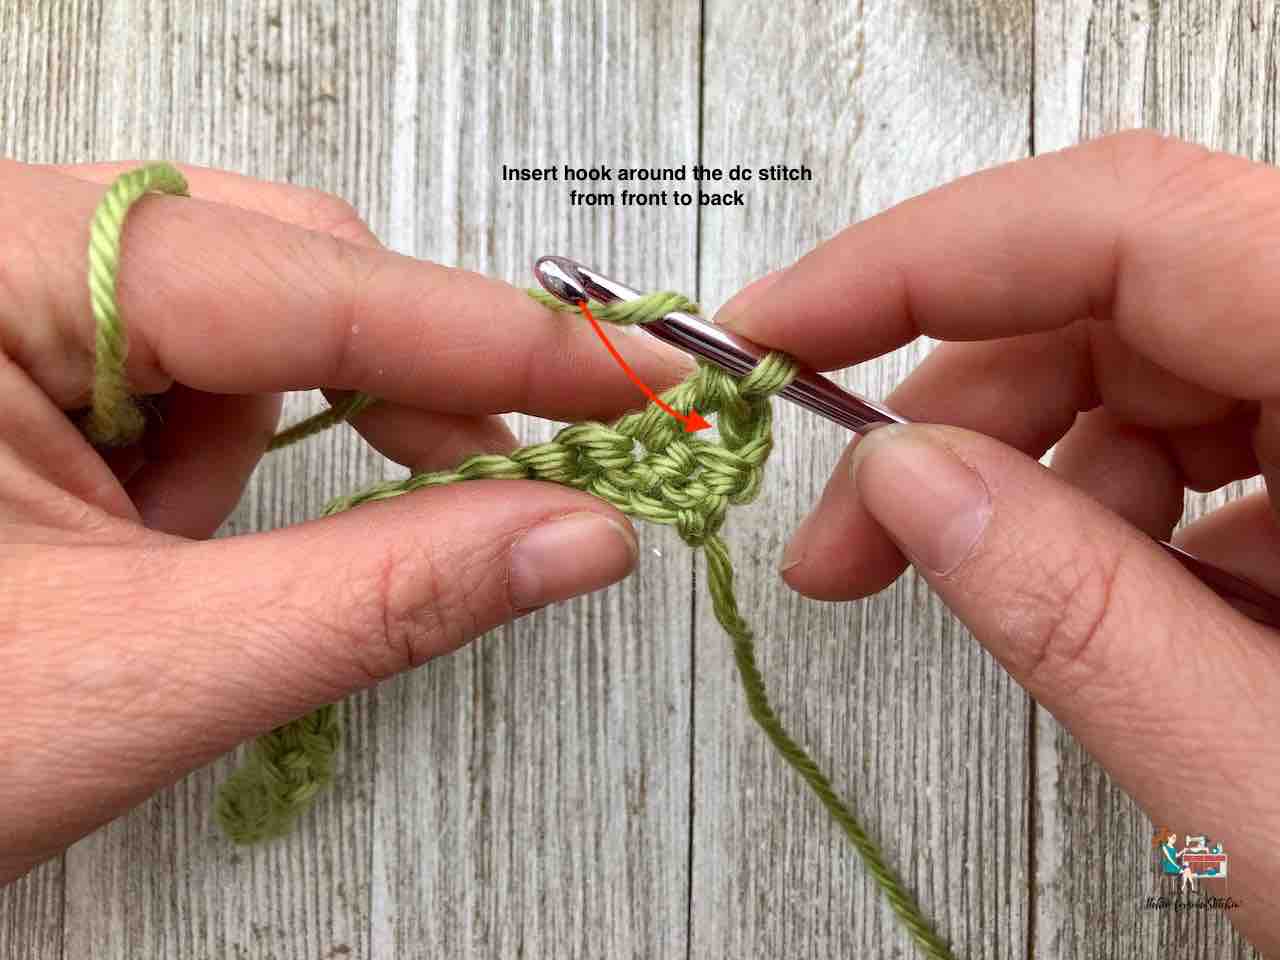
Make a bead stitch (bst).
Step 1: Yarn over.
Step 2: Insert the hook behind the previous double crochet from front to back.
Step 3: Yarn over and pull up a loop.
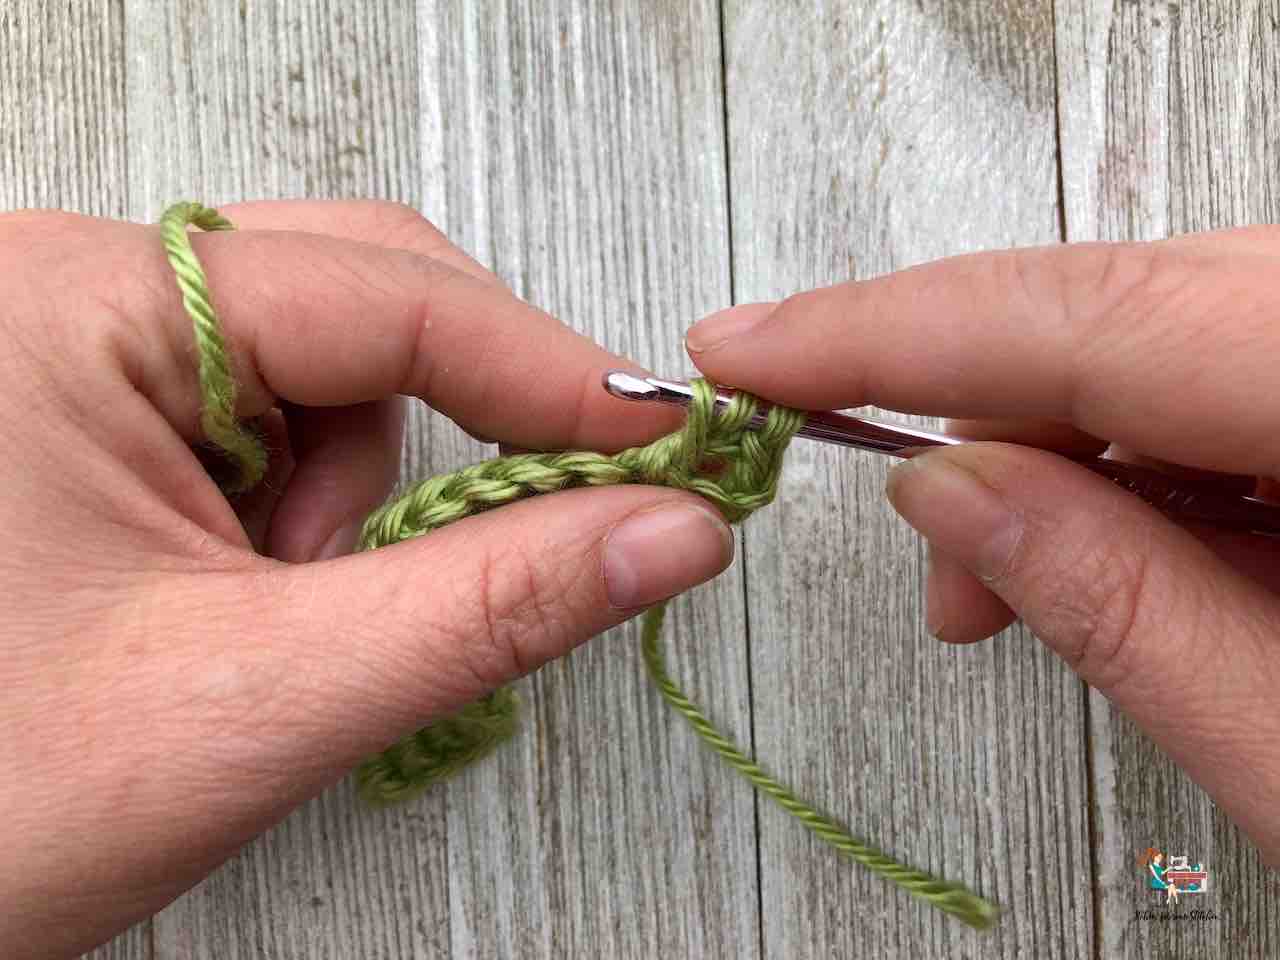
You should now have 3 loops on your hook.
Step 4: Repeat steps 1-3 two more times.
~You will have done steps 1-3 three times total and should have 7 loops on your hook.
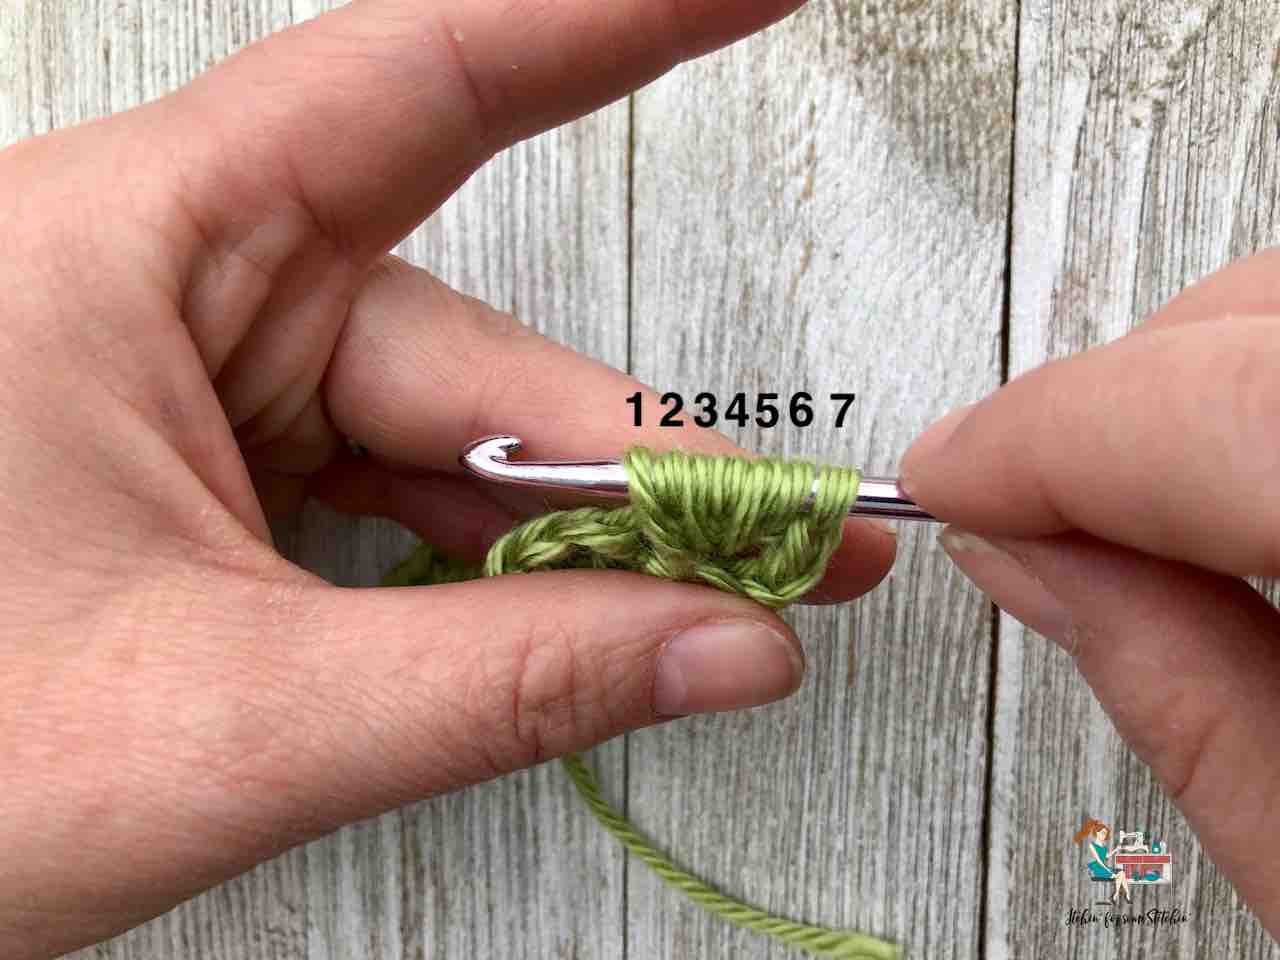
Step 5: Yarn over.
Step 6: Pull through 6 loops.
You should have 2 loops left on your hook.
Step 7: Yarn over.
Step 8: Pull through remaining loops on the hook.
Finish the second row.
Repeat steps 1-2 of the “start the second row” section and steps 1-8 of the “make a bead stitch” section all the way to the last stitch.
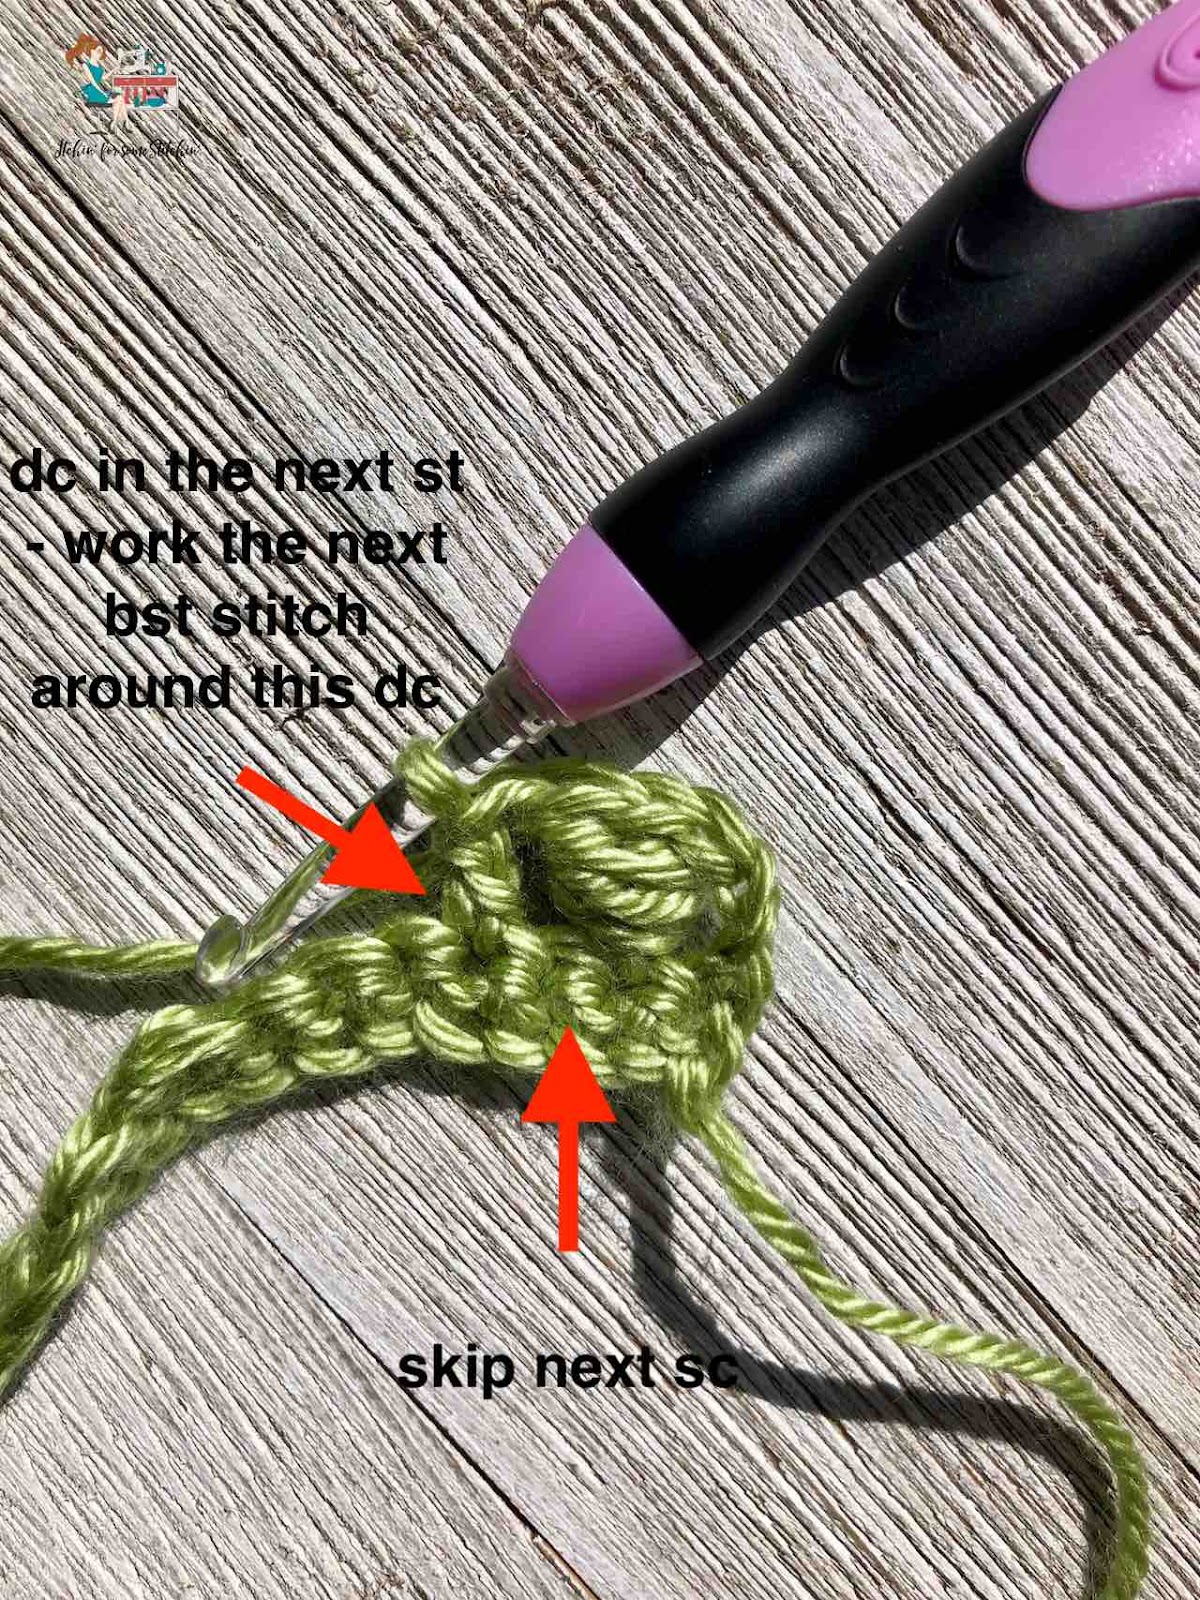
NOTE: from here on out step 1 of the “start the second row” section now becomes skip the next sc instead of skip the 1st sc.
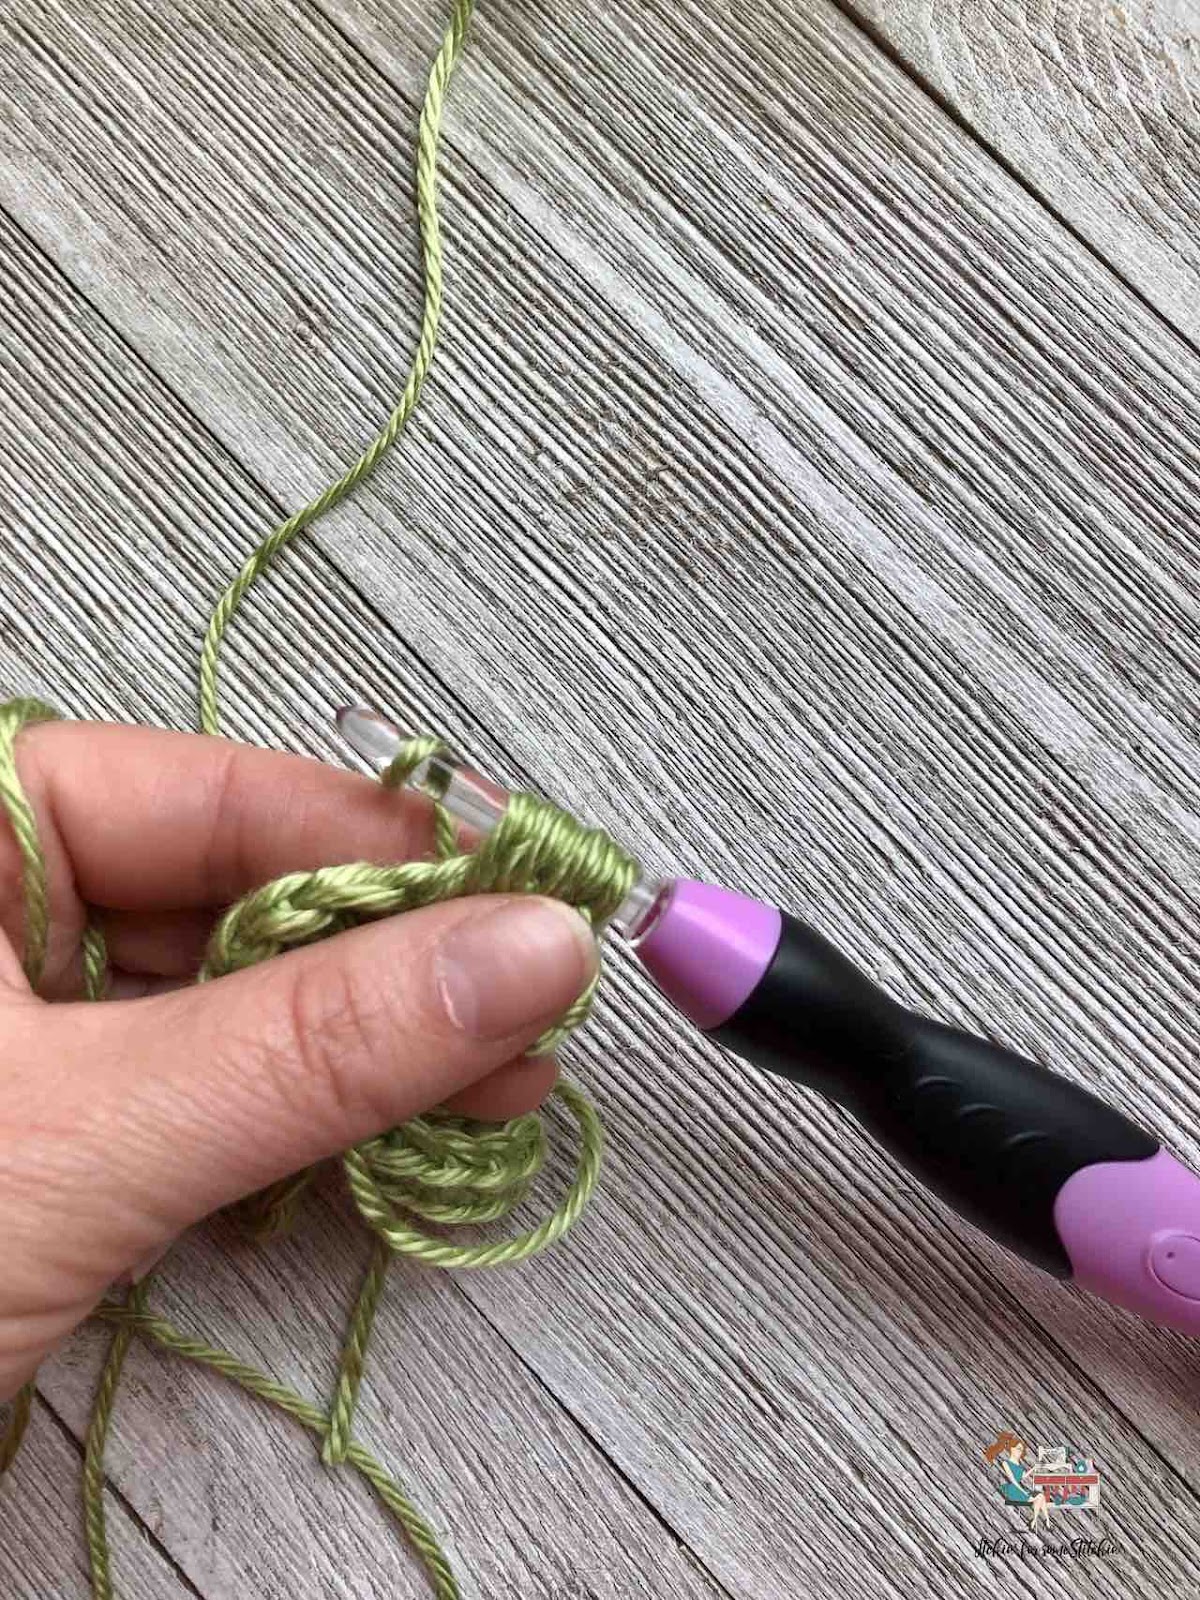
- Skip the last stitch and work 1 dc in the top of the ch 3 turning chain.
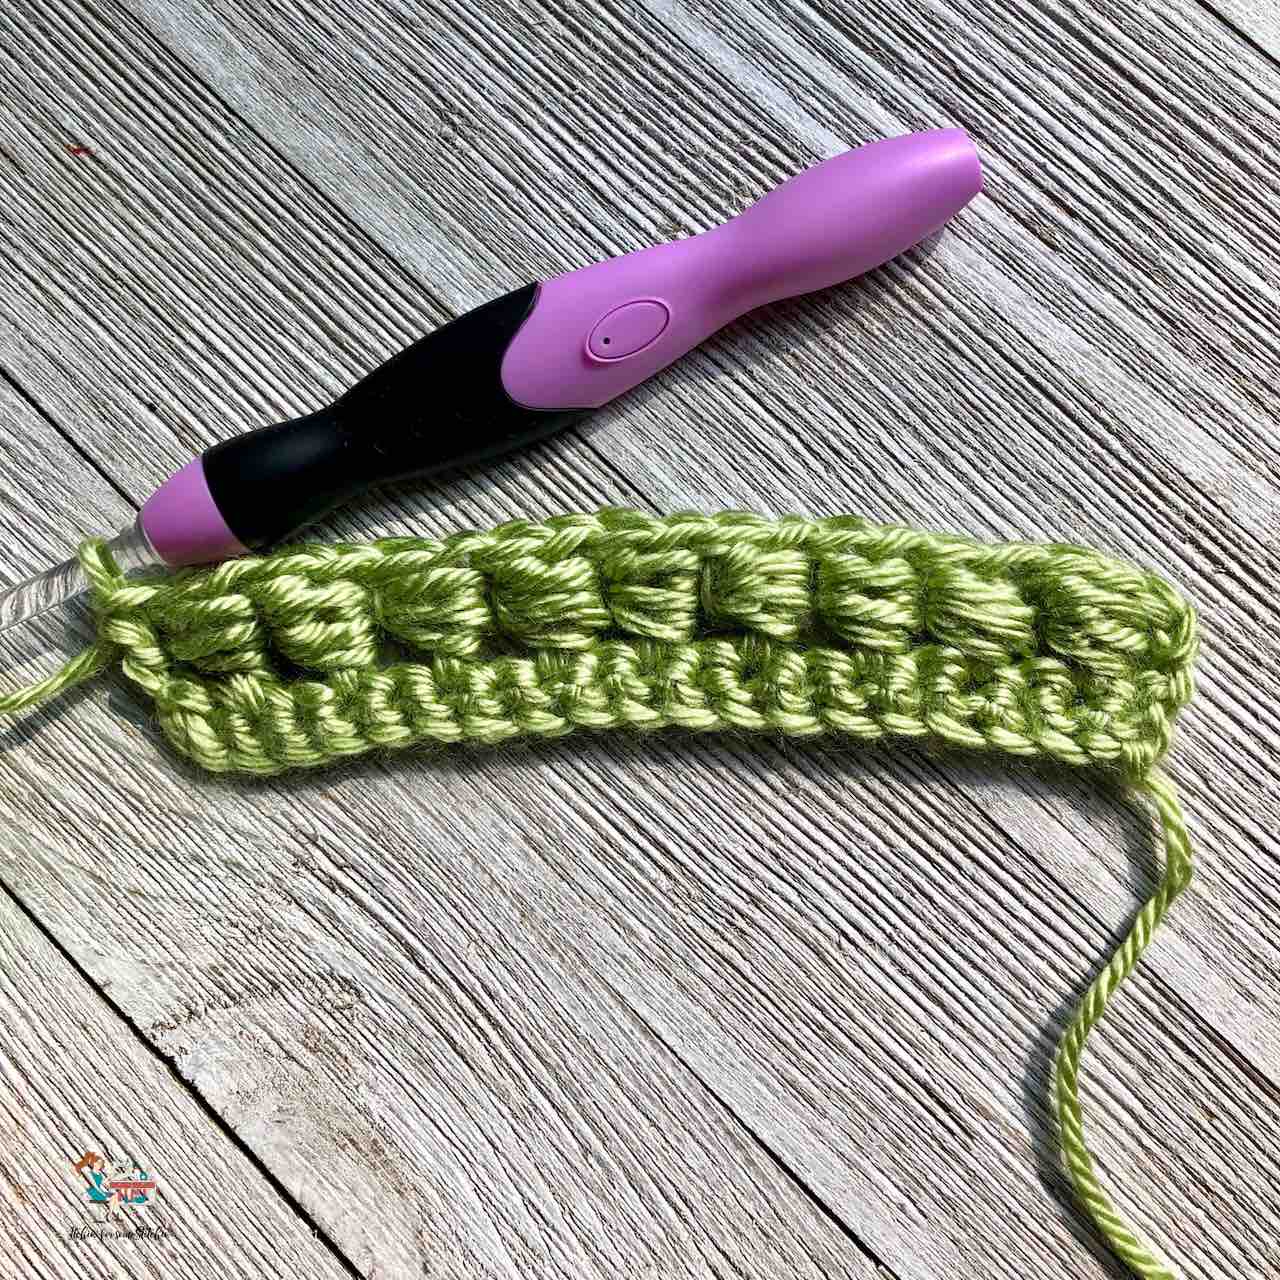
NOTE: You should have 9 bead stitches (bst).
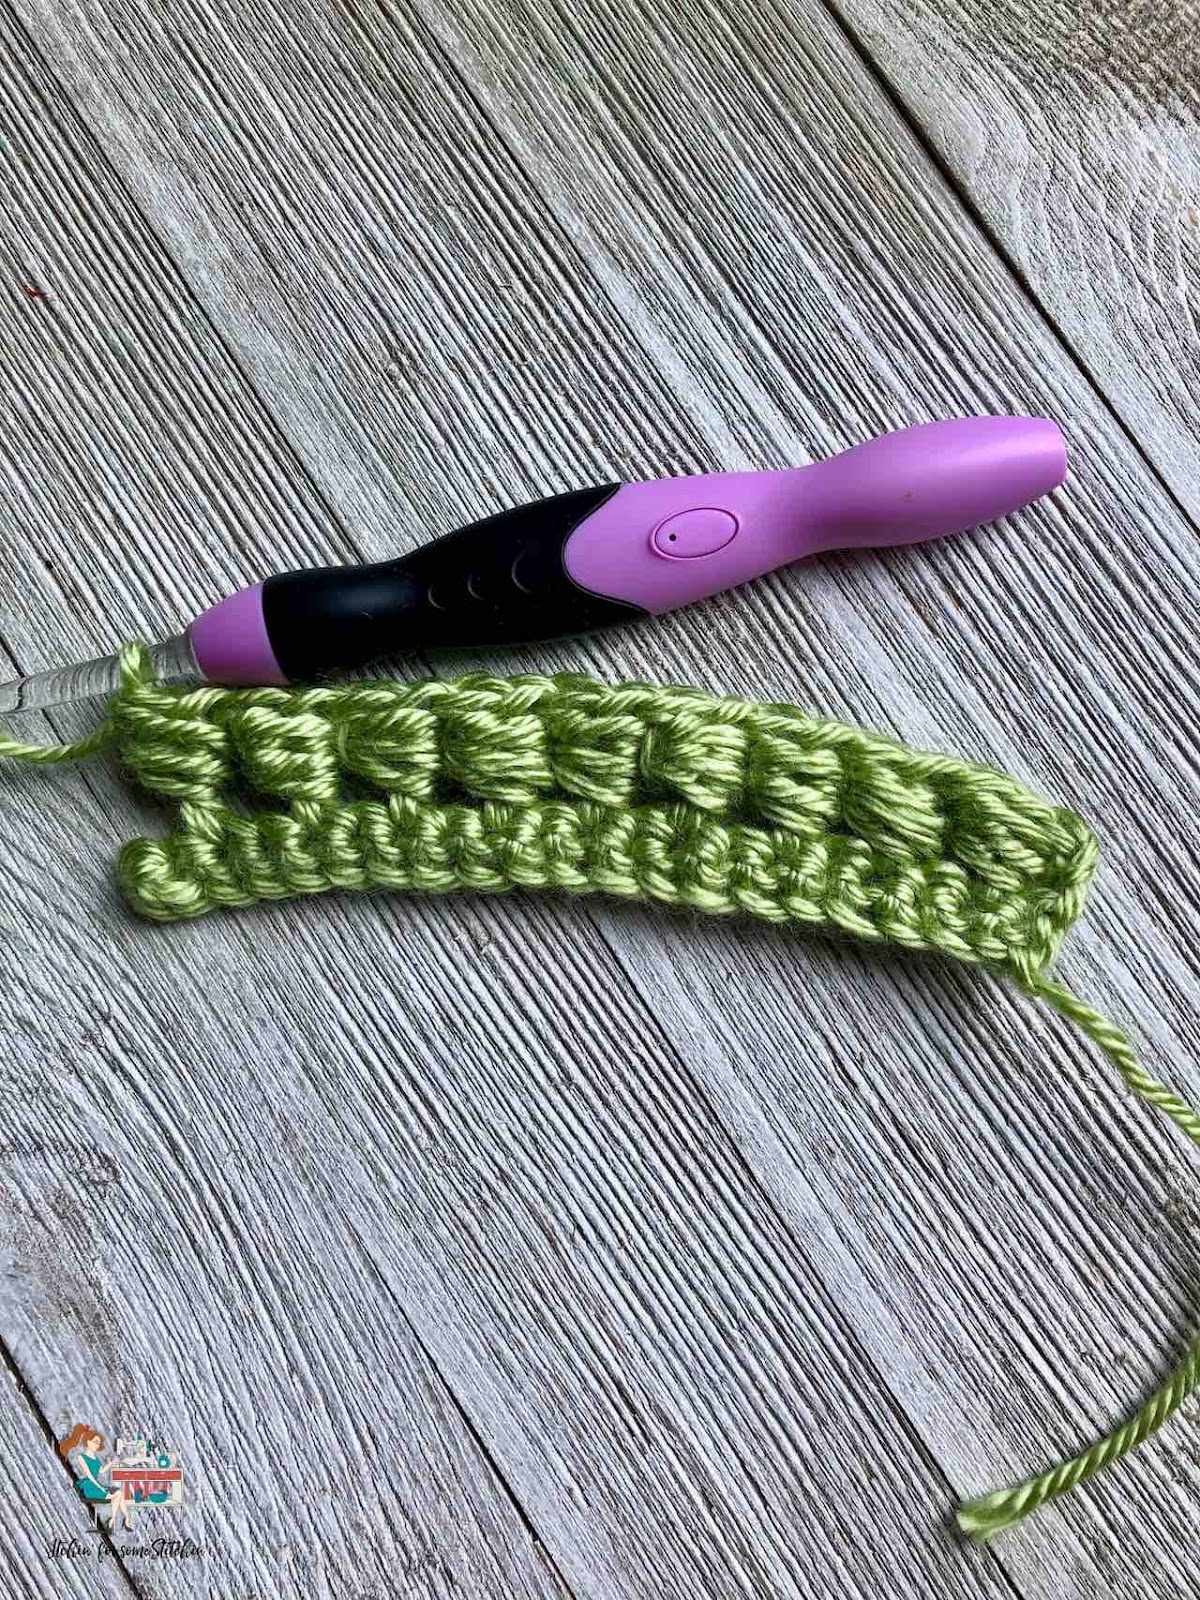
Additional Rows.
For additional rows, simply repeat all steps of rows 1 and 2 until the fabric is to your liking.
You should be alternating rows of sc and rows of bst stitches.
NOTE: From this point on, the row of single crochets (row 1 above) will be worked in each stitch of the bead stitch row (row 2 above).
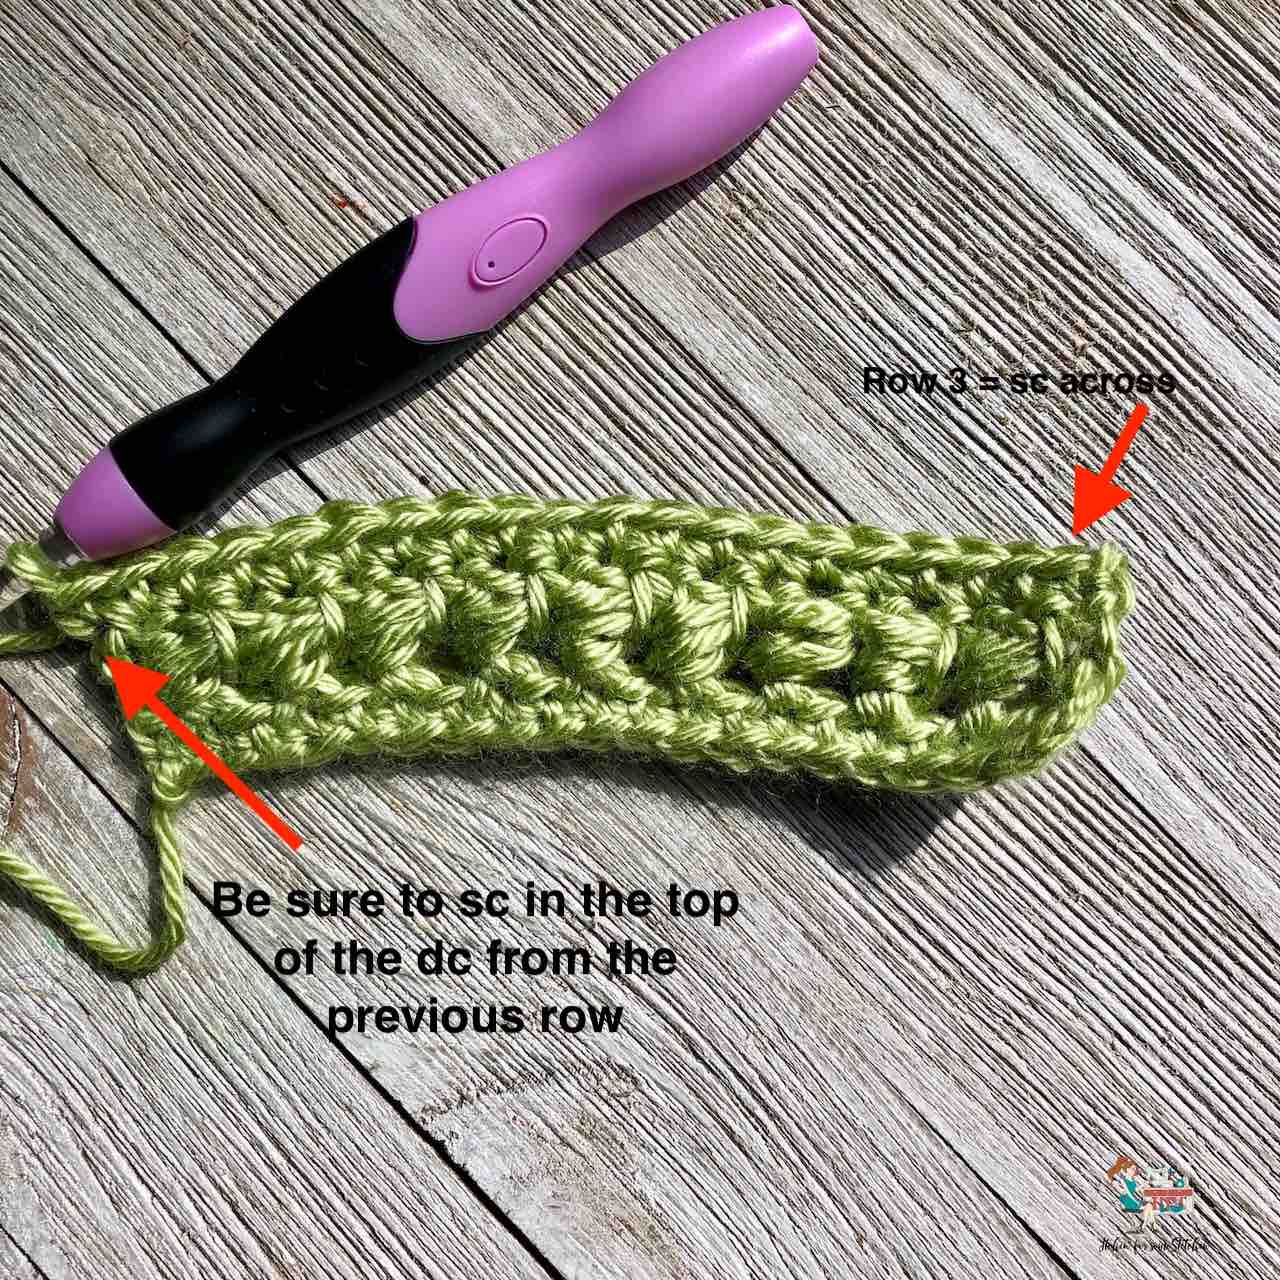
**When working the sc across rows, be sure to sc into the top of the ending dc from the previous row (bead stitch row). Otherwise, you will end up reducing your stitch count by one.
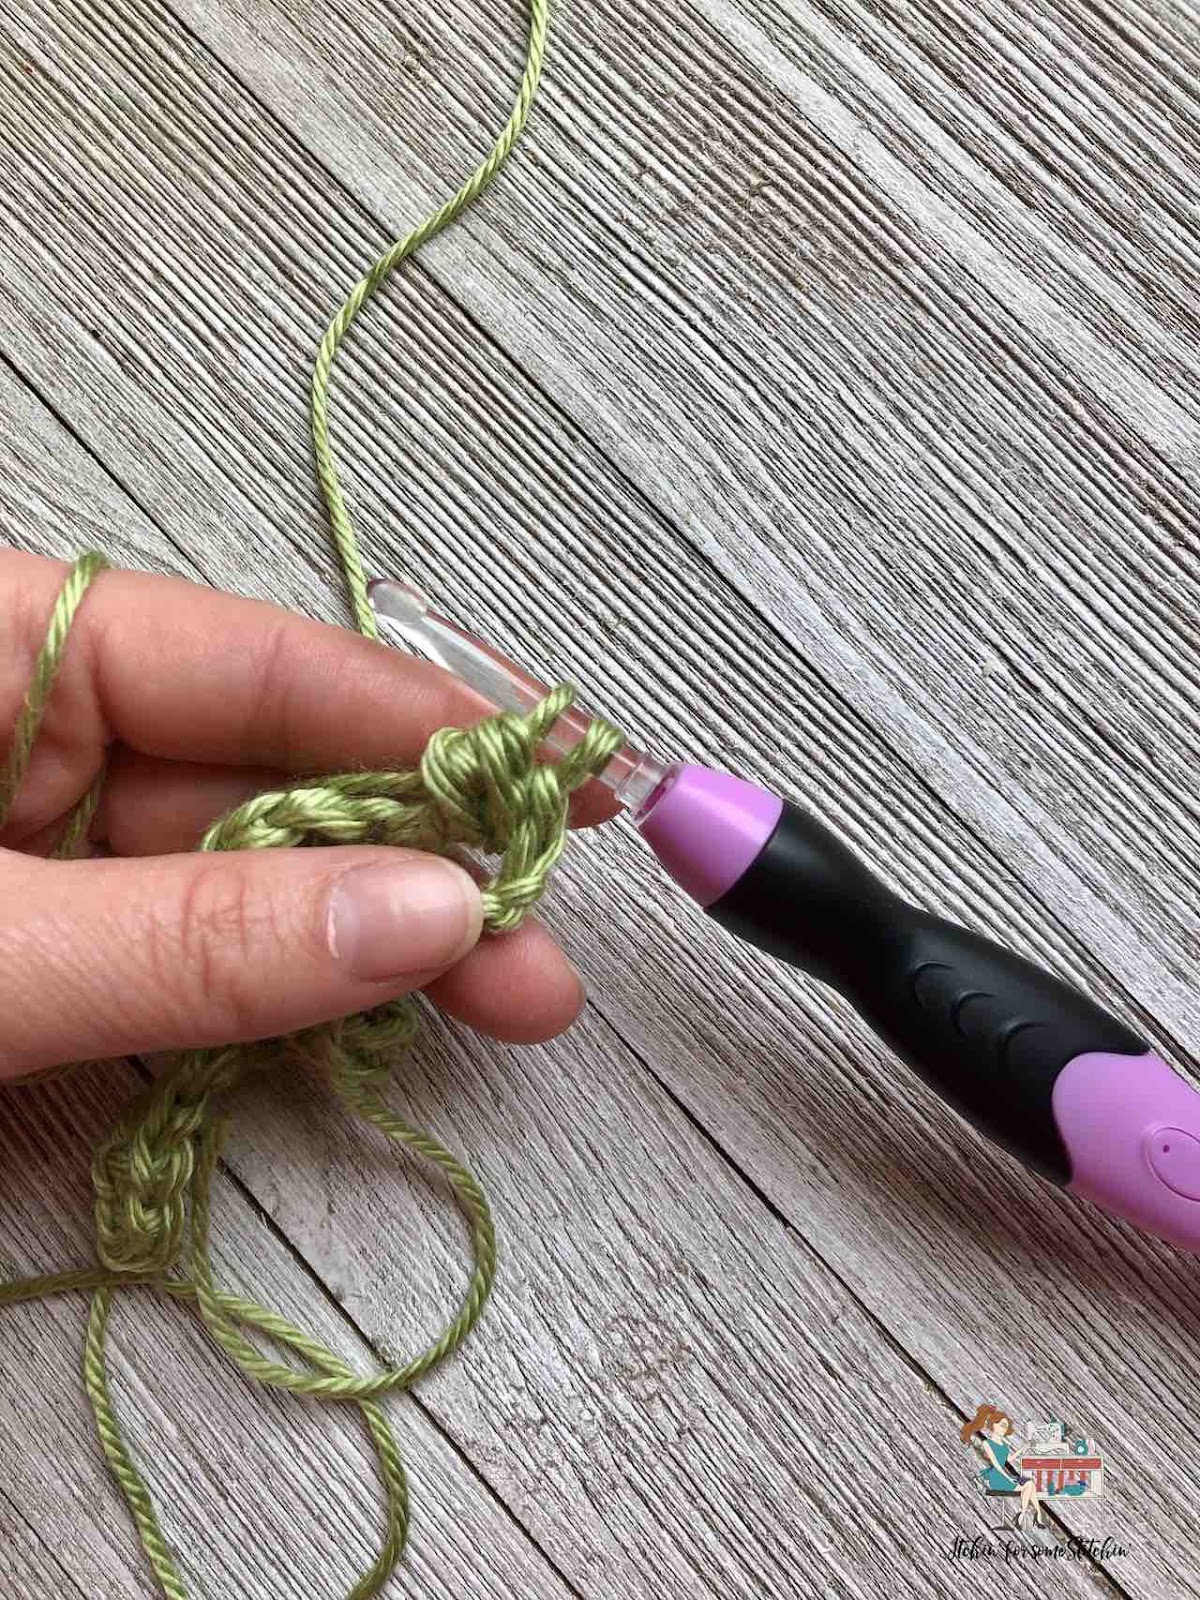
Final photo above shows the start of the second bead stitch row. Continue as outlined above to finish the row.
Then continue on to make the fabric as long as you like.
Check Out These Bead Stitch Patterns!
There now, that wasn’t so hard, was it?
Of course not!
Like I said, this stitch may look intricate, but it’s really not that complicated once you learn how to do it.
Just take your time with the tutorial, check out the video, and give it a little practice and you’ll have this beautifully textured stitch under your belt in no time!
You won’t regret it because the bead stitch opens up a world of possibilities, adding texture and allure to your creations.
By following my step-by-step tutorial and checking out the common questions below, you are will be ready to dive into this gorgeous stitch.
Let your creativity shine as you start using the bead stitch your future crochet projects!
Love Pinterest?
I do!
PIN this pattern to your Pinterest boards for later.
You can also follow all my boards!
» CLOSE THE INSTRUCTIONS
» CLICK HERE TO VIEW BEAD STITCH FAQS
Commonly Asked Questions about the Bead Stitch:
1: How many loops should I pull up in the bead stitch?
The number of loops you pull up in the bead stitch depends on the desired effect and the pattern instructions.
It can range from 3 to 7 loops, but 7 loops are commonly used.
Experiment with different loop counts to achieve your desired look.
2: Can I use the bead stitch in different crochet projects?
Absolutely!
The bead stitch can be used in a wide range of projects, including scarves, hats, blankets, and even garments. I
The bead stitch adds texture and visual appeal to any design.
Get some of my patterns designed with the bead stitch above.
3: How do I maintain consistent tension while crocheting the bead stitch?
Maintaining consistent tension is essential to ensure that your bead stitches appear uniform throughout your project.
Practice the bead stitch on a swatch before starting your project, and adjust your tension accordingly to achieve the desired result.
Experiment with different hook sizes if needed.
4: Can I substitute the bead stitch for other stitches?
Yes, the bead stitch can be substituted for other stitches in certain patterns.
Especially if you want to substitute it for similar stitches, such as the puff stitch and bobble stitch.
However, keep in mind that it will alter the overall texture and appearance of the project.
Always refer to the pattern instructions for any recommended stitch substitutions.
Thank you for coming to my blog! By sharing my content and/or making a purchase you are making it possible for me to continue producing and sharing free content for everyone to enjoy. I sincerely appreciate your support!
Until next time… Happy Crocheting!


Please Share!
» CLOSE THE FAQS
Julie
Wednesday 1st of April 2020
Hello!
Thank you for sharing your video and pattern!
I am currently making a blanket for my son using your instructions.
One quick question, which row should I end on: row one or two?
Thanks! Julie
Itchin4Stitchin
Saturday 4th of April 2020
Hi Julie,
Are you making a blanket using the bead stitch or using my baby blanket pattern?
Thanks,
RaeLynn
How to Crochet the Bead Stitch | Lyn's Crafts Yarns
Wednesday 2nd of October 2019
[…] The bead stitch is a beautifully textured stitch that may look a bit complicated, but really isn’t! It only takes a few simple stitches worked in a specific way to create these little tornado-like stitches. This tutorial provides step-by-step instructions, photos, and a video to help make this complicated looking stitch super easy for crocheters of all levels. See the full pattern here. […]
HG
Sunday 30th of June 2019
an actually pattern would be extremely!! helpful. Instead of all these pictures you have 1 liners underneath and don't add how to do the bean stitch in the instructions just do tisL
STITCHES - bead stitch: List instructions her SC. DC
Row 1: do etc.... Row 2: etc
YOUR INSTRUCTIONS ARE SCATTERED TO SAY THE LEAST
Itchin4Stitchin
Sunday 25th of August 2019
Hi HG,
Thank you for your comment. I have found that most people prefer a photo with accompanying instructions for each step of a stitch tutorial and I am quite surprised that you do not like the tutorial format as a teaching tool.
The pattern for the bead stitch is as follows: *yarn over, insert the hook behind the previous double crochet from front to back, yarn over and pull up a loop* Repeat from * to * 2 more times (3 times total = 7 loops on the hook). Yarn over and pull through 6 loops, yarn over and pull through remaining loops on the hook.
The pattern does indeed tell you WHAT to do in order to create the bead stitch. However, it does not show you HOW to perform each step necessary to create the bead stitch - which was the point of this tutorial.
Best wishes,
RaeLynn
How to Crochet a Foundation Chain - Itchin' for some Stitchin'
Tuesday 25th of June 2019
[…] Infinity Scarf /2. How to Crochet the Bead Stitch /3. Easy Beginner […]
Crochet Triangular Shawl: It's a Colorful Summer Shawl by Itchin' for Some Stitchin' | Underground Crafter
Monday 10th of June 2019
[…] Bead stitch (bst) – *yarn over, insert the hook behind the double crochet from front to back, yarn over and pull up a loop* Repeat from * to * 2 more times (3 times total = 7 loops on the hook). Yarn over and pull through 6 loops, yarn over and pull through remaining loops on the hook. NOTE for Beginners: The bead stitch is worked AROUND a double crochet (dc). So, you always start out by working a dc and then start the instructions from * to *. Video and photo tutorials for the bead stitch are available here. […]