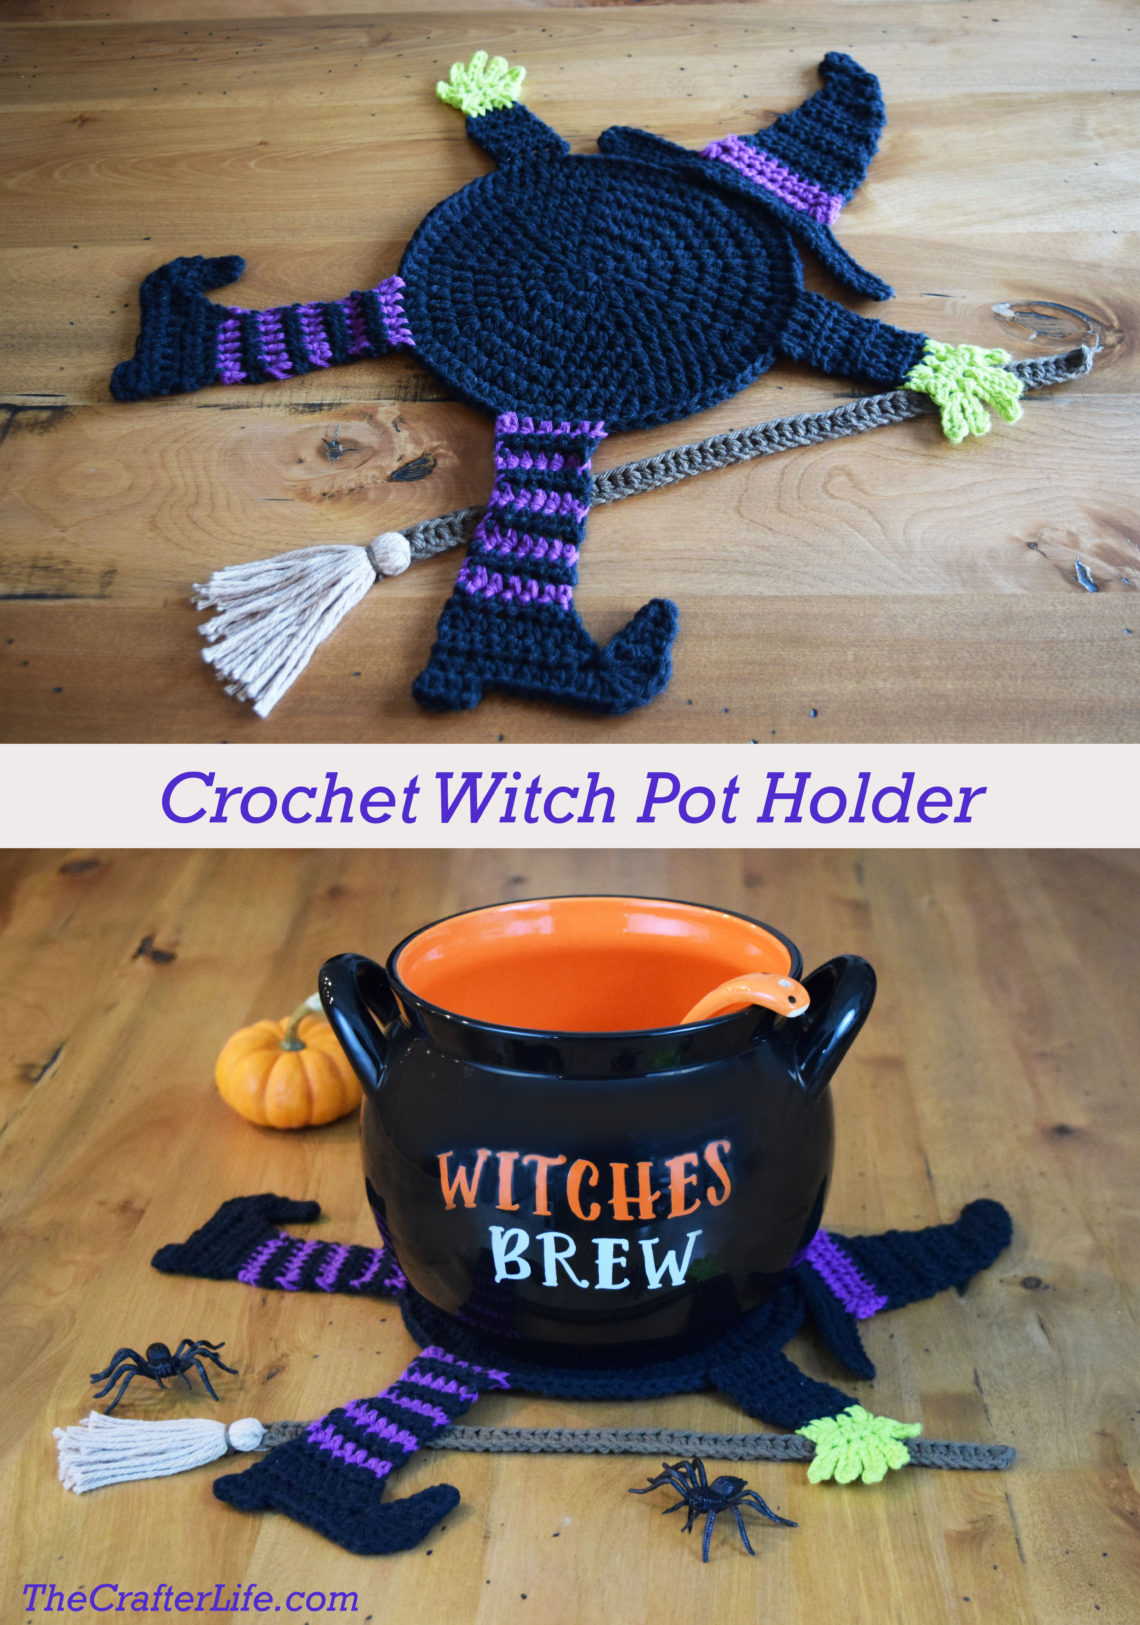
Flattened Witch Pot Holder
This unfortunate witch got squashed by a pot that landed on her! This pot holder would be a great decorative and functional accent for your table/counter during the Halloween season. A perfect accessory for any Halloween party! Sit a candy dish, bowl, pot, or cauldron with whatever you’re brewing right on top for a totally cute and festive look!
If you are interested in making one for yourself, follow my crochet pattern below.
***I also offer an Ad-Free Large Print PDF Pattern on Etsy with over 130 pictures!!***
FINISHED MEASUREMENTS
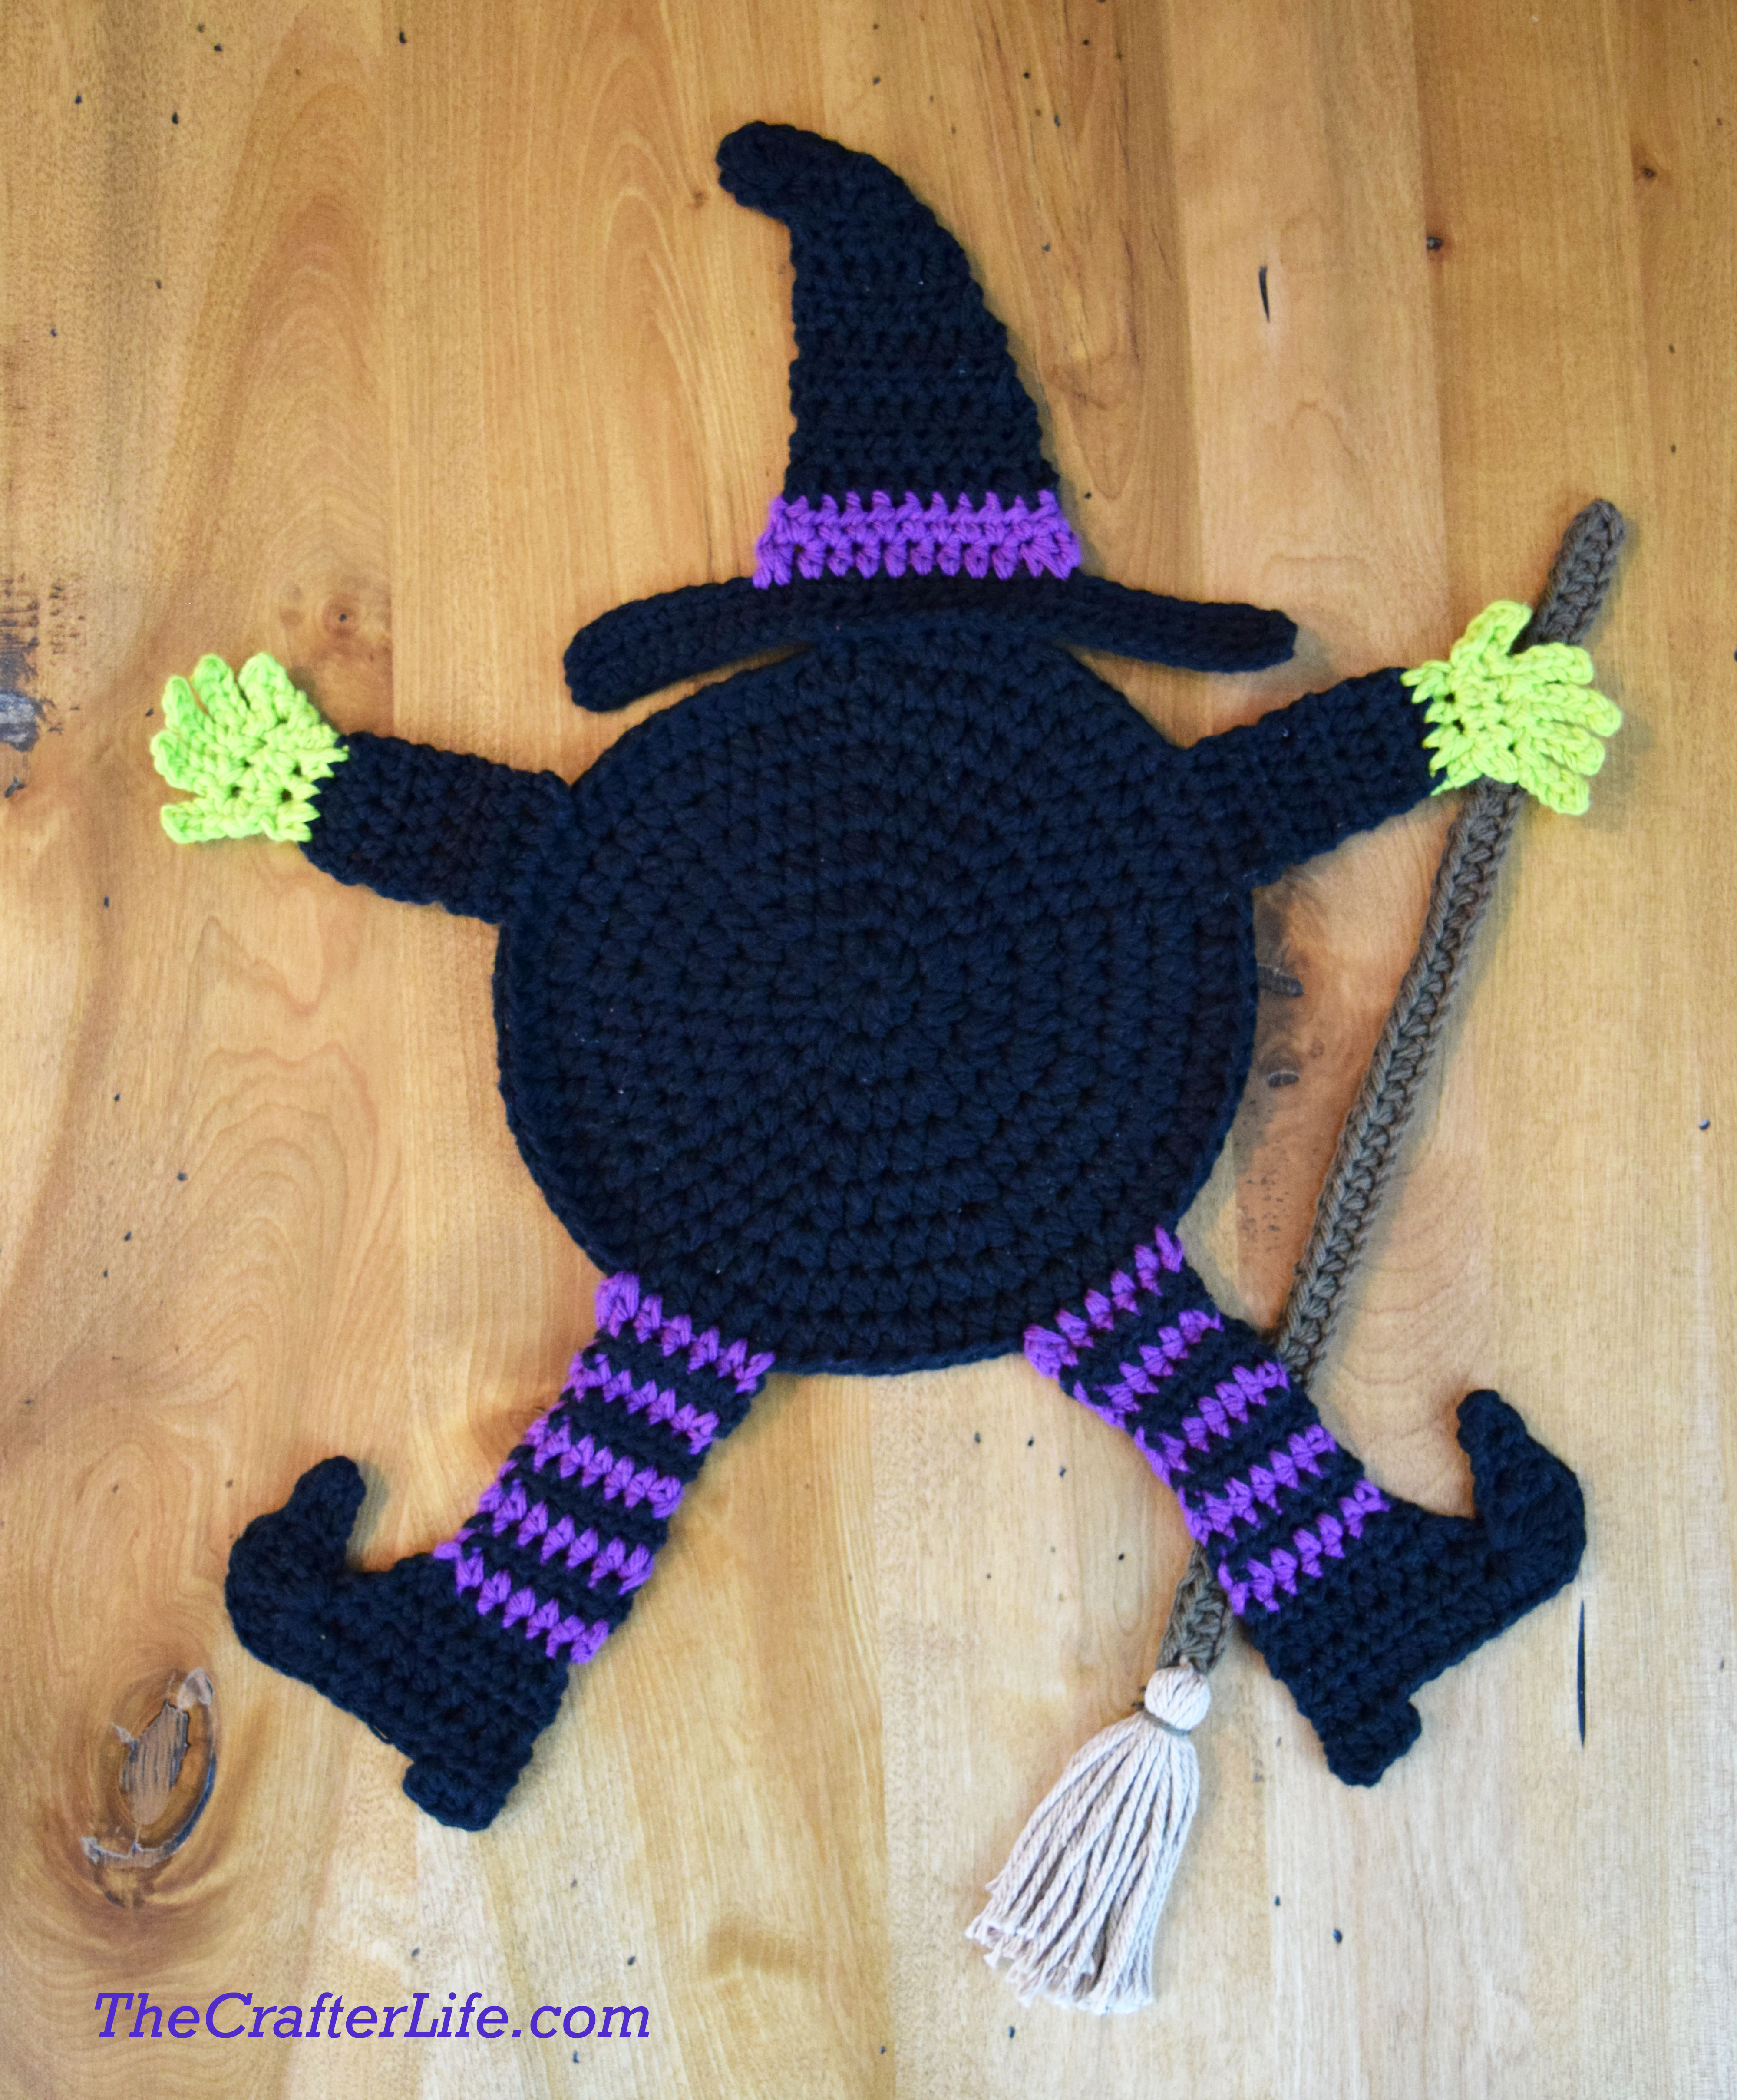
The main circle body is about 7 inches in diameter.
Each arm is about 4 inches long and 1¼ inches wide.
Each leg is about 5 inches long and 1½ inches wide.
The hat is about 5 inches tall and about 2 inches wide in the middle. The brim of the hat is about 7 inches long.
The broom is about 15½ inches long and ½ inch wide.
*The total height is about 17 inches. The total width (at widest part) is about 14½ inches.*
MATERIALS
– Size H/8/5.00mm crochet hook
– Size 4.50mm crochet hook
– 2 skeins cotton worsted weight (4) yarn in black (I used Lily Sugar ‘n Cream yarn in Black)
– Cotton worsted weight (4) yarn in purple (I used Lily Sugar ‘n Cream yarn in Black Currant)
– Cotton worsted weight (4) yarn in green (I used Lily Sugar ‘n Cream yarn in Hot Green)
– Cotton worsted weight (4) yarn in brown (I used Lily Sugar ‘n Cream yarn in Warm Brown)
– Cotton worsted weight (4) yarn in tan (I used Lily Sugar ‘n Cream yarn in Jute)
– Tapestry Needle
– Scissors
– Stitch Markers
I also offer an Ad-Free Large Print PDF Pattern on Etsy with over 130 pictures!!
ABBREVIATIONS
– ch = chain
– chs = chains
– dc = double crochet
– hdc = half double crochet
– hdc2tog = half double crochet 2 together (half double crochet decrease)
– sc = single crochet
– slst = slip stitch
– st = stitch
– sts = stitches
– tc = triple crochet
GAUGE
3 hdc rounds of main body has a diameter of approximately 2¾ inches
5 rows of hdc = 2 inches; 4 hdc = 1 inch
PATTERN NOTES
- The main circle is made with TWO black strands of yarn held together. Hold two separate strands of black yarn together and crochet like you would with one strand. This is to make it thicker and more durable. Use a 5.00mm hook for the main circle.
- The main circle is worked in continuous rounds. Start the first stitch of each round in the first st of the previous round without any joins or chains. You might want to use stitch markers to mark the beginning/end of rounds
- The legs, arms, hat, and broom are made with one strand of yarn and a 4.5mm hook..
- When changing the colors for the stripes in the legs, change the color by completing the final stitch in each row with the new color (pull through new color during final step of last stitch). Refer to my Witch Legs Scarf Pattern for a picture on changing colors.
DIRECTIONS
Main Circle Body
*Use your 5.00mm crochet hook.
*Work circle in continuous rounds using two strands of yarn. See pattern notes.
Rnd 1: Holding two strands of black yarn together, form a magic circle, ch 2, 9 hdc in circle. (9 hdc)
Rnd 2: 2 hdc in each st around. (18 hdc)
Rnd 3: Repeat [hdc in next st, 2 hdc in next st] around. (27 hdc)
Rnd 4: Repeat [hdc in next 2 sts, 2 hdc in next st] around. (36 hdc)
Rnd 5: Repeat [hdc in next 3 sts, 2 hdc in next st] around. (45 hdc)
Rnd 6: Repeat [hdc in next 4 sts, 2 hdc in next st] around. (54 hdc)
Rnd 7: Repeat [hdc in next 5 sts, 2 hdc in next st] around. (63 hdc)
Rnd 8: Hdc in next 3 sts, 2 hdc in next st, repeat [hdc in next 6 sts, 2 hdc in next st] 8 times, then hdc in next 2 sts, sc in last st, join to first st of round with slst, fasten off and weave in ends. (71 hdc, 1 sc)
1st Leg
*Use your 4.5mm hook and one strand of yarn.
*Each row/stripe of the leg alternates colors between black and purple. Odd numbered rows are done in purple and even numbered rows are done in black. When changing the colors for the stripes, change by completing the last st of each row with the new color. See pattern notes.
*Make sure to carry the other color under your stitches so you can easily pick it up to begin the next row.
*Row 10 starts the shoe so all remaining rows will be done in black.
Hold the main circle body so that the right side is facing. Attach purple yarn to the 28th st of Round 8 of the main circle body. Then begin Row 1.
I also offer an Ad-Free Large Print PDF Pattern on Etsy with over 130 pictures!!
Row 1: Ch 2, hdc in same st as your join/ch 2, hdc in next 5 sts. You should now have black yarn on your hook. (6 hdc)
Row 2: Ch 2, turn, hdc in each st across. You should now have purple yarn on your hook. (6 hdc)
Row 3: Ch 2, turn, hdc in each st across. You should now have black yarn on your hook. (6 hdc)
Rows 4-9: Repeat Rows 2-3 three times. On Row 9, do not carry your black yarn under the row, but don’t fasten it off yet. This is so you can start the shoe on that side. Fasten off the purple at the end of Row 9.
***Row 10 starts the shoe. The shoe is done using only black yarn.***
Row 10: Pick up the black yarn you left on the starting side of Row 9 on your hook. Ch 2, (DO NOT TURN YOUR WORK), 2 hdc in first st of Row 9, hdc in next 5 sts. (7 hdc)
Row 11: Ch 2, turn, hdc in next 6 sts, 2 hdc in last st. (8 hdc)
Row 12: Ch 2, turn, 2 hdc in first st, hdc in next 7 sts. (9 hdc)
***The last st of Row 13 starts the toe of shoe.
Row 13: Ch 2, turn, hdc in next 8 sts, [2 hdc, 3 dc, 3 tc, hdc] in last st. (11 hdc, 3 dc, 3 tc; total of 17 sts)
Row 14: Ch 2, turn, hdc in first st, dc in next st. (1 hdc, 1 dc; total of 2 sts)
Row 15: Ch 2, turn, hdc in first st, slst in next st, fasten off and weave in ends. (1 hdc, 1 slst; total of 2 sts)
Heel of 1st Shoe
*The heel is a row of three hdc stitches. Follow the below directions to make the heel and complete the shoe.
Attach black yarn to the third st of Row 13 (three stitches over from the corner of the shoe bottom). Ch 2, hdc in the same st as you attached your yarn (3rd st of Row 13), and then hdc in the next 2 sts, fasten off and weave in ends. (3 hdc)
2nd Leg
Attach purple yarn to the 41st st of Round 8 of the main circle (this should be the 13th stitch over on the main circle from the starting stitch of the 1st leg).
Follow the directions/pattern for the 1st leg once you have attached your yarn to the correct stitch UNTIL YOU REACH ROW 9. Then stop and follow the directions below before continuing.
Once you reach Row 9, carry the black yarn underneath the entire row (unlike the 1st leg) as you have done in the previous rows. Follow the pattern directions below for Rows 9 and 10 of the 2nd leg.
Row 9: Ch 2, turn, hdc in each st across. You should now have black yarn on your hook. (6 hdc)
Row 10: Ch 2, turn, 2 hdc in first st, hdc in next 5 sts across. (7 hdc)
*After completing Row 10, you can continue following the pattern for the 1st leg, starting at Row 11.
Continue UNTIL YOU REACH THE HEEL. Then follow the directions below for the heel of the 2nd leg.
Heel of 2nd Shoe
*The heel is a row of three hdc stitches. Follow the below directions to make the heel and complete the shoe.
Attach black yarn to the first st of Row 13 (the corner of the shoe bottom). Ch 2, hdc in the same st as you attached your yarn (1st st of Row 13), and then hdc in the next 2 sts, fasten off and weave in ends. (3 hdc)
I also offer an Ad-Free Large Print PDF Pattern on Etsy with over 130 pictures!!
1st Arm
*Use your 4.5mm hook and one strand of yarn.
*The arm is made up of 6 rows with 5 hdc in each row.
Hold the main circle body so that the right side is facing. Attach black yarn to the 12th st of Round 8 of the main circle body (this should be 16 stitches away from where you attached your purple yarn for the 1st leg). Then begin Row 1.
Row 1: Ch 2, hdc in the 12th st of Round 8 of the main circle body (same st as your join/ch 2), hdc in next 4 sts. (5 hdc)
Rows 2-6: Ch 2, turn, hdc in each st across. (5 hdc)
At the end of Row 6, attach green yarn by completing the last hdc by pulling through green.
***Row 7 starts the hand so all remaining rows will be done in green.***
Row 7: With green yarn, ch 2, turn, hdc2tog, hdc in next st, hdc2tog. (3 hdc)
Row 8: Ch 2, turn, 2 hdc in first st, hdc in next st, 2 hdc in last st. (5 hdc)
Row 9: Ch 1, turn, slst in first st, ch 3, sc in 2nd ch from hook and in next ch, slst in first st again (same st as you placed slst before). You should now have the thumb complete and 4 remaining sts from Row 8. Slst in next st in Row 8, ch 5, slst in 2nd ch from hook and in next 3 chs, slst in same st in Row 8 again. You should now have the index finger complete and 3 remaining sts from Row 8. Ch 6, slst in 2nd ch from hook and in next 4 chs, slst in next st over in Row 8. You should now have the middle finger complete and 2 remaining sts from Row 8. Ch 5, slst in 2nd ch from hook and in next 3 chs, slst in next st over in Row 8. You should now have the ring finger complete and 1 remaining st from Row 8. Ch 4, slst in 2nd ch from hook and in next 2 chs, slst in last st in Row 8. You should now have the pinkie finger complete which finishes the hand. Fasten off and weave in the ends.
2nd Arm
*Use your 4.5mm hook and one strand of yarn.
*The arm is made up of 6 rows with 5 hdc in each row.
Hold the main circle body so that the right side is facing. Attach black yarn to the 58th st of Round 8 of the main circle body (this should be 17 stitches away from where you attached your purple yarn for the 2nd leg). Then begin Row 1.
Row 1: Ch 2, hdc in the 58th st of Round 8 of the main circle body (same st as your join/ch 2), hdc in next 4 sts. (5 hdc)
Rows 2-6: Ch 2, turn, hdc in each st across. (5 hdc)
At the end of Row 6, attach green yarn by completing the last hdc by pulling through green.
***Row 7 starts the hand so all remaining rows will be done in green.***
Row 7: With green yarn, ch 2, turn, hdc2tog, hdc in next st, hdc2tog. (3 hdc)
Row 8: Ch 2, turn, 2 hdc in first st, hdc in next st, 2 hdc in last st. (5 hdc)
Row 9: Ch 1, turn, ch 4, slst in 2nd ch from hook and in next 2 chs, slst in first st in Row 8. You should now have the pinkie finger complete and 4 remaining sts from Row 8. Ch 5, slst in 2nd ch from hook and in next 3 chs, slst in next st in Row 8. You should now have the ring finger complete and 3 remaining stitches from Row 8. Ch 6, slst in 2nd ch from hook and in next 4 chs, slst in next st in Row 8. You should now have the middle finger complete and 2 remaining sts from Row 8. Ch 5, slst in 2nd ch from hook and in next 3 chs, slst in next 2 sts in Row 8. You should now have the index finger complete and no remaining sts from Row 8. Ch 3, sc in 2nd ch from hook and in next ch, slst in side of hand (space made by the 1st hdc of Row 8. You should now have the thumb complete which finishes the hand. Fasten off and weave in ends.
Hat
*Use your 4.5mm hook and one strand of yarn.
Rows 1 and 2 of the hat are made with black yarn.
Row 1: Ch 30, hdc in the 3rd ch from the hook and in each ch across. (28 hdc)
Row 2: Ch 1, turn, sc in each st across. Fasten off, leaving a long tail to use later for sewing onto the main circle body. (28 sc)
*Rows 3 and 4 of the hat are made with purple yarn. At the end of Row 4, change back to black yarn by completing the last hdc of Row 4 by pulling through black yarn.
Row 3: Don’t turn work, attach your purple yarn to the 9th st in Row 2. Ch 2, hdc2tog, hdc in next 8 sts, hdc2tog. (10 hdc)
Row 4: Ch 2, turn, hdc in each st across. Complete the last hdc by pulling through black yarn. (10 hdc)
*The rest of the hat is made with black yarn. You should already have black yarn on your hook after completing the last st of Row 4.
Row 5: Ch 2, turn, hdc2tog, hdc in next 6 sts, hdc2tog. (8 hdc)
Rows 6-7: Ch 2, turn, hdc in each st across. (8 hdc)
Row 8: Ch 2, turn, hdc in next 6 sts, hdc2tog. (7 hdc)
Row 9: Ch 2, turn, hdc in each st across. (7 hdc)
Row 10: Ch 2, turn, hdc in next 5 sts, hdc2tog. (6 hdc)
Row 11: Ch 2, turn, hdc in each st across. (6 hdc)
Row 12: Ch 2, turn, hdc in next 2 sts, hdc2tog, hdc2tog. (4 hdc)
Row 13: Ch 2, turn, hdc2tog, hdc in next st, 3 hdc in last st. (5 hdc)
Row 14: Ch 4, turn, [tc, dc, hdc] in first st, hdc in next st, hdc2tog, slst to last st, fasten off and weave in ends. (1 tc, 1 dc, 3 hdc, 1 slst; total of 6 sts)
Broom
*Use your 4.5mm hook and one strand of yarn.
- Handle
Use BROWN yarn to complete Row 1 (which is the broom handle).
Row 1: Ch 55, hdc in 3rd ch from hook and in each ch across, fasten off, weave in ends. (53 hdc)
- Bristles
Next, make the broom bristles using TAN yarn.
Wrap the tan yarn around 4 fingers about 18 or so times. Tie a strand of brown yarn around the top to hold it together. Then, cut across the loops of yarn at the bottom to create the ends of the bristles (you should have about 18 strands of yarn that are each about 6 inches long).
- Attach Bristles to Handle
Use a tapestry needle to pull 3 or 4 of the strands of tan yarn halfway through the bottom end of the broom handle (between the 51st hdc and 52nd hdc). Make sure the ends hang evenly below to broom handle. Then cut a strand of brown yarn and tie it around the top of the tan “bristles” to hold them together and in place.
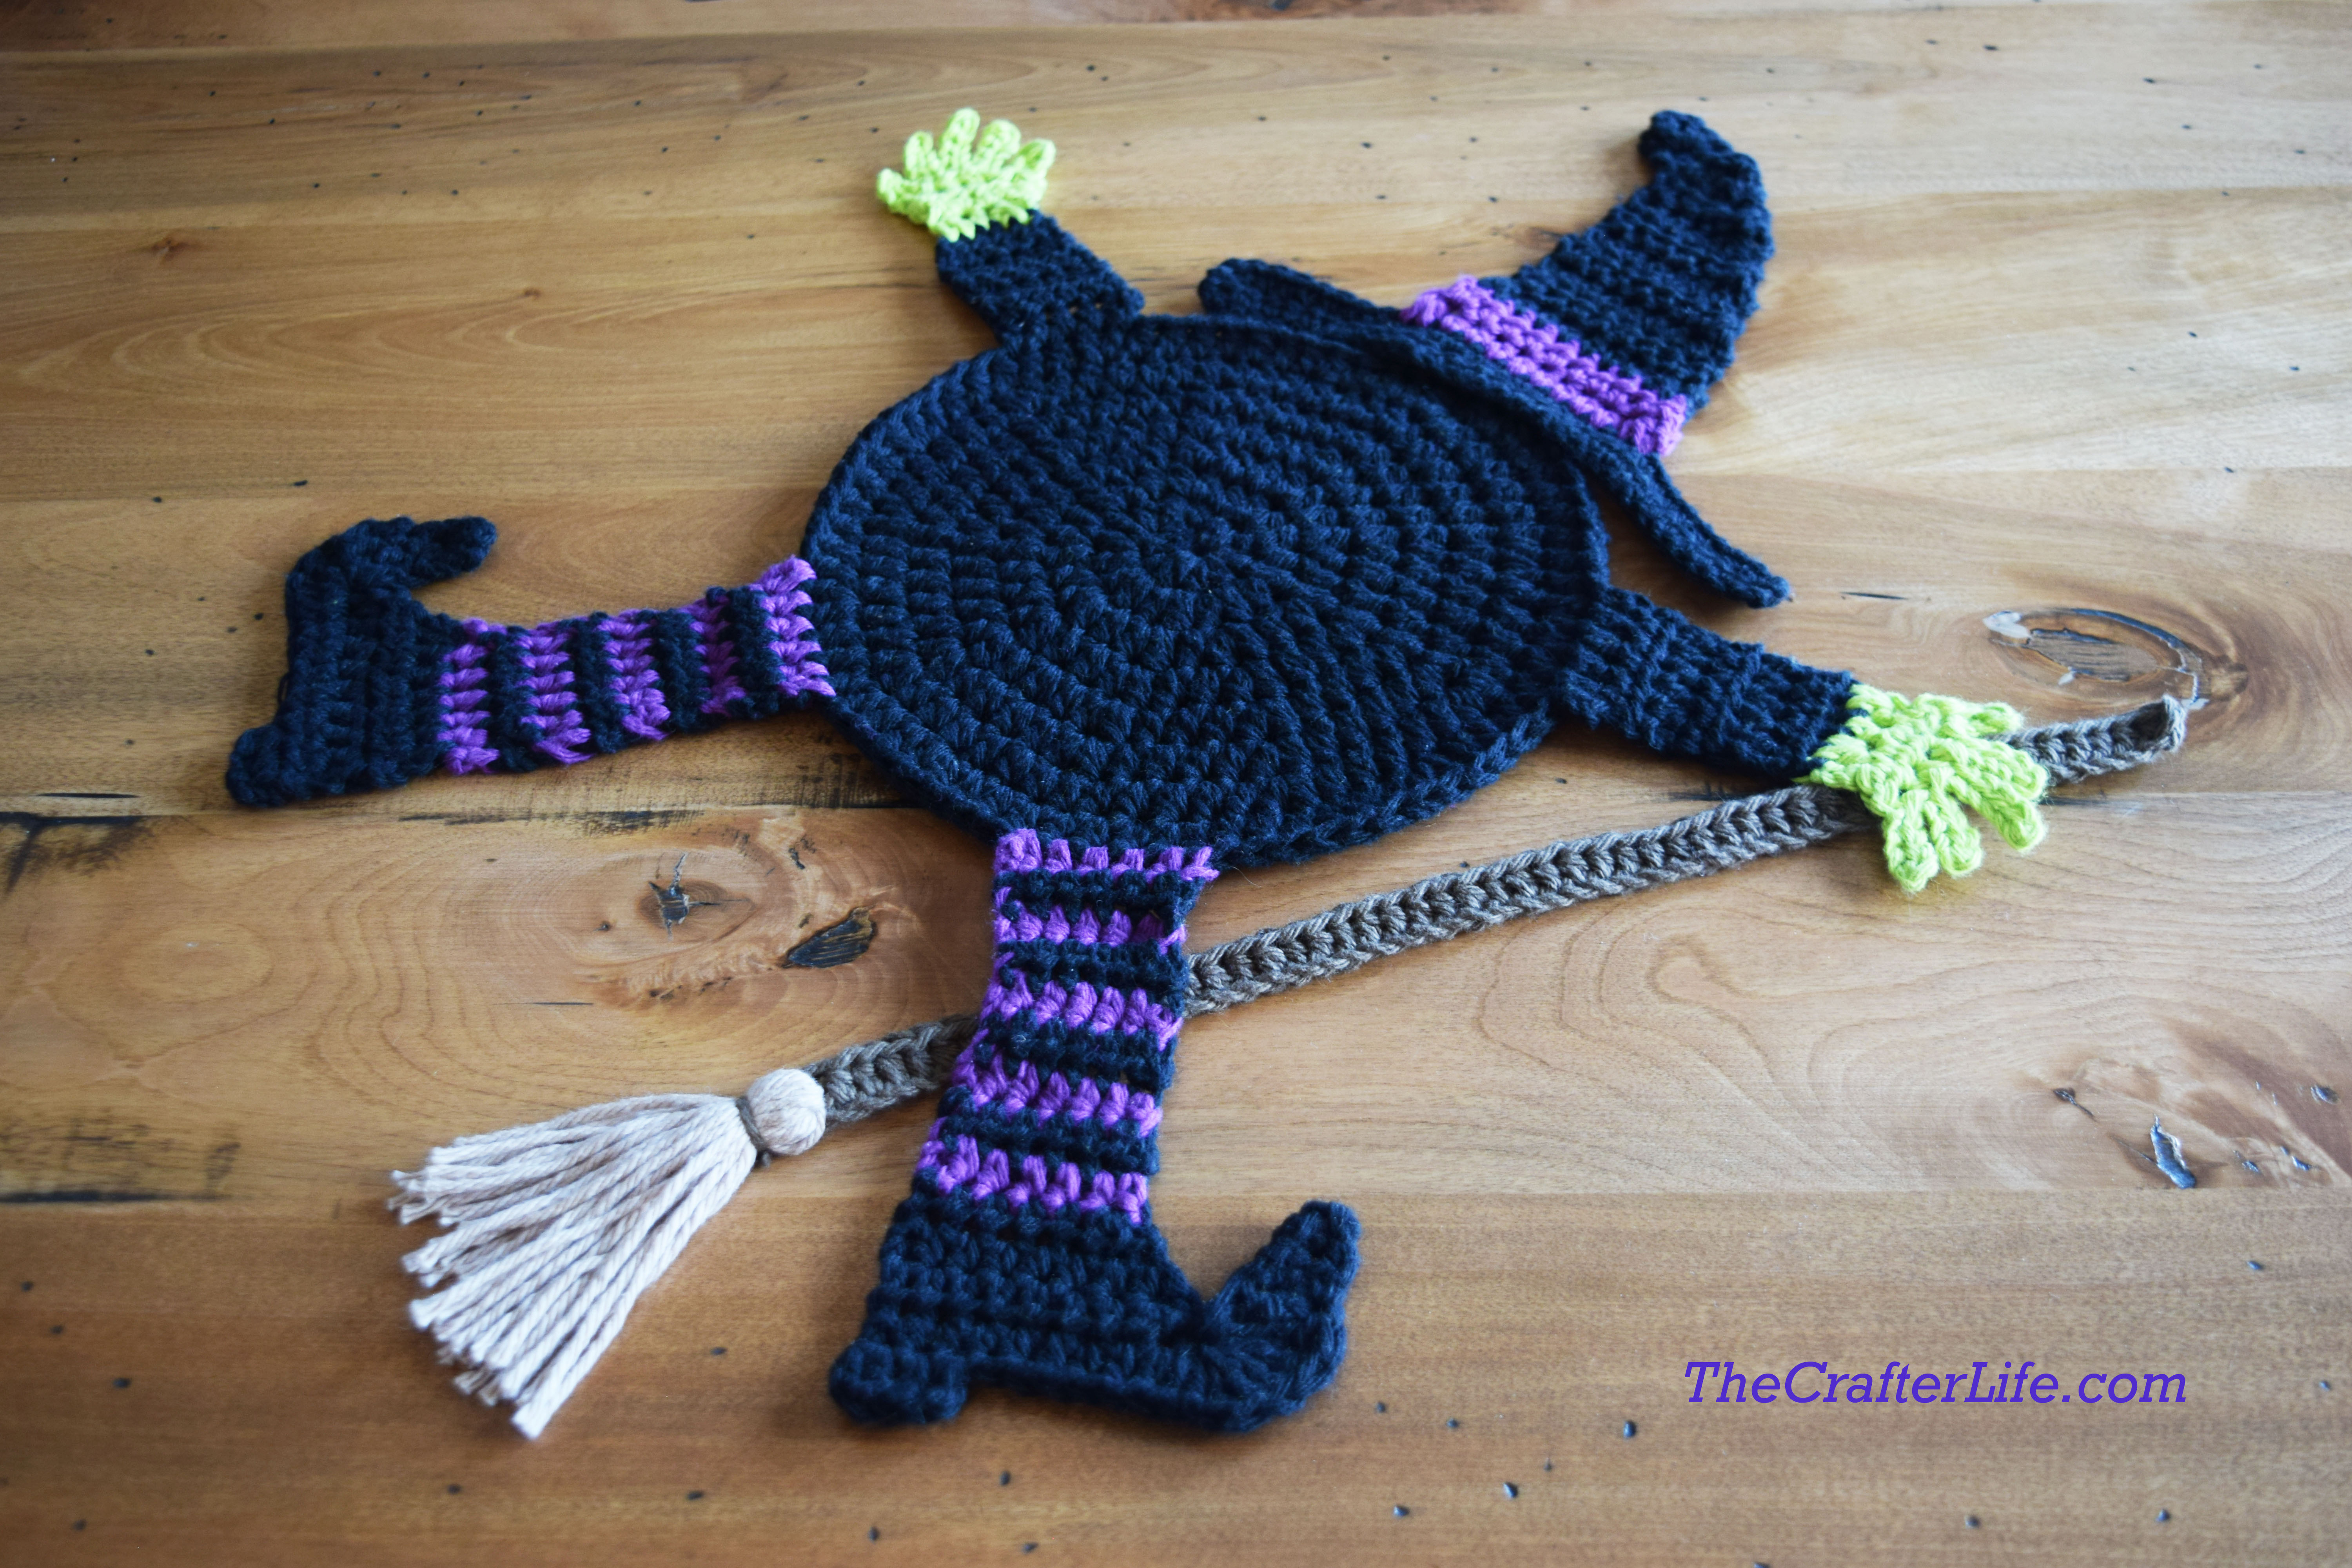
ASSEMBLY
- Sew the hat to the top of the main circle body using a tapestry needle and a piece of black yarn (I used the tail left from the brim of the hat by weaving it under the bottom stitches of the hat and then attaching it to the top of the circle body). Sew the center stitches of Row 1 of the hat to the stitches from Row 8 of the main circle body that are on top and in the middle of the two arms.
- Position the broom where you would like it to be when attached to the hot pad. I placed mine on the right side, under her hand and leg on that side. Use brown yarn and a tapestry needle to attach/sew the back of the hand stitches to the broom. Use another piece of brown yarn to attach/sew the back of the leg stitches to the broom.
- Make sure to weave in all loose ends.
Enjoy dropping a house…oops, I mean pot…on your witch! 😉
The pattern and photos of this item are the property of TheCrafterLife. This pattern and design are subject to copyright, and are for personal, non-commercial use only. You may not sell my patterns or claim them as your own. You may make items to sell (i.e. on Etsy) from my patterns but I ask that you link back to my site and provide credit for the pattern. You are welcome to share my patterns on social media as long as you link back directly to my site by providing the link.