
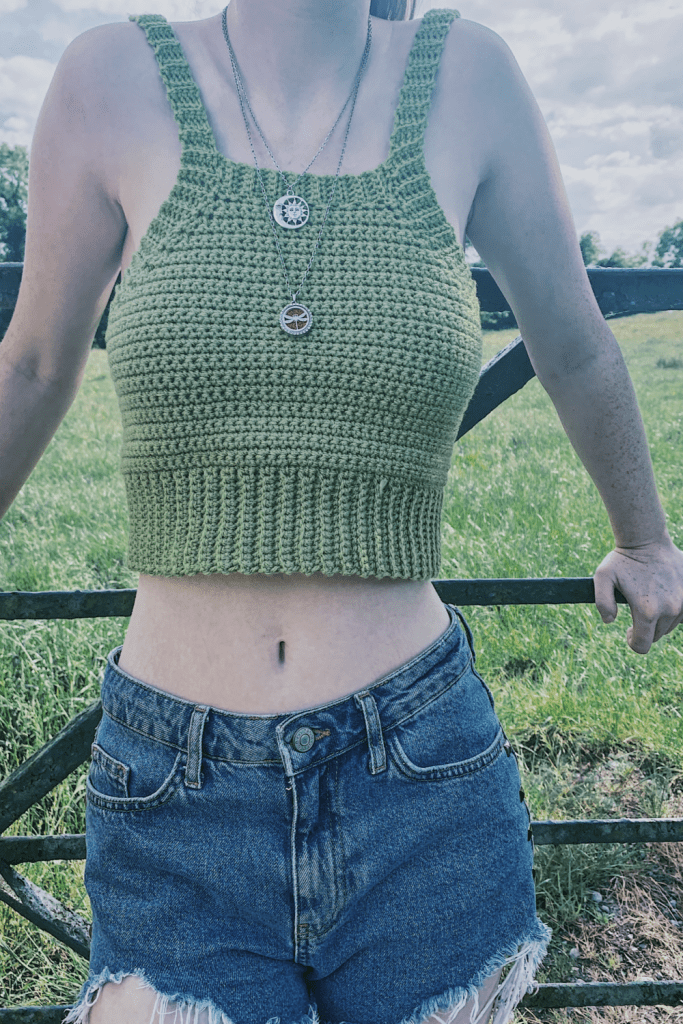
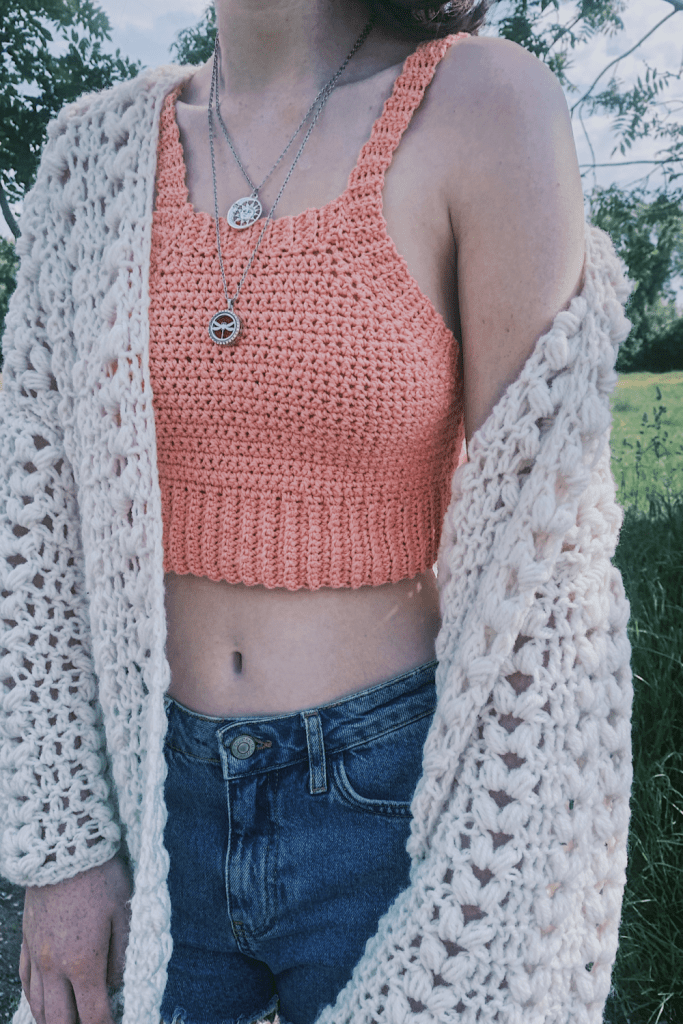
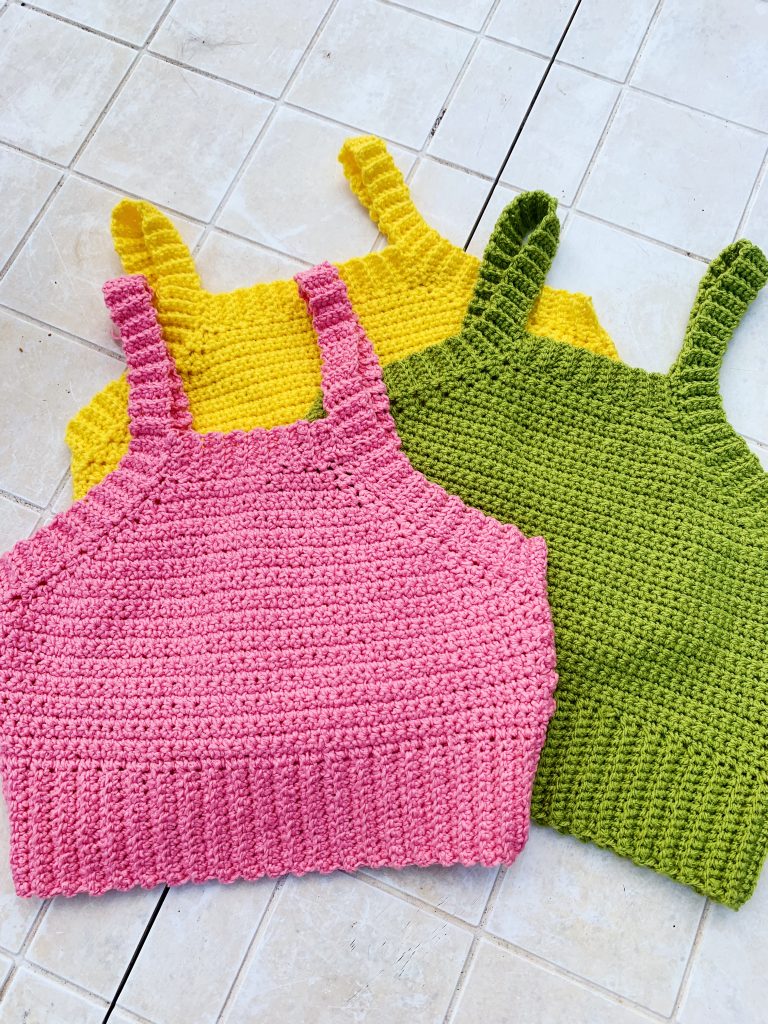
I am so excited to share with all my newest design, the Summer Fruits crochet top. This pattern, in my opinion is so easy to make, and perfect for all levels. It uses very basic stitches, so I reckon this is another project to have in your lap while watching your favourite Netflix series!
The top is worked from the bottom up, starting on the bottom ribbing. We will work in the round for a bit then section off the top to work in straight rows, before doing a little bit of decreasing.
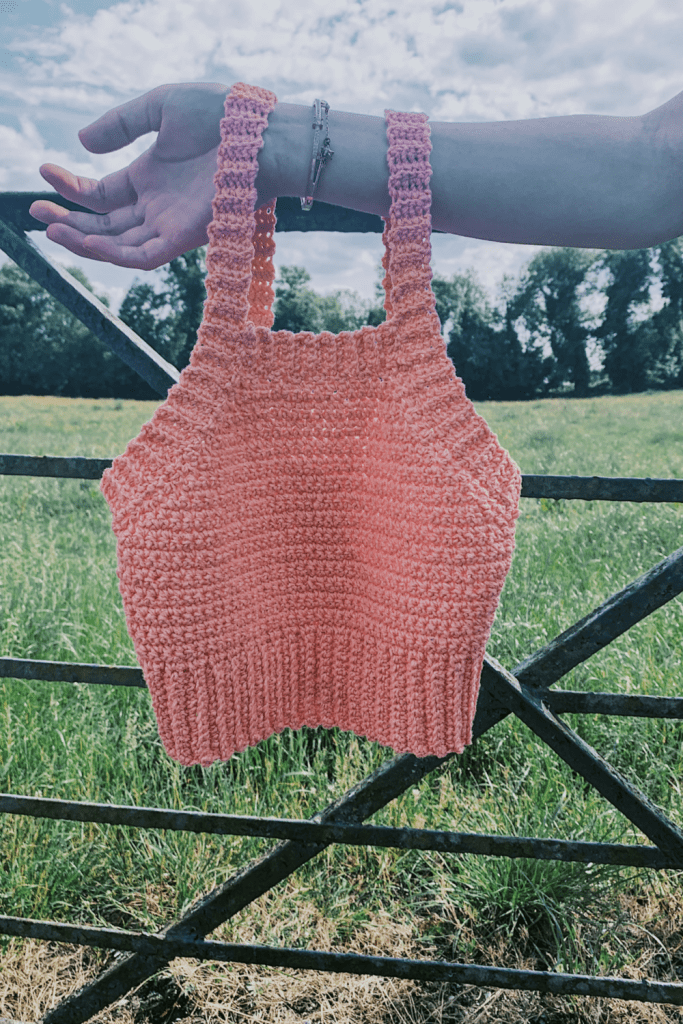
I think the outer ribbed edging really brings this top together. I just love it and it’s quickly becoming one of my favourite designs to date.
The sizing guide is S(M, L, XL, 2XL)
*ch 1 does NOT count as a stitch.
If you want a longer top I would suggest you add more rows before the decreasing section.
This pattern uses standard American crochet terms.
MATERIALS:
Any weight 3/DK/10 ply yarn of your choice. 100g/300m for S,M,L and 150g/450m for XL and 2XL
4 mm crochet hook
5 mm crochet hook
Stitch marker
Measuring tape.
STITCHES:
Ch = chain
Sc = single crochet
Slst = slip stitch
BLO = back loop only
MEASUREMENTS:
To fit bust: 34(38, 42, 46, 50) inches.
YOU CAN NOW PURCHASE THE AD FREE PATTERN ON MY ETSY
PATTERN:
Using 4 mm hook
Begin ribbed bottom edge:
Ch 14
Row 1: sc in 2nd ch from hook, sc to end. Turn.
Row 2: Ch 1, sc in BLO across. Turn (13 sc)
Row 3: Repeat row 2 until you have a total of 102(110, 118, 126, 134) rows.
Next slip stitch two end together to form a circle.
Change to 5 mm hook
Next round: Ch 1, sc 102(110, 118, 126, 134) around. Slst into first sc to close round. TURN
Repeat last round until top measures 7 inches in total, including the ribbed part.
Count 51( 55, 59, 63, 67) from where you are now. Place a stitch marker into that stitch.
Continuing on where your hook is now:
Next row: Ch 1, TURN, sc in same st, then sc2tog, sc across until you reach 3rd st from stitch marker, then sc2tog, sc in last st. TURN
Next row: Ch 1, sc in same st, sc2tog, sc across until 3 sts remain, sc2tog, sc in last st. TURN
Repeat last row until you have 17(17, 19, 19, 21) sc.
Change back to 4 mm hook
Next, continuing on from where you are now we are going to ch 6. We will be making a ribbed edge across the top edge of top.
sc in 2nd ch from hook, sc in next 4 chains. Turn, slst into next 2 sc,* turn, sc in BLO in next 5 sc, ch 1, turn, sc in BLO of next 5 sc, slst into next 2 sc, repeat from * across top edge of top. Fasten off.
Turn you top around now so we can work a ribbed edge along the back. Attach your yarn to the far right corner of the back edge:
Ch 6, sc in 2nd ch from hook, sc in next 4 chains. Turn, slst into next 2 spaces,* turn, sc in BLO in next 5 sc, ch 1, turn, sc in BLO of next 5 sc, slst into next 2 spaces, repeat from * across the back. Continue up along the side edge of the top in the same manner and keep going all the way to the top so you are at the same level as the top edge ribbing.
When you are level with the top ribbed edge we will begin straps so continue on from where you are now and turn:
Next row: ch 1, sc 5 in BLO. Turn. Repeat this row until your strap has a total of 45-50 rows. Its best to measure yourself here to see how long you want the strap to be. It must be long enough to go over your shoulder and stitch to the back of the top.
Once your strap is long enough fasten off leaving a long tail.
Now attach your yarn to the bottom corner of the other side edge.
Ch 6, sc in 2nd ch from hook, sc in next 4 chains. Turn, slst into next 2 spaces,* turn, sc in BLO in next 5 sc, ch 1, turn, sc in BLO of next 5 sc, slst into next 2 spaces, repeat from * all the way up along the side and keep going all the way to the top so you are at the same level as the top edge ribbing.
When you are level with the top ribbed edge we will begin straps so continue on from where you are now and turn:
Next row: ch 1, sc 5 in BLO. Turn. Repeat this row until your strap has a total of 45-50 rows. Its best to measure yourself here to see how long you want the strap to be. It must be long enough to go over your shoulder and stitch to the back of the top.
Now you can slst or use a yarn needle to connect the straps to the back. Its best to put your top on here to see where you want to connect your straps.
You will notice on one of the corners of your top that the ribbed edge needs to be connected. Just slst that together and you are done.
Weave in any ends and you are ready to wear.
If you want to make this top completely fitted to your body just start off with the ribbed edge. Do as many rows that are needed to go around your waist but have an even number of rows.
Sl st the two end together. Then sc the same number of stitches as you had for the number of rows it took to go around your waist. So for example if you did 104 rows for the ribbed edge, you will do 104 sc around for the main body.
If you need more coverage along the sides of the top try chaining 7, 8 or 9 instead of the 6 that I used.
Enjoy your top!
Thank u so much for the video and written pattern , almost finished with one for my grandaughter !!!!!!
Great and very comprehensive, please is there a way to download this write up?
I have two questions:
1. Do you think that I Love This Yarn sport weight will work for this pattern?
2. Do you allow people to sell products made from this pattern?
Same question with question #2
I would also like to know if you allow people to sell products using this pattern.
You could easily double up a sport weight for this, honestly. I even did it in a worsted weight (but with the same hook sizes indicated in the pattern), and it turned out well. 🙂
Did the ribbing in a different color. Wow so awesome! Thank you for your quality free patterns they are simply the best!
Hi. Super pattern. I’ve just completed the back ribbing but it’s wavy. Any idea what I have o wrong?
Thanks
Hey!
Something that you could have done wrong is using the wrong number of stitches, so I would make sure that you have the same amount of stitches as the pattern!
Hi
Lovely work. Thank you. I’m really inspired.
Hi, this is lovely! Is there a way to make this fit an extra small? I’ve made 86 rows and that fits my rib cage perfectly.
Thank you for the pattern, Carrie! I used Caron Cotton Cakes in ‘Silver Cloud’ and the hooks recommended in the pattern. I was able to whip this out in no time! No adjustments needed and it fits perfectly. Now I MUST make matching shorts 😉
Do you have a gauge for this?
Excelente!! Gracias por el patrón, maravilloso trabajo. Saludos desde Venezuela!!
I love it!and in green looks really nice
Should the length of the ribbed trim equal the bust measurement?
Thanks!