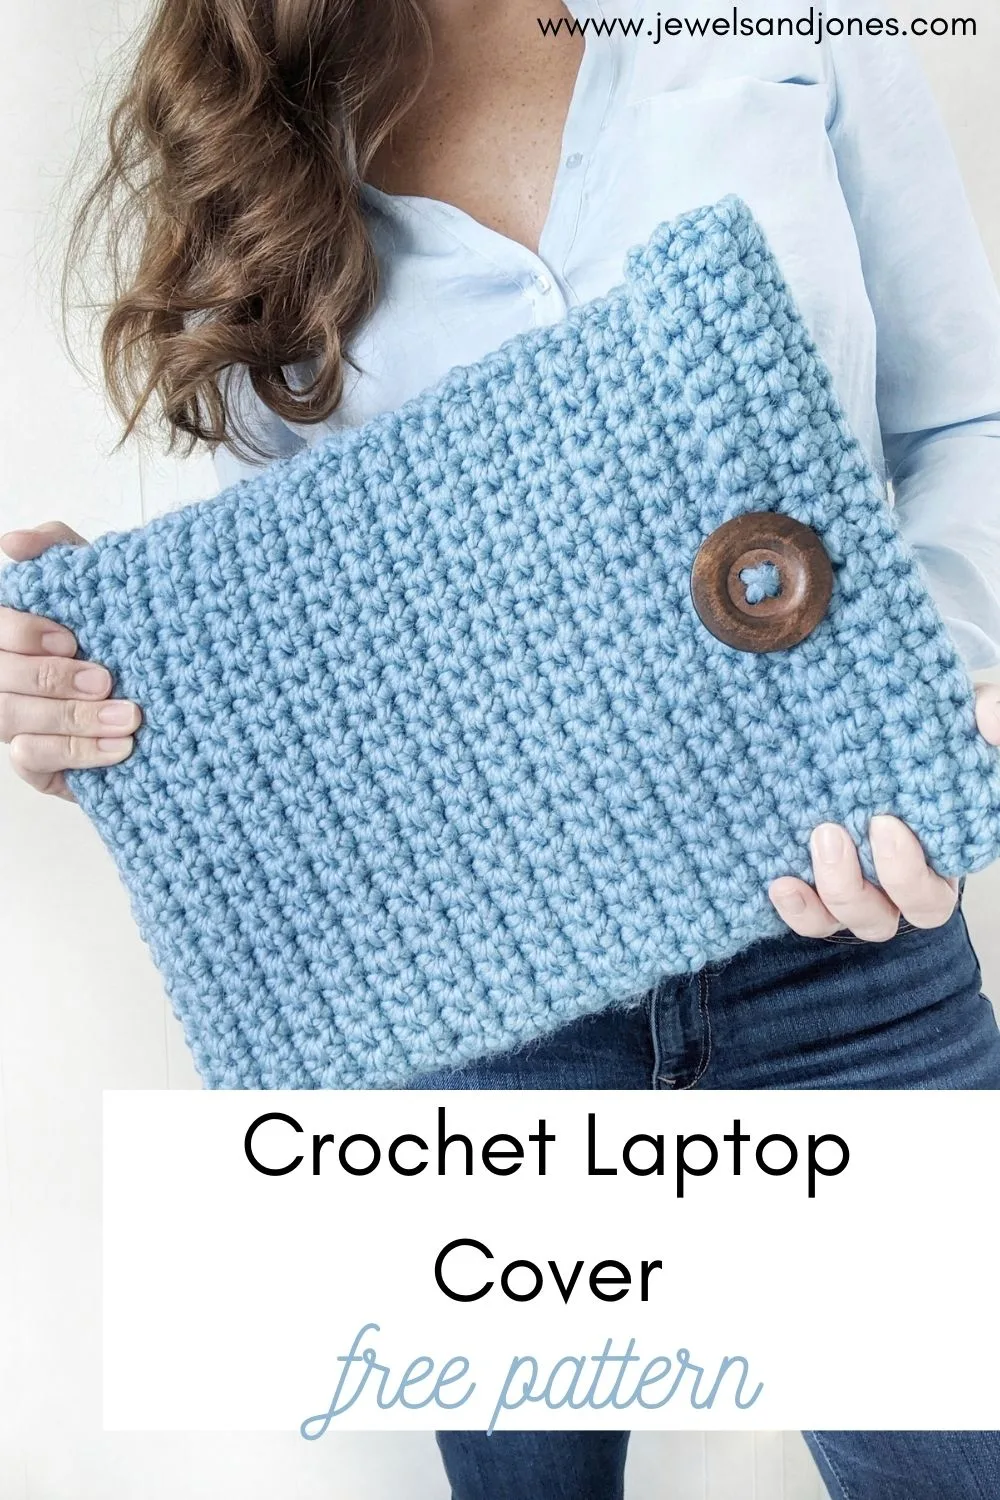
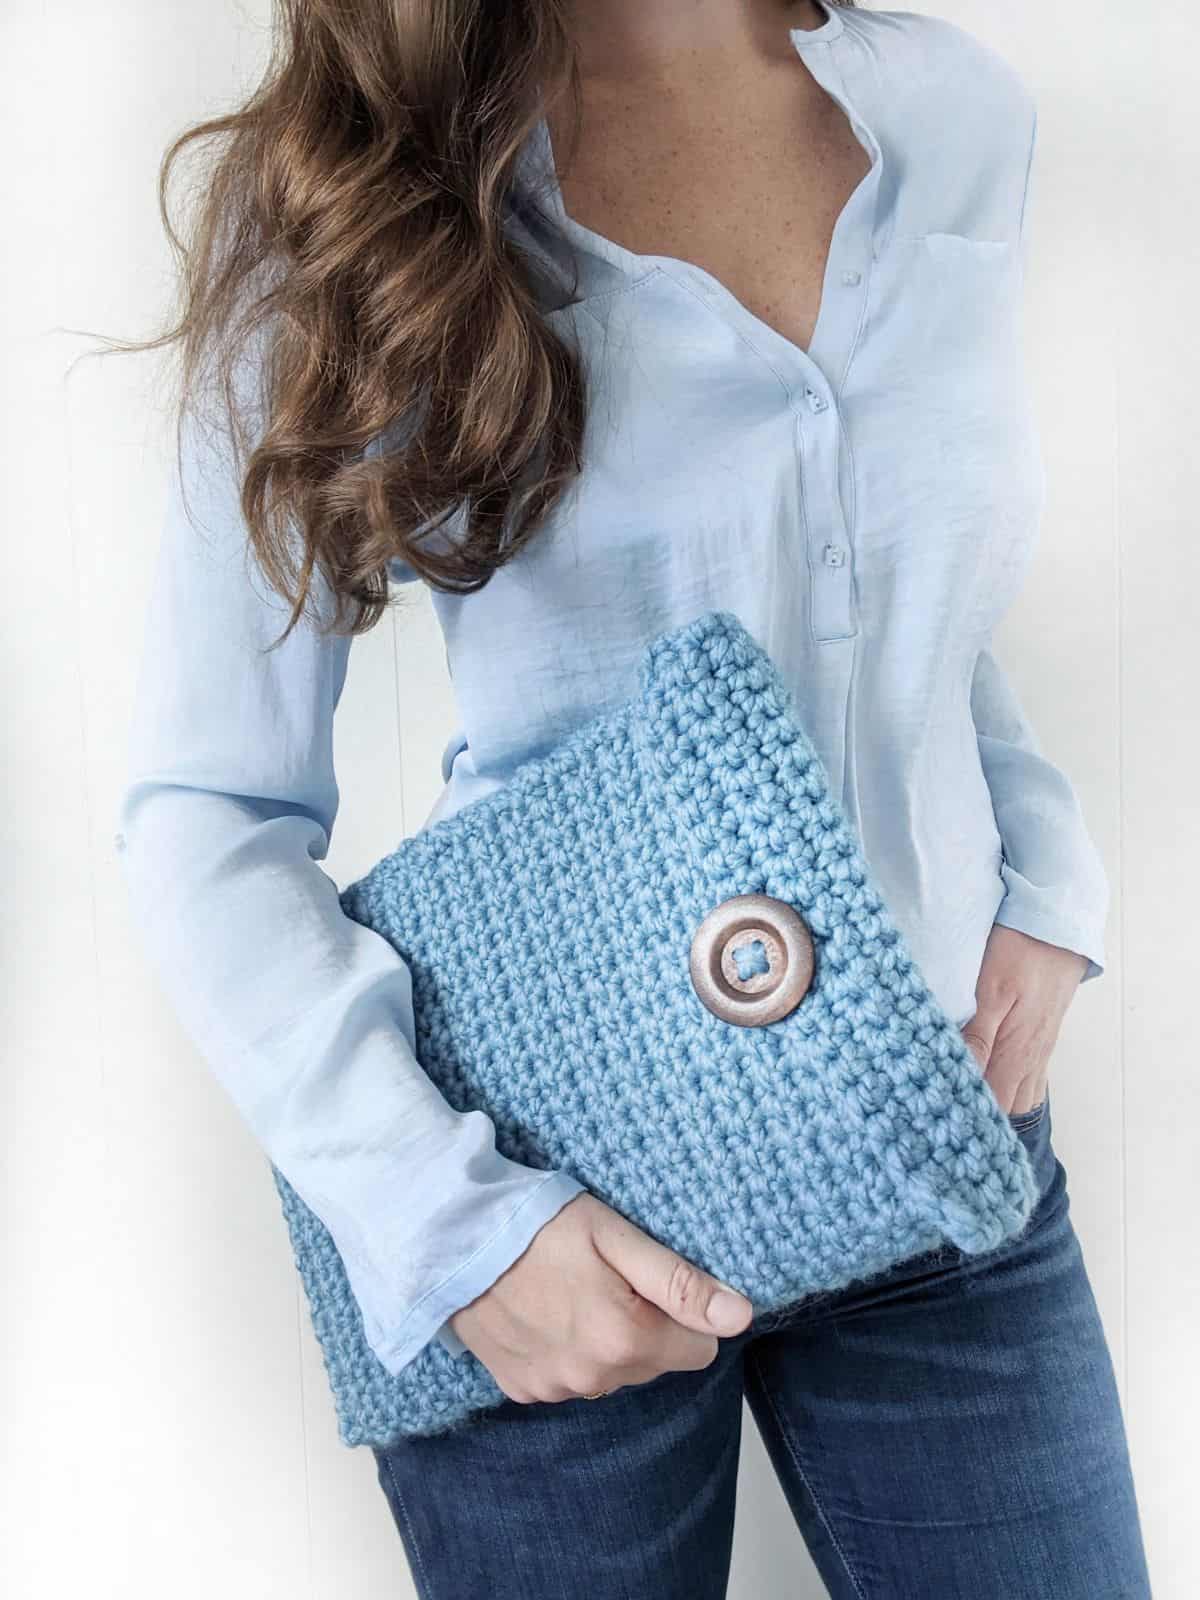
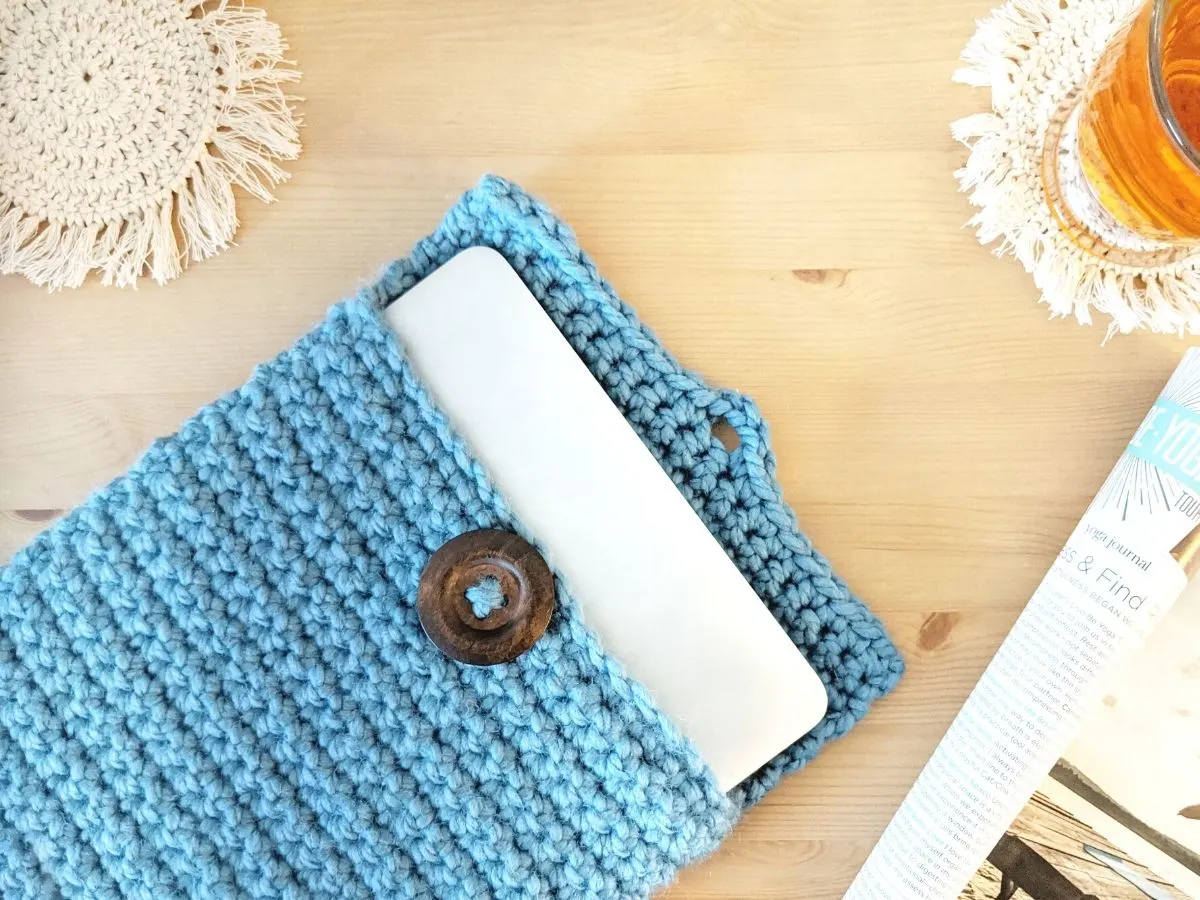
Learn how to crochet your very own laptop case using this easy tutorial. This crochet laptop cover is double-thick, durable, and totally customizable. It’s made using a bulky weight yarn and only one stitch.
It’s simple, works up fast, and oh so stylish! Perfect for beginners and intermediate crocheters alike.
You can find the free crochet laptop case pattern down below or continue to read through the inspiration behind my latest design.

This post contains affiliate links, which means I make a small commission at no extra cost to you. See my full disclosure here
Crochet Laptop Cover Pattern
My latest free pattern is this easy crochet laptop case pattern. This crochet pattern is simple to make and only requires a few materials.
All you need for this laptop cover is some bulky weight yarn, a 10.0 mm crochet hook, and a button. You will also need a darning needle and a pair of scissors.
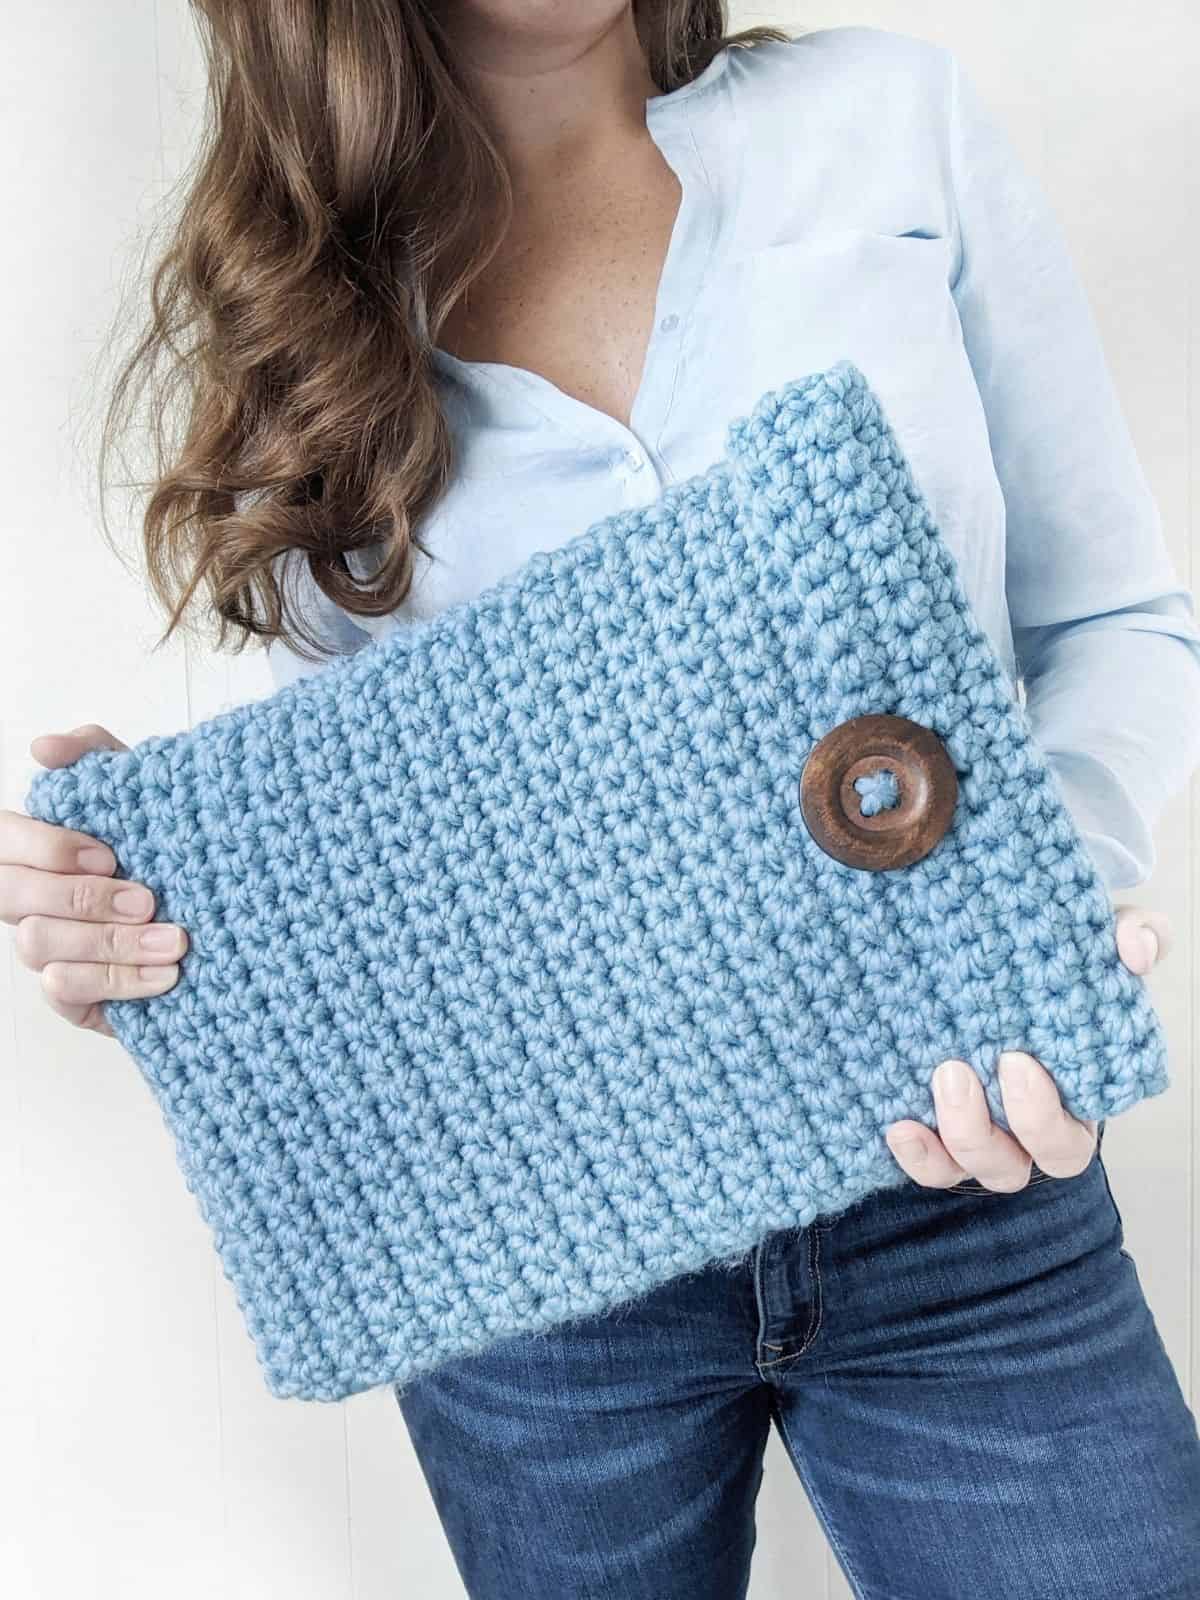
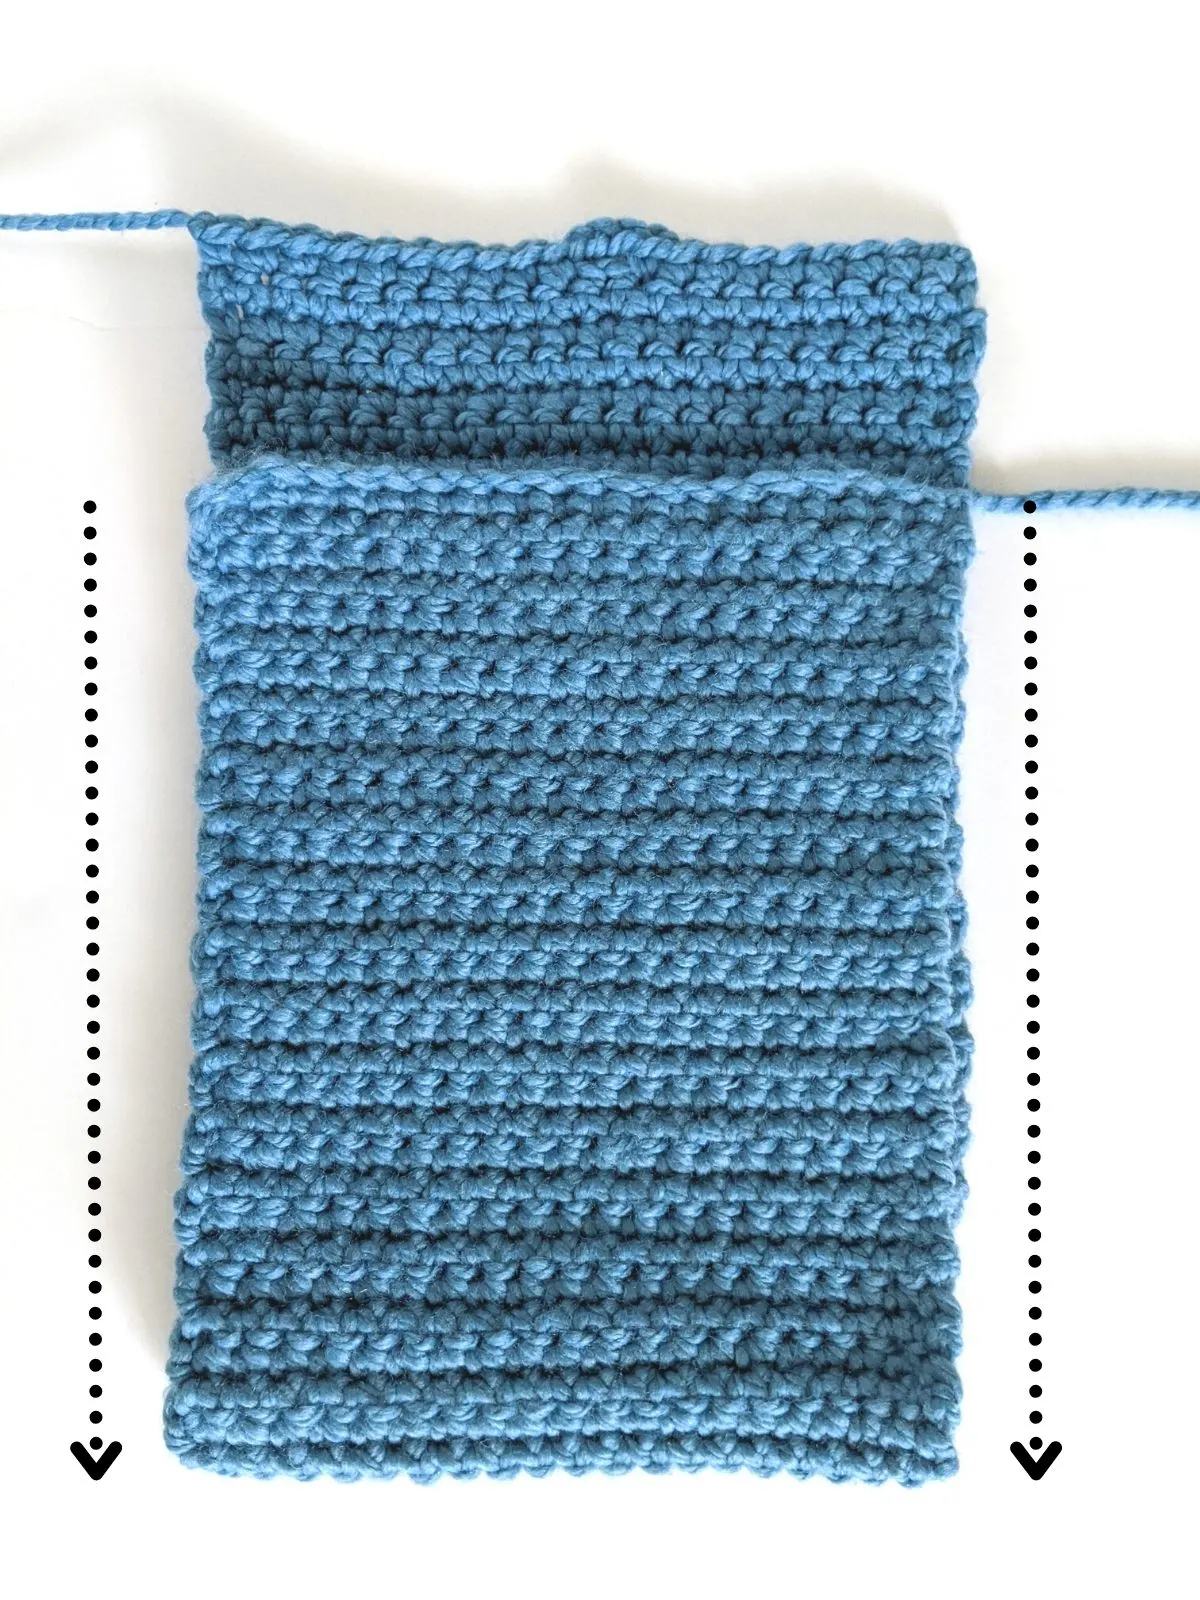
The first step in making this laptop cover is by crocheting a rectangle. This rectangle is then folded in half and sewn together at the sides using the whipstitch method. Once everything is sewn and all ends have been weaved in, it’s time to add on the button.
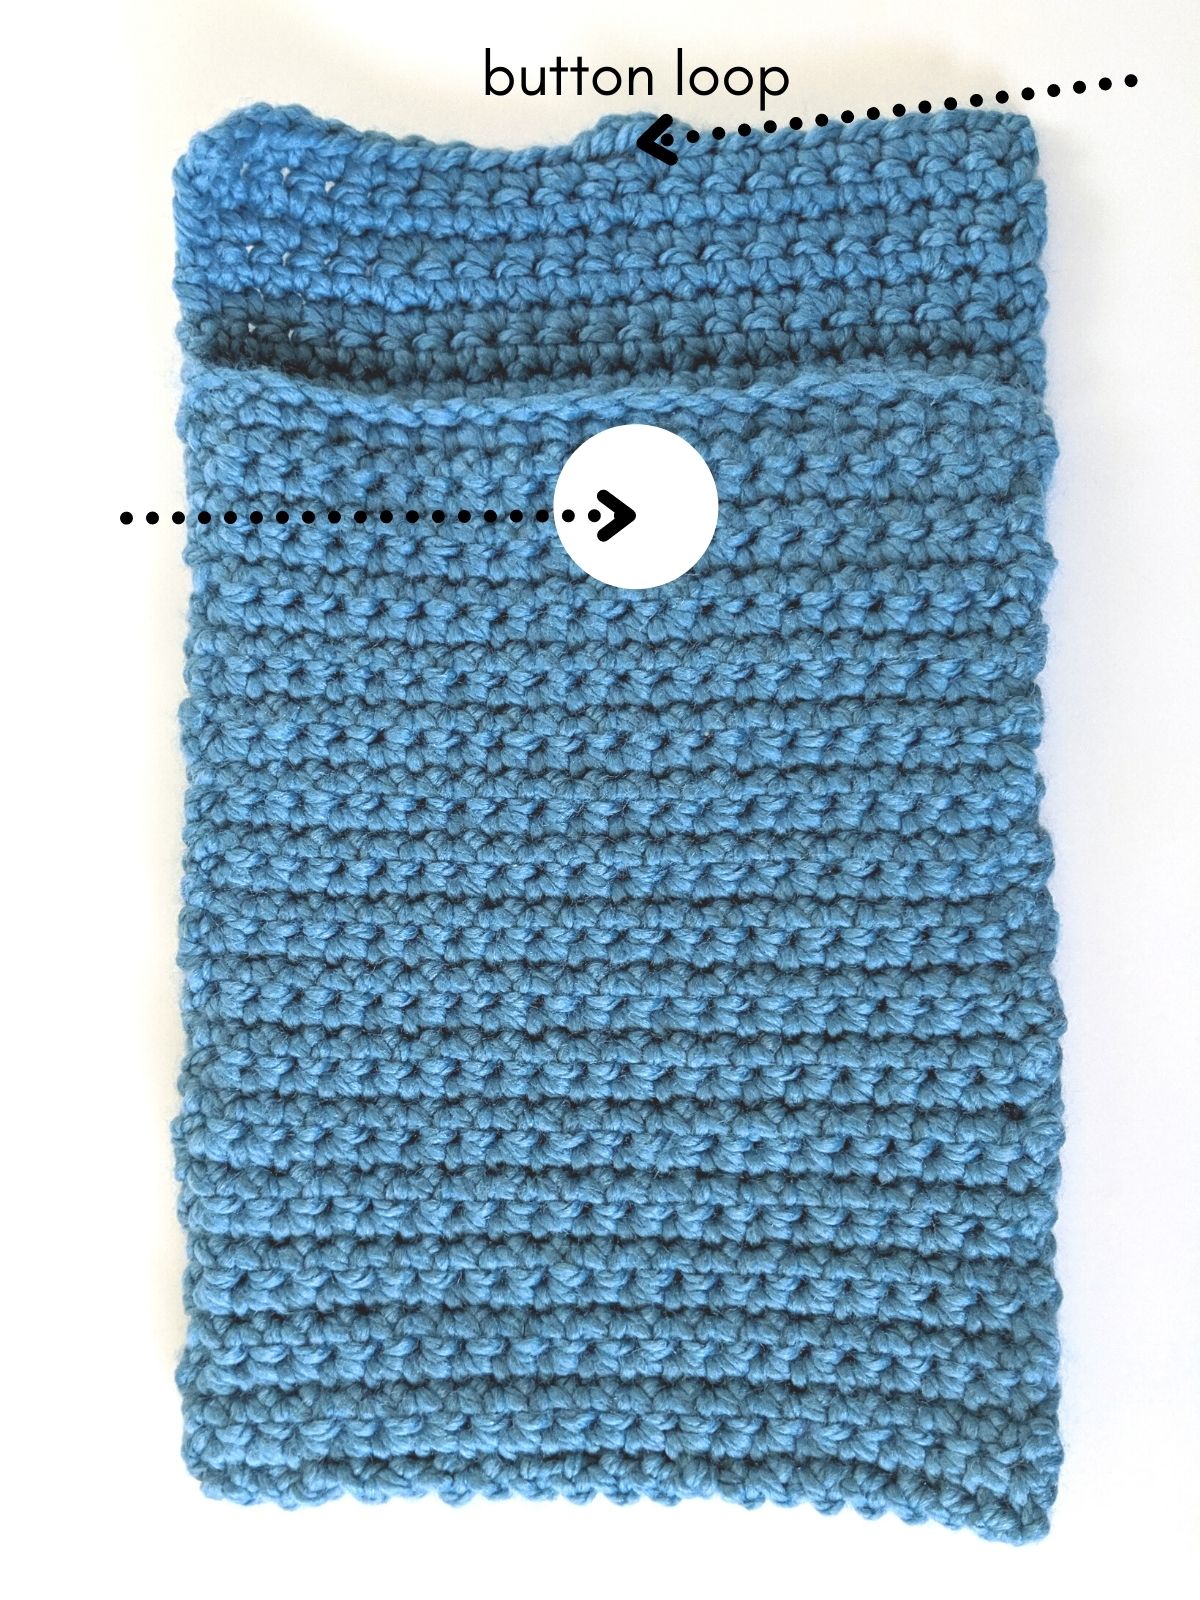
The button will be sewed onto the front of the panel using either your yarn or some thread. Once the button has been sewed on, you’re finished.
I just love how this project turned out and so I hope you enjoy making it as well.
A Quick Crochet Project
One thing that I love about this project is that it works up quite fast. So if you only have a few hours to spare or want to make something in the evening, this would be the project.
Plus, it’s totally customizable. Once you have the laptop cover made, you can add some embellishments to it. You might one to embroider your initials or add some cute pins to it.

This crochet laptop cover would also make a great gift for someone in your family or a friend. It would be perfect for the new high school grad going off to college. You can make it in the school’s color and add the person’s initials.
Just an idea, but I think that would be so cool. I always love to personalize things! How about you?
The Yarn You’ll Use for Your Crochet Laptop Case
For this crochet laptop case pattern, I used 2 balls of Lion Brand Wool-Ease Thick and Quick in the color Air Force. It’s a super bulky number 6 yarn that’s made from acrylic and wool.
As the name states, this yarn works up quickly, which is why I used it for this project. It’s also very thick, so it provides awesome protection for your laptop!
I loved using this yarn and highly recommend it for this pattern. If you like using this yarn as well, you might like this chunky crochet scarf pattern or this cottage-inspired pillow that uses this yarn.
If you decide to go with another yarn, make sure it’s a bulky weight yarn. The double-thickness of this yarn is what helps provide the extra protection for your laptop.
How to Make a Crochet Laptop Cover in Any Size?
If you want to make a different size for your laptop, all you have to do is change the number of chains at the beginning of this pattern. I highly recommend reading through this detailed post about how to make a laptop cover in any size. This post goes over in detail how to chain the right amount for your laptop case.
For example, if you want to make a bigger laptop case, increase the number of chains at the beginning of this pattern and adjust the length of the rectangle. If you want to make a smaller version, decrease the number of chains and adjust the length of the rectangle.
Since this pattern is made using only single crochets, there’s a lot of room for adjustments. You might have to add a stitch or a row to get the perfect fit. So it might take some trial and error, but the end result is worth it!


Another free laptop case you might like
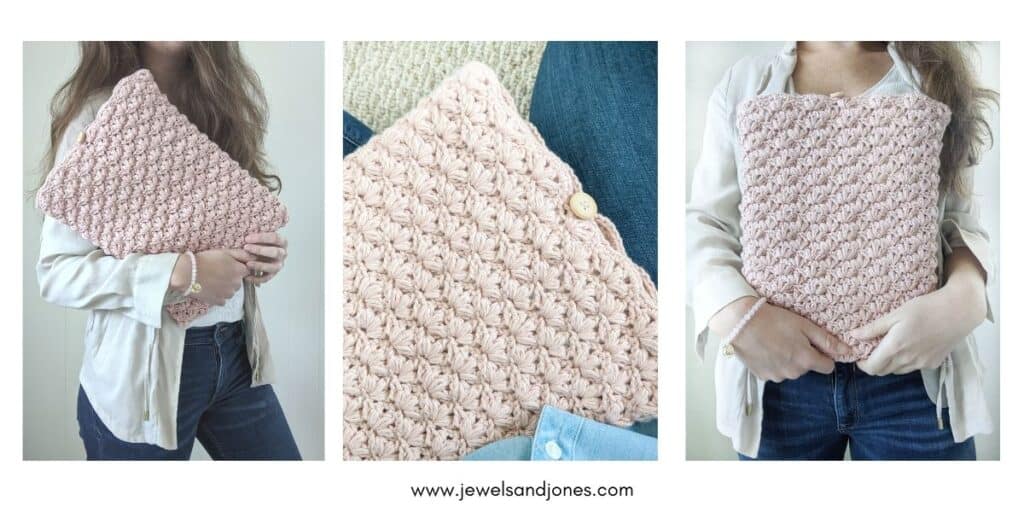

Here’s another fun crochet laptop case pattern! The Lotus Laptop Case is an intermediate crochet pattern that’s made using single crochet stitches and puff stitches.
This free crochet pattern is made from 2 basic panels and includes a helpful video tutorial.

Free Crochet Laptop Case Pattern
Description:
Add some charm to your laptop by slipping on this stylish crochet laptop cover. Made from a basic rectangle that’s folded in half and whip-stitched together. This simple pattern is made using only one stitch and bulky weight yarn.
You can purchase a printable PDF here
Materials:
- 2 balls of Lion Brand Wool Ease Thick & Quick in the color Air Force (Weight 6/6oz, 106 yds), a total of 212 yards or another super bulky weight yarn.
- 10.0 mm crochet hook (size N)
- 1 medium to large size button (I purchased mine from a local craft store).
- Darning needle
- Scissors
Gauge:
8 stitches x 10 rows = 4 inch square.
Abbreviations:
ch – chain: Yarn over, pull through loop on hook.
sc – single crochet: Insert hook into stitch, yarn over and pull through, yarn over and pull through last two loops on hook.
Size of Crochet Laptop Cover:
A standard 13 inch laptop case.
If you need help making a crochet laptop cover in another size, be sure to check out this post explaining how to crochet a laptop cover in any size.
Pattern Notes:
- Pattern written in U.S Terms.
- Chain 1 does not count as a stitch in the beginning of each row.
- Whipstitch is used in the pattern to close the sides of the rectangle together.
- The button will be sewed on last.
Laptop Case Pattern
ch 21
R1: In 2nd ch from hook, sc across (20)
R2 – R35 : Repeat row 1
R36: In 2nd ch from hook, *sc in stitch (repeat from * 9 times), ch 3, skip stitch, sc across till end.
Finish off, and work in ends.
Construction:
Step 1: Lay your rectangle down on a flat surface and you want to fold 3/4ths of the rectangle. You want to make sure that 4 rows are showing (this section will be folded over).
Step 2: Once you have your rectangle folded over, you will need to grab your darning needle and yarn. Insert your yarn through the darning needle and start whip-stitching the left and right side of the rectangle.
The dotted lines on the photo below indicate where you need to whipstitch the rectangle together.

Step 3: Once you have the sides sewn together and worked in your ends, it’s time the sew on our button. Using your yarn, sew the button in the middle of the front panel.
You want to make sure the button is aligned with the loop created in row 36. The white circle in the photo below indicates where the button needs to be sewed on.

Once your button is sewed on and your ends are neatly worked in, you’re all done!
One last step would be to block your new laptop cover, I personally skipped this step because I wanted to use it right away. So it’s totally up to you!
If you do block this laptop cover, I highly recommend just lightly steaming it with an iron. This pattern is made with an acrylic wool base, so lightly steaming it should do the trick. You could always use a bulky cotton yarn for this project as well.
I hope you enjoyed making this fun modern laptop cover. I would love to see your project, so don’t forget to share it with me either on Facebook, Ravelry, or Pinterest.
Other Free Crochet Patterns You Might Like
- Cozy Cotton Crochet Blanket
- One-Row Repeat Throw
- Crochet Chunky Pillow with Pom-Poms
- Easy Chunky Crochet Scarf
Pin It for later