
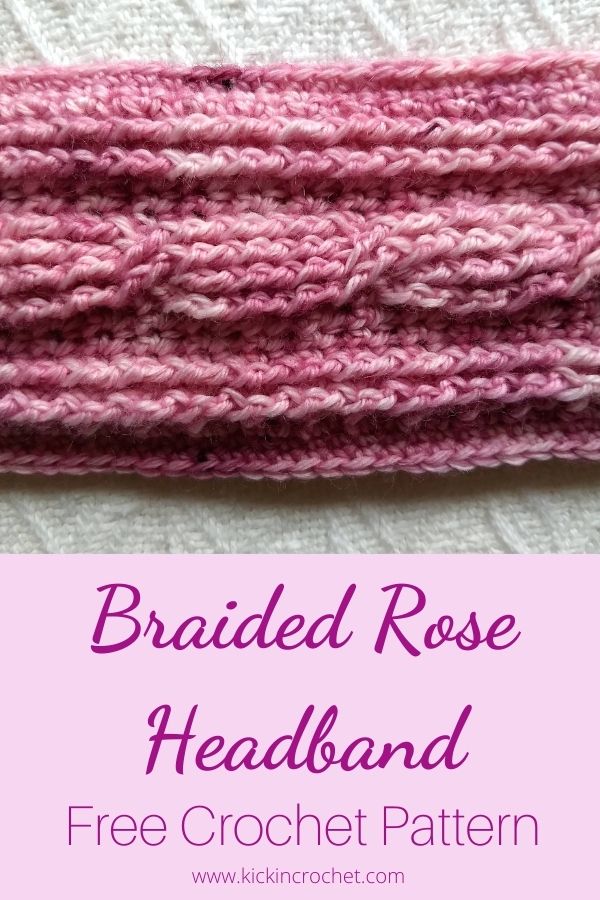
Today I’m happy to get to share with you the Braided Rose Headband. This little goodie completes the Braided Rose Set, and best of all – it’s FREE! All the info you need to make this lovely headband is included below.
*Disclosure: Some of the links in this post are affiliate links, which means if you click on them and make a purchase I may, at no additional cost to you, earn a commission. Read full disclosure here.
The Braided Rose set was inspired by the lovely yarn I received in a mystery box from my local yarn store. The delicate pink just screamed “cable me!” and thus the Braided Rose Cowl was born. After that, I purchased two more skeins, because the cowl clearly needed some companions, and the Braided Rose Hat and Braided Rose Fingerless Gloves patterns were born. The Braided Rose Headband was a happy addition. After finishing the first three patterns, I discovered that I had enough leftover yarn for just one more thing – the Braided Rose Headband!
You can get the free pattern right here on the blog, below, or you can pick up a printable PDF copy of the pattern from Ravelry or Etsy using these buttons!
Supplies
- Approximately 80 yards of fingering weight yarn. I used Trilogy Yarns Glamorous in Blush (400y/100g)
- Size F crochet hook – I love these Odyssey hooks from Furls Crochet!
- Yarn/Tapestry Needle
Stitch Abbreviations
- ch chain
- st(s) stitch(es)
- fsc foundation single crochet
- sc single crochet
- dec sc 2 together
- inc work 2 sc in stitch
- fpdc front post double crochet
- fptc front post triple crochet
Gauge and Finished Size
In single crochet, 12 sts and 8 rows = 2 inches.
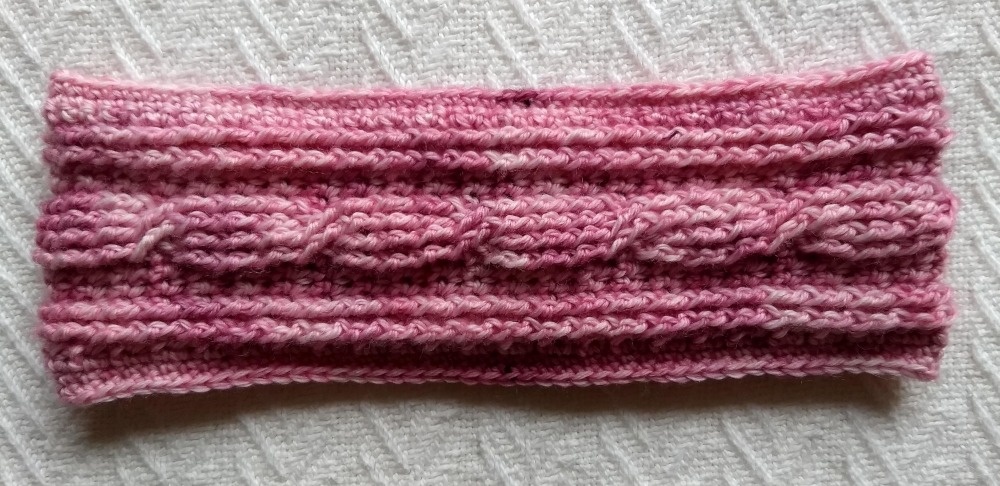
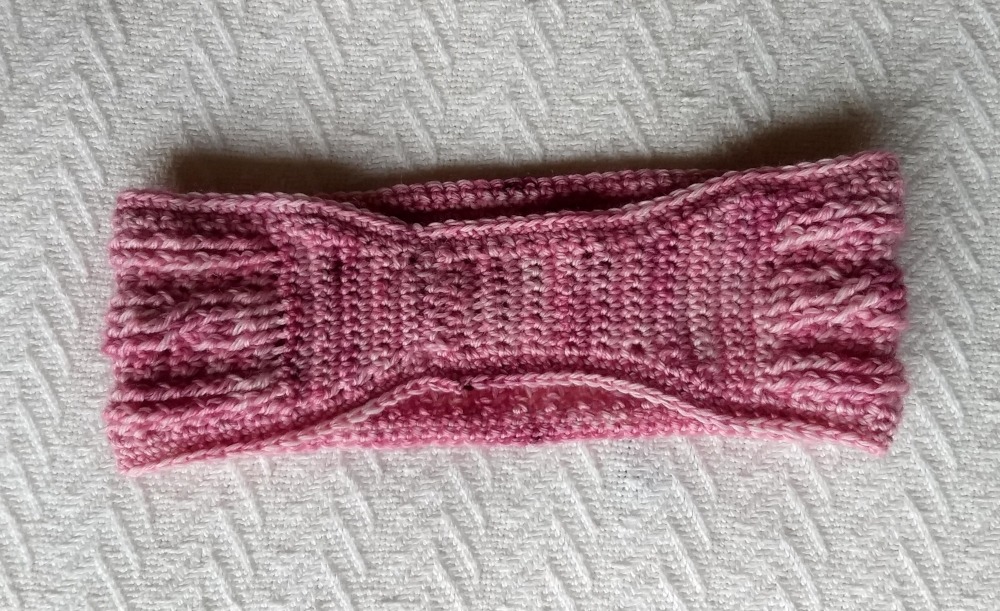
This headband is written as a “one size fits most” design. It stretches to fit adult large (23″), but my 9-year-old daughter can also wear it comfortably. The finished width is approximately 3″.
However, if you would like to customize the size, it is easy to do – see the pattern notes!
Pattern Notes
This headband is worked flat, then seamed. After seaming, borders are added to each side of the headband to finish.
To adjust sizing – there are two simple ways to adjust the length of this headband. The first is to change the number of times you repeat rows 20-27. One repeat will change the headband length by approximately 2″. The other place you can modify length is at the very beginning and end of the headband when you’re working straight sc rows (rows 2-6 and 94-99). 4 rows (2 on each side) will increase/decrease the length by approximately 1″.
So, for example, if you wanted to decrease the length by 3″, you could remove one repeat of rows 20-27 and remove two rows on each side at the beginning and end.
Turn chains do not count as the first stitch.
fptc’s are always worked around the fpdc’s or fptc’s below them to form the cables.
To see a video showing the braided rose cabling pattern that is used in all the braided rose patterns, see the video below. If you would like instructions for making foundation crochet stitches, see the video here.
Braided Rose Cables Video Tutorial
How to Make The Braided Rose Headband
- 1. fsc 8 (or, if you don’t want to fsc, you may ch9, turn, sc in 2nd ch from hook and across (8sts)
- 2-6. ch1, turn, sc across (8sts)
- 7. ch1, turn, inc, sc 6, inc (10sts)
- 8. ch1, turn, sc across (10sts)
- 9. ch1, turn, inc, sc 8, inc (12 sts)
- 10. ch1, turn, sc across (12 sts)
- 11. ch1, turn, inc, sc 10, inc (14sts)
- 12-13, ch1, turn, sc across (14sts)
- 14. ch1, turn, sc, fpdc 2, sc 2, fpdc 4, sc 2, fpdc 2, sc (14sts)
- 15. ch1, turn, sc across (14sts)
- 16. ch1, turn, sc, fptc 2, sc 2, fptc 4, sc 2, fptc 2, sc (14sts)
- 17. ch1, turn, sc across (14sts)
- 18. Crossing Cables – ch1, turn, sc, fptc 2, sc 2, sk first two fptc below, fptc in each of next two fptc, fptc in each of the two skipped fptcs, sc 2, fptc 2, sc (14sts)
- 19. ch1, turn, sc across, join (14sts)
- 20-25. Repeat rows 16-17 three times (14sts)
- 26-27. Repeat rows 18-19 once (14sts)
- 28-83. Repeat rows 20-27 seven times more (eight crossed cable rows total) (14sts)
- 84-87. Repeat rows 16-17 twice more (14sts)
- 88. ch1, turn, sc across (14sts)
- 89. ch1, turn, dec, sc 10, dec (12sts)
- 90. ch1, turn, sc across (12sts)
- 91. ch1, turn, dec, sc 8, dec (10sts)
- 92. ch1, turn, sc across (10sts)
- 93. ch1, turn, dec, sc 6, dec (8sts)
- 94-99. ch1, turn, sc across (8sts)
- 100. Finish off, leaving a long end for sewing. Sew the two ends of the headband together.
- 101. Join to one side of the headband. Work 1 sc in each row around the headband, join.
- 102-103. ch1, turn, sc around, join. – Tie off this side of headband.
- 104-106. Work rows 93-95 on other side of headband.
- 107. Finish off, weaving in all ends.
(Note: This photo of the back shows the seam slightly off-center. The finalized version of the pattern, as written here, has the seam in the center of the back of the headband)
Remember, if you’d like to purchase the ad-free printable PDF copy of this pattern, you can get it from Ravelry or Etsy!
If you liked this pattern, check out the Braided Rose Cowl, Hat, and Fingerless Gloves. There are also a limited quantity of crochet kits available in my Etsy shop HERE that give you everything you need to make all three!
This pattern and all images are copyrighted. Please do not copy, share, or sell this pattern. You may use this pattern in crochet pattern/craft roundups by linking to this pattern and using one image from this post. Thank you for supporting Kickin Crochet!
