This post may contain affiliate links. Please see my full disclosure and privacy policy for details.
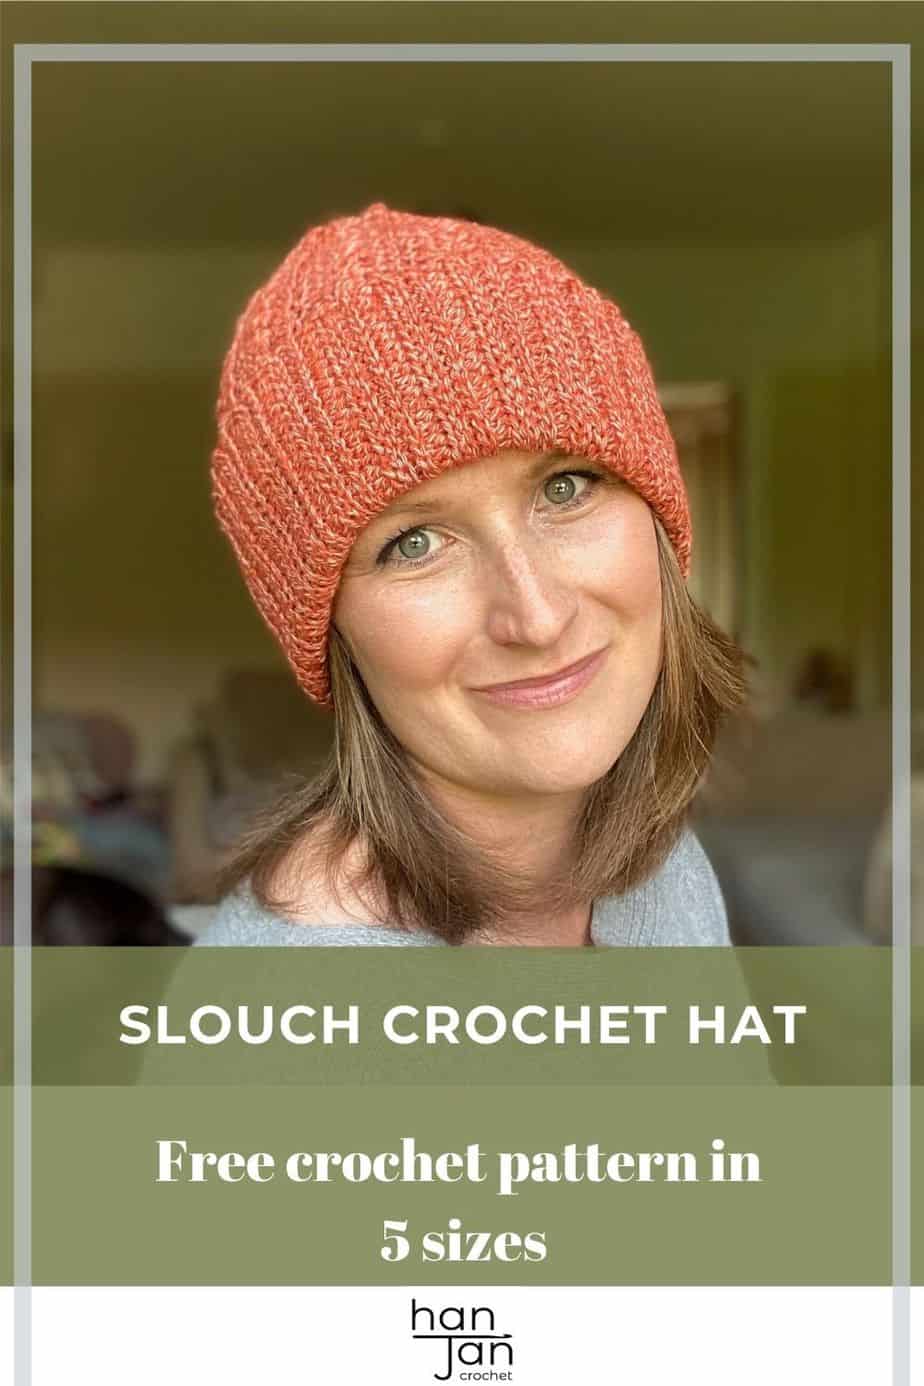
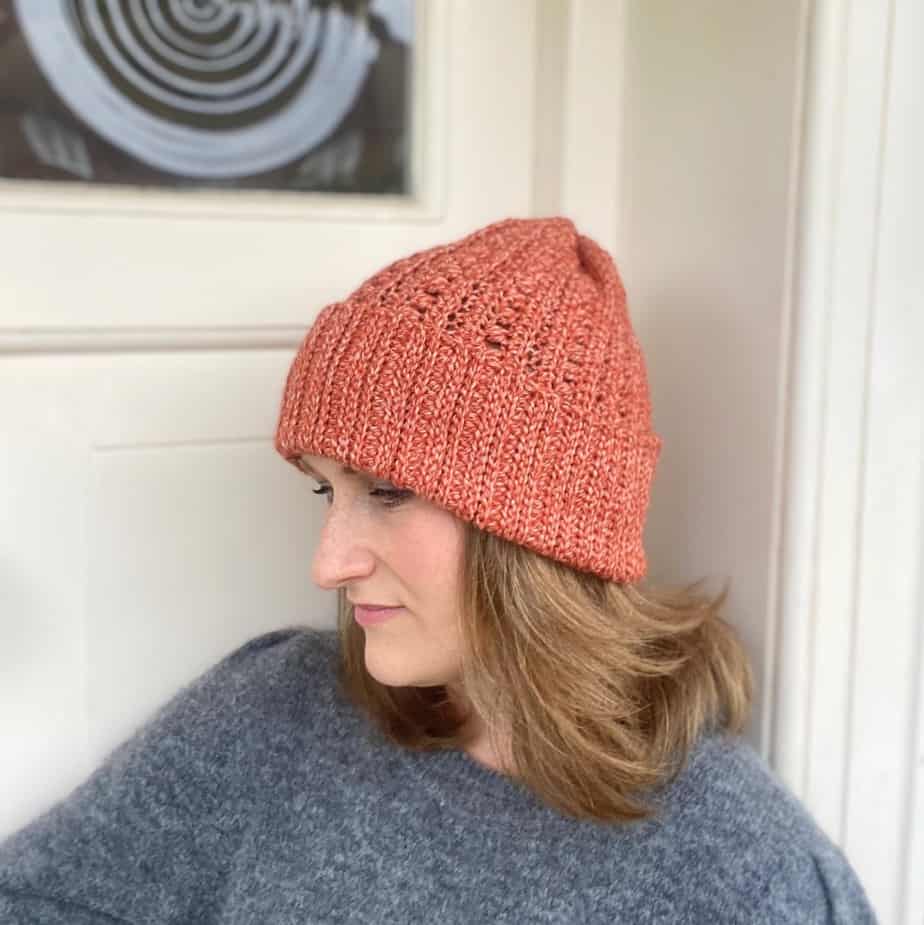
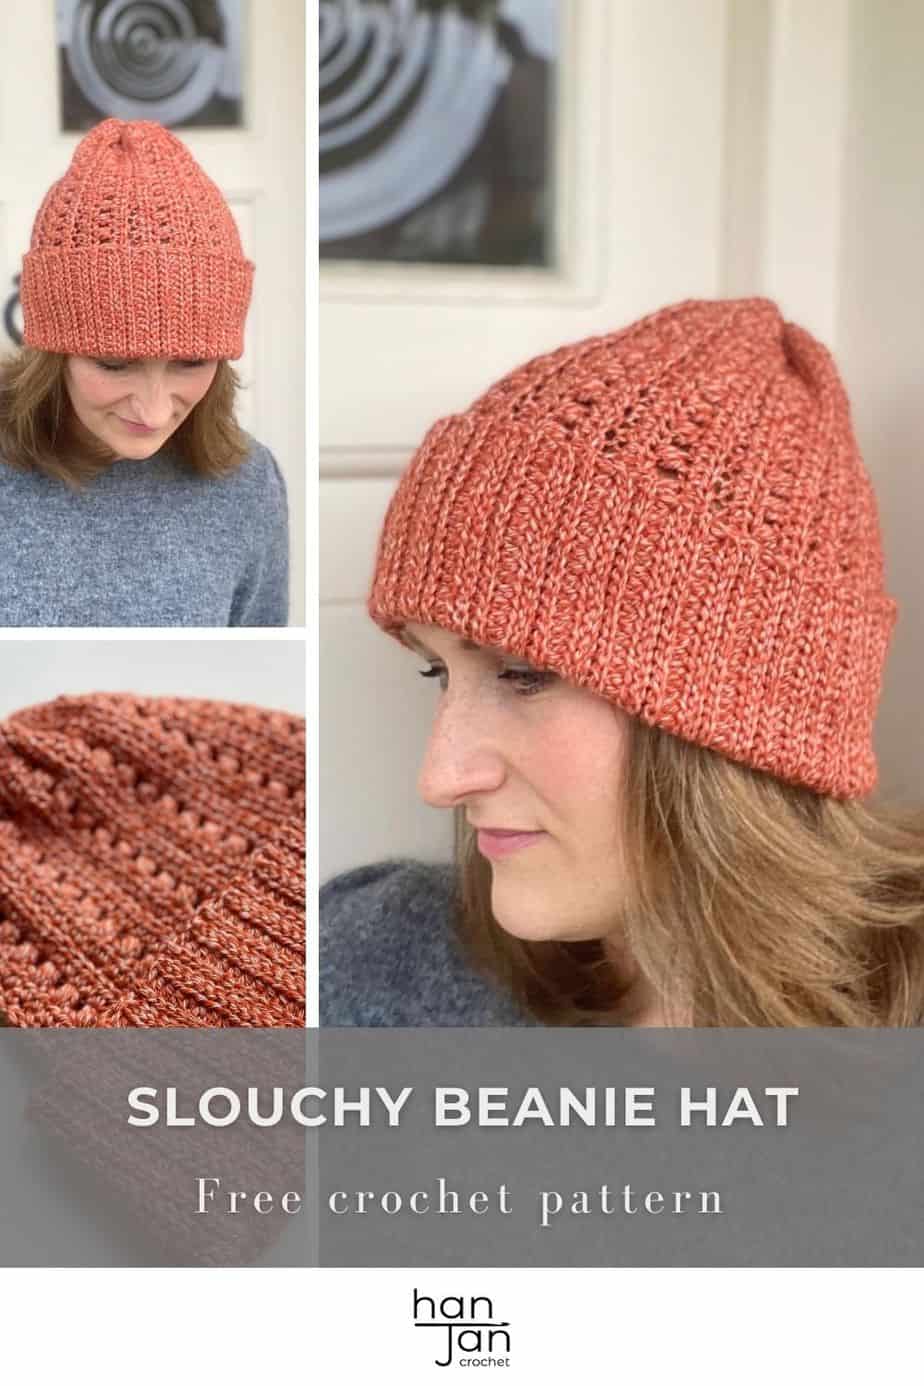
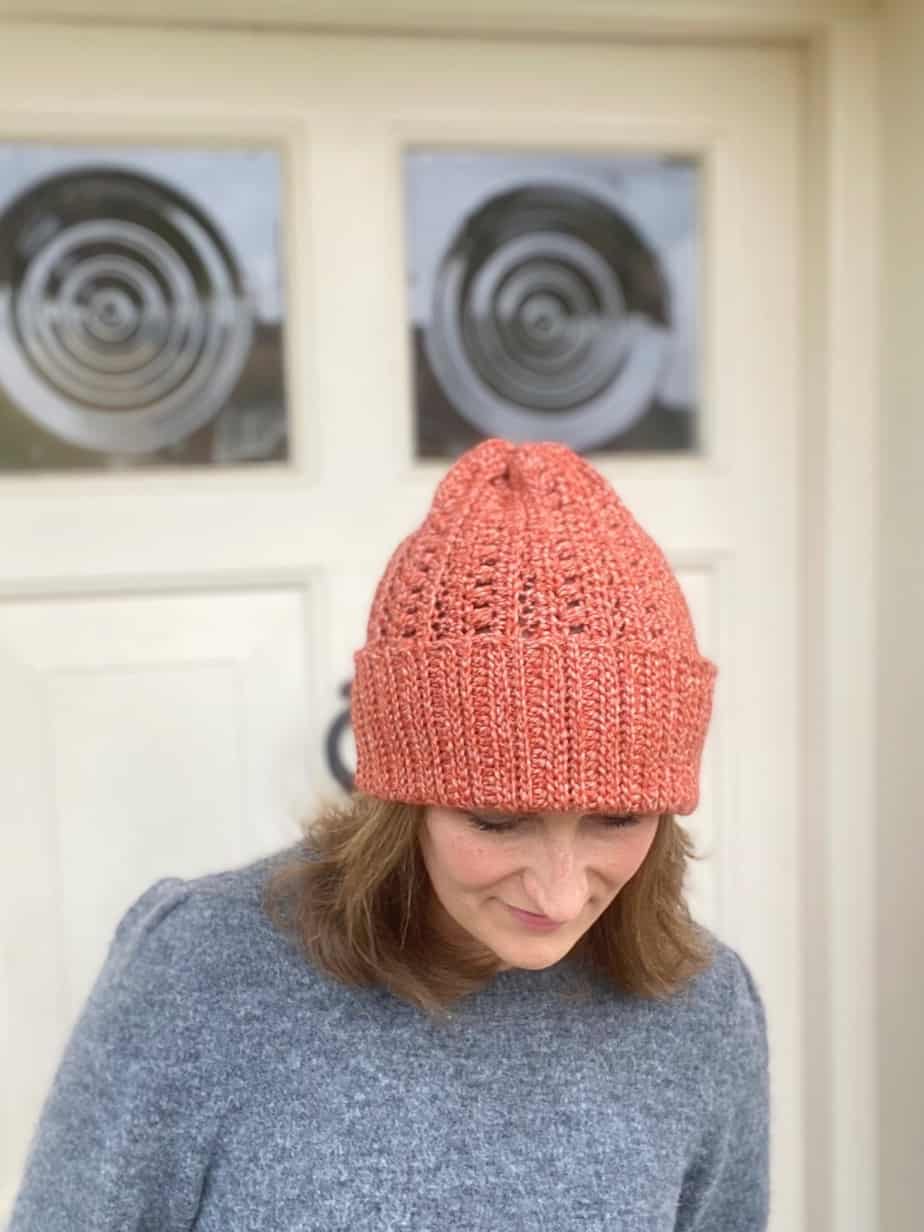
The Mirabilis Beanie is the ultimate in comfy slouchy crochet hat pattern. With plenty of delicate drape the puff stitch detail feels like pure luxury. A perfect gift to make and give or a cheeky treat for yourself perhaps!
The hat is worked flat with extra short rows for the rib and fabulous puff stitches for the top section to create a relaxed knitted look.
In 5 sizes from Baby to Large Adult, it also co-ordinates perfectly with a Mirabilis Cardigan to get you set for the season.
You can carry on reading to find the free pattern and crochet the Mirabilis Beanie here in this blogpost or purchase an ad-free, printable PDF version of this intermediate crochet pattern in my stores to download and print:
How do you make a beanie slouchy?
I’ve found that there are 3 key aspects to making a really good slouchy crochet hat – the stitch, the hook size and the length of the beanie.
- The crochet stitch I’ve chosen to use here has a soft and delicate ‘open’ feel to it so that it has lots of drape and therefore doesn’t make the hat too stiff. You want your slouch hat to be a bit floppy and well, ‘slouch’ a bit on the top or the back of your head!
- The crochet hook size is important too because it will dictate how the yarn behaves and what the drape is like too. In reality, the stitch, hook and yarn choice create the magic formula in any crochet pattern to give you so many different fabric choices.
- Finally, the length of the beanie is also really important. The idea of a slouchy hat is that it has some excess fabric at the top that can flop over the back and so you need to make the hat much longer than you normally would.
As you can see from the images I’m not a fan of a huge amount of slouch and for years I avoided these kind of hats as I felt silly wearing them but I think I’ve cracked exactly the right length for me now!
The great thing about patterns like this is that you can add or take away from the brim length to suit you and make yours as slouchy as you like!
You can carry on reading to find the free pattern here in this blogpost or purchase an ad-free, printable PDF version of the Mirabilis Slouchy Crochet hat pattern in my pattern store to download and print.
This post may contain affiliate links. Please see my full disclosure and privacy policy for details.
About the slouchy crochet hat pattern
I was lucky enough to be selected to design a pattern for the Fall 2021 Crochet Foundry Magazine and as soon as I had finished my Mirabilis Cardigan pattern I knew I had to make a co-ordinating hat to wear with it!
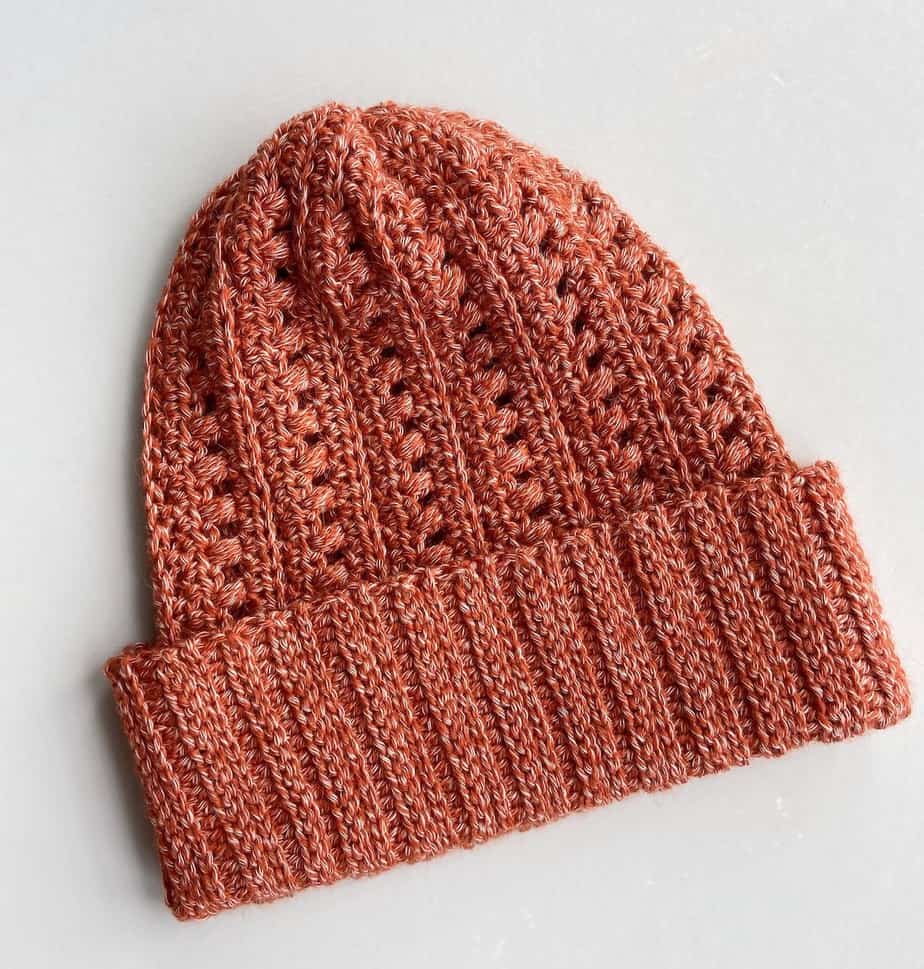
I had great fun designing the short row rib to make the brim look knitted and you won’t believe the amount of stretch it gives it! The slouchy hat is so comfy to wear and even though it looks quite delicate, it’s really warm too.
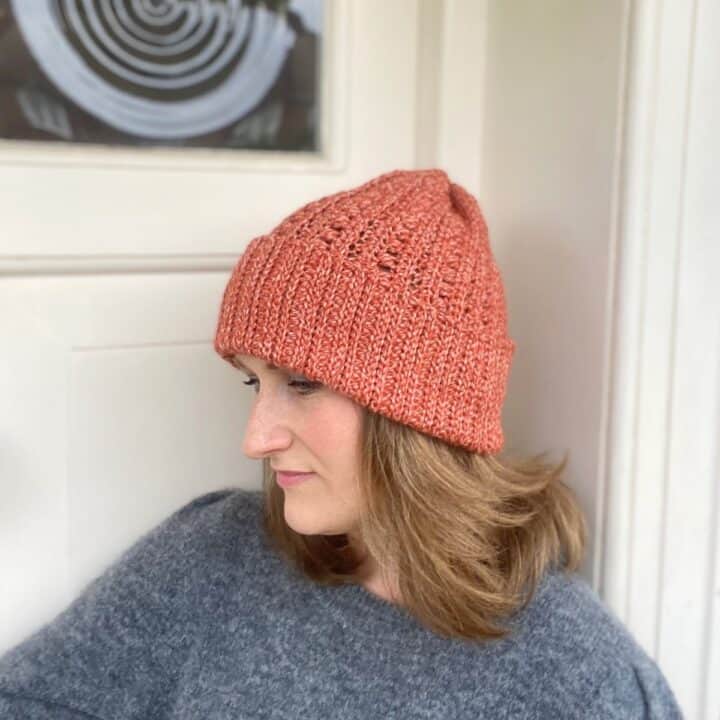
The basis of the main stitch means that it’s a puff stitch crochet hat with a lovely deep brim to turn further up or down depending on how you’d like to style it.
The crochet hat is worked flat in a big rectangle that you then seam along the side and gather at the top to form the hat shape and get that all important slouch.
How long should a crochet slouchy hat be?
Well, that’s a very good question. As I said earlier, I don’t much like the really floppy crochet slouch hats (or even ones that aren’t crocheted in fact) so it really comes down to personal taste.
The Craft Yarn Council have a handy head circumference guide but it’s trickier to find standard lengths because of how variable and open to personal opinion it is I suppose.
There is a great chart from Oombawka Design Crochet that tells you some great info about how to make a hat that fits including how long to make them if you’d like it to be a slouch hat.
So a good general rule of thumb is to make a slouchy hat about 2.5cm or 1 inch longer than a regular hat that sits at the base of your ear. Maybe just measure your head and see what you think!
How do you wear a slouch hat?
Another good question that I really had no idea about until I finally decided to design and wear one! It seems that there are many opinions on the subject and the most important deciding factor sees to be your hairstyle.
Until fairly recently I had very short, cropped hair and I found wearing hats quite tricky but I think because I was doing it wrong – if you make sure to wear the slouch hat right at the back of your head and show some of the fringe or sides of your hair it looks great!
If you have longer hair then it looks really nice pulled right down over your forehead and a low ponytail also suits a slouchy beanie really well.
The whole idea of this style of hat is to have a relaxed look so it’s great to just pop it on and do whatever feels comfortable. There’s no right or wrong way to wear one.
What other crochet hat pattern can I make?
If you enjoy making crochet hats then I have plenty for you to choose from! The thing I love most about handmade hats is that they don’t take that much time or yarn to make and so are perfect to whip up as gifts or to sell at craft fairs.
You might like to try out my Walcot seamless chunky hat pattern, my Neo Mint crochet cable stitch hat, or my Slip Stitch beginner crochet beanie pattern. They all use different techniques and are worked from the top down, bottom up and side to side!
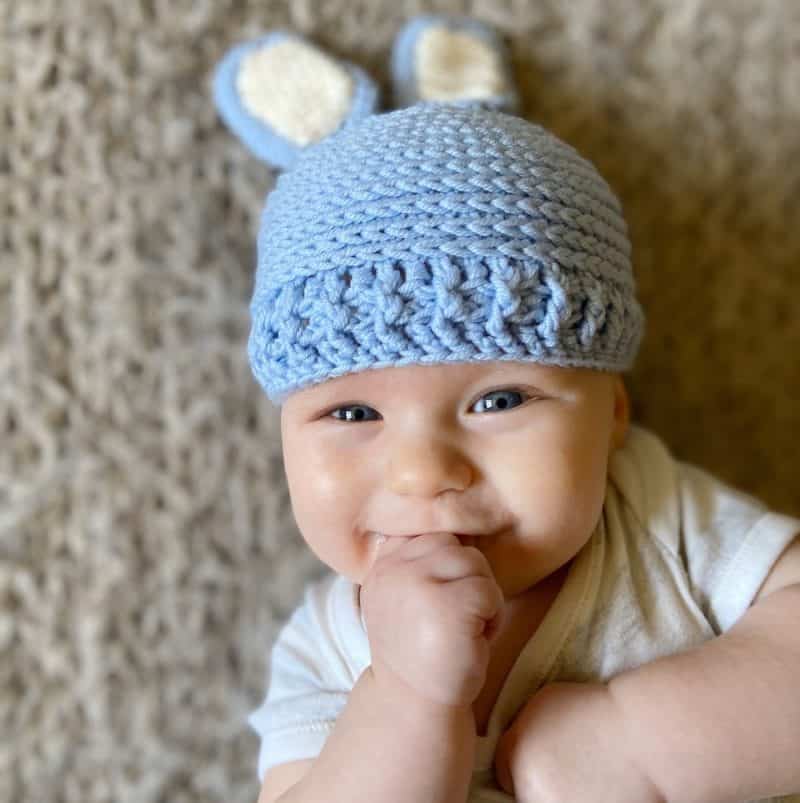
If you’re looking for something to make for little ones then you could try the crochet bunny hat, or my pumpkin beanie hat or my basketweave stitch beanie – they are all super quick and easy to make!
Why is the crochet hat worked flat?
I know that lots of people prefer to work crochet hats in the round and not flat but because I was coordinating this one with my new cardigan design I wanted the stitch pattern to run in the same direction and also I really like working hats flat and then seaming them!
I know that might be a surprise to those that know me as I really don’t like seaming anything but for the level of drape and cardigan coordination this ones gives, I’m more than happy to do a bit of seaming!
It also means that there is no increasing or decreasing to worry about. You literally just make a rectangle following the pattern and you’re there.
Tension and sizing options
The slouchy crochet hat comes in 5 sizes from Baby to Large Adult.
The gauge for the hat is 14sts by 10 rows = 10cm by 10cm.
The five sizes, size to fit and the finished hat circumferences are as follows. You’ll see that there is a lot of negative ease (meaning it’s smaller than the head it will go on) but that’s because the stitch pattern is so stretchy. If you find you’d like it a bit bigger then you can just work a few more rows to suit.
| Size | To fit head size (cm) | Finished hat circumference (cm) |
| Baby | 44 | 32 |
| Toddler | 48 | 36 |
| Child | 52 | 40 |
| Teen/Small Adult | 54 | 42 |
| M/L Adult | 58 | 46 |
How much yarn do I need to crochet a slouchy hat?
You don’t need an awful lot of yarn to crochet a hat and so it’s a great project to either raid your stash for (so it’s basically free!) or have a splurge and get some really luxurious yarn!
I chose to use WeCrochet Kindred DK yarn to make my hat and it is perfect for it. The mix of baby alpaca and twist of Peruvian Pima cotton makes it so soft and delicate to work with.
It’s 68% Baby Alpaca, 32% Peruvian Pima Cotton, 115 yds(105m)/ 50g, and I chose the shade Spice.
You’ll need approximately 140 (190, 230, 275, 300)yds of yarn.
A great alternative yarn if you want something acrylic (great to wash for little ones) then I’d go with Paintbox Simply DK – it comes in loads of beautiful colours and is great for you stash too!
Crochet stitches used to crochet the slouch beanie
The crochet pattern uses the following crochet stitches:
| Standard US Crochet Term | Standard UK Terms |
| sc – single crochet | dc – double crochet |
| hdc – half double crochet | htr – half treble crochet |
How to get the Mirabilis Crochet Pattern
This blanket pattern is a free crochet pattern in US and UK terms on the blog for everyone to enjoy, just scroll down to find it.
There are a few ways you can access and enjoy this crochet pattern and help support HanJan Crochet.
- You can find and use the slouch hat crochet pattern here on the blog that is supplemented with ads.
- You can purchase, print and keep the 5 page ad-free pattern PDF in any of my stores below:
Purchase and Print
Get the ad-free, printable PDF with added extras in my pattern stores:
Subscribe to HanJan Crochet for an extra free pattern today!
If you’d like a coordinating cardigan to go with your Mirabilis beanie then I have you covered!
The Mirabilis Cardigan Pattern is the perfect partner to this hat.
It’s size inclusive in 9 sizes from XS to 5X and you can either get it as an individual pattern or as part of the Fall 2021 Crochet Foundry Issue. The entire issue is packed with 11 amazing patterns perfect for Fall. Here’s a peek at my cardigan and taste of some of the other projects in the issue too, it truly is stunning!
Free Slouchy Crochet Hat Pattern - Mirabilis Puff Stitch Beanie
Learn to crochet this modern slouchy crochet hat pattern from HanJan Crochet. Worked flat, seamed at the side and gathered at the top, it has a deep brim worked in short rows that you can make as deep as you like to style your look.
Materials
- WeCrochet Kindred DK in Spice or a category 3 yarn of your choice (see below for yardage in each size).
Instructions
Stitches and Abbreviations
ch(s) - chain(s)
ss - slip stitch
st(s) - stitch(es)
rep - repeat
RS - right side
WS - wrong side
blo - back loop only
flo - front loop only
yo - yarn over
US Terminology:
sc - single crochet
hdc - half double crochet
Special Stitches
US: 3hdc Puff stitch (3hdc-puff)
(Yo, insert hook in st indicated, yo and pull up loop) 3 times, inserting the hook in the same st each time, yo and draw through all loops on hook.
Tension for the crochet pattern
14sts and 10 rows = 10cm/4 inches over main set pattern.
Sizing of the Slouchy Crochet Hat and Yarn
Size: Baby (Toddler, Child, Teen/Small Adult, M/L Adult)
To fit: 44 (48, 52, 54, 58) cm head
Hat length: 17 (19, 20, 23, 25) cm
Approx Yarn Required: 140 (190, 230, 275, 300) yards
Notes
The hat is worked in one flat piece in rows. The last row is then joined to the first and the top gathered and sewn to create the shape.
A ch1 at the beginning of a row does not count as a stitch.
Turn your work after each row.
Short Row Rib
Each wrong side row of the hat has 2 short rows of rib before then completing the row as follows:
Beginning of Row:
Short Row 1: Ch1, ss in flo of cuff stitches, turn
Short Row 2: Ch1, ss in blo of cuff stitches, turn
Slouchy Crochet Hat Pattern Steps
- Row 1 (RS): Foundation hdc 37 (43, 44, 53, 56) stitches [37 (43, 44, 53, 56)]
- Row 2: (WS): Work 2 beginning short rows of rib for 17 (22, 22, 28, 28) sts (see special notes above), then ch1, ss in blo of next 17 (22, 22, 28, 28) sts, *sc in blo of next st, ch1, skip next st; rep from * to last 4 (3, 4, 3, 4) sts, ss in blo of remaining sts.
- Row 3: Ch1, hdc in blo of next 4 (3, 4, 3, 4) sts, hdc in next 16 (18, 18, 22, 24) sts, hdc in blo of next 17 (22, 22, 28, 28) sts.
- Row 4: Work 2 beginning short rows of rib (see special notes on p3 and above), then ch1, ss in blo of next 17 (22, 22, 28, 28) sts, *3hdc-puff in next st, ch1, skip next st; rep from * to last 4 (3, 4, 3, 4) sts, ss in blo of remaining sts.
- Row 5: Rep Row 3
- Rows 2-5 create the main set pattern.
- Repeat the main set pattern 6 (7, 8, 9, 10) more times [29 (33, 37, 41, 45) rows]
- Sizes Baby, Toddler and Child only - Last 3 Rows: Repeat Rows 2, 3 and 4 [32, 36, 40]
- Sizes Teen/Small Adult and M/L Adult only - Last Row: Repeat Row 2 [42, 46]
- Total completed rows for all sizes: [32 (36, 40, 42, 46)]
- At the end of the last row, break the yarn, leaving a long tail to gather the top of the hat and seam the side too.
- Sew through the sides of the rows at the top of the hat and pull tightly to gather. Secure in place before rotating to seam the last row to Row 1 with a whipstitch seam (or a crocheted slip stitch seam if you prefer).
- Weave in all ends.
- Turn back your cuff two thirds of its length (or wherever you'd like it to sit) and your hat is ready to wear.

This post may contain affiliate links. Please see my full disclosure and privacy policy for details.
Join HanJan Crochet and Share Your Crochet!
I’d love to stay connected with you so please do sign up for my subscriber list if you’d like to. Looking forward to hearing from you and sending you your free gift!
Thank you so much for being here to share in my free crochet patterns and supporting my blog. It’s such an honour to be able to create and share my craft with you.
I’d love to see your finished crochet projects and so please share them with me in one (or all!) of the following ways:
- Share a picture on Instagram and tag me #hanjancrochet
- Share your projects on Ravelry
- Share a picture in the HanJan Crochet Facebook group