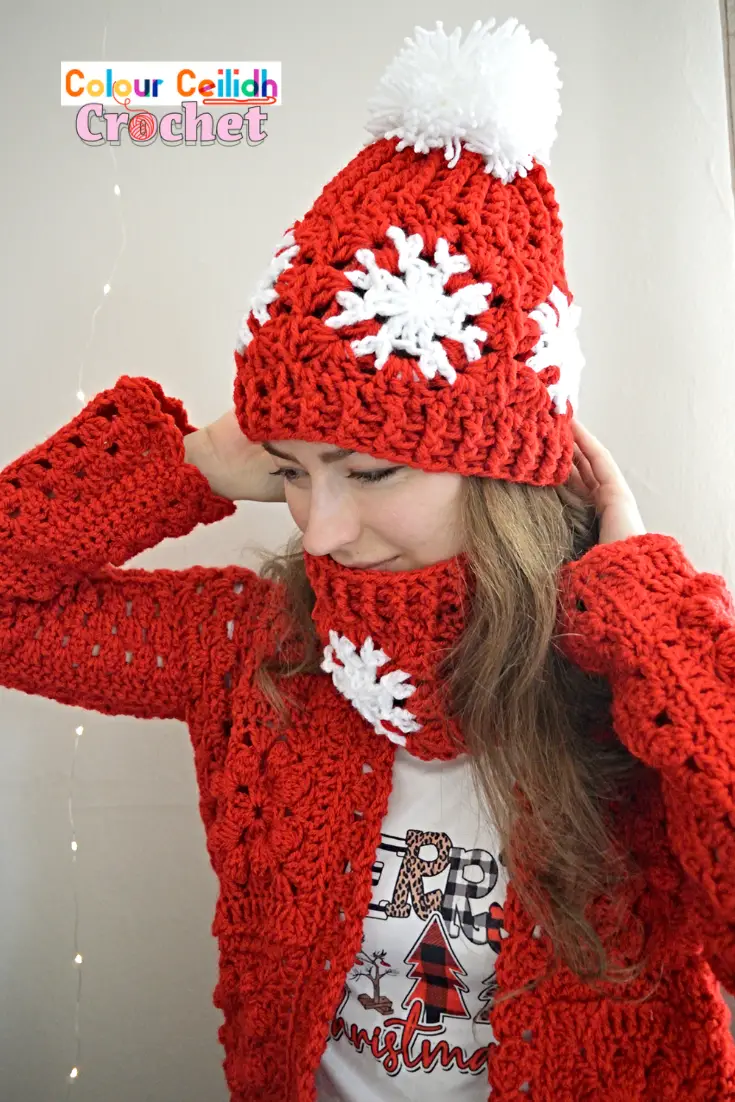
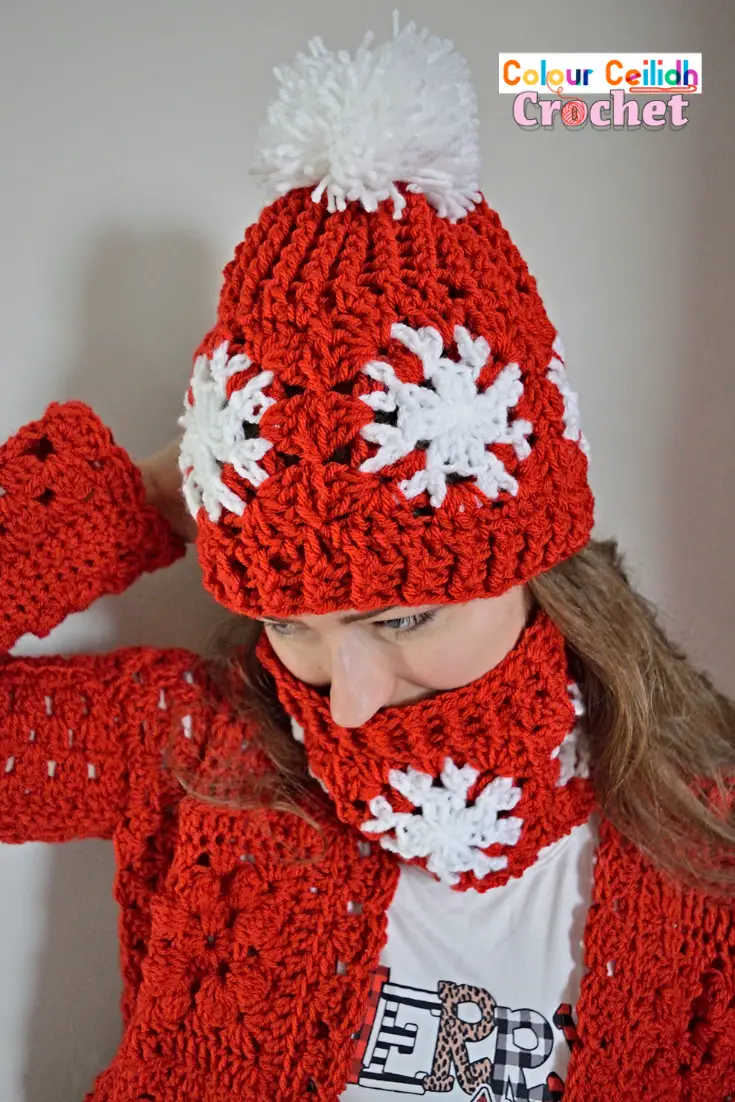
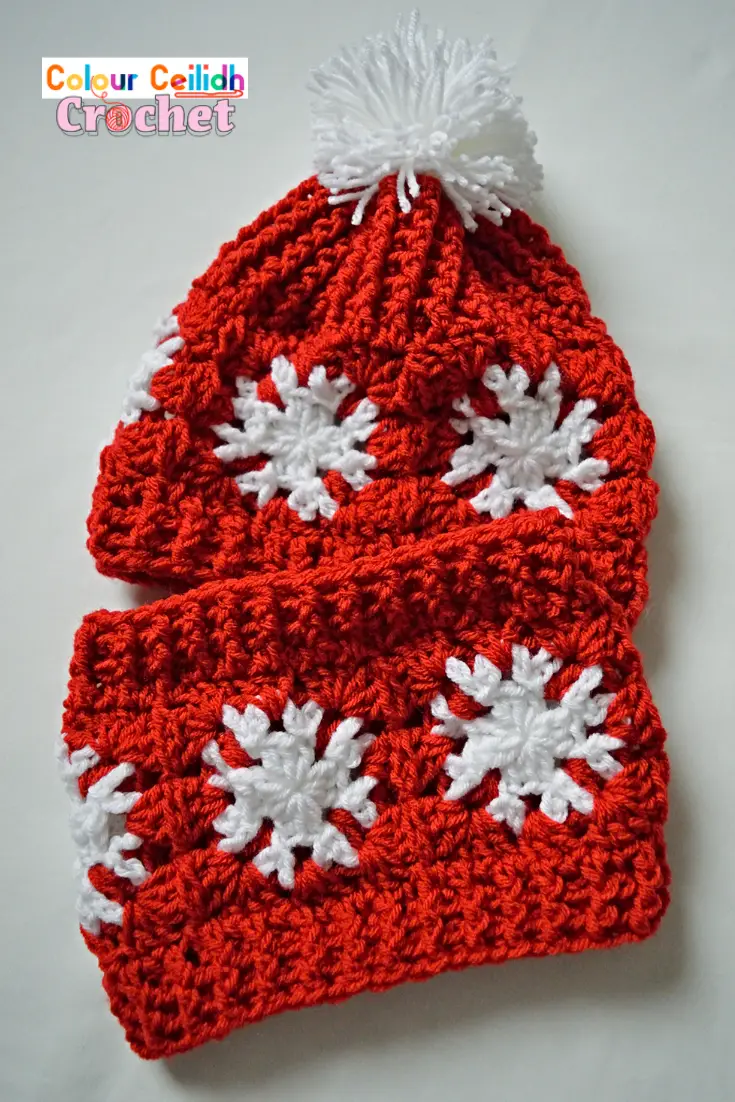
This crochet snowflake hat & cowl pattern is made with simple snowflake granny squares and there is no seaming involved as the squares are joined as you go and the ribbing is done in the round. This easy pattern is beginner friendly as it uses basic stitches plus post stitches for ribbing.
This crochet hat can be made in a variety of bold statement colours such as blue, black, green, grey, pink and it would make a great crochet hat for men.
While the crochet cowl is great for children too as it’s quick, easy and fast to make, it’s small enough and it uses cheerful colours. My daughter who is 8 has actually claimed mine and I’ve had to give in!
This pattern includes a YouTube video as well.
This post contains affiliate links to products. I may receive a small commission for purchases made through these links.
Crochet jacket: one colour granny square cardigan.
It All Begins with Yarn…
For this crochet snowflake hat & cowl pattern I used a 9 mm hook and Lion Brand Vanna’s Choice in Scarlet and White, which is a worsted weight yarn.
…And Inspiration…
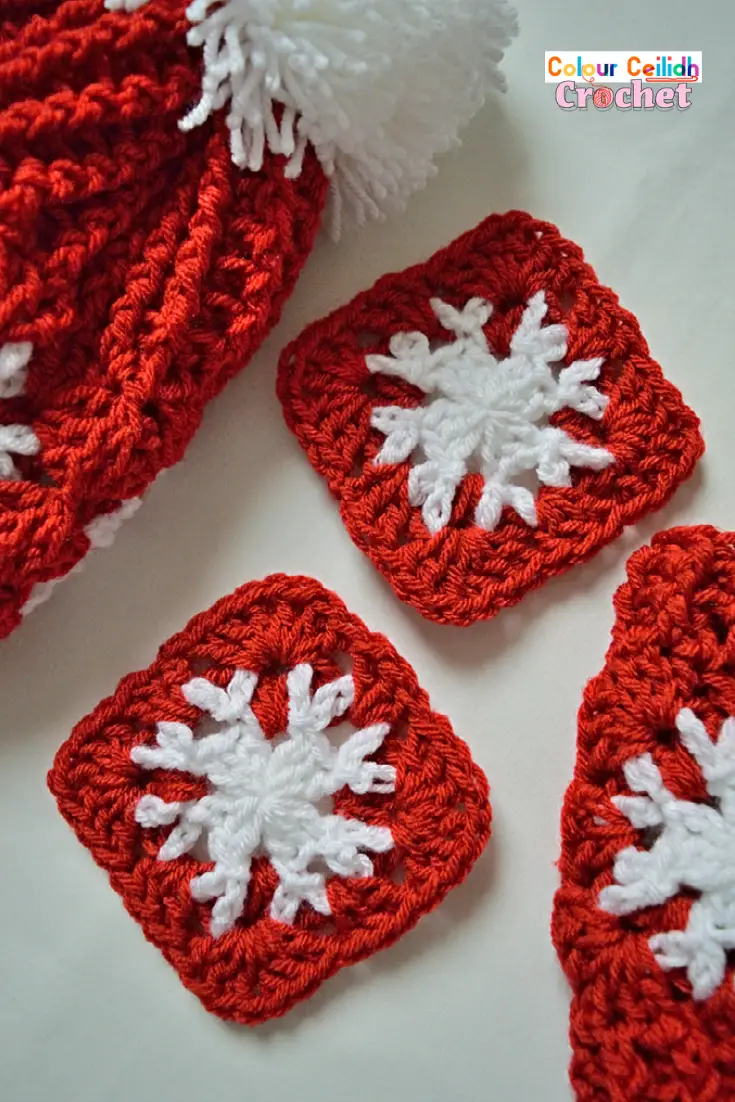
This crochet snowflake granny square was actually a happy accident, because I was trying to create a crochet star granny square for Christmas, not a snowflake! However this snowflake has now become the star of the show!..
Crochet Snowflake Hat & Cowl Set – Free Pattern
- Love it? PIN it!.
- You can add this pattern to your Ravelry queue here.
- Ready to crochet but don’t want the ads in your way? PRINT it here*.
* a print friendly version for a small fee.
Description
This crochet snowflake hat & cowl pattern is made with simple snowflake granny squares and there is no seaming involved as the squares are joined as you go and the ribbing is done in the round. This easy pattern is beginner friendly as it uses basic stitches plus post stitches for ribbing. This crochet hat can be made in a variety of bold statement colours such as blue, black, green, grey, pink and it would make a great crochet hat for men. While the crochet cowl makes a great cowl for kids too as it’s quick, easy and fast to make, it’s small enough and it uses cheerful colours. My daughter who is 8 has actually claimed mine and I’ve had to give in! This pattern includes a YouTube video as well.
Sizes
The hat and cowl’s circumference is the same because they’re both made with 5 granny squares each. The circumference is about 21″ which will happily stretch to fit both adult small (21 – 23 “) and large (22 – 24”) heads, because the pattern uses a large hook which gives a nice stretch and squishiness to the fabric.
However, if you’re an adult small and you’re used to snug fit hats where the hat circumference is approx 2″ smaller than your head’s, try using a 7 mm hook to achieve a hat that’s approx 19″ in circumference. I don’t have an 8 mm hook at home (I thought I did! Because I have one of those large sets. I should get more hooks! :)) but that should logically give you a 20″ hat.
Model wears a 21″ hat & cowl and her head circumference is 22″.
Care Instructions
Lion Brand Vanna’s Choice yarn is a 100% acrylic. It’s machine washable at 30 C / 86 F.
Pattern Notes
- Project Level: Easy! (Beginner friendly)
- Read this if you want to learn how I change color without tails. To minimise weaving in the ends and because I love working with color so much I developed a method of how to change color in crochet without tails.
Crochet Snowflake Hat & Cowl Pattern – Video Tutorial
Here’s a link to the video tutorial on YouTube: Crochet Hat Tutorial | Easy Snowflake Hat & Cowl Pattern.
Materials
- Lion Brand Vanna’s Choice (4 / medium / aran / 10 ply / worsted weight, 100 g / 3.5 oz, 156 m / 170 yd, 100% acrylic). If you’re making the hat or the cowl only: 1 skein in Scarlet, 1 skein in White. If you’re making both the hat & the cowl: 2 skeins in Scarlet, 1 skein in White.
- 9 mm crochet hook.
- Yarn needle.
Gauge
Following the pattern below, one granny square is approx 4.5″.
Abbreviations (US Terms)
- BPdc: back post double crochet
- ch: chain
- dc: double crochet
- FPdc: front post double crochet
- magic ring: sliding loop, magic loop, magic circle, adjustable loop, adjustable ring, drawstring ring
- rep: repeat
- sl: slip
- st: stitch
Crochet Snowflake Hat & Cowl Pattern:
Pattern Overview – 4 Easy Steps
- Make your first granny square.
- Join 5 granny squares together into a circle.
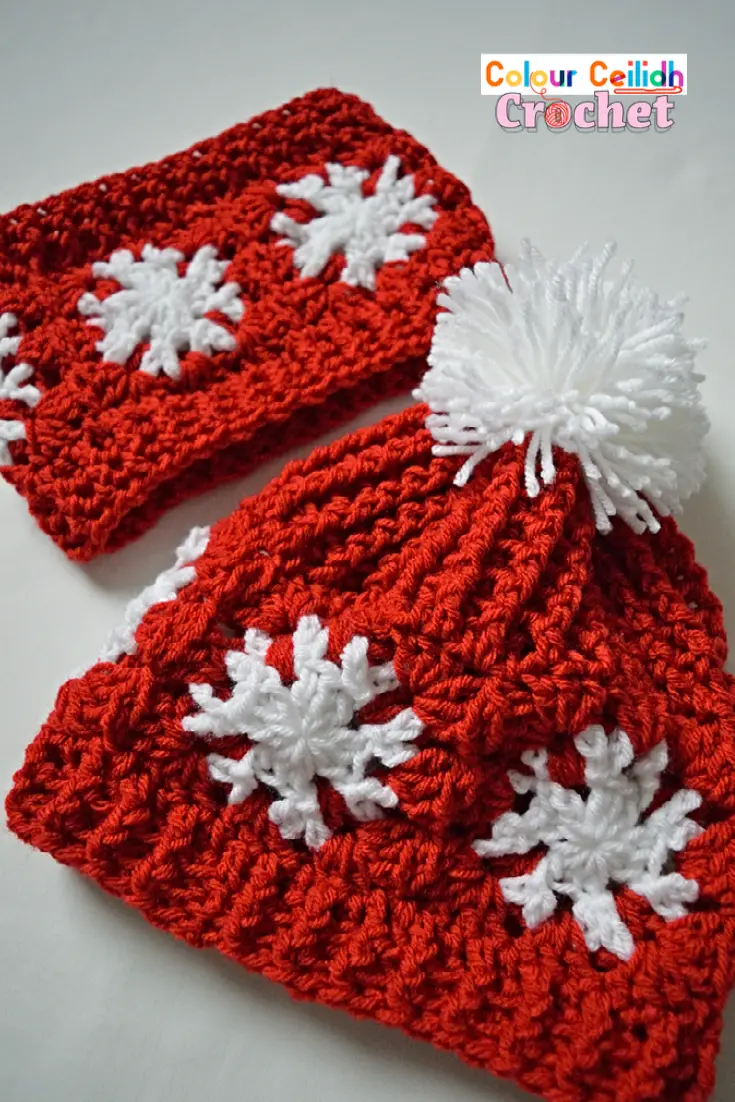
- To make the cowl, add 3 rows of ribbing on both sides. And to make the hat, add 3 rows of ribbing on one side and 8 on the other.
- For the hat, close the opening and add a large pom pom.
1. Make Your First Granny Square.
To make the first granny square follow the instructions below.
Easy Crochet Snowflake Granny Square
With White, begin with a magic ring.
Rnd1 (White) Ch 3 (counts as dc), 2 dc in ring, *ch 1, 3 dc in ring; rep from * 2 times, ch 1, join with sl st to top of ch-3. (4 clusters of 3-dc with ch-1 in between)
Rnd2 (White) *Ch 6, (sl st, ch 6, sl st) in next space; rep from * 3 times. (8 ch-6 loops)
Rnd3 (Red) Fold down ch-6 loop from the same space downwards towards you. Sl st in ch-1 space (from 2 rnds ago) in between both ends of ch-6. Ch 3 (counts as dc), (2 dc, ch 1, 3 dc) in same space. *Skip the next ch-6 loop. Fold down the ch-6 loop from next space downwards towards you. (3 dc, ch 1, 3 dc) in ch-1 space (from 2 rnds ago) in between both ends of ch-6. Rep from * 2 times, join with a sl st to top of ch-3. (8 clusters of 3-dc with 4 ch-1 corner spaces)
Rnd4 (Red) Sl st in same space while crocheting over the ch-6 loop from below. Ch 3 (counts as dc), 2 dc in same space while crocheting over the ch-6 loop. Make (3 dc, ch 1, 3 dc) in corner spaces while crocheting over the ch-6 loop from below and 3 dc in other spaces while crocheting over the ch-6 loop from below. Fasten off. (12 3-dc clusters and 4 ch-1 corner spaces)
2. Join 5 Granny Squares Together Into A Circle.
As you make your second and subsequent granny squares, join them together to form a circle as follows. At first join 4 granny squares on one side into a “column”. Then when you make the 5th square, join it with the 1st and the 4th granny squares on opposite sides to form a ring with the squares. My preferred method of joining granny squares is joining as-you-go in the last round.
Joining Granny Squares As-You-Go in the Last Round.
As you’re making the last round of your granny, leave one full side undone to be joined with the other square (two opposite sides for the 5th square, which means start joining as soon as you reach the first corner). We’ll start joining in the corner.
Start making the corner but stop after the first 3 dc. Remove your hook from the loop, insert the hook front to back through the corner space of the other square you’re joining with, pick up the loose loop, pull it up and ch 1, 3 dc in the same corner space to complete the corner. *Remove the hook from the loop, insert the hook front to back through the next space along of the other granny, pick up the loose loop, pull it up and ch 1, and make 3 dc in the next space again. Rep from * until you joined the second corner with a ch 1.
Complete the round as usual by joining with a sl st to the top of ch-3 but do not fasten off! This is because you can start your first row of ribbing straight away and save yourself weaving in two tails.
For more details, see the video tutorial.
3. Add Ribbing
To make the cowl, you will need to add 3 rounds of ribbing on both sides of your 5 square granny circle. And to make the hat, you will need to add 3 rounds of ribbing on one side and 8 on the other.
If you forgot and fastened off in the last step, join new yarn (Red) in any stitch on your chosen side in your granny ring (I used the slip stitch method: make a slip knot on your hook, insert hook in the space indicated, yarn over and pull through the fabric & the slip knot). Or you could also attach new yarn to an existing tail with a magic knot!
Rnd1 (Red) Ch 3 (counts as dc), make dc in next dc and every dc as well as corner spaces where two squares were joined together, join with sl st to top of ch-3. (Stitch count doesn’t matter here)
Rnd2 (Red) Ch 2, skip the post below, *FPdc around the next post, BPdc around the next post; rep from *, join with a sl st to the top of ch-2.
Rnd3 (Red) Rep rnd 2 making sure to match front posts with front posts and back posts with back posts to continue growing the ridges, fasten off.
4. Finish The Hat
After you’ve added 3 rounds of ribbing on one side and 8 rounds of ribbing on the other side of your 5 square granny circle, leave a longer tail (say 18″) at the top of the hat and thread it through a yarn needle.
Next weave the needle up & down through the back loops of approximately every second stitch in the last round of your ribbing and then pull the yarn to close the opening and secure it.
Finally, make yourself a large pom pom, approx 4.8″ wide. I used Pattern Paradise instructions. I used a 4.8″ wide piece of cardboard and wrapped the yarn around it approx 150 times.
More Ideas
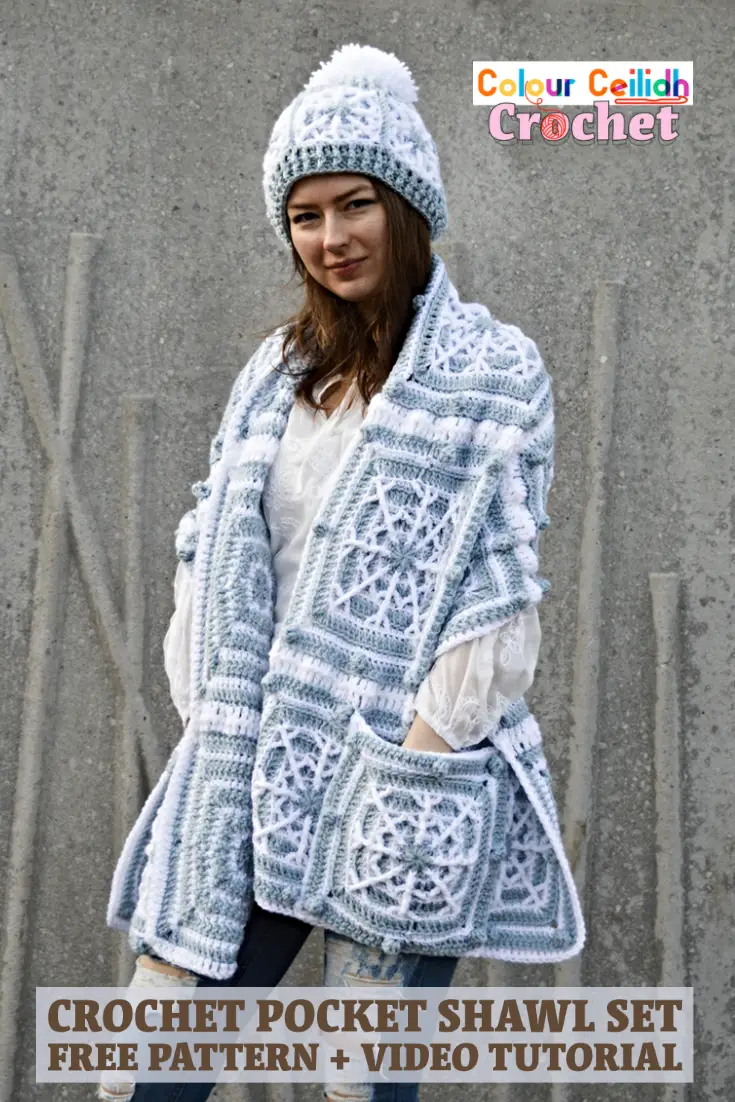
This Crochet Snowflake Scarf by Crazy Cool Crochet is pretty cool! This list of 10 crochet snowflake patterns by Spruce Crafts has some good ideas. Finally, I used my own crochet snowflake square to make a crochet pocket shawl, hat & mittens as it’s a warmer solid square with denser fabric (yet still a great drape) and it has no holes, which is perfect for covering up in the cold winter.
Well Done!
I hope you enjoyed this free crochet pattern for my crochet snowflake hat and cowl. What should I crochet next? See you in my next pattern!
Happy crocheting!
Justina
