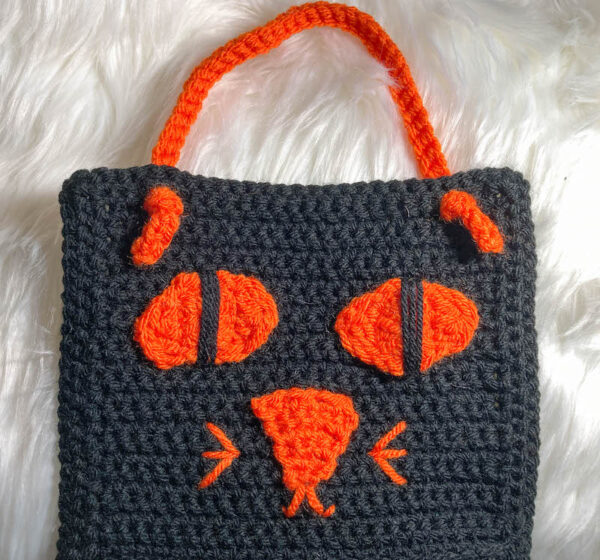
I’m excited to kick off the third annual Halloween Crochet Along with CAL Central with a pattern for a DIY Halloween treat bag. The Black Cat Treat Bag can be made in black and orange yarn for Halloween, or change up the colors to make a treat bag that looks like your own cat!

This post contains affiliate links. I may receive compensation (at no added cost to you) if you make a purchase using these links. Supplies for this project were generously provided by Paintbox Yarns and Clover USA.
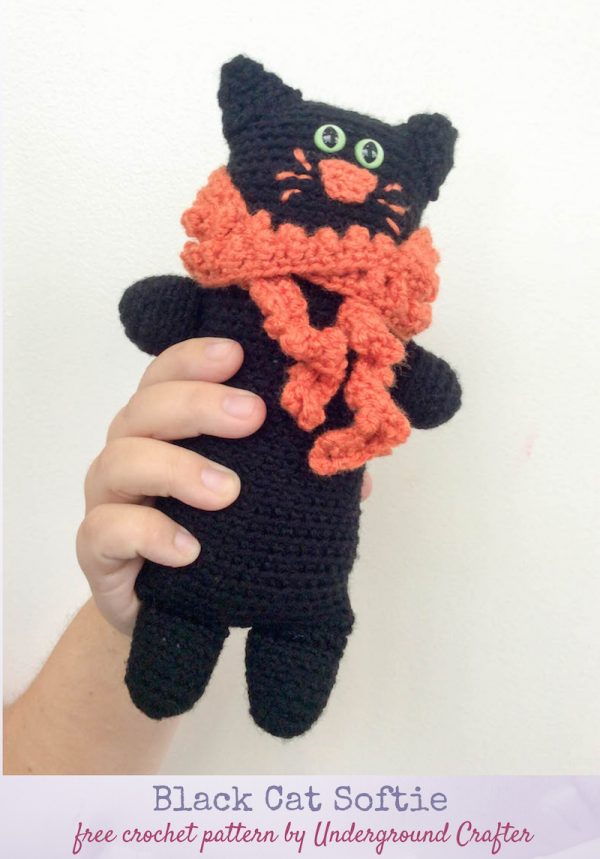
It’s no secret I love cats. I currently have two black cats, which has inspired me to create several Halloween-themed projects, like the Black Cat Softie…
…and, today’s pattern, the Black Cat Treat Bag. This is a quick DIY Halloween treat bag pattern that is perfect for filling with (not TOO much) candy and sweets. Your little one can also use it year round to carry special findings.

This pattern is part of the Halloween Crochet Along with CAL Central. Visit this blog post to get all the information on this CAL, including the link to each pattern as it is released, and enter for your chance to win a prize from Amy’s Trinket Shop, GlassEyesOnline, and Hooked for Life by 11:59 p.m. on Sunday, October 3, 2021! To join the Halloween Crochet Along…
- Sign up for the Underground Crafter newsletter to get regular updates, including links to new CAL patterns, each week. When you sign up, you’ll also get access to my subscriber vault which includes exclusive free PDF patterns, a coupon code for your choice of any crochet or knitting pattern or ebook from my Ravelry shop, and coupon codes from other indie designers and crafts businesses.
- You can join in by crocheting the patterns as you have time.
- Share your progress and post pictures of your finished projects. Tag your projects and posts #CALCentralCrochet on all social media.
- If you’d like to chat with other crocheters, join the CAL Central Facebook group or visit this thread in the CAL Central Ravelry group.
- By the end of the CAL, you’ll have up to 12 spooky Halloween projects!
- Use this button below on your Ravelry project pages or elsewhere on social media. Right click (on desktop) or tap and hold (on mobile) to save.

Scroll down for the free crochet pattern for the Black Cat Treat Bag!
If you make your own Black Cat Halloween Treat Bag, I’d love to see it! Share your progress and questions by tagging me on Facebook as @Underground Crafter, Instragram as @ucrafter, or Twitter as @ucrafter. You can also share a picture in the Underground Crafters Facebook group. Sign up for my weekly newsletter and get a coupon code for your choice of one of my premium patterns and private access to my vault of subscriber goodies. Plus, you’ll never miss one of my free patterns again!
Add the Black Cat Treat Bag to your favorites or queue, or buy the ad-free PDF on Ravelry.

Black Cat Treat Bag
DIY Halloween Treat Bag Crochet Pattern by Underground Crafter


This kitty cat bag is perfect for carrying treats. Change the yarn colors for a tiny tote your child can use all year round!
Finished Size
- Approximately 6.5” (16.5 cm) tall x 7.5” (19 cm) wide after folding and assembling, not including straps.
Materials
- Paintbox Yarns Simply Chunky yarn (100% acrylic, 3.5 oz/100 g/149 yd/136 m) in 301 Pure Black (CA) and 319 Blood Orange (CB) – 1 skein each, or approximately 120 yd (110 m) in CA and 25 yd (23 m) in CB in any bulky weight yarn.
- US Size H-8/5 mm crochet hook, or size needed to obtain gauge.
- Clover Quick Locking Stitch Marker set (optional, but helpful for marking the holding pieces together for seaming).
- Clover bent-tip yarn needle.
Gauge
- 16 sc = 4” (10 cm) across. Exact gauge is not critical for this project. Use tight stitches so bag has dense, stiff fabric.
Abbreviations Used in This Pattern
- BL – back loop only – Fiber Flux has a helpful video tutorial for identifying the back loop here.
- CA – Color A
- CB – Color B
- ch – chain
- dc – double crochet
- dc3tog – double crochet 3 stitches together (decrease) – [Yo, insert hook in next st, yo and draw up a loop, yo and draw through 2 loops] 3 times, yo and draw through all 4 loops on hook. The Lindsey Life has a helpful video tutorial for this stitch here.
- rep – repeat
- sc – single crochet
- sl st – slip stitch
- sp – space
- st(s) – stitch(es)
- yo – yarn over
- *Repeat instructions after asterisk as indicated.
- [] Repeat instructions between brackets as indicated.
- () Work stitches between parentheses into same stitch or space.
Pattern Notes
- When choosing colors, CA is the color of the Bag/Cat Body, Iris, and Ears. CB is the color of the Eyes, Nose, Mouth and Whiskers, and Bag Handles.
- Ch 1 at beginning of row or round and sl st at end of rounds DO NOT count as stitches.
- Oombawka Design has helpful magic adjustable ring tutorials here.
- A helpful photo tutorial for joining with the whipstitch seam is available here.
- A video tutorial for the embroidery backstitch is available at the end of this blog post.
- Helpful video tutorials for crocheting around the unworked edge of a project and joining with the mattress stitch are embedded in the pattern below.
Pattern Instructions
Eyes (Make 2)
- With CB, start with magic adjustable ring (see Pattern Notes).
- Round 1: (Right Side) Ch 1, 12 dc in ring, join with sl st to top of first dc, pull yarn tail tightly to close ring. (12 sts)
- Round 2: Ch 1, starting in same st [dc3tog, ch 3, sl st to next 4 sts] twice.
- Fasten off CB with long yarn tail (approximately 18”/45.5 cm) for seaming.
- With yarn needle, weave in yarn tail from start/magic adjustable ring on Wrong Side.
Nose
- With CB, ch 2.
- Row 1: Turn, skip 1 ch, 2 sc in next ch. (2 sts)
- Row 2: Turn, ch 1, sc in first st, 2 sc in next st. (3 sts)
- Row 3: Turn, ch 1, sc in first st and in each st across to last st, 2 sc in last st. (4 sts – increases by 1 st)
- Rows 4-6: Rep Row 3, 3 times. (7 sts)
- Fasten off CB with long yarn tail (approximately 18”/45.5 cm) for seaming.
- With yarn needle, weave in yarn tail from start.
Bag Handles (Make 2)
- With CB, ch 51.
- Row 1: Turn, skip 1 ch, sc in next 50 ch. (50 sts)
- Fasten off CB. With yarn needle, weave in yarn tails.
Ears (Make 2)
- With CA, ch 2.
- Row 1: Turn, skip 1 ch, 2 sc in next ch. (2 sts)
- Row 2: Turn, ch 1, sc in first st, 2 sc in next st. (3 sts)
- Row 3: Turn, ch 1, sc in first st and in each st across to last st, 2 sc in last st. (4 sts – increases by 1 st)
- Rows 4-8: Rep Row 3, 5 times. (9 sts)
- Fasten off CA with long yarn tail (approximately 18”/45.5 cm) for seaming.
- With yarn needle, weave in yarn tail from start.
Bag/Cat Body
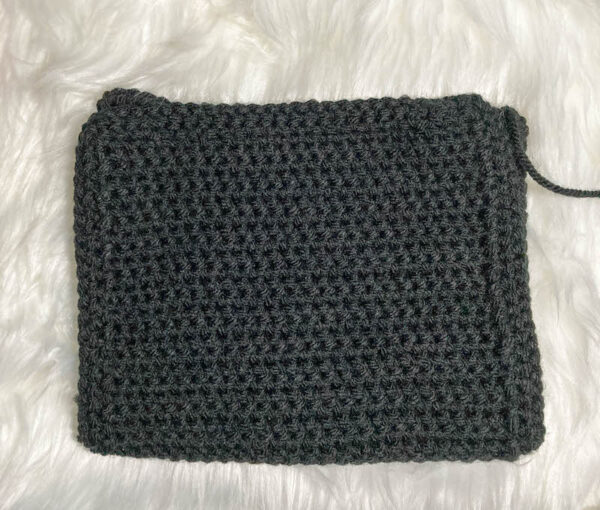
- With CA, ch 26.
- Row 1: Turn, skip 1 ch, sc in next 25 ch. (25 sts)
- Row 2: Turn, ch 1, sc in first 25 sts.
- Rows 3-25: Rep Row 2, 23 times, or until piece measures approximately 6” (15 cm) long.
- Row 26: Turn, ch 1, scBL in first 25 sts.
- Rows 27-50: Rep Row 2, 24 times, or until piece, when folded at Row 26, is the same length on both sides.
Begin Edging and Form Holes for Bag Handles
- Row 51/Round 1: (Right Side) Turn, ch 1, *sc in first 3 sts, ch 1, skip 1 st, sc in next 17 sts, ch 1, skip 1 st, sc in next 3 sts, ch 2, turn to work along long edge, sc in side of each row (see video below), ch 2,** turn to work along foundation row, rep from * to **, join with sl st to top of first sc.
- If you can’t see the video above, click here to watch How To Single Crochet Around the Side of Your Project on YouTube.
Continue Edging
- Round 2: Ch 1, sc in same st and next 2 sts, *sc in ch-1 sp, sc in next 17 sts, sc in ch-1 sp, sc in next 3 sts, (sc, ch 1, sc) in ch-2 sp, turn to work along long edge, sc in each st across to next ch-2 sp, (sc, ch 1, sc) in ch-2 sp,** turn to work along foundation row, sc in next 3 sts, rep from * to **, join with sl st to top of first sc.
- Fasten off CA with long yarn tail (approximately 24”/61 cm) for seaming.
- With yarn needle, weave in yarn tail from start on Wrong Side.

Assembly and Finishing
- When finished, Bag will be folded along Row 26 of Bag/Cat Body. Designate one side as the face (front) to decorate.

- Unfold/open Bag so you can join face decorations without seaming through Bag. Position Eyes and Nose on Bag as desired. Using stitch markers to lock positions in place before seaming.

- Thread yarn needle with CB from Nose. Using whipstitch seam (see Pattern Notes), attach Nose to Bag. With CB from first Eye, attach Eye to Bag with whipstitch seam. Repeat for second Eye. With yarn needle, weave in ends on Wrong Side of Bag.
- Thread yarn needle with approximately 24” (61 cm) of CB. Add Mouth and Whiskers with embroidery backstitch (see Pattern Notes). Thread yarn needle with approximately 24” (61 cm) of CA. Form Iris using CA. Weave in ends on Wrong Side of Bag.

- Starting on front side of bag, insert first Bag Handle into skipped stitches on Row 51/Round 1 of Edging, being careful not to twist. Tie each end of Bag Handle into decorative knots on the Right Side. Fold Bag along Row 26 of Bag/Cat Body.

- Attach second Bag Handle on back side of bag, aligning Bag Handle heights before tightening knots.

- Thread yarn needle with CA from first Ear. Position Ear so that, when seamed, it will rest against knot from Bag Handle to stay upright.

- With yarn needle, seam first Ear to face with whipstitch (see Pattern Notes). Repeat for second Ear.

- With yarn needle, weave in ends on Wrong Side.
- Fold Bag along Row 26 of Bag/Cat Body. Thread yarn needle with CA from end of Bag/Cat Body.

- With yarn needle, seam side closed with mattress stitch (see video below).
- If you can’t see the video above for seaming with the mattress stitch, click here to watch it on YouTube.
- Working on inside of bag across fold, weave yarn tail through to other side of Bag.

- Continue to seam other side closed with mattress stitch. With yarn needle, weave in yarn tail on inside of bag.
© 2021 by Marie Segares (Underground Crafter). This pattern is for personal use only. You may use the pattern to make unlimited items for yourself, for charity, or to give as gifts. You may sell items you personally make by hand from this pattern. Do not violate Marie’s copyright by distributing this pattern or the photos in any form, including but not limited to scanning, photocopying, emailing, or posting on a website or internet discussion group. If you want to share the pattern, point your friends to this link: https://undergroundcrafter.com/2021/08/23/diy-halloween-treat-bag-black-cat/ Thanks for supporting indie designers!


