
Heart's Desire Sweater

ABOUT THIS Design:
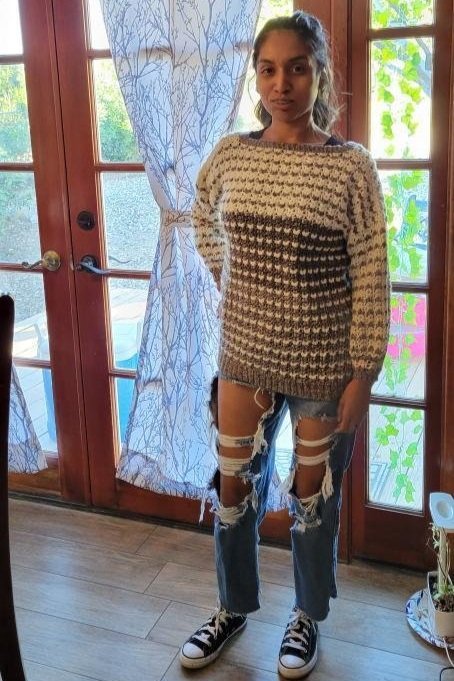
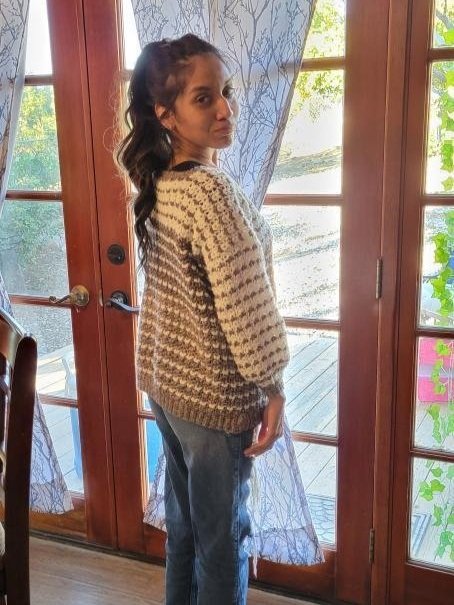
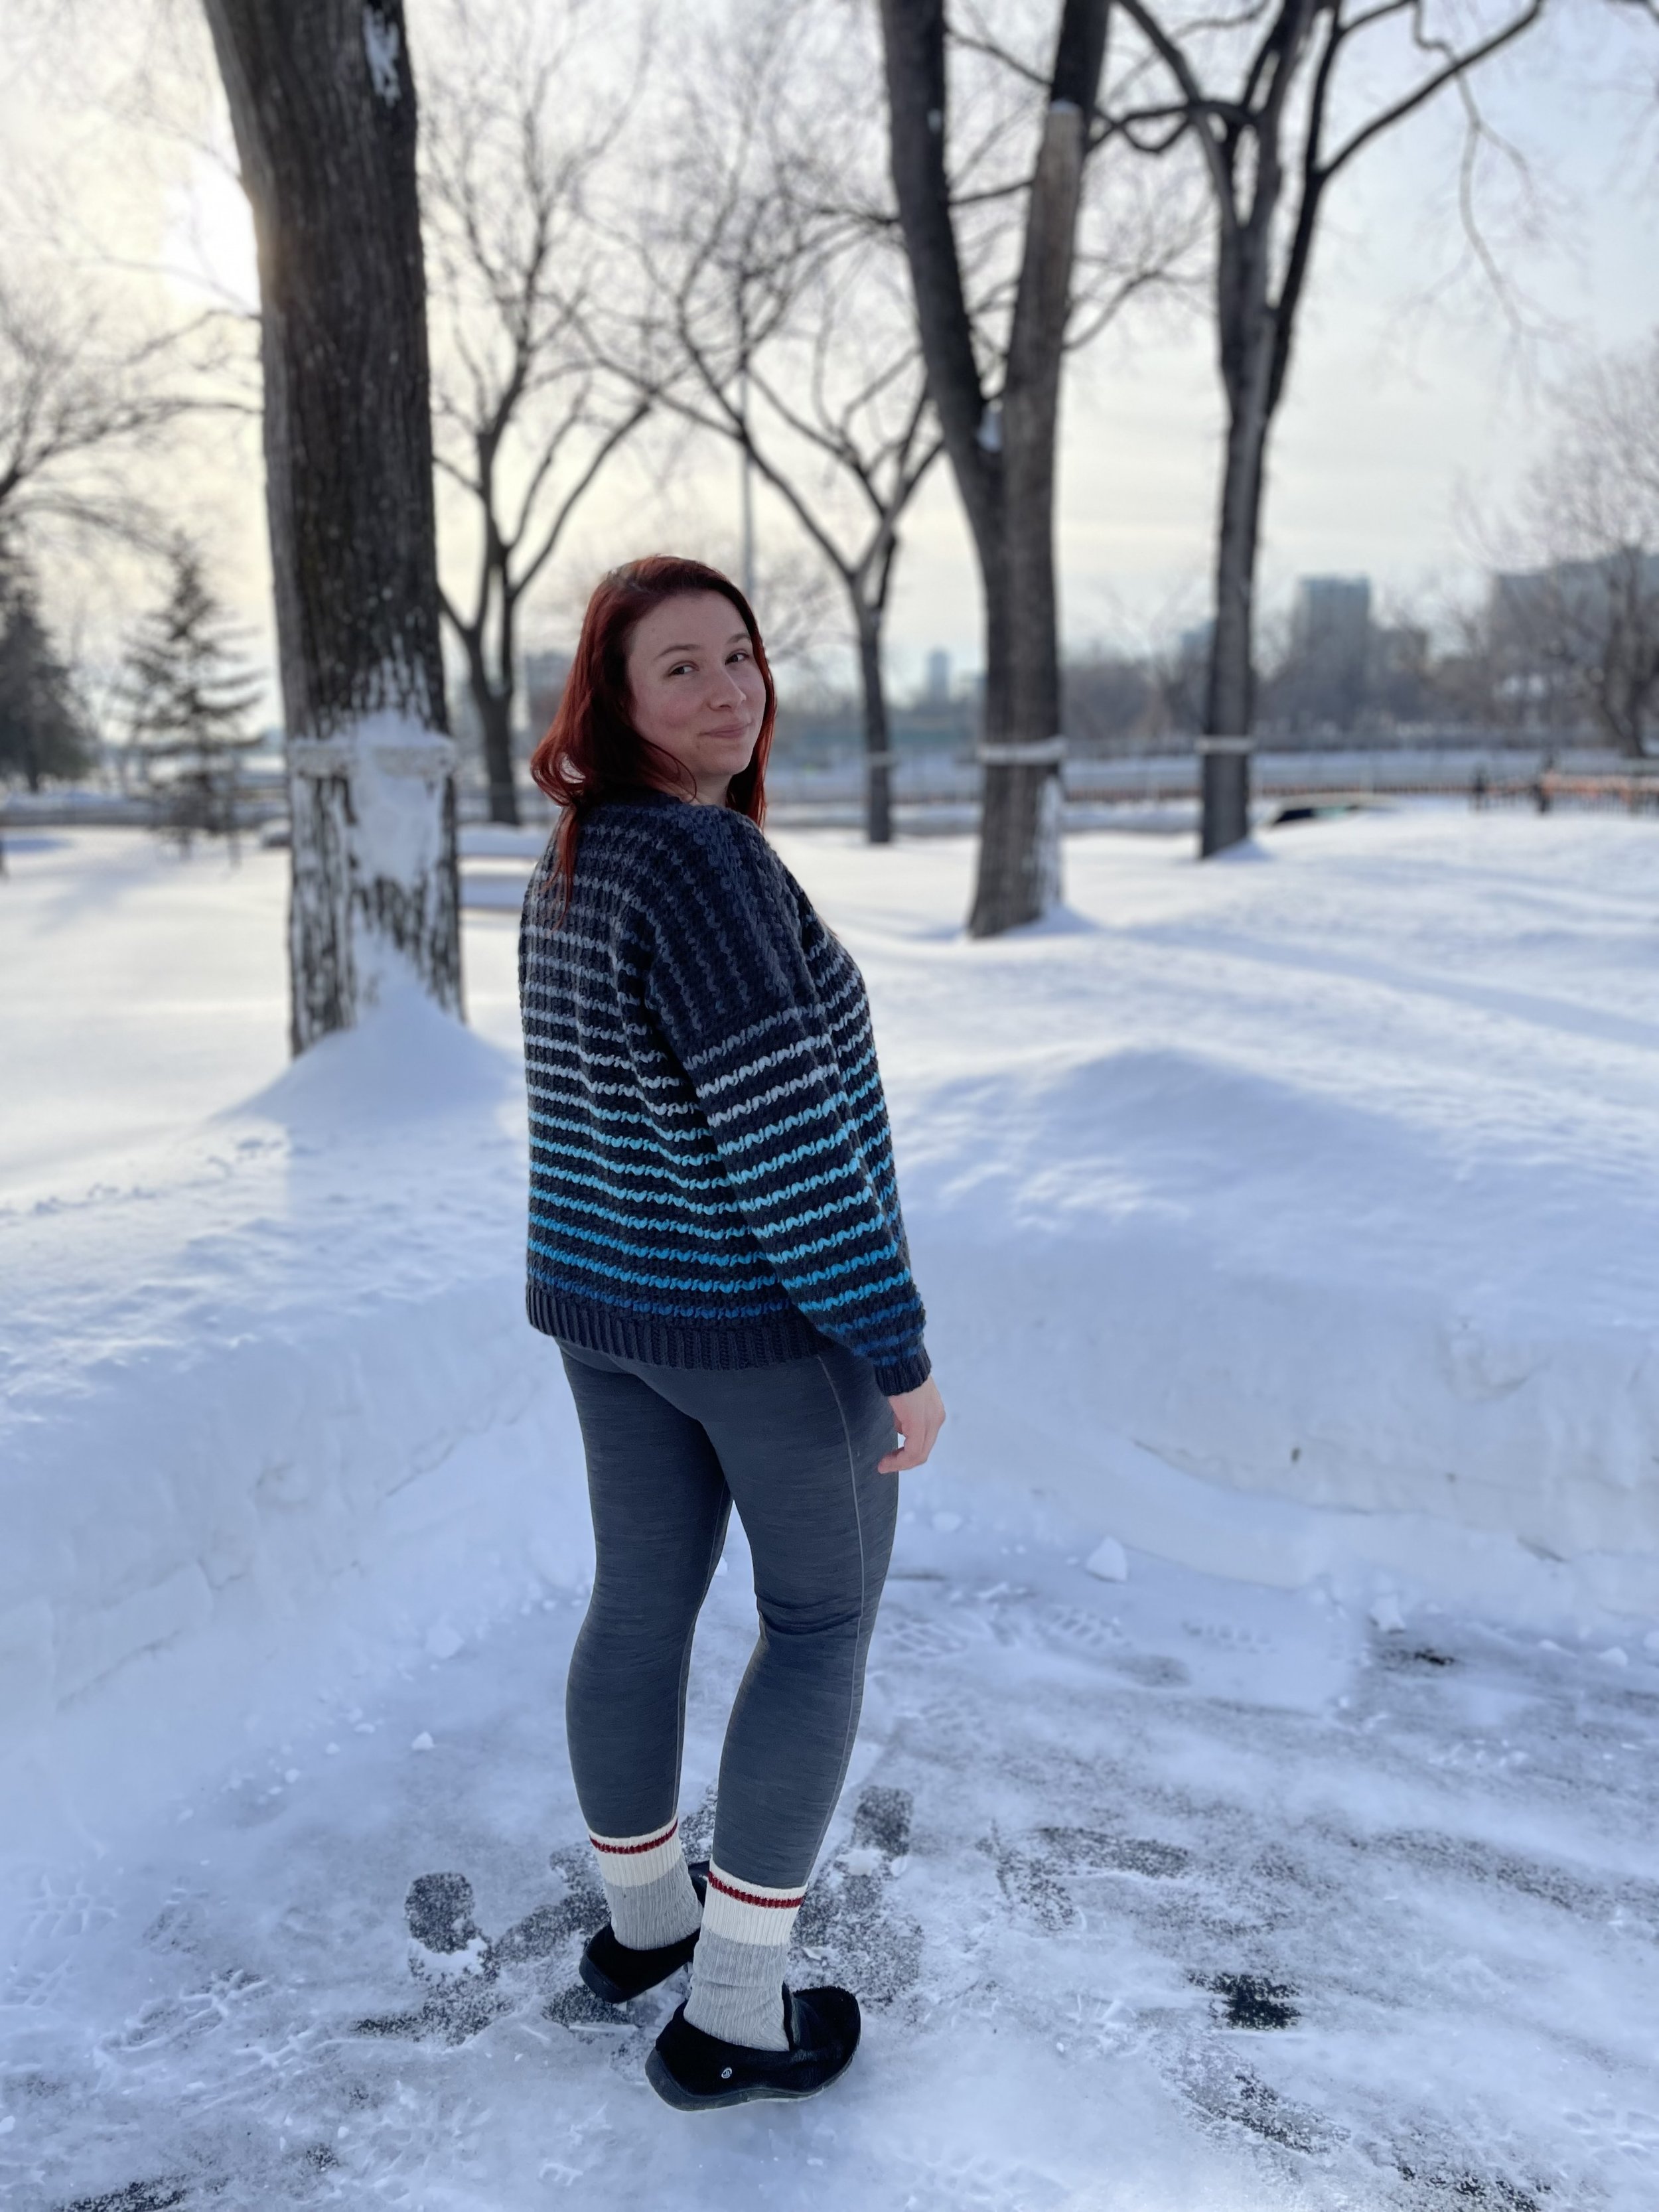
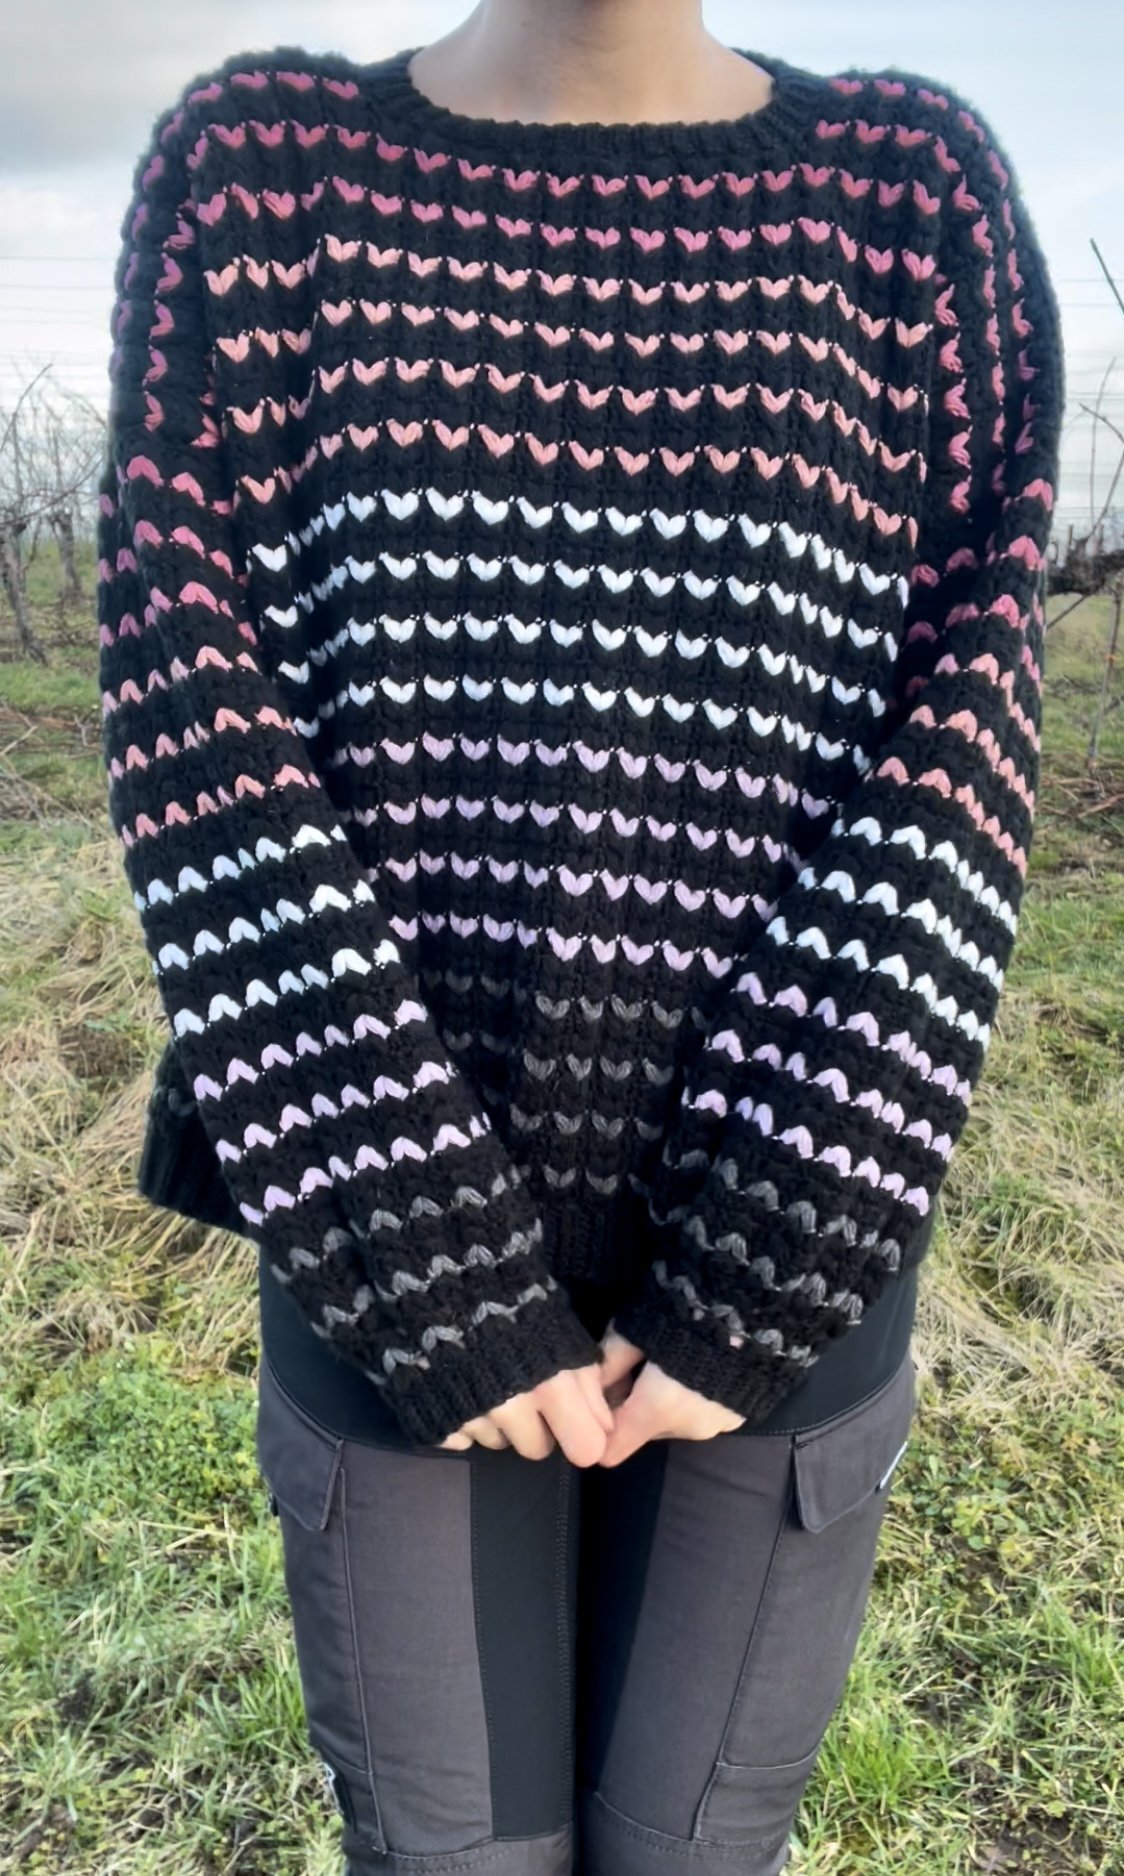
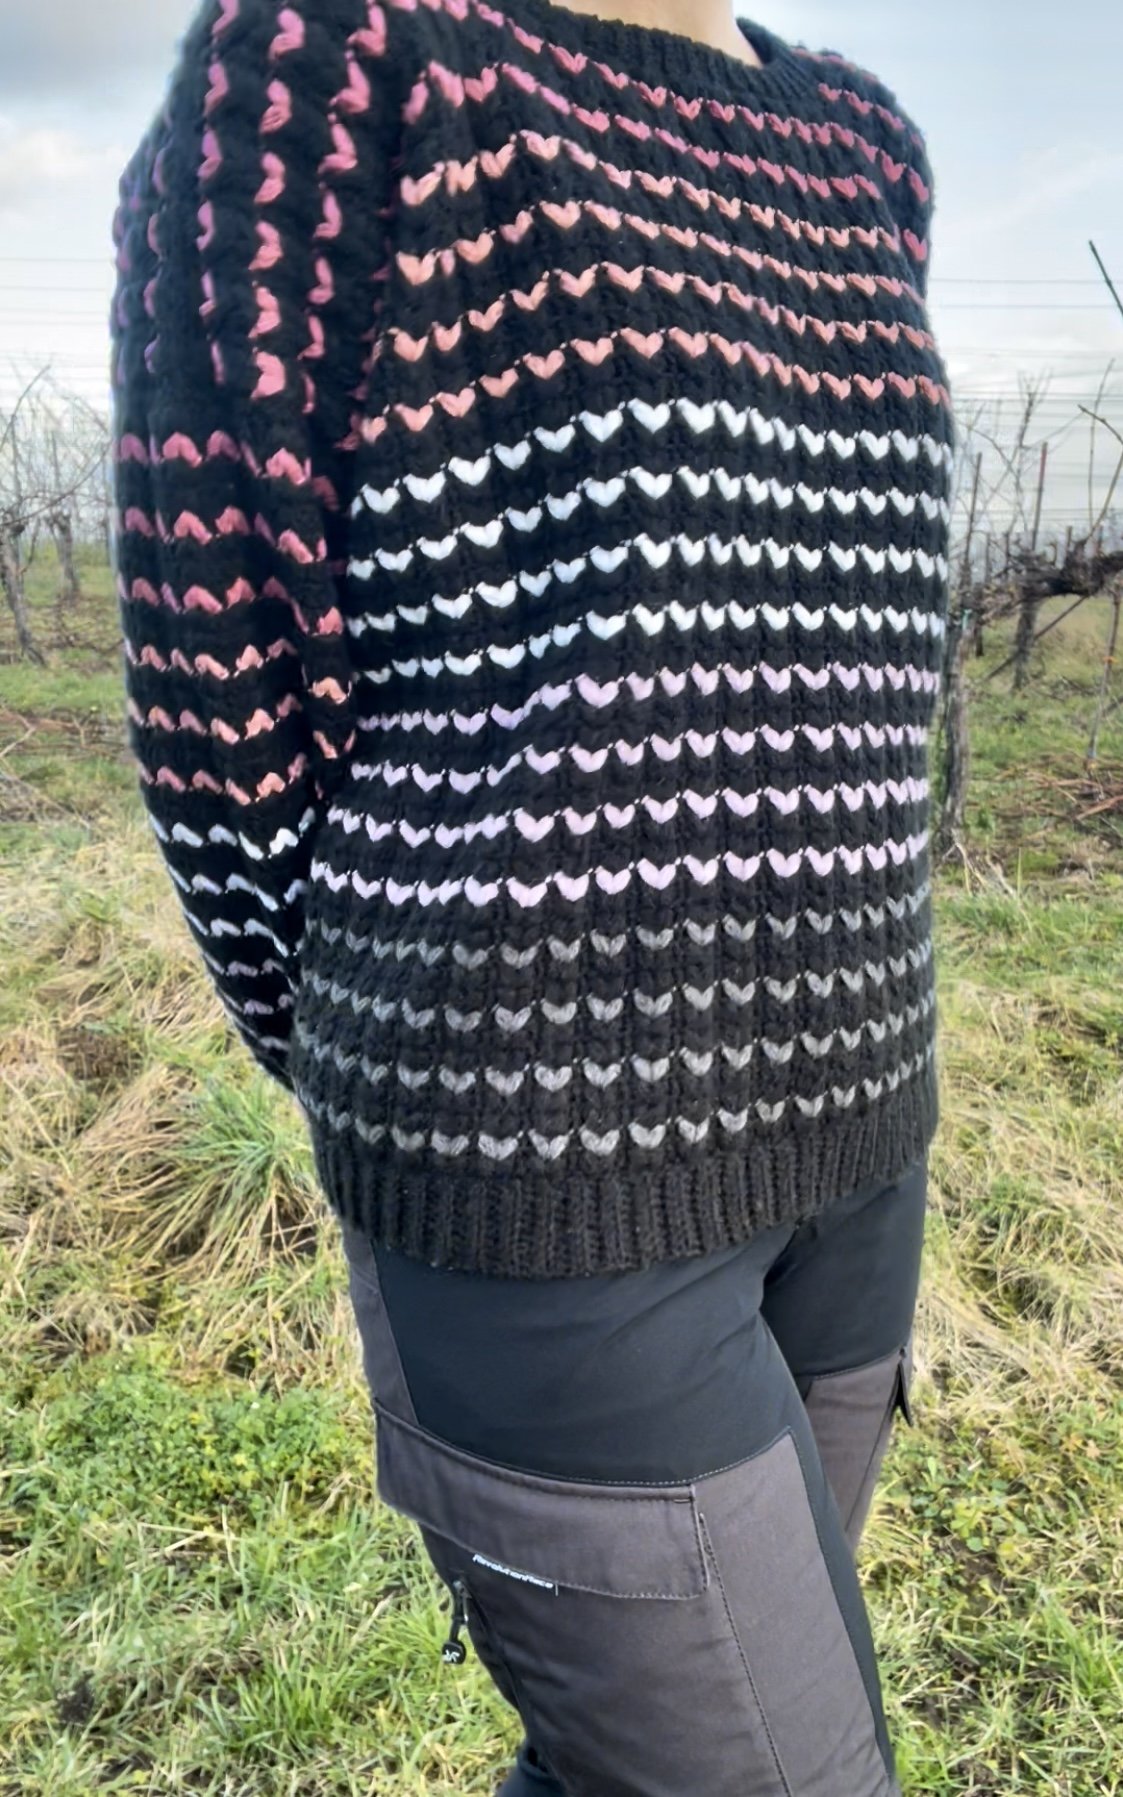
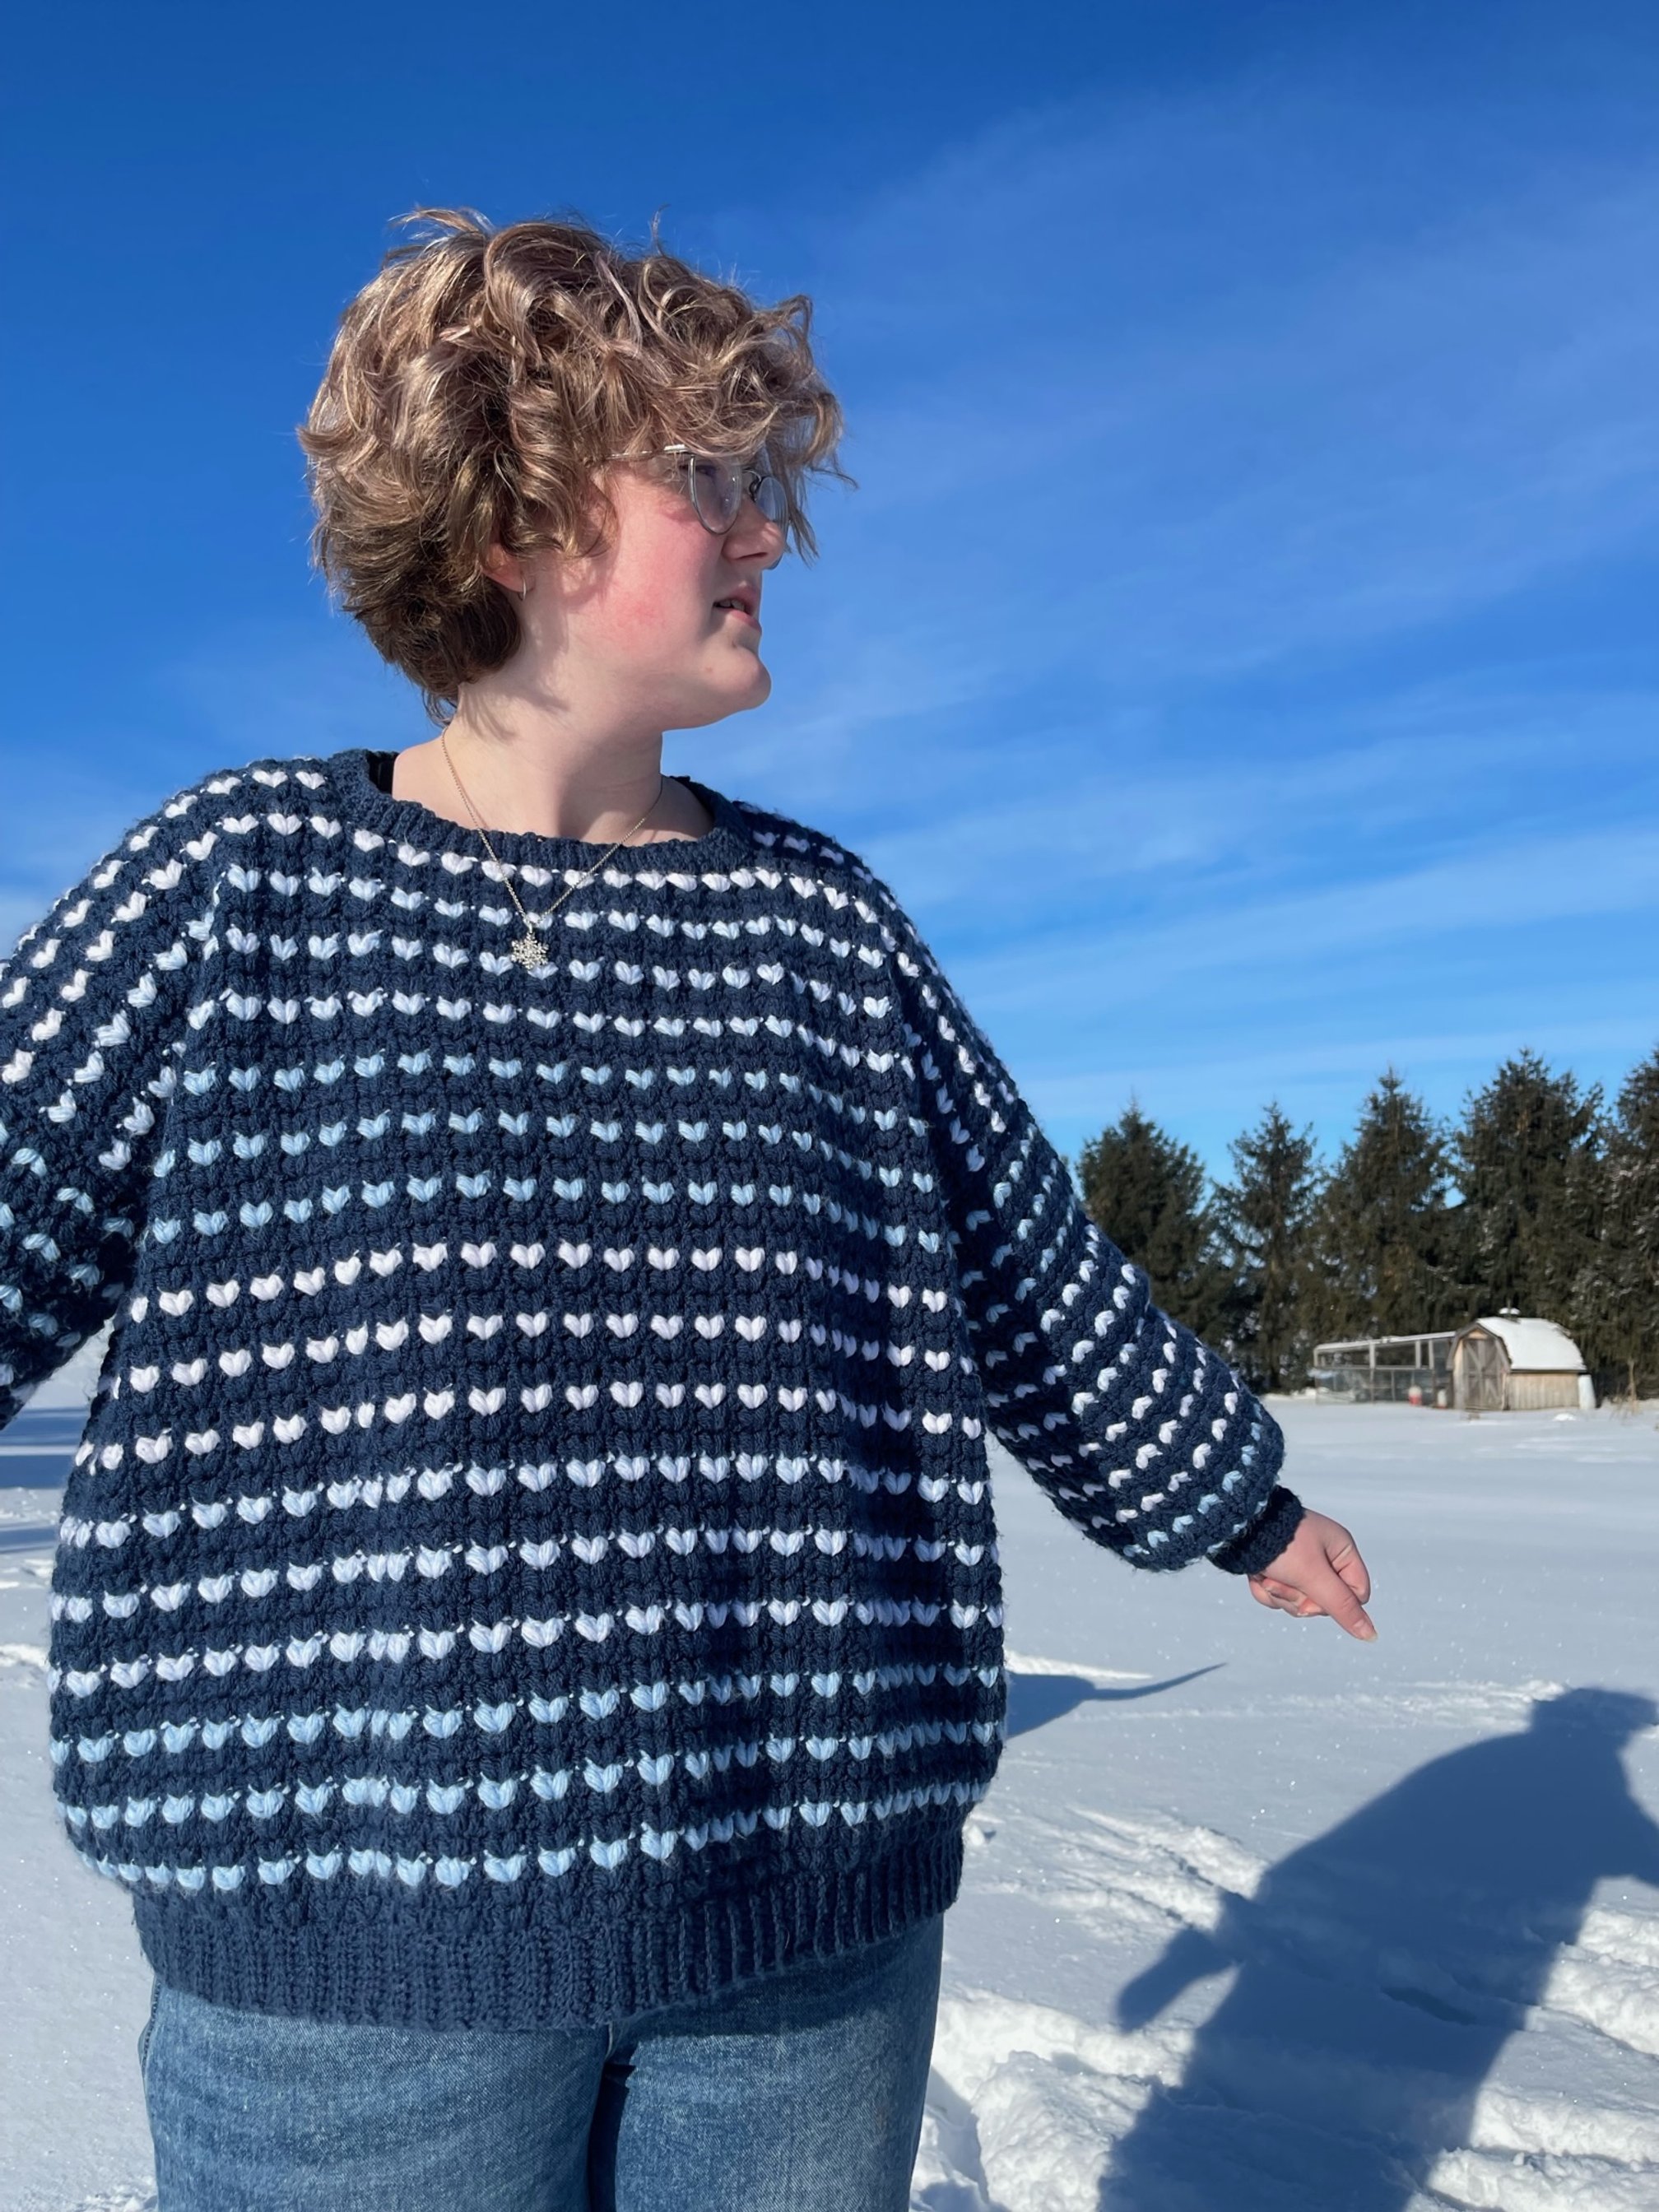
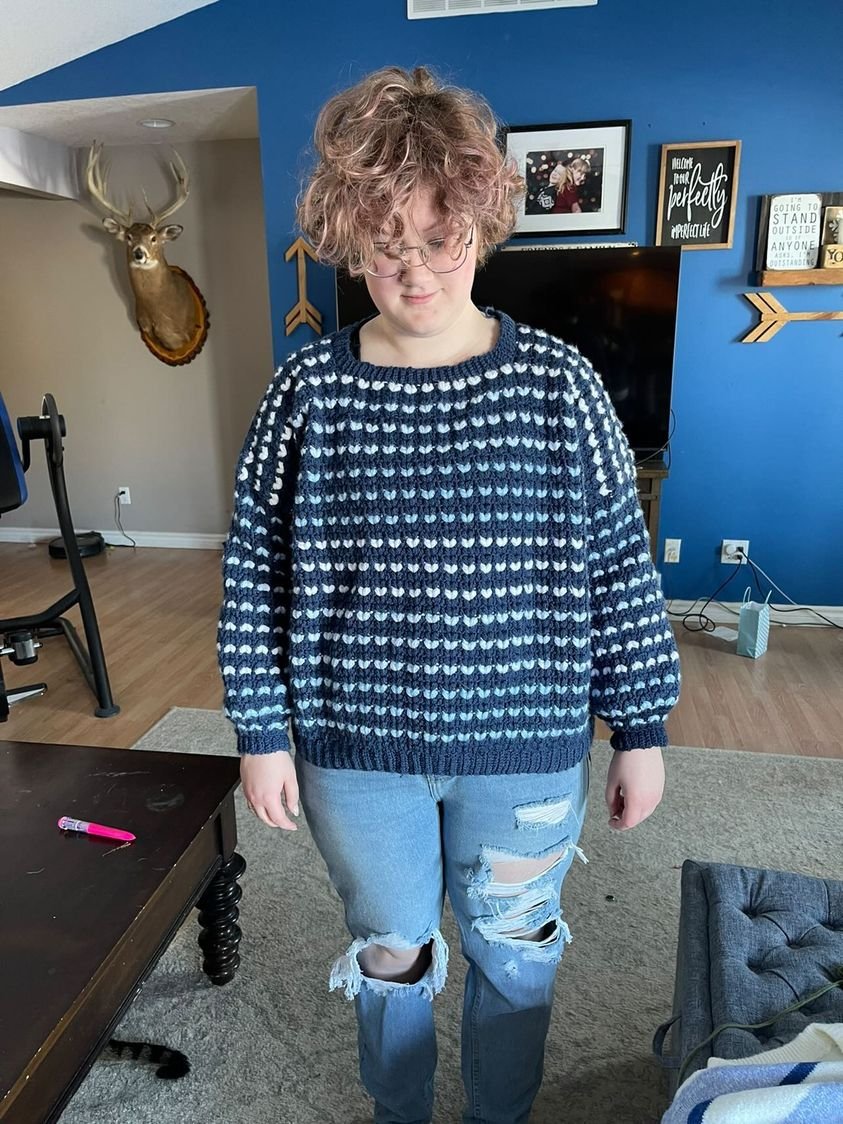
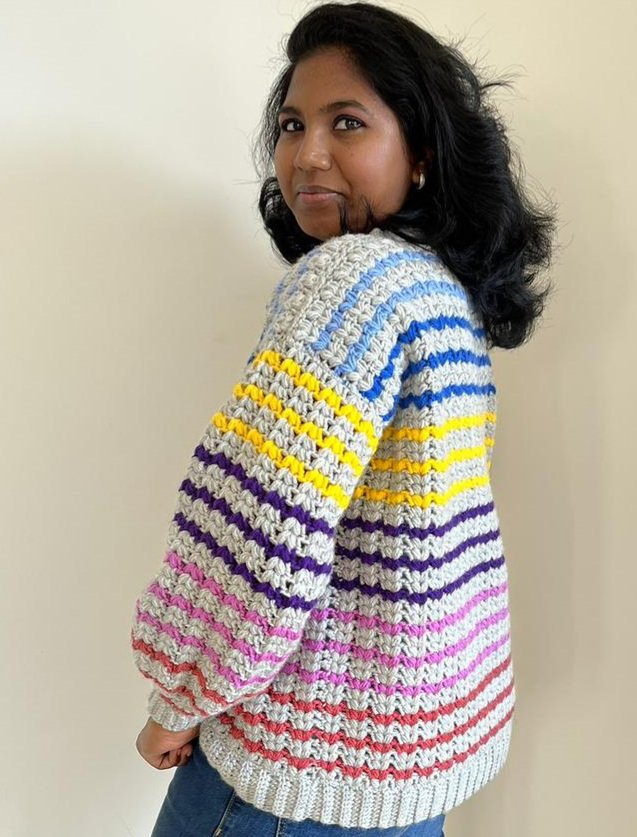
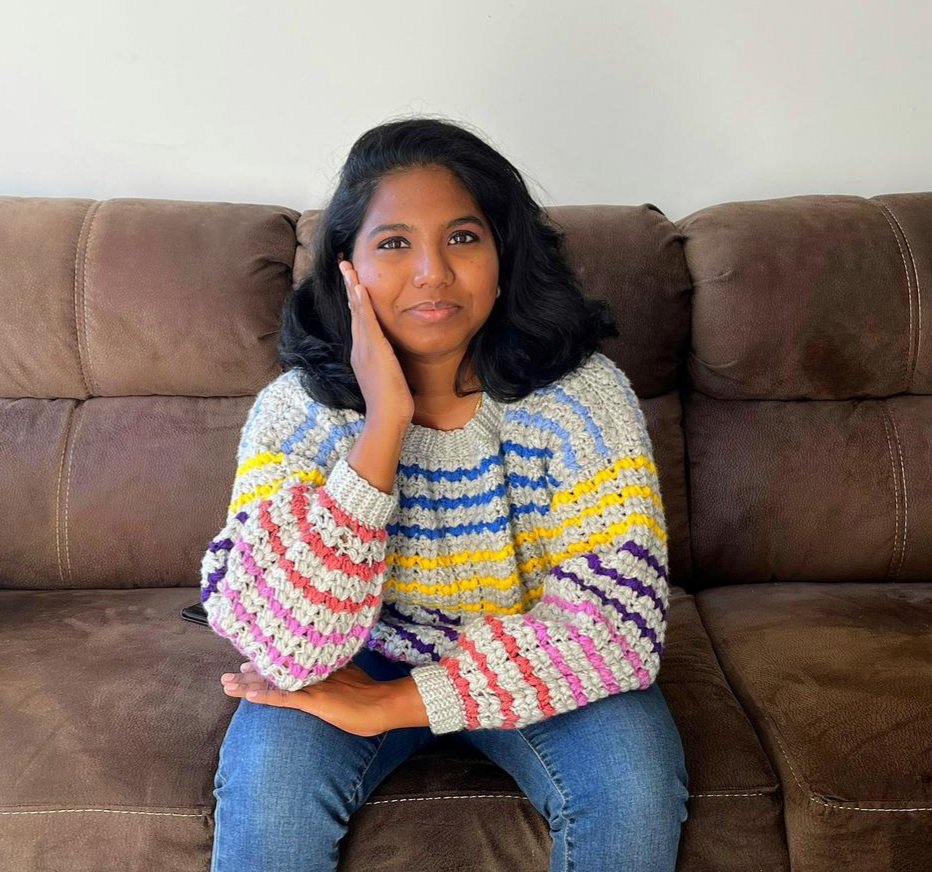
This is the Heart's Desire Sweater and it is just waiting for you to make it yours! There's so many different ways to create the striping on this sweater, it truly is up to your heart's desire!
The pattern is SIZE INCLUSIVE, with directions for sizes S - 5XL; bust measurements of 32" - 63". So there should be a size for you! The sweater is meant to be worn with 13"-16" of positive ease. But, you can always make a size down if you'd like a more form fitting sweater, or a size up if you want to go for that extra oversized fit.
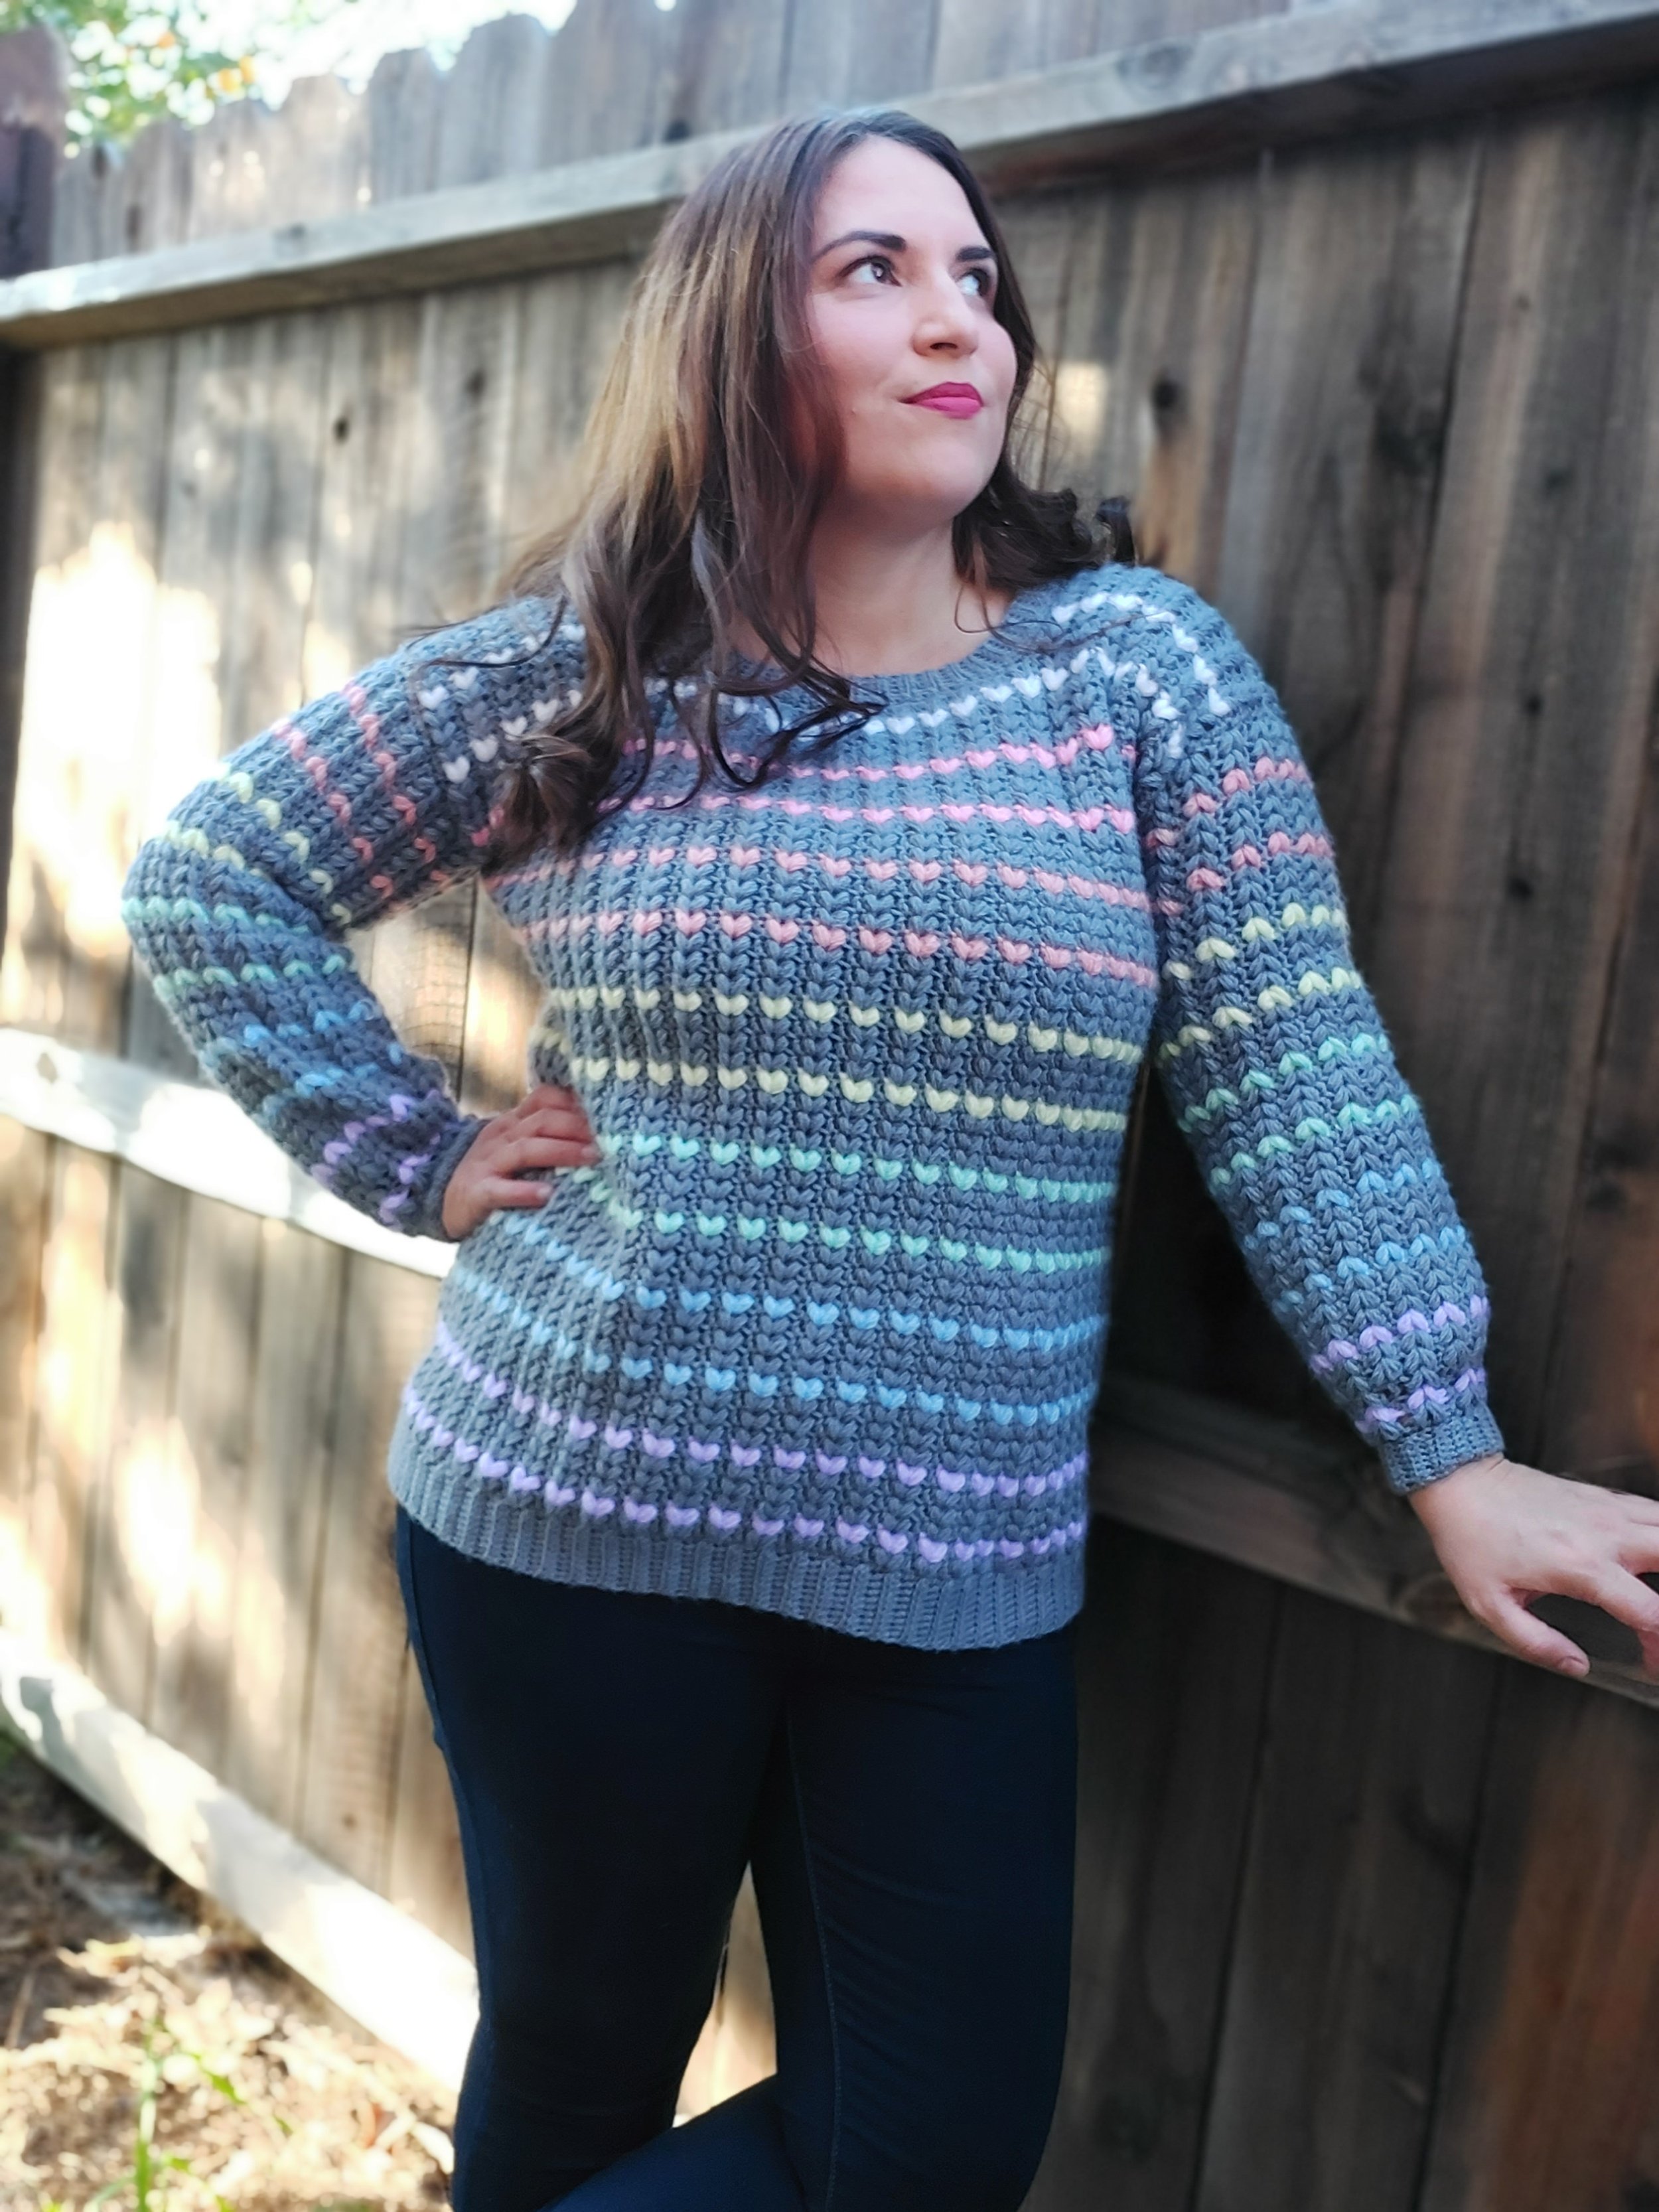
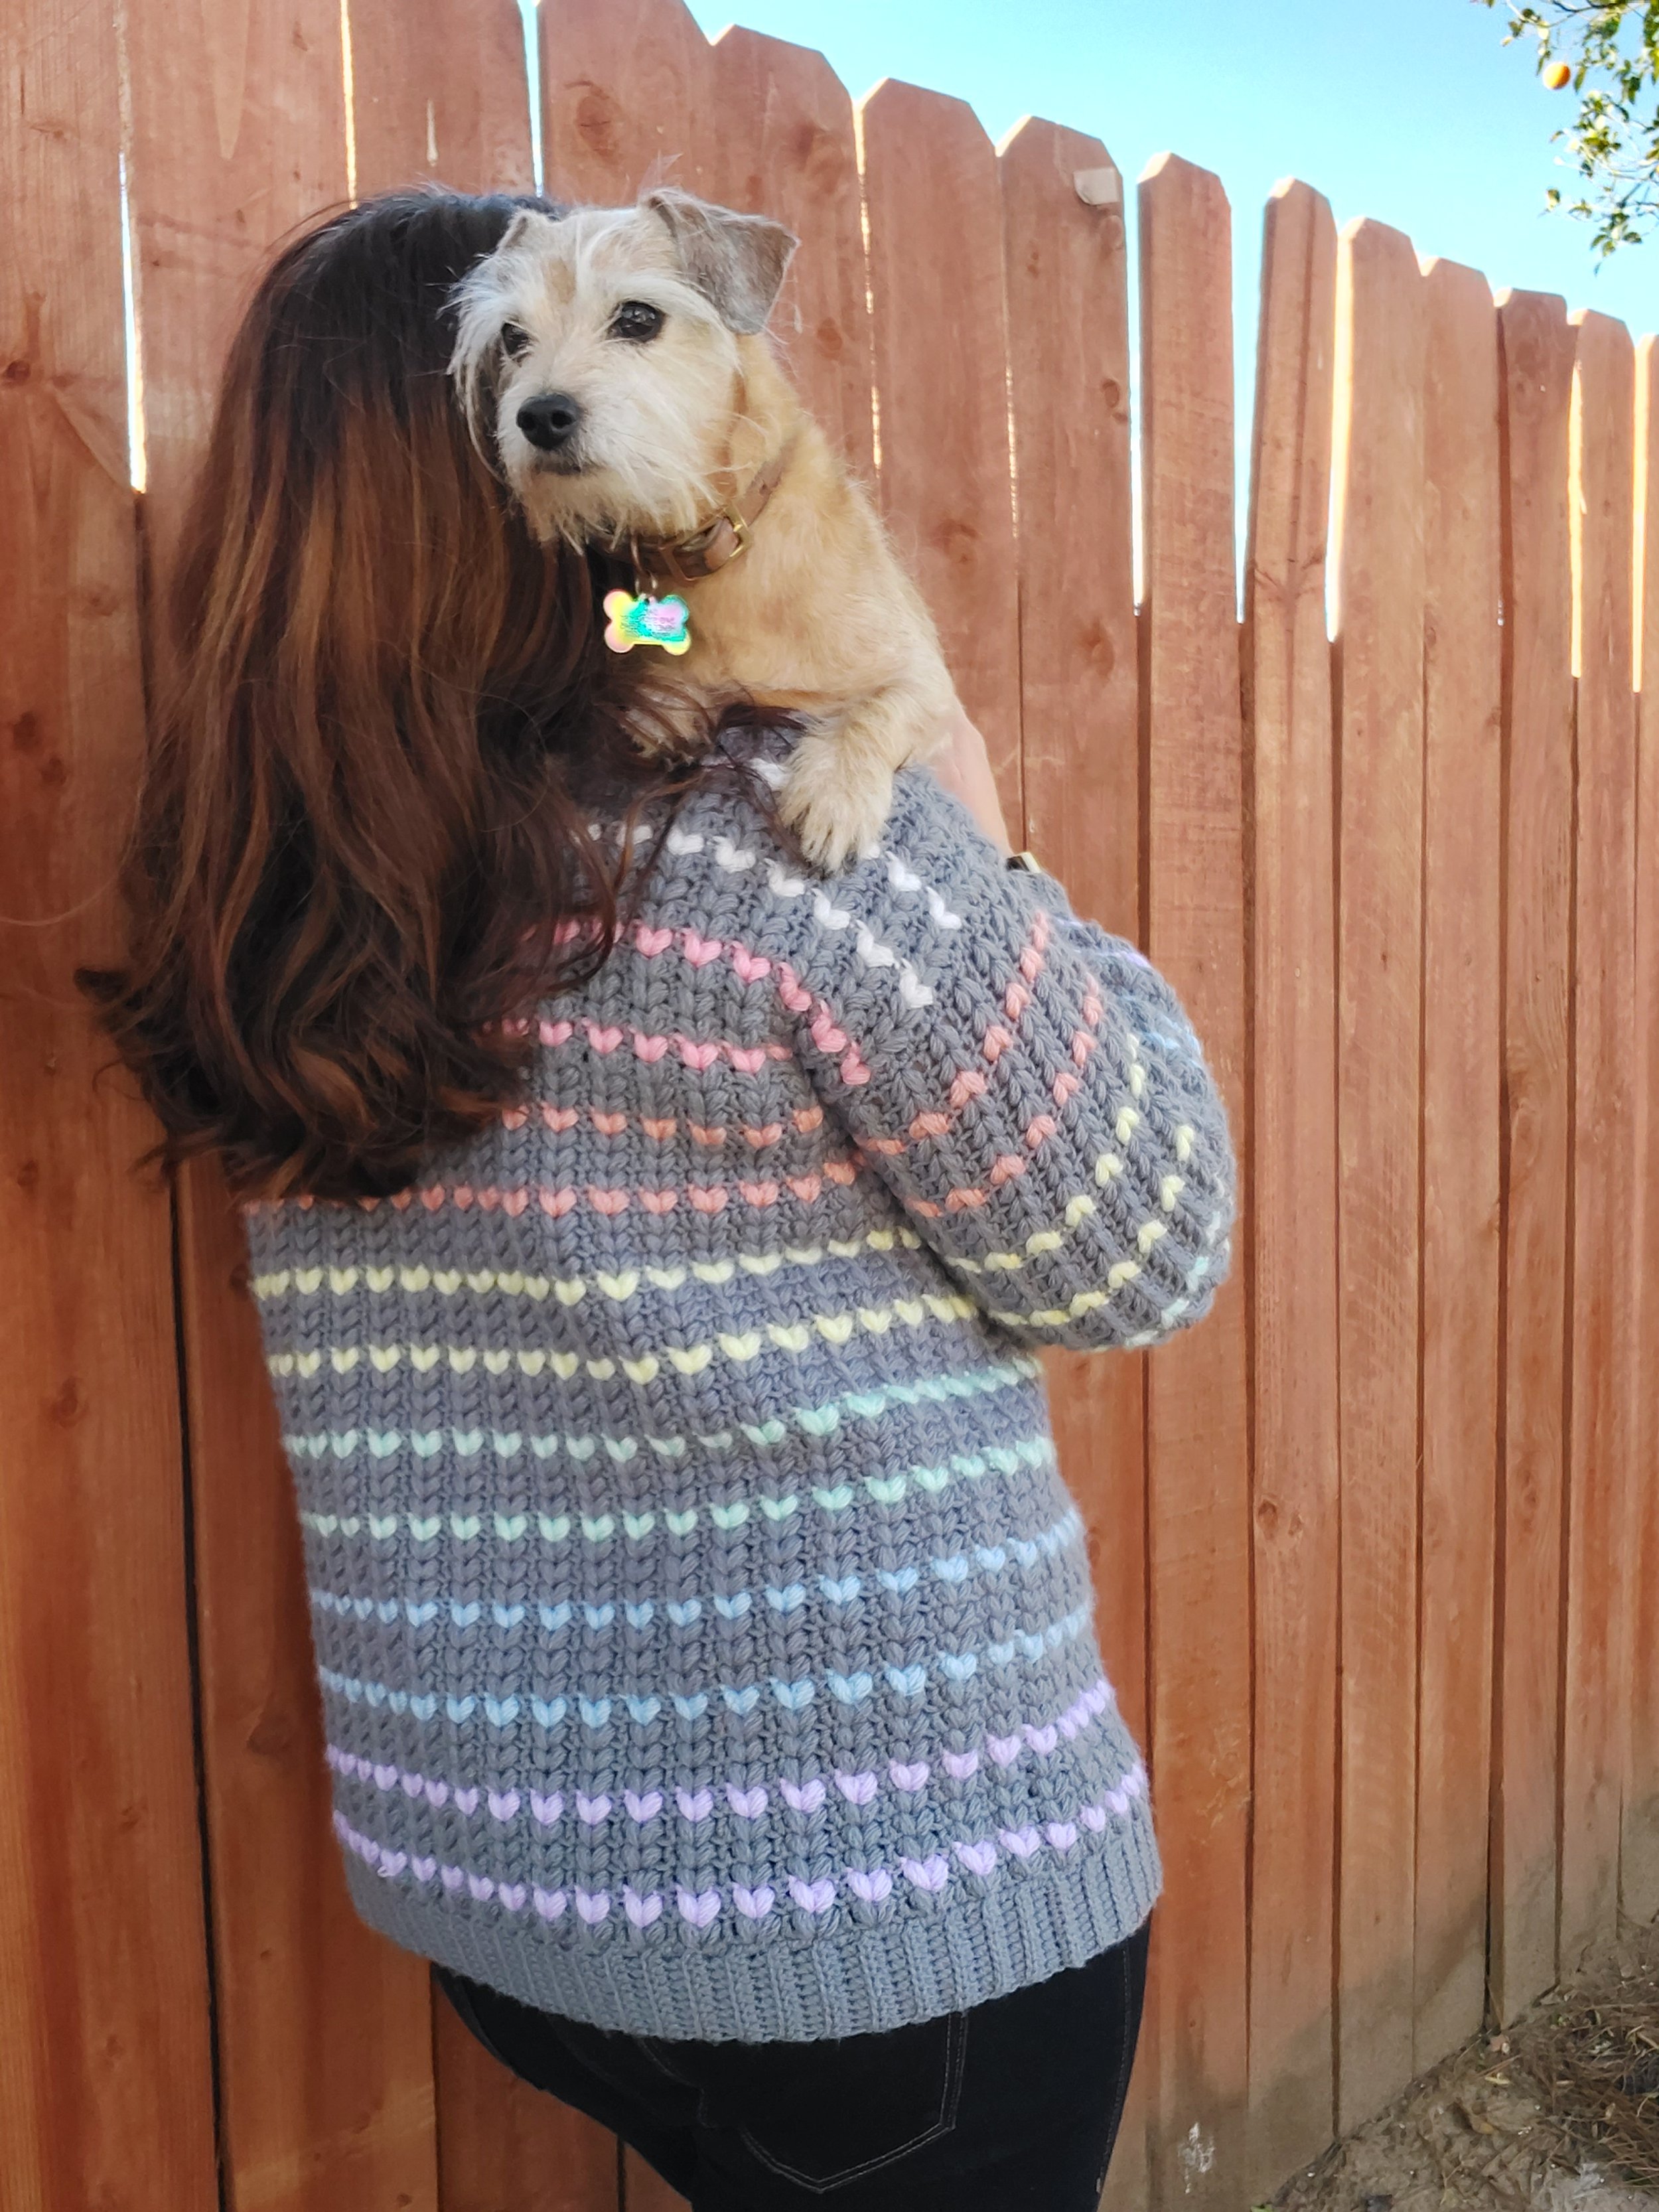
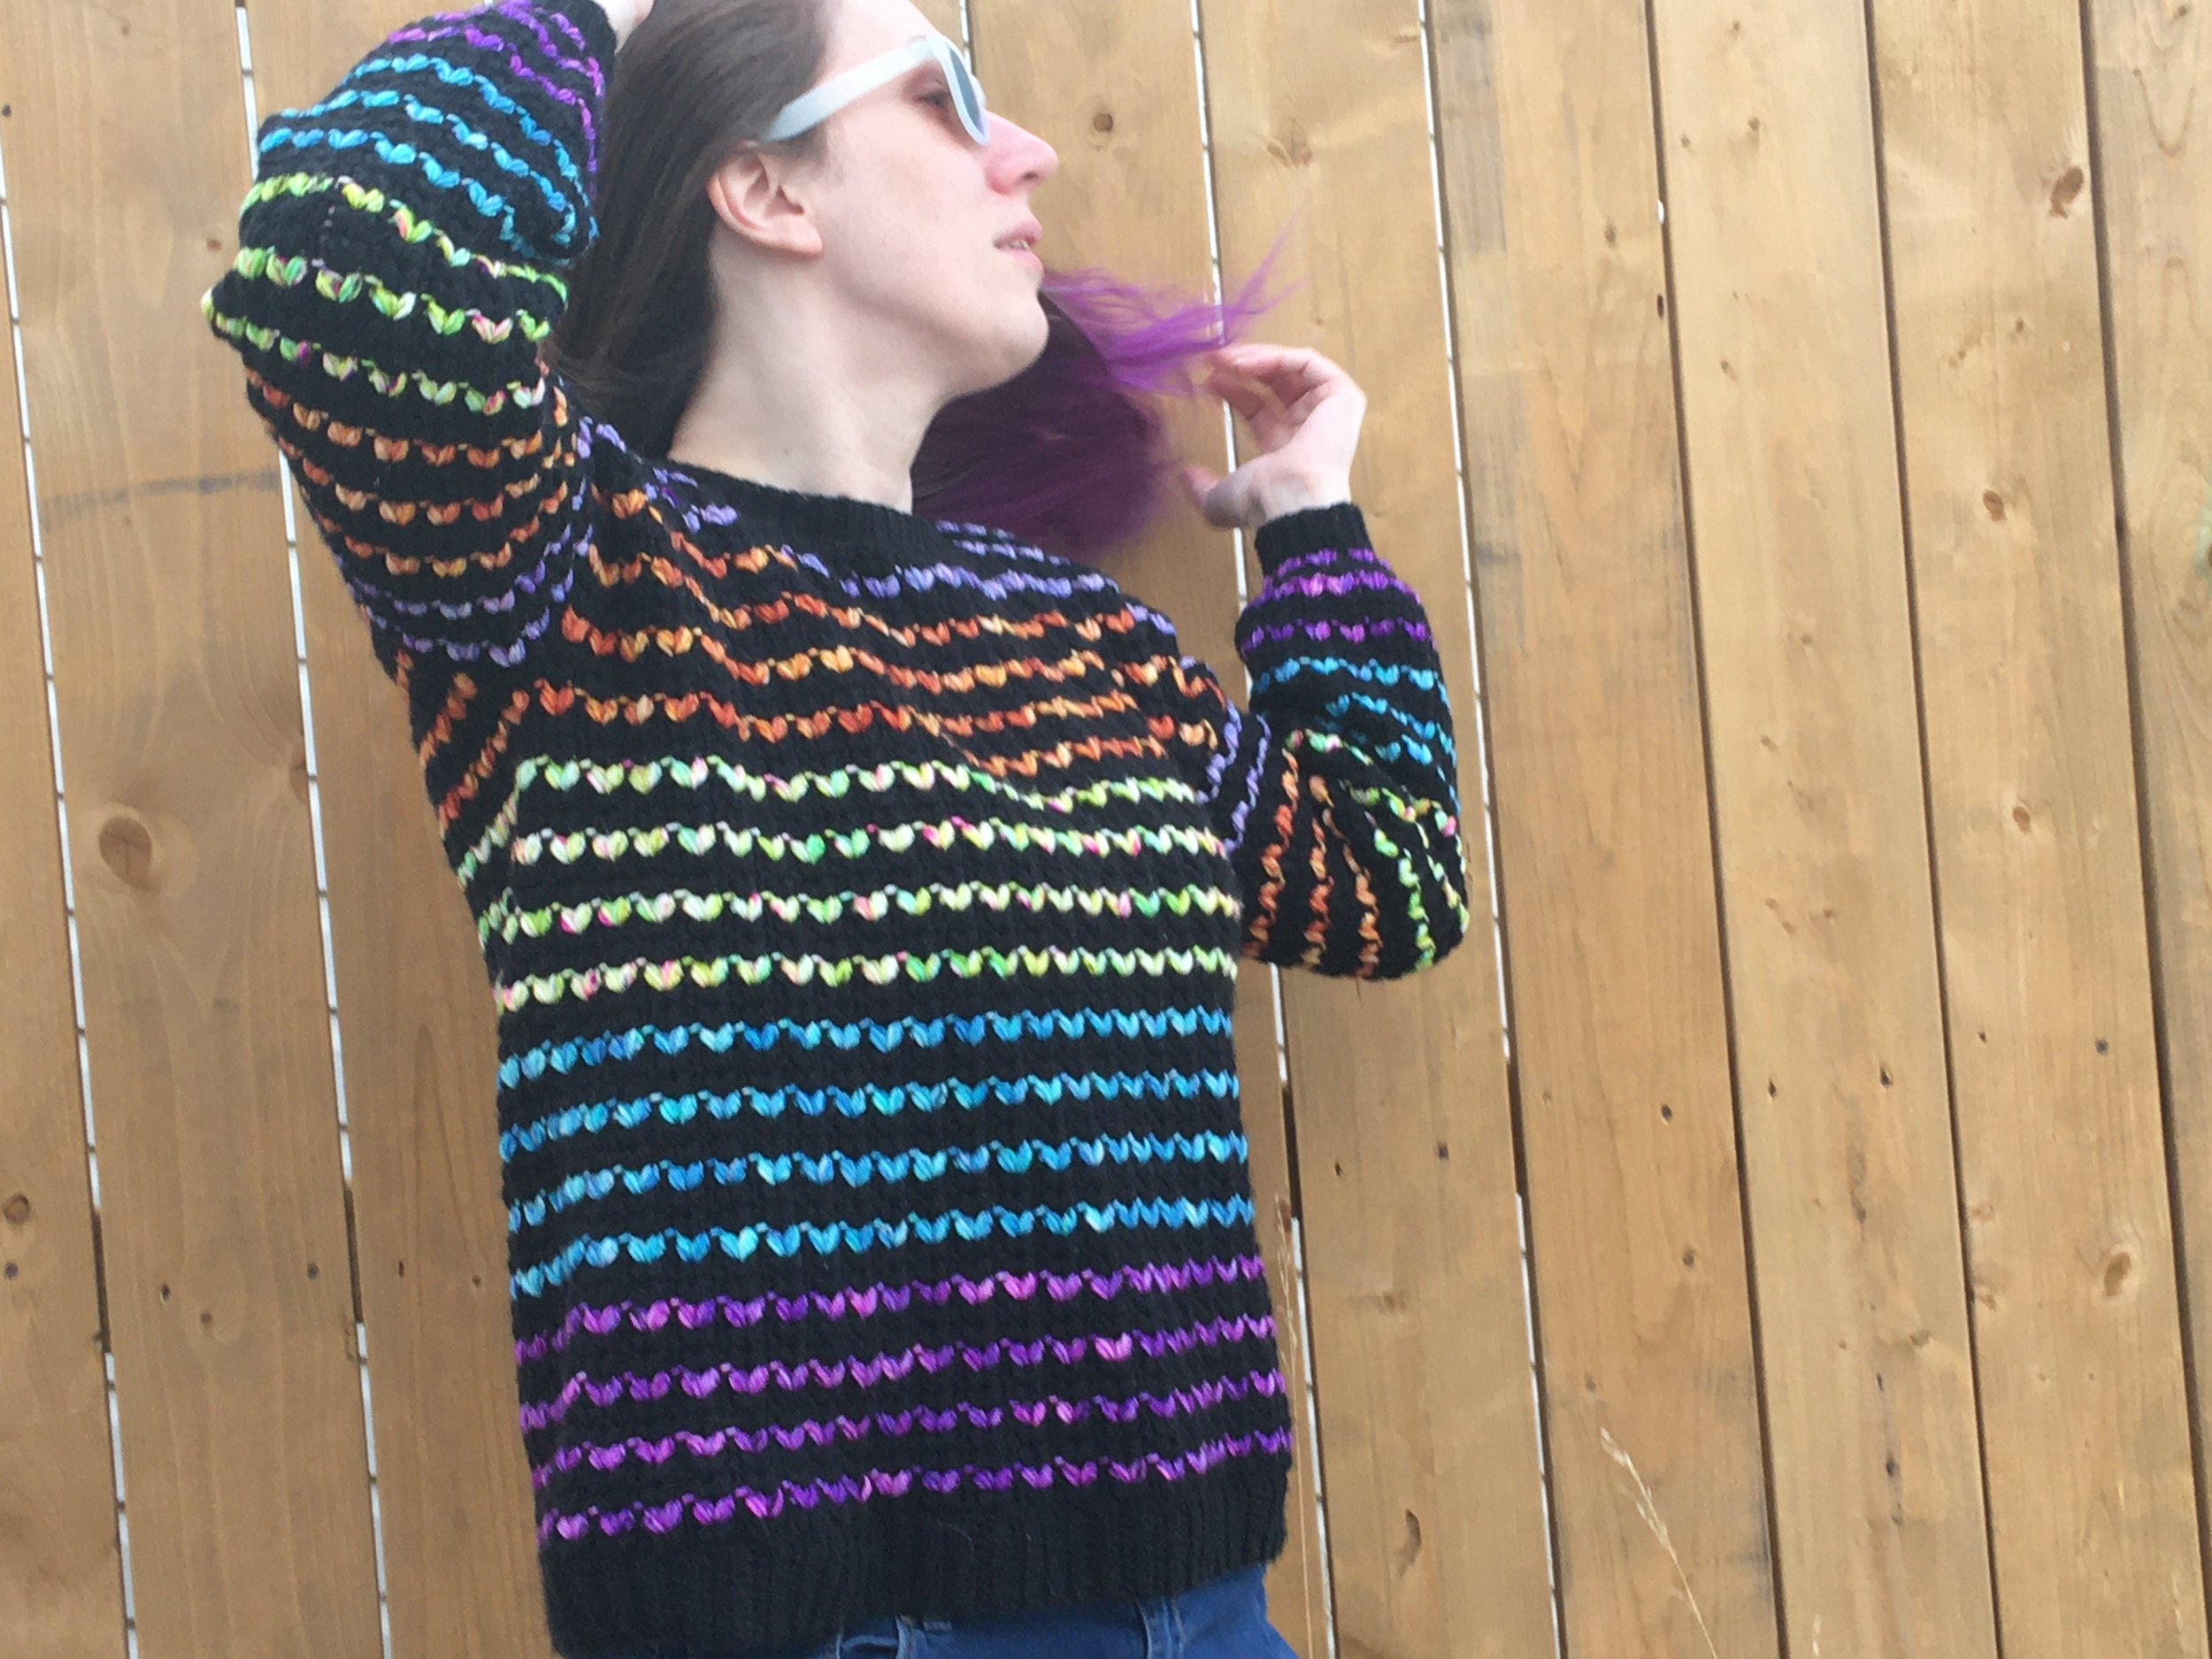
The sweater is created using DK weight 3 yarn and a 4mm hook. I found this yarn and hook combo the best for creating a nice oversized pull-over with out having too much bulk or weight. For the sample sweater, I used a combination of Lion Brand Mandala Yarn and Paintbox Yarns Simply DK. The Mandala created an awesome ombre effect on the sweater. However, you can use a rainbow of solids, just 2 colors, or make the whole sweater only one solid color. It's really up to you.
Make it however your heart desires!
I LOVE TO SEE WHAT YOU CREATE!
Please share your creations with the community on social media tagging @ravinsekaidesigns and hashtag #heartsdesiresweater
I can’t wait to see the beautiful things you come up with!
FOLLOW ME ON SOCIAL MEDIA
Facebook: Ravin Sekai Designs
Ravelry: RavinSekai
Instagram: @ravinsekaidesigns
Pinterest: Ravin Sekai Designs
Patreon: Ravin Sekai Designs

WHAT YOU NEED:
Hook Size: 4mm hook or size needed to obtain gauge
Yarn: Light/DK weight 3 yarn. Sample crocheted in Paintbox Yarns Simply DK for MC and Lion Brand Mandala for CC. Approx 2200(2410, 2667, 2738, 2968, 3281, 3596, 3847, 4105) yards total.
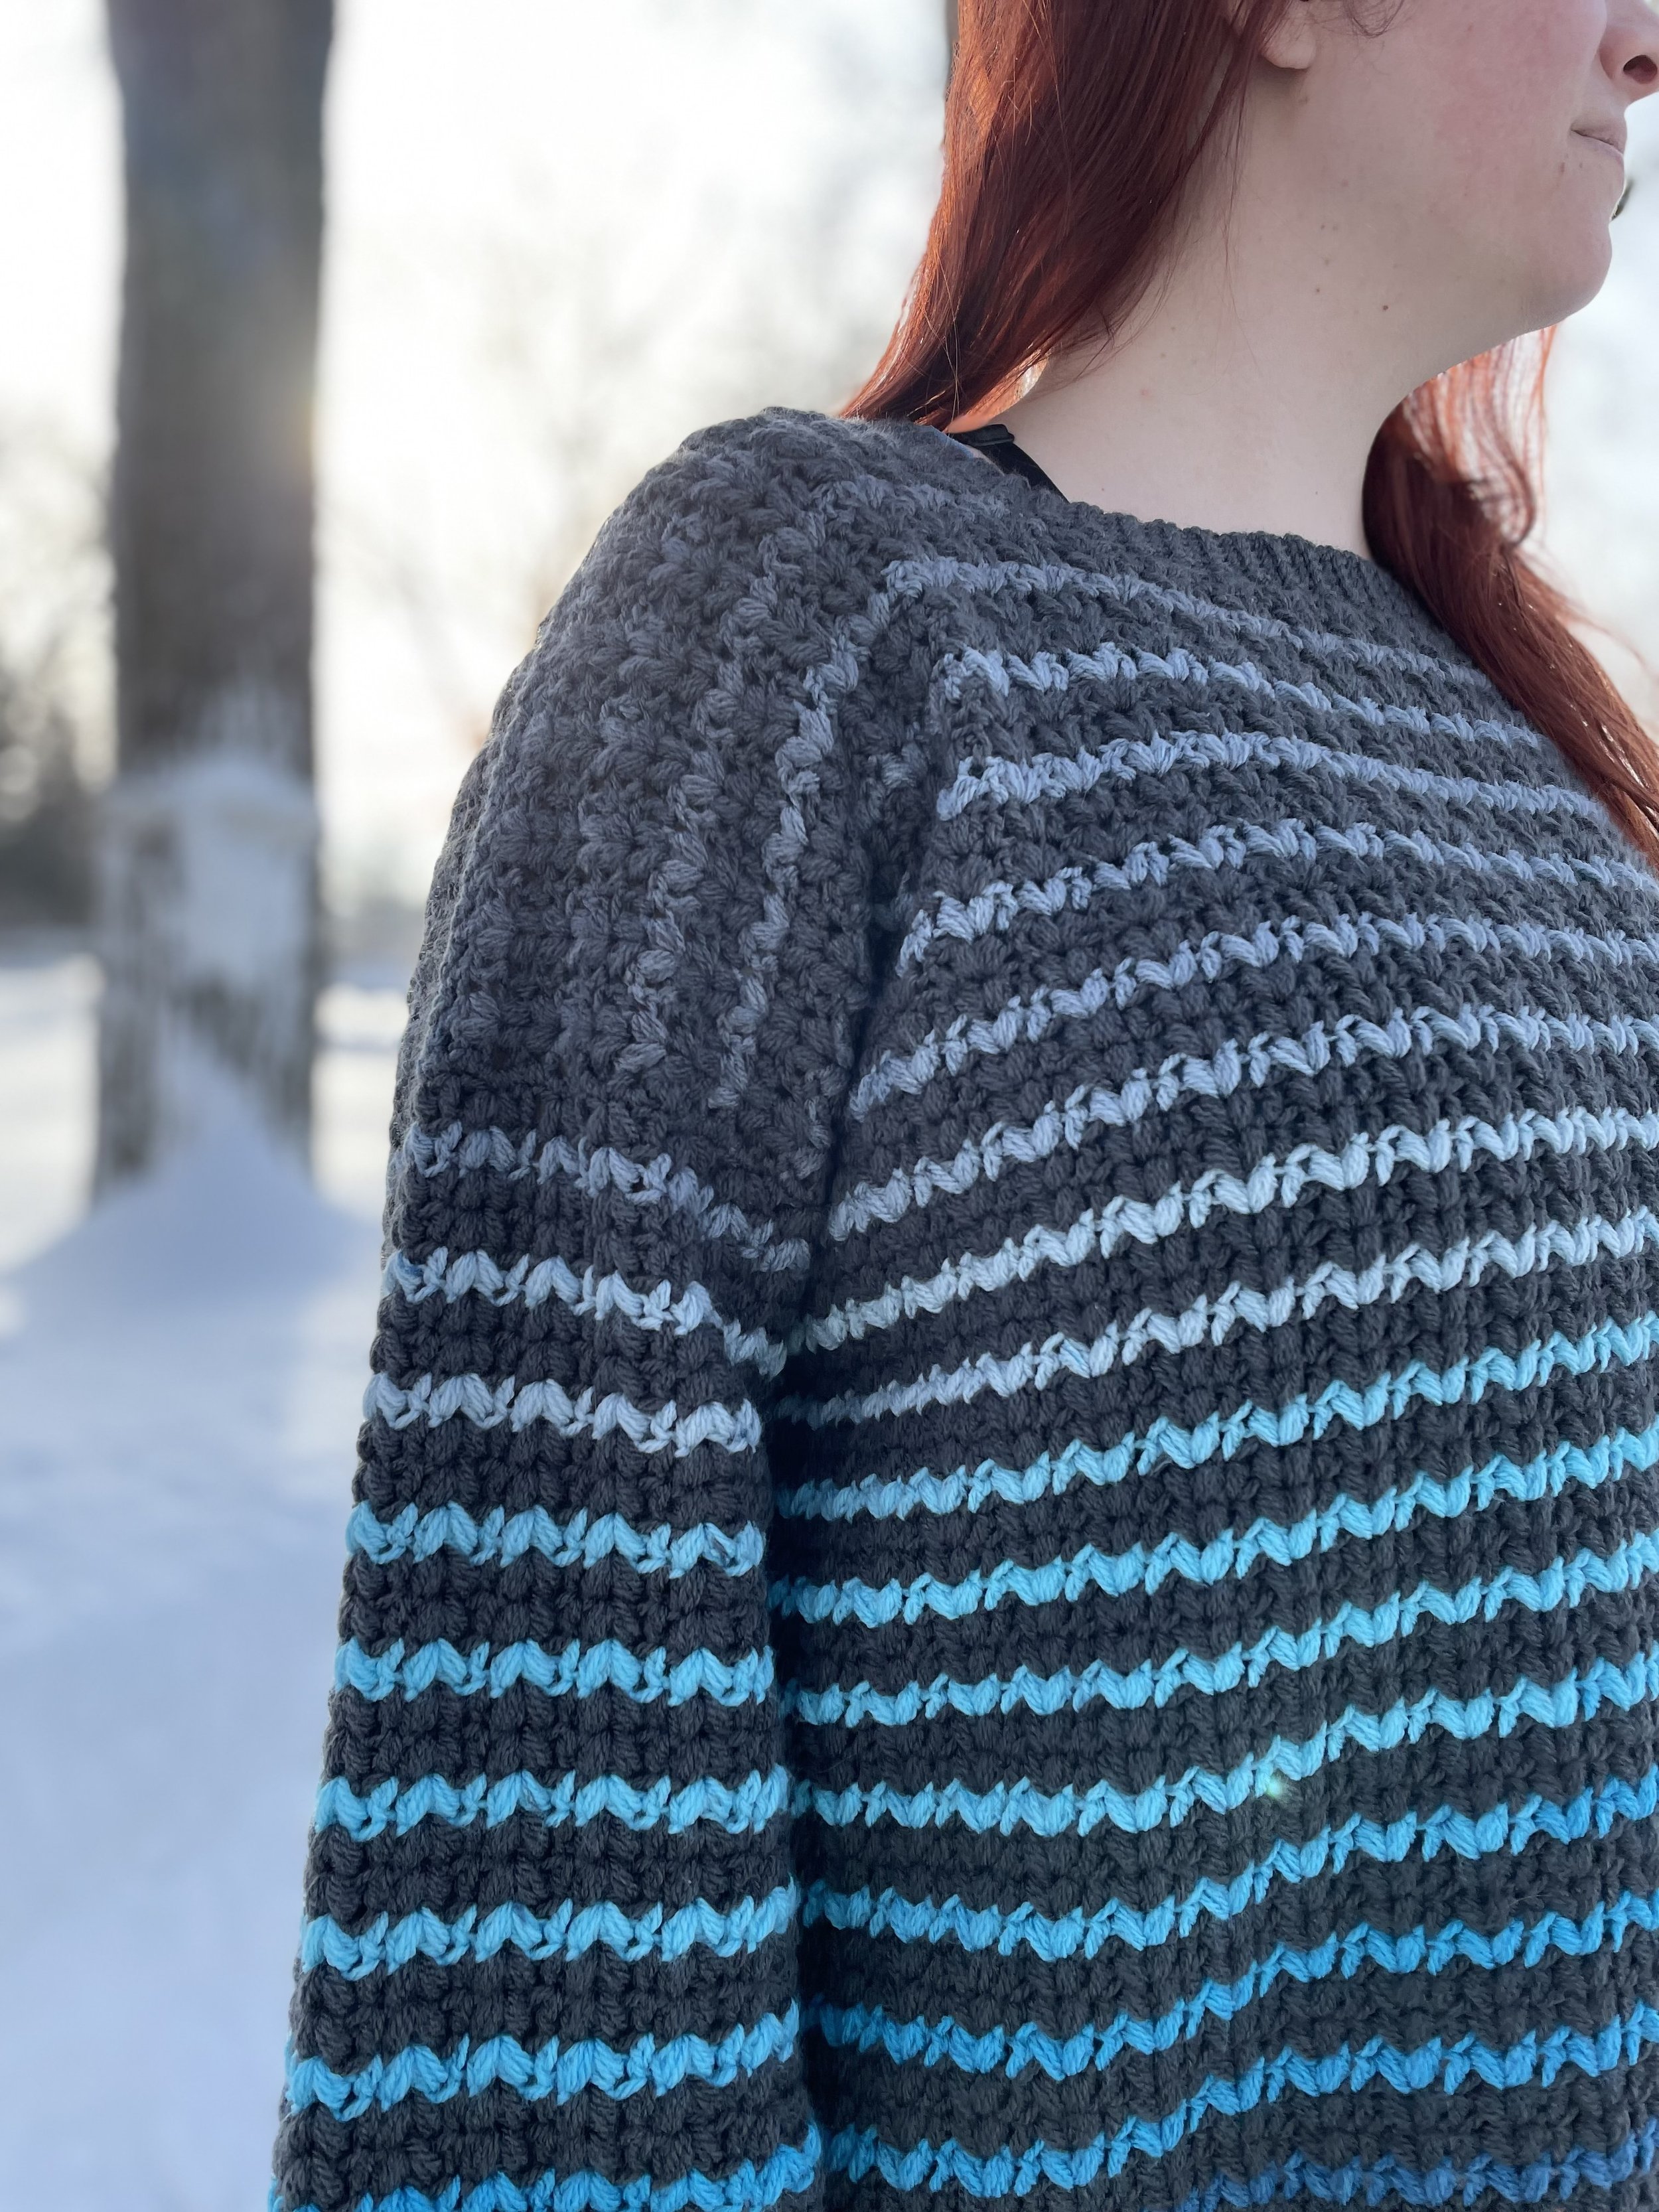
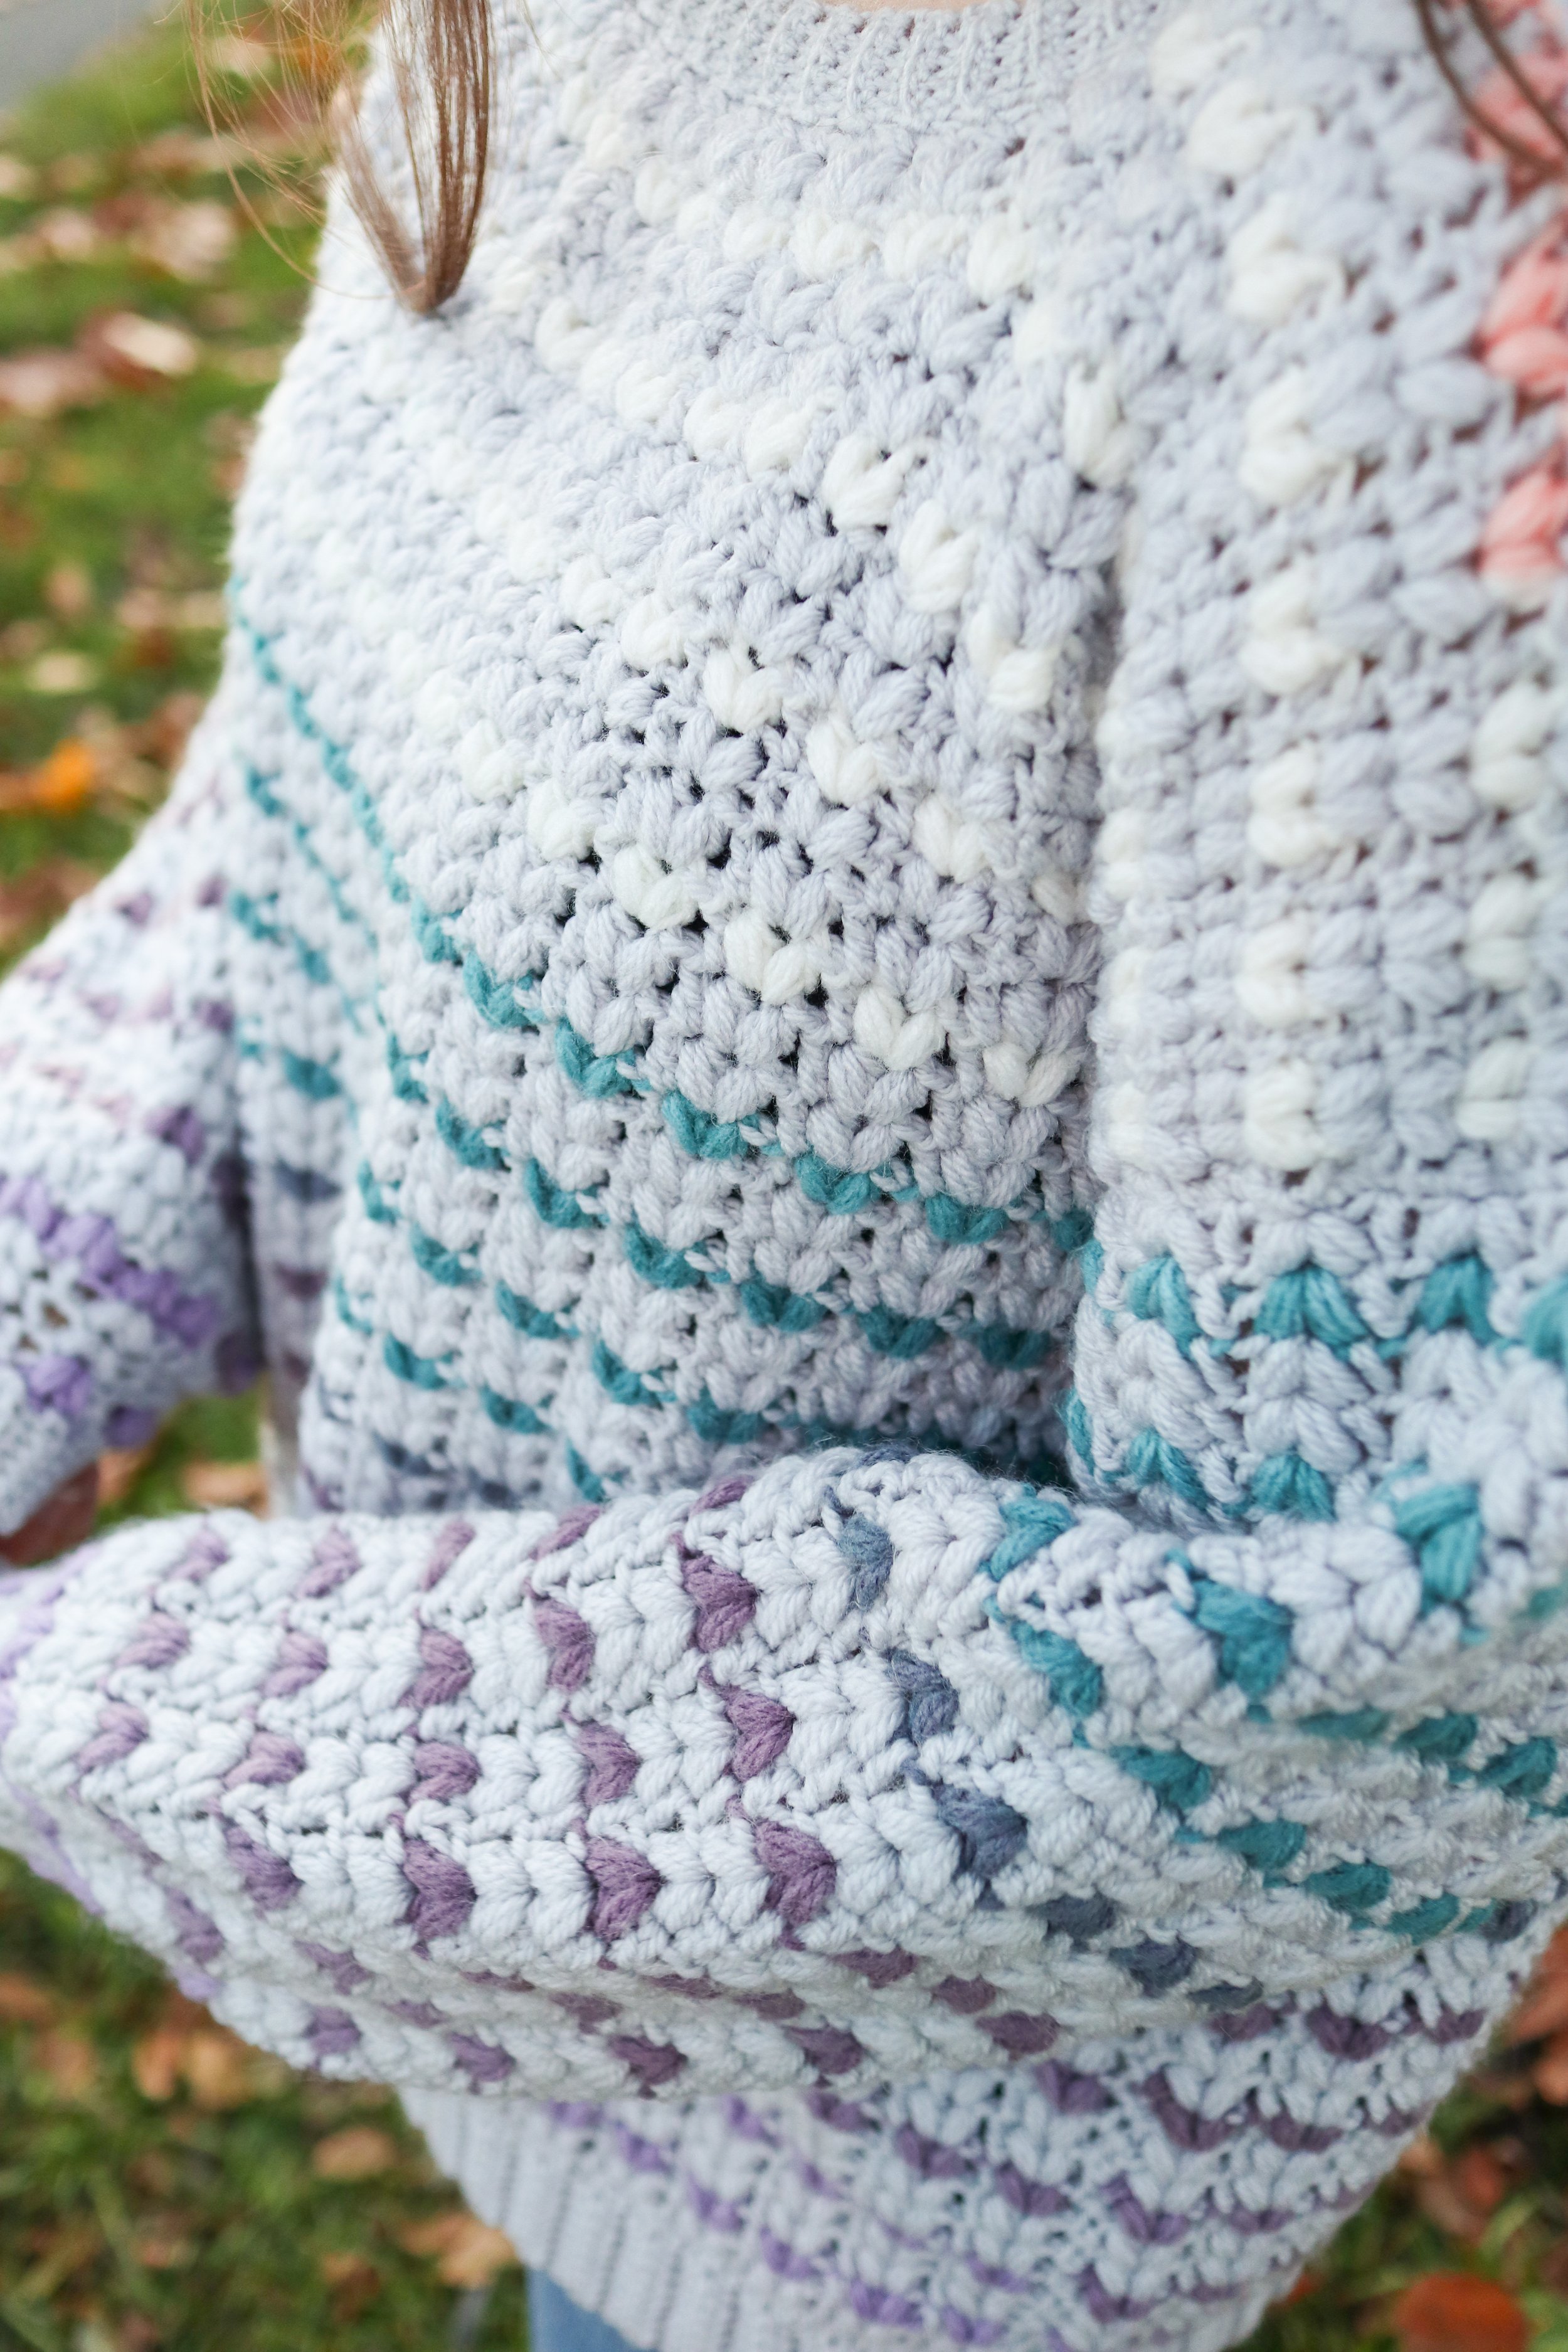
Gauge: 18st/9.75 rows= 4” in heart pattern stitch (gauge is after blocking). See Note #1 on pg. 4
Suggested Bust Measurements: XS: 28”-31”, S: 32”-35”, M: 36”-39”, L: 40”-43”, XL: 44”-47”, 2XL: 48”-51”, 3XL: 52”-55”, 4XL: 56”-59”, 5XL: 60”-63”
Finished Garment Sizing: Size is after blocking. Worn with 13” - 16” of positive ease. Length: 23(23, 24.25, 24.75, 25, 25.5, 26.5, 26.75, 27.25)” x Bust: 42(48, 52, 56, 59.5, 65, 69, 72.75, 76.5)”
Model: model is 4’11” tall, 36” bust, 28” waist, 39” hips wearing size small, with 12” positive ease in bust.

ABBREVIATIONS:
Abbreviations in US terms
Ch: chain
RS: right side, the side of your crochet on the outside that everyone will see.
WS: wrong side, the side of your crochet on the inside that no one will see.
MC: main color (background, I used light grey)
CC: contrast color (colored hearts, I used a variegated yarn)
St: stitch
Sl st: slip stitch
Sc: single crochet
Scblo: single crochet in the back loop only
Hdc: half double crochet
Hdcblo: half double crochet in the back loop only
Dc: double crochet
Rep: repeat
Sk: skip
FO: fasten off
Pf: Puff Stitch. YO, insert hook into st, YO, pull through just the st, YO, insert hook into same st, YO, pull through just the st, YO, insert hook into same st, YO, pull through just the st, YO, pull through all loops. This makes a 7 loop puff.
Csdc: chainless starting double crochet. Pull up loop on hook approx the same height as your regular dc, holding elongated loop on hook with your finger twist the hook counterclockwise down towards you, wrapping the lengthened loop around your hook (should look like a yarn over), insert hook into loop and finish stitch how you would a normal dc. Here is a video to help you if this is confusing. https://www.youtube.com/watch?v=XFK1tTRBugQ
Notes:
Gauge Swatch: The gauge is worked in the “heart pattern stitch.” Because most of the sweater is worked in the round, you should make your swatch in the round.
- Ch 40 sts, join to crochet in the round, then follow the directions for Rounds 2-3 on pg. 5 with your chosen yarn until your swatch measures over 4”. Then block it for the most accurate measurements of gauge. Remember, each heart = 3 sts (2 puff sts and 1 ch1) and the dc counts as 1 st. So, each repeat is 4 sts.
Gauge For Sweater: Make sure you check your gauge as you work on your sweater. Some crocheters might accidentally loosen their tension as they crochet which can drastically change the size of your sweater. As this garment is already oversized, you don’t want to make it even more so.
Pattern is written as follows: XS(S, M, L, XL, 2XL, 3XL, 4XL, 5XL)
Fit: The sweater pattern is written for 13” - 16” of positive ease. However, there is nothing stopping you from choosing a smaller size for a more form fitting top. For a more form fitting top, choose the size that has measurements that more closely match your actual bust.
Top is crocheted bottom up, in the round until you separate front and back for the sleeves. Then, the shoulders are seamed and the sleeves are crocheted directly onto the body in the round.
For my top, I used a chainless starting dc (csdc) to start each row because it makes a seamless join. After the first row, I will no longer be mentioning this and it will be written as simply dc. If you would rather ch3, that is ok too. If you ch3 to start, be aware that your ch3 will count as 1dc.
Make sure you hold your non-working yarn in back on the RS rows and in front on the WS rows when you separate for the arm holes to prevent carried yarn from showing on the front.
The length of the body of the sweater and also the sleeves are adjustable. You can make either longer by adding more rounds where it’s mentioned in the pattern.
The cuffs for the sleeves and the neckline are made with scblo ribbing. A good tutorial for this method of adding ribbing on the end of a project can be found on Toni from TL Yarn Crafts’ Youtube channel. https://www.youtube.com/watch?v=xsEPLeUSwmg&t=176s
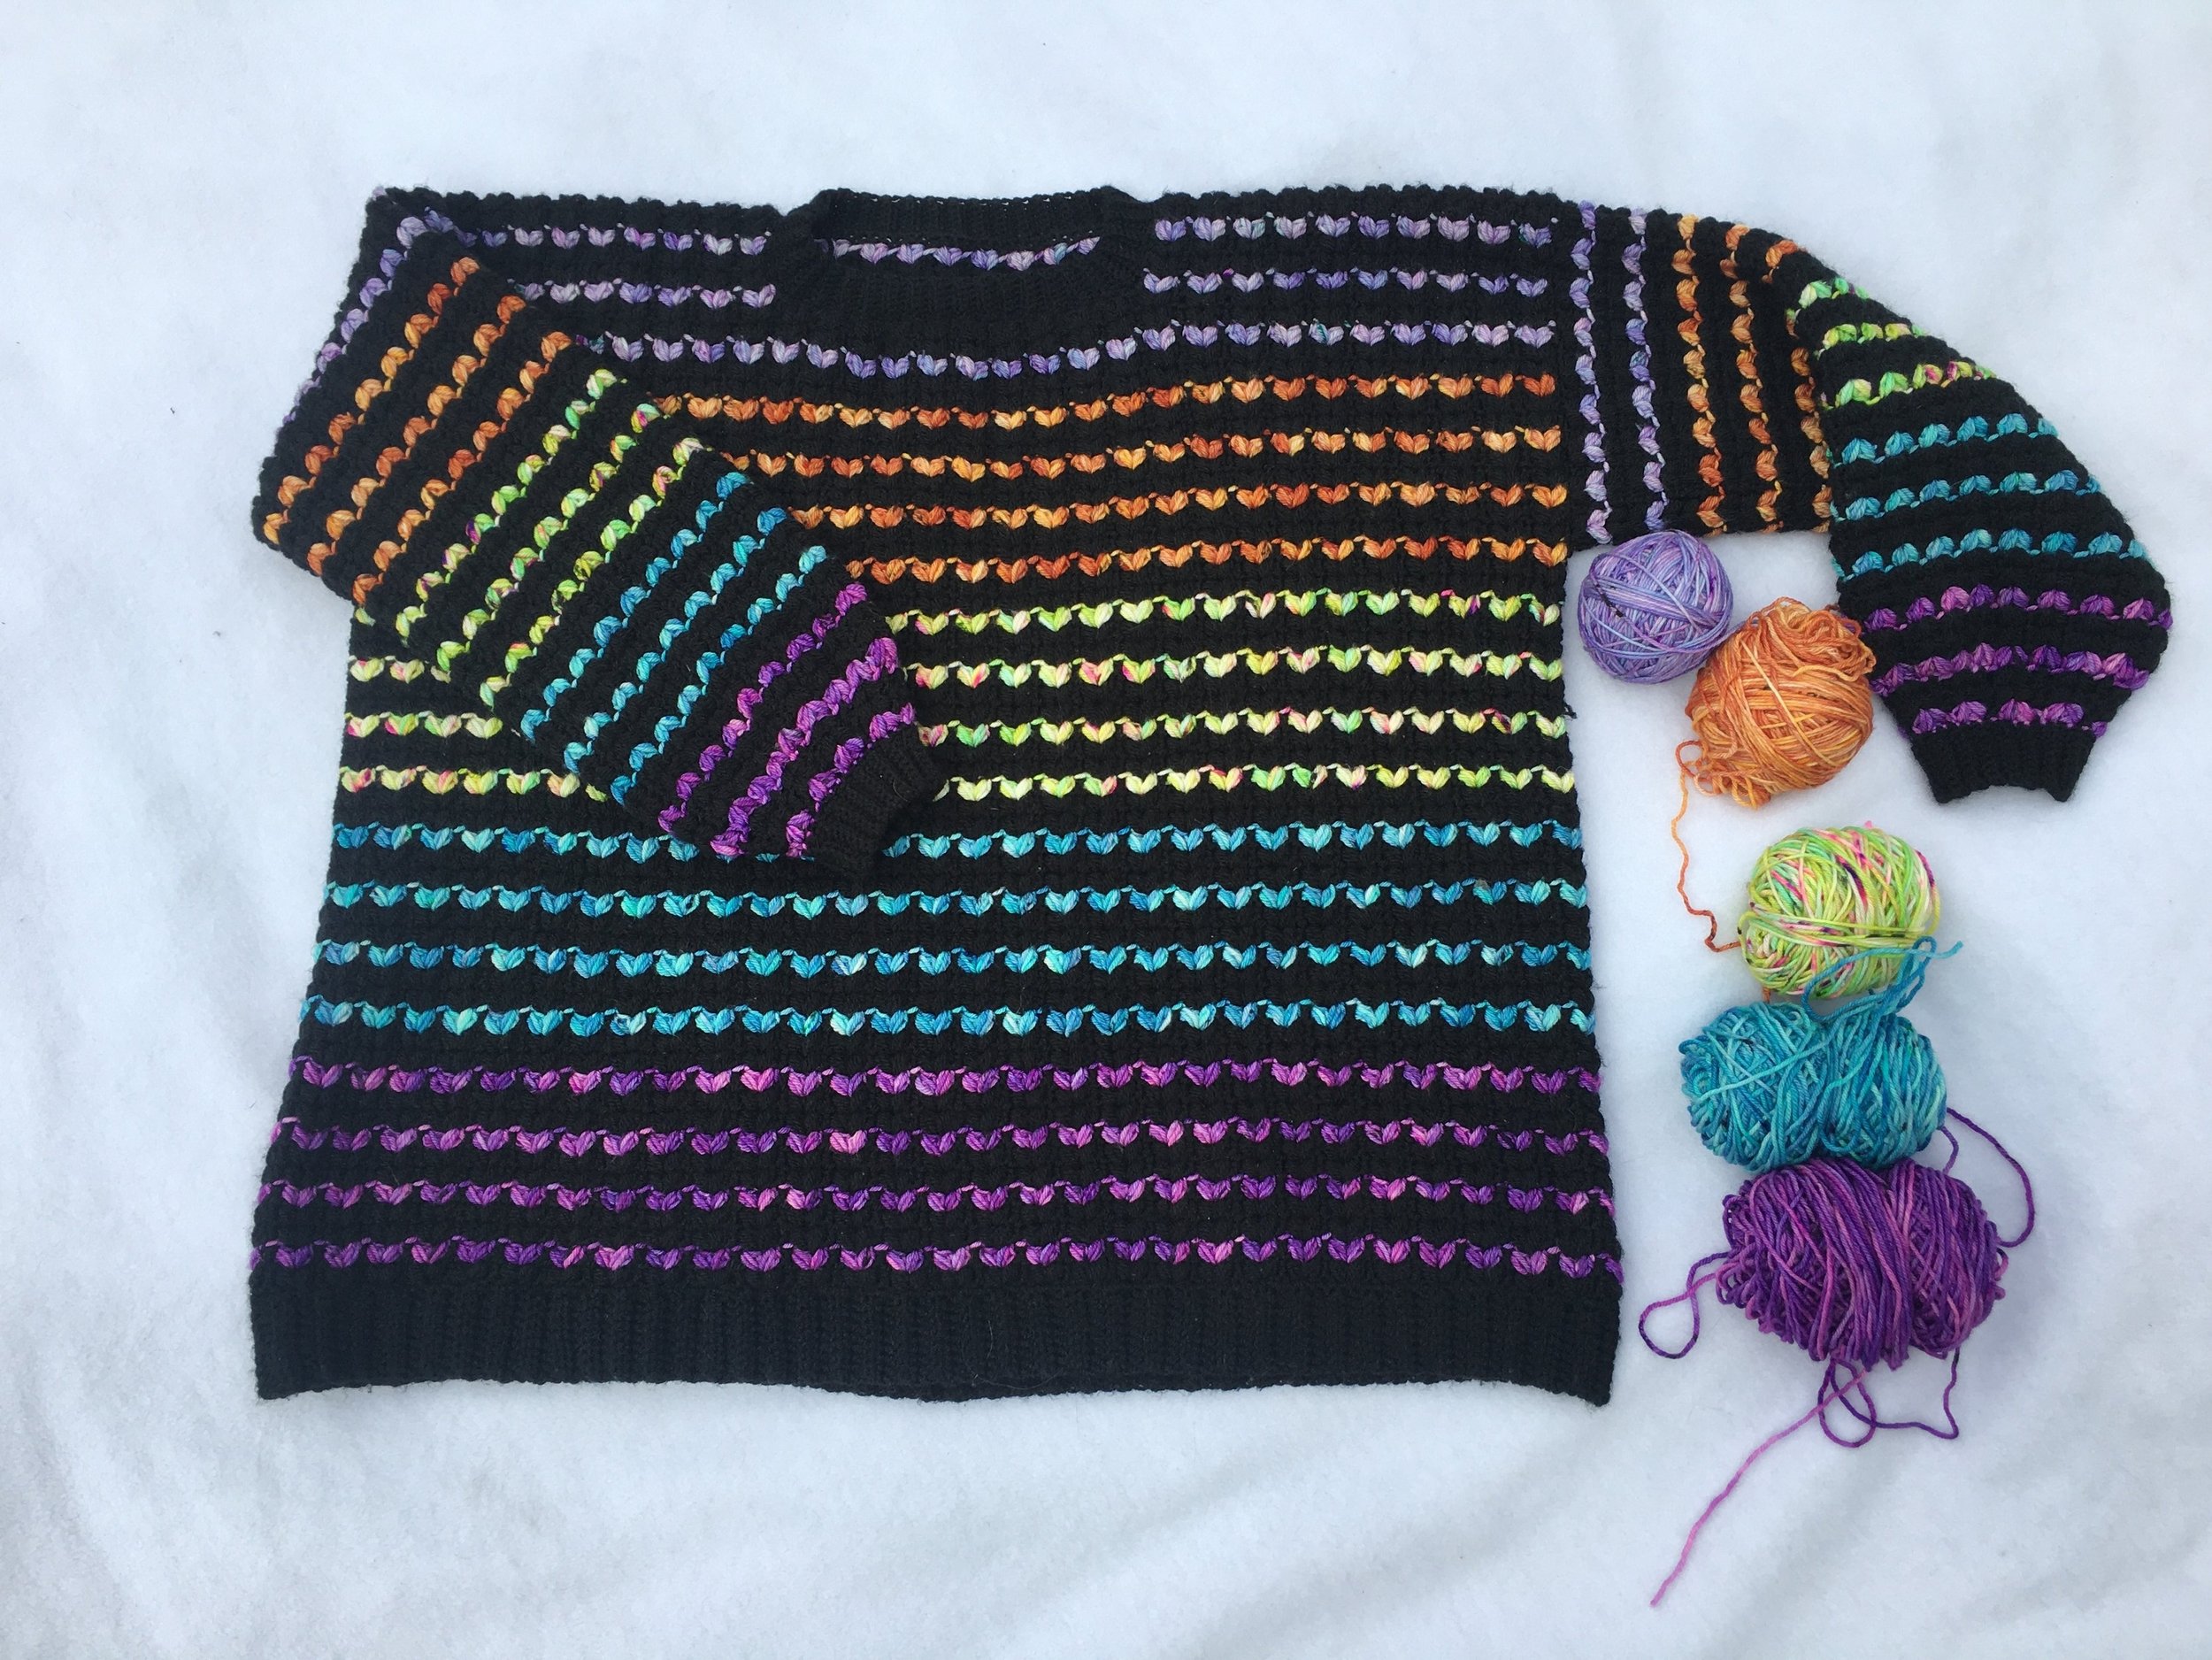
Yarn: I used a solid color yarn for my MC and a variegated yarn for my CC. In order to line up my colors on the sleeves, I needed to separate out each color from the skein and create separate cakes. That way I could line up the rows on the sleeves with the rows on the body. Trying the sweater on after seaming the shoulders will tell you the approximate row that the start of the sleeves matches up to. Then, you can decide which color you should start on your sleeves. This is not strictly necessary unless you want the sleeves and body to have the same color shifting like the sample sweater.

Save It For Later
Pin to Pinterest

BOTTOM BAND
With MC Ch 10
Row 1: hdc in 2nd st from hook, hdc in each ch across (9 hdc). Turn.
Row 2: ch1, hdcblo of each hdc below. (9 hdc). Turn.
Row 3 - 128(138, 148, 160, 171, 186, 197, 208, 218): rep. Row 2
Ch1, sc ends of bottom band together so that you can begin crocheting top in the round.
MAIN SWEATER
Round 1: ch1, sc 192(208, 224, 240, 256, 280, 296, 312, 328) st around the bottom band (about 3st for every 2 rows). Sl st in first sc from the beginning of the round.
Round 2: with MC *csdc in 1st st (csdc at the start of each row will be labelled as dc on following rows. When not at the beginning of the row, csdc is a dc.), sk1, [pf, ch1, pf], sk1* rep * * around, sl st into top of chainless dc.
Round 3: *with MC 1dc in dc below, with CC [pf, ch1, pf] all in middle of ‘heart’ below* rep * * around, sl st into top of 1st dc.
Round 4 - Round 5: with MC *1dc in dc below, [pf, ch1, pf] all in middle of ‘heart’ below* rep * * around, sl st into top of 1st dc.
Round 6 - Round 36: rep Round 3 - Round 5
Tip 1: if you’re using a variegated yarn, make a note of what color you were on when you separated the front and back. Have a second skein of the same color so that when it’s time to do the back, you can wind the skein to the correct color and make the front and back match!
Tip 2: If you’re wanting to add length to your sweater, this is where you will add rounds. Rep Rounds 3 - 5 until the sweater reaches the length you’d like. Be aware of how many inches the sleeves gaps are though!
SEPARATING FRONT AND BACK
Front:
Row 37: with MC *1dc, [pf, ch1, pf] all in middle of ‘heart’ below* rep * * 23(25, 27, 29, 31, 34, 36, 38, 40) more times, 1dc in the next dc. Turn. [97(105, 113, 121, 129, 141, 149, 157, 165) sts]
Row 38: *1dc, [pf, ch1, pf] all in middle of ‘heart’ below* rep * * 23(25, 27, 29, 31, 34, 36, 38, 40) more times, 1dc in the 1st dc of the previous row. Turn.
Row 39: *with MC 1dc, with CC [pf, ch1, pf] all in middle of ‘heart’ below* rep * * 23(25, 27, 29, 31, 34, 36, 38, 40) more times, with MC 1dc in the 1st dc of the previous row. Turn.
Row 40 - Row 46(48, 49, 50, 51, 53, 54, 55, 55): rep Row 37 - Row 39
Neckline:
Row 47(49, 50, 51, 52, 54, 55, 56, 56): cont. in color pattern *1dc, [pf, ch1, pf] all in middle of ‘heart’ below* rep * * 6(7, 8, 9, 10, 11, 12, 13, 14) more times, 1 dc in the next dc. Turn. [29(33, 37, 41, 45, 49, 53, 57, 61)sts]
Row 48(50, 51, 52, 53, 55, 56, 57, 57) - Row 53(55, 56, 57, 58, 60, 61, 62, 62): rep Row 47(49, 50, 51, 52, 54, 55, 56, 56)
FO
Reattach yarn to the opposite side with a sl st and rep Row 47(49, 50, 51, 52, 54, 55, 56, 56) - Row 53(55, 56, 57, 58, 60, 61, 62, 62) starting the 1st dc in the same st that you sl st into.
FO

Back:
With the back of the sweater facing you, starting on the right side, reattach the yarn to the same stitch on Row 36 as your last dc of the front side’s Row 37.
Row 37: with MC *1dc, [pf, ch1, pf] all in middle of ‘heart’ below* rep * * 23(25, 27, 29, 31, 34, 36, 38, 40) more times, 1dc in the 1st dc of the previous row. Turn. [97(105, 113, 121, 129, 141, 149, 157, 165) sts]
Row 38: *1dc, [pf, ch1, pf] all in middle of ‘heart’ below* rep * * 23(25, 27, 29, 31, 34, 36, 38, 40) more times, 1dc in the 1st dc of the previous row. Turn.
Row 39: *with MC 1dc, with CC [pf, ch1, pf] all in middle of ‘heart’ below* rep * * 23(25, 27, 29, 31, 34, 36, 38, 40) more times, with MC 1dc in the 1st dc of the previous row. Turn.
Row 40 - Row 53(55, 56, 57, 58, 60, 61, 62, 62) : rep Row 37 - Row 39
Turn. Do not FO

SEAMING SHOULDERS
I used the Continuous Flat Braid join to sew my shoulders together, because it creates a join that is smooth and delicate. This seam adds about .5" to the sleeve opening. Feel free to choose a different join method if you prefer. But, be aware that you might have to adjust for the number of sts in the sleeves.
Row 1: ch2, sc in the first st of the front side, *ch2, sk1, sc in next st* to the end.
Row 2: ch2, turn piece so you are working back towards sleeve opening, (Row 1 is now on the right side), sc in the same st from end on the back side, *ch1, remove hook from loop, place hook through 1st ch2 space on front side, pull loop through, ch1, sk1 on back side, sc in next* rep * * to end.
SLEEVES
Round 1: With MC, attach yarn to the bottom of the sleeve opening with a sl st, ch1, sc in the same place, 63(63, 67, 71, 75, 79, 87, 91, 95) sc evenly around the sleeve opening, sl st into the first sc of the round. [64(64, 68, 72, 76, 80, 88, 92, 96) sts]
Round 2: with MC *dc in 1st st, sk1, [pf, ch1, pf], sk1* rep * * around, sl st into top of chainless dc.
Round 3: *with MC 1dc, with CC [pf, ch1, pf] all in middle of ‘heart’ below* rep * * around, sl st into top of 1st dc.
Round 4 - Round 5: with MC *1dc, [pf, ch1, pf] all in middle of ‘heart’ below* rep * * around, sl st into top of 1st dc.
Round 6 - Round 32: rep Round 3 - Round 5
(If you feel like you need longer sleeves, this is where you would add a few rounds. Keep in mind the cuff and next 5 rows are about 3.25”.)
Round 33: with CC ch 2 (does not count as a st), [pf, ch1, pf] in center of each heart below around, sl st into ch2 at beginning of round. [48(48, 51, 54, 57, 60, 66, 69, 72) sts]
**Try your sweater on to check the sleeve’s length. Round 33 should end at right above your wrist bone. If you need a few more rows (ie. if you made a more form fitting size), add them now. Make note of how many rows you add so that you can add them to the second sleeve as well.**
XS and S Only:
Round 34: with MC, ch2, *[pf, ch1, pf] in center of first heart, dc in center of next heart* rep * * around, sl st in the top of the ch2. [32sts]
Round 35: csdc, *[pf, ch1, pf] in center of first heart, dc in the next dc* rep * * around, sk last dc, sl st into csdc [32sts]
Round 36: w/ MC csdc, *w/ CC [pf, ch1, pf] in center of first 2 hearts, w/ MC dc in next dc* rep * * around 2 more times, w/ CC [pf, ch1, pf] in center of last 2 hearts, sl st into csdc. [28 sts]
Round 37: ch1, sc around, sl st into 1st sc of round. [28 sts]
Go to “Cuff”
M Only:
Round 34: with MC, csds, *[pf, ch1, pf] in center of first heart, dc in center of next heart* rep * * around to last heart, [pf, ch1, pf] in center of last heart, sl st in the top of the csdc. [36sts]
Round 35: csdc, *[pf, ch1, pf] in center of first heart, dc in the next dc* rep * * around to last heart, [pf, ch1, pf] in center of last heart, sl st into csdc [36sts]
Round 36: w/ MC csdc, *w/ CC [pf, ch1, pf] in center of first 2 hearts, w/ MC dc in next dc* rep * * around 3 more times, w/ CC [pf, ch1, pf] in center of last heart, sl st into csdc. [32sts]
Round 37: ch1, sc around, sl st into 1st sc of round. [32 sts]
Go to “Cuff”
L Only:
Round 34: with MC, ch2, *[pf, ch1, pf] in center of first heart, dc in center of next heart* rep * * around to last heart, dc in last heart, sl st in the top of the ch2. [36sts]
Round 35:csdc, *[pf, ch1, pf] in center of first heart, dc in the next dc* rep * * around, sk last dc, sl st into csdc. [36sts]
Round 36: w/ MC csdc, *w/ CC [pf, ch1, pf] in center of first 2 hearts, w/ MC dc in next dc* rep * * around 3 more times, w/ CC [pf, ch1, pf] in center of last heart, sl st into csdc. [32 sts]
Round 37: ch1, sc around, sl st into 1st sc of round. [32 sts]
Go to “Cuff”
XL Only:
Round 34: with MC, csds, *[pf, ch1, pf] in center of first heart, dc in center of next heart* rep * * around to last heart, [pf, ch1, pf] in center of last heart, sl st in the top of the csdc. [40 sts]
Round 35: csdc, *[pf, ch1, pf] in center of first heart, dc in the next dc* rep * * around to last heart, [pf, ch1, pf] in center of last heart, sl st into csdc. [40 sts]
Round 36: w/ MC csdc, *w/ CC [pf, ch1, pf] in center of first 2 hearts, w/ MC dc in next dc* rep * * around 3 more times, w/ CC [pf, ch1, pf] in center of last 2 hearts, sl st into csdc. [35 sts]
Round 37: ch1, sc around, sl st into 1st sc of round. [35 sts]
Go to “Cuff”

2XL Only:
Round 34: with MC, ch2, *[pf, ch1, pf] in center of first heart, dc in center of next heart* rep * * around to last heart, dc in last heart, sl st in the top of the ch2. [40 sts]
Round 35: csdc, *[pf, ch1, pf] in center of first heart, dc in the next dc* rep * * around, sk last dc, sl st into csdc. [40 sts]
Round 36: w/ MC csdc, *w/ CC [pf, ch1, pf] in center of first 2 hearts, w/ MC dc in next dc* rep * * around 3 more times, w/ CC [pf, ch1, pf] in center of last 2 hearts, sl st into csdc. [35 sts]
Round 37: ch1, sc around, sl st into 1st sc of round. [35 sts]
Go to “Cuff”
3XL Only:
Round 34: with MC, ch2, *[pf, ch1, pf] in center of first heart, dc in center of next heart* rep * * around to last heart, dc in last heart, sl st in the top of the ch2. [44 sts]
Round 35: csdc, *[pf, ch1, pf] in center of first heart, dc in the next dc* rep * * around, sk last dc, sl st into csdc. [44 sts]
Round 36: w/ MC csdc, *w/ CC [pf, ch1, pf] in center of first 2 hearts, w/ MC dc in next dc* rep * * around 4 more times, w/ CC [pf, ch1, pf] in center of last heart, sl st into csdc. [39 sts]
Round 37: ch1, sc around, sl st into 1st sc of round. [39 sts]
Go to “Cuff”
4XL Only:
Round 34: with MC, csds, *[pf, ch1, pf] in center of first heart, dc in center of next heart* rep * * around to last heart, [pf, ch1, pf] in center of last heart, sl st in the top of the csdc. [48 sts]
Round 35: csdc, *[pf, ch1, pf] in center of first heart, dc in the next dc* rep * * around to last heart, [pf, ch1, pf] in center of last heart,, sl st into csdc. [48 sts]
Round 36: w/ MC csdc, *w/ CC [pf, ch1, pf] in center of first 2 hearts, w/ MC dc in next dc* rep * * around 4 more times, w/ CC [pf, ch1, pf] in center of last 2 hearts, sl st into csdc. [42 sts]
Round 37: ch1, sc around, sl st into 1st sc of round. [42 sts]
Go to “Cuff”
5XL Only:
Round 34: with MC, csds, *[pf, ch1, pf] in center of first heart, dc in center of next heart* rep * * around to last heart, [pf, ch1, pf] in center of last heart, sl st in the top of the csdc. [52 sts]
Round 35: csdc, *[pf, ch1, pf] in center of first heart, dc in the next dc* rep * * around to last heart, [pf, ch1, pf] in center of last heart,, sl st into csdc. [52 sts]
Round 36: w/ MC csdc, *w/ CC [pf, ch1, pf] in center of first 2 hearts, w/ MC dc in next dc* rep * * around 5 more times, w/ CC [pf, ch1, pf] in center of last heart, sl st into csdc. [46 sts]
Round 37: ch1, sc around, sl st into 1st sc of round. [46 sts]
Go to “Cuff”

CUFF
ch 7
Row 1: sc in 2nd ch from hook, 5sc down ch, sl st in the next 2 sc on the collar. Turn. 6sts
Row 2: 6 scblo back up. Turn.
Row 3: ch1, 6scblo back down, sl st in the next 2 sc on the cuff. Turn.
Rep Rows 2 - 3 around the cuff until you come back around to the start. Seam the 2 sides of the cuff together. See notes for more info.
Rep from Sleeve for the opposite sleeve.
COLLAR
Set up: attach yarn to the neckline at the shoulder and sc around evenly. I like to sc 2 sts for every 3 sts on the front and back of the neckline, and sc 3 sts for every 2 rows on the sides. This is up to you and how tight/loose you want your neckline to be. The more sc you put around the neckline to make the collar, the looser/wider your neckline will be. However, if you put in too many sc, then the collar will be ripply and baggy. The fewer sc you make around the collar, the tighter/higher your neckline will be. But, if you put too few sts in, then the neckline will be too tight and stiff. But, it is essentially up to your heart’s desire.
ch 6
Row 1: sc in 2nd ch from hook, 4sc down ch, sl st in the next 2 sc on the collar. Turn. 5sts
Row 2: 5 scblo back up. Turn.
Row 3: ch1, 5scblo back down, sl st in the next 2 sc on the collar. Turn.
Rep Rows 2 - 3 around the collar until you come back around to the start. Seam the 2 sides of the collar together. See notes for more info.
Happy Creating!
IF YOU LIKED THIS PATTERN, PLEASE SUPPORT ME ON PATREON OR BUY ME A COFFEE!

KO-FI

SUPPORT ME ON PATREON
I LOVE TO SEE WHAT YOU CREATE!
Please share your creations with the community on social media tagging @ravinsekaidesigns and hashtag #heartsdesiresweater
I can’t wait to see the beautiful things you come up with!
FOLLOW ME ON SOCIAL MEDIA
Facebook: Ravin Sekai Designs
Ravelry: RavinSekai
Instagram: @ravinsekaidesigns
Pinterest: Ravin Sekai Designs
Patreon: Ravin Sekai Designs

Hi! I’m Rachel.
I’m a quirky world traveller, avid knitter, crochet lover, pattern maker, and all around nerd! I spend a lot of time clowning around, and I often have the goofiest smile on my face. This website is the landing place for my new patterns, random thoughts, and general craziness. I hope you enjoy my randomness and my yarnie goodness!
Archive
- September 2023
- March 2023
- November 2022
- October 2022
- September 2022
- August 2022
- July 2022
- June 2022
- May 2022
- April 2022
- March 2022
- February 2022
- January 2022
- November 2021
- October 2021
- September 2021
- August 2021
- July 2021
- June 2021
- May 2021
- April 2021
- March 2021
- February 2021
- January 2021
- December 2020
- November 2020
- October 2020
- September 2020
- August 2020
- July 2020
- June 2020
- May 2020
- April 2020
- March 2020
- February 2020
- January 2020
- December 2019
- November 2019
- October 2019
- September 2019
- August 2019
- July 2019
- June 2019
- May 2019
- April 2019


