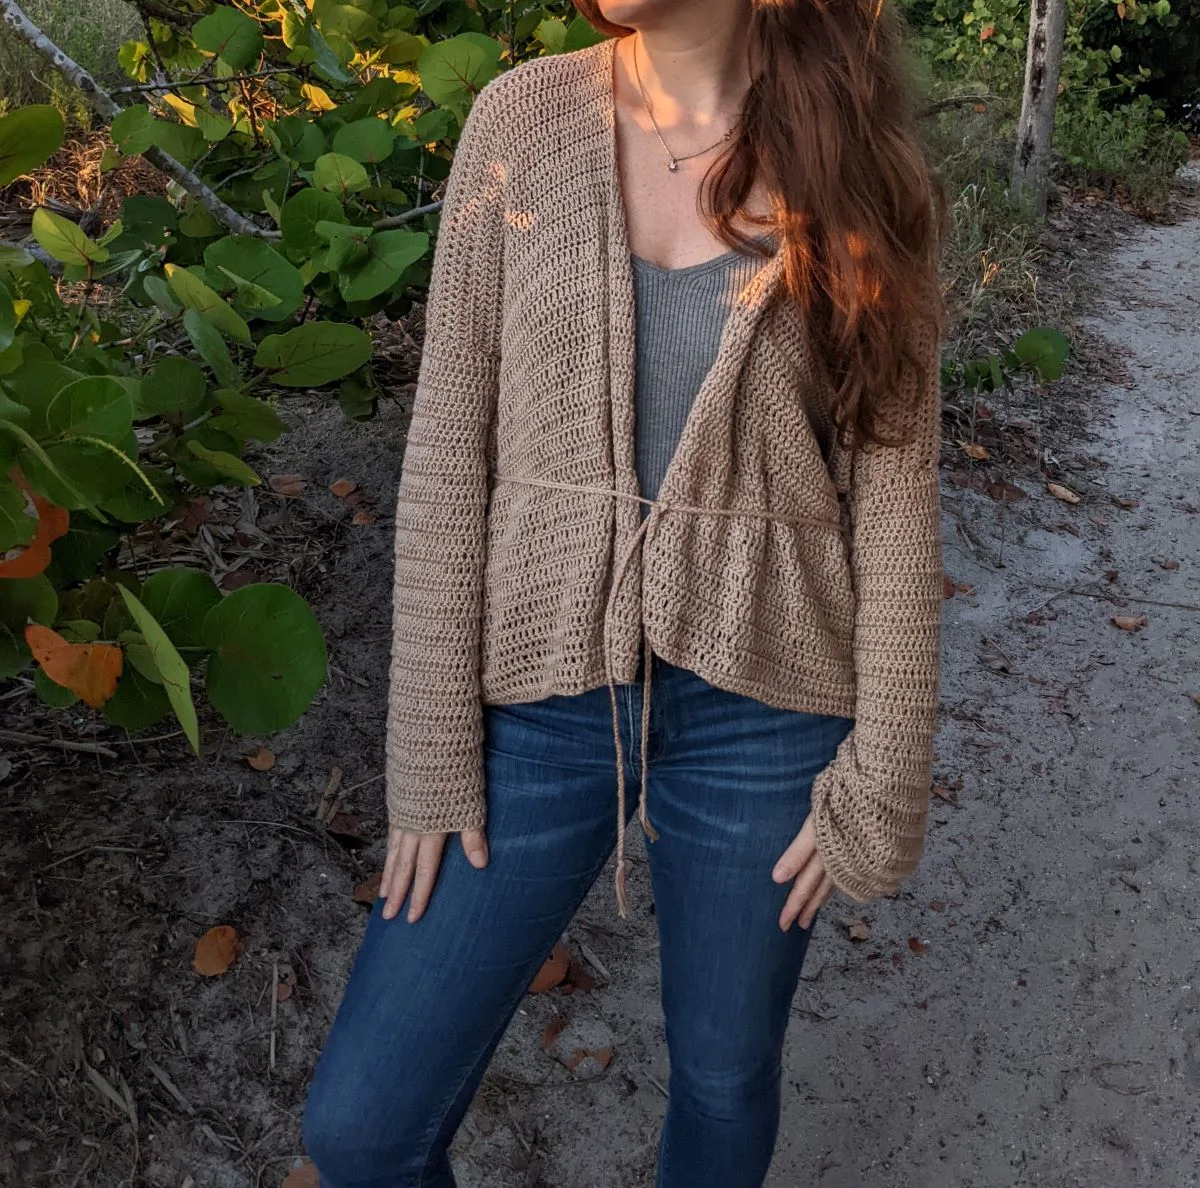
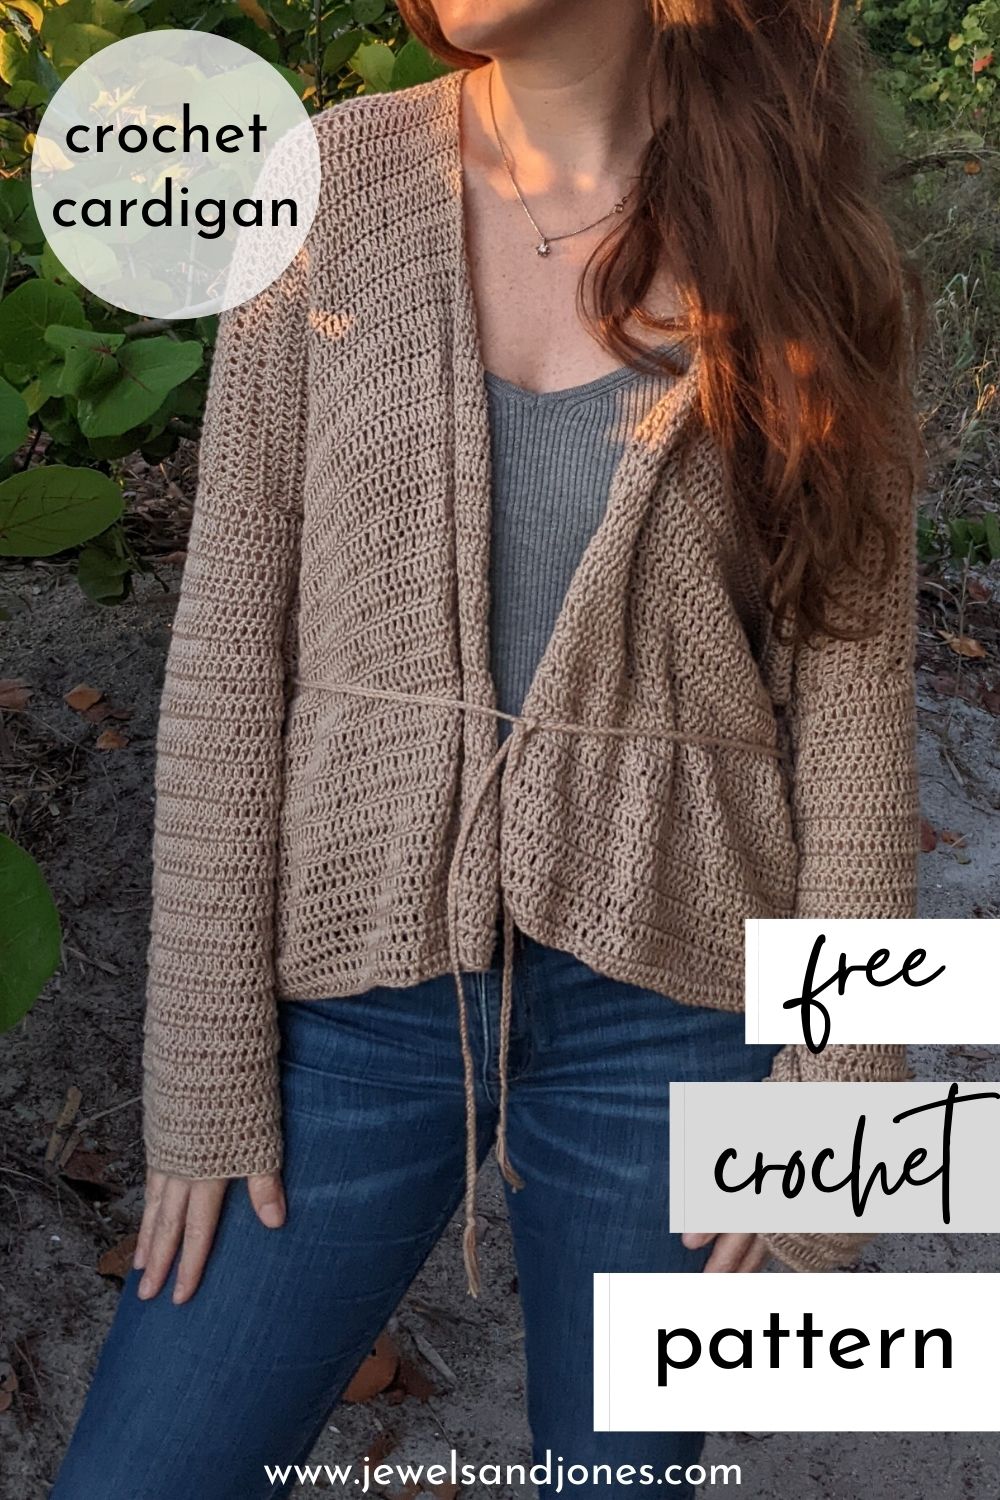
Elevate your wardrobe by adding this simple lightweight crochet cardigan to the mix. This free crochet cardigan pattern is cozy, cute, and perfect to pair with some jeans or a dress.
It’s also entirely made up of double crochets and has minimal seaming, so totally beginner-friendly.
Continue to read through some of the inspiration behind my latest design or scroll down for the free pattern.


This post contains affiliate links, which means I make a small commission at no extra cost to you. See my full disclosure here
A Simple Crochet Cardigan Pattern
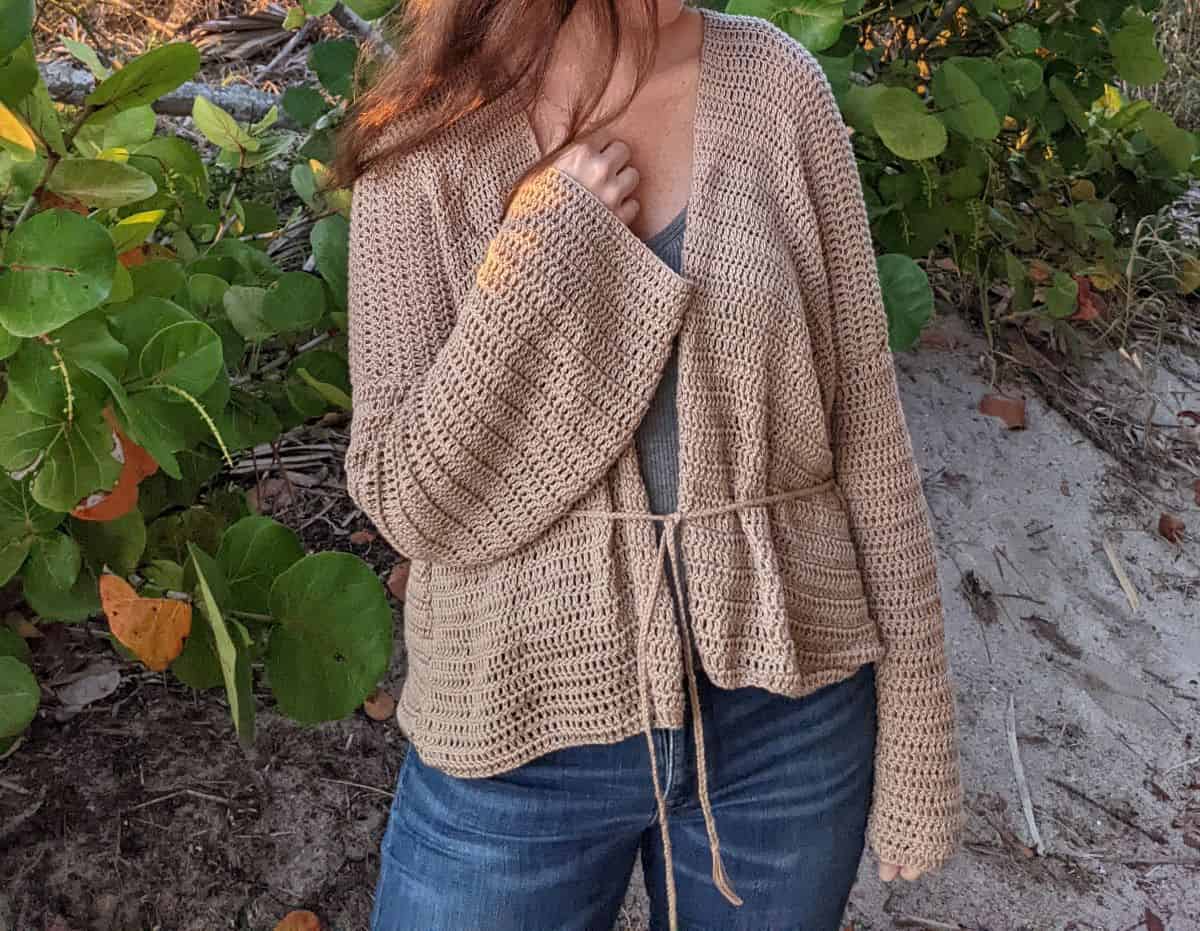
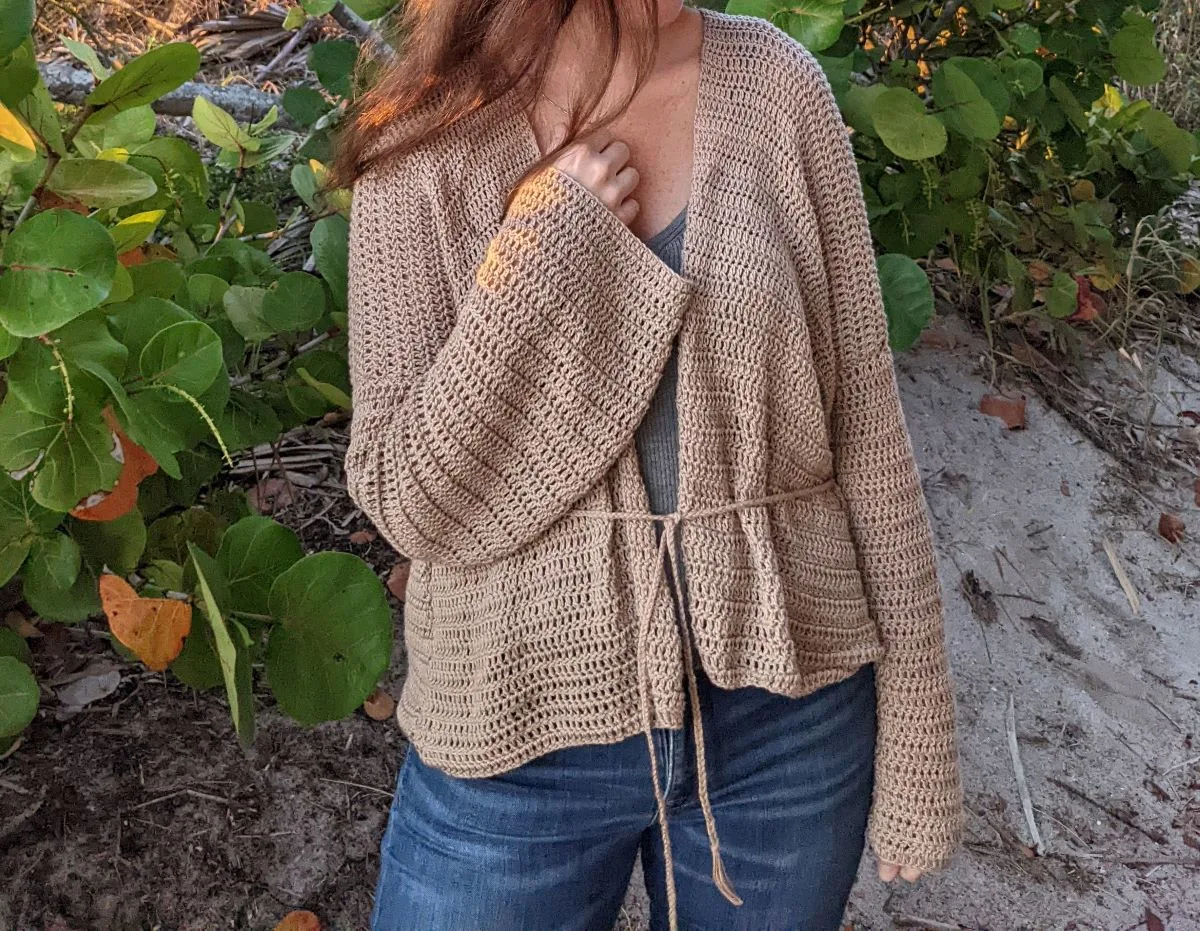
My latest free pattern is a simple oversized crochet cardigan that has a wrappable tie strap. It’s cozy, flowy, and is a great staple piece to have in your wardrobe.
I love pairing mine with my favorite jeans and my crochet top. It also works great as a coverup (perfect for the beach)!
I just love how the Seaside cardigan turned out and I hope you enjoy making it as well. This is a beginner-friendly pattern and is made using only double crochets.
So if you’re new to making crochet cardigans, this would be a great pattern to start with as it requires minimal seaming and uses only one stitch.

Easy Stitch + Simple Seaming
I love making patterns that are one-stitch repeats (like this beginner crochet cardigan pattern) because there’s something so relaxing about making one stitch and not having to think much.
So that’s why I chose to go with a simple double crochet stitch for this pattern. Plus, double crochet stitches pair so well with lightweight yarn.
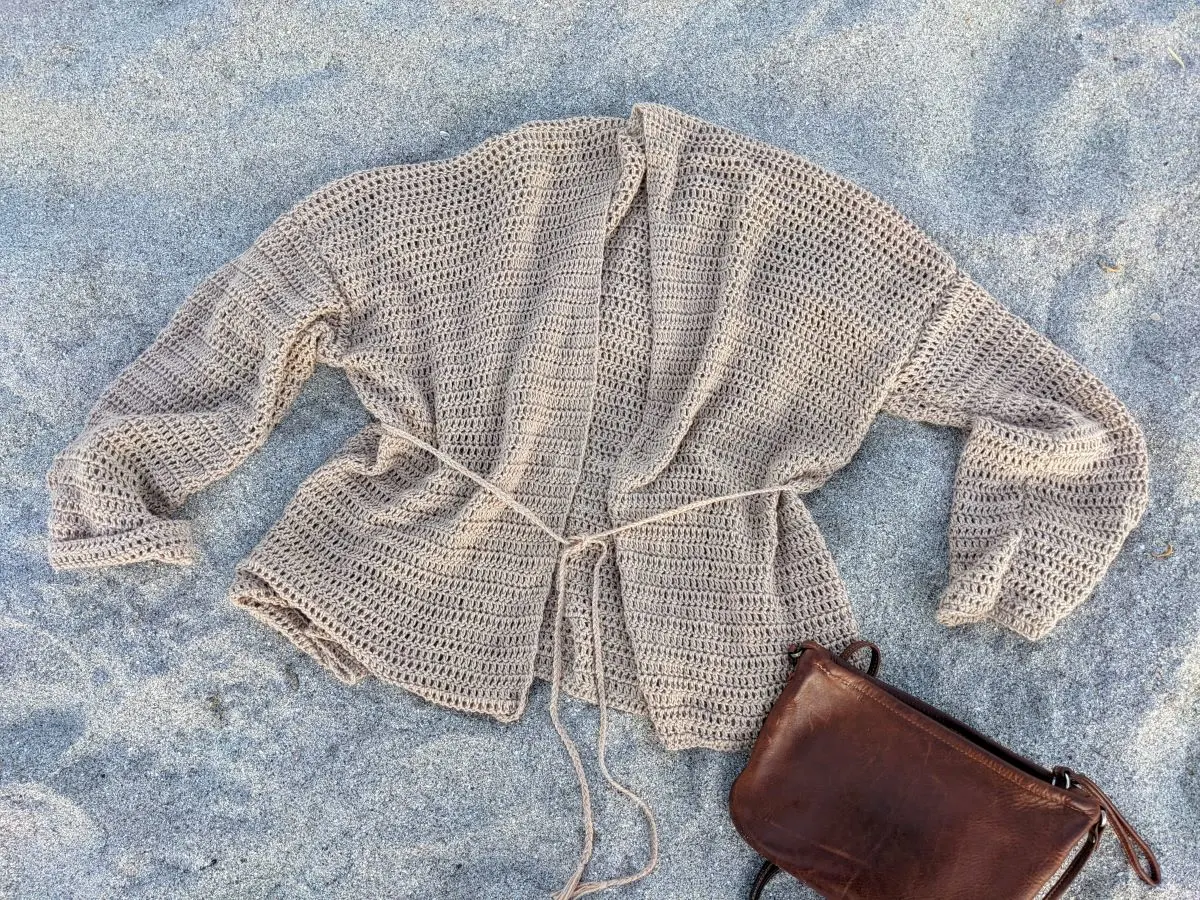
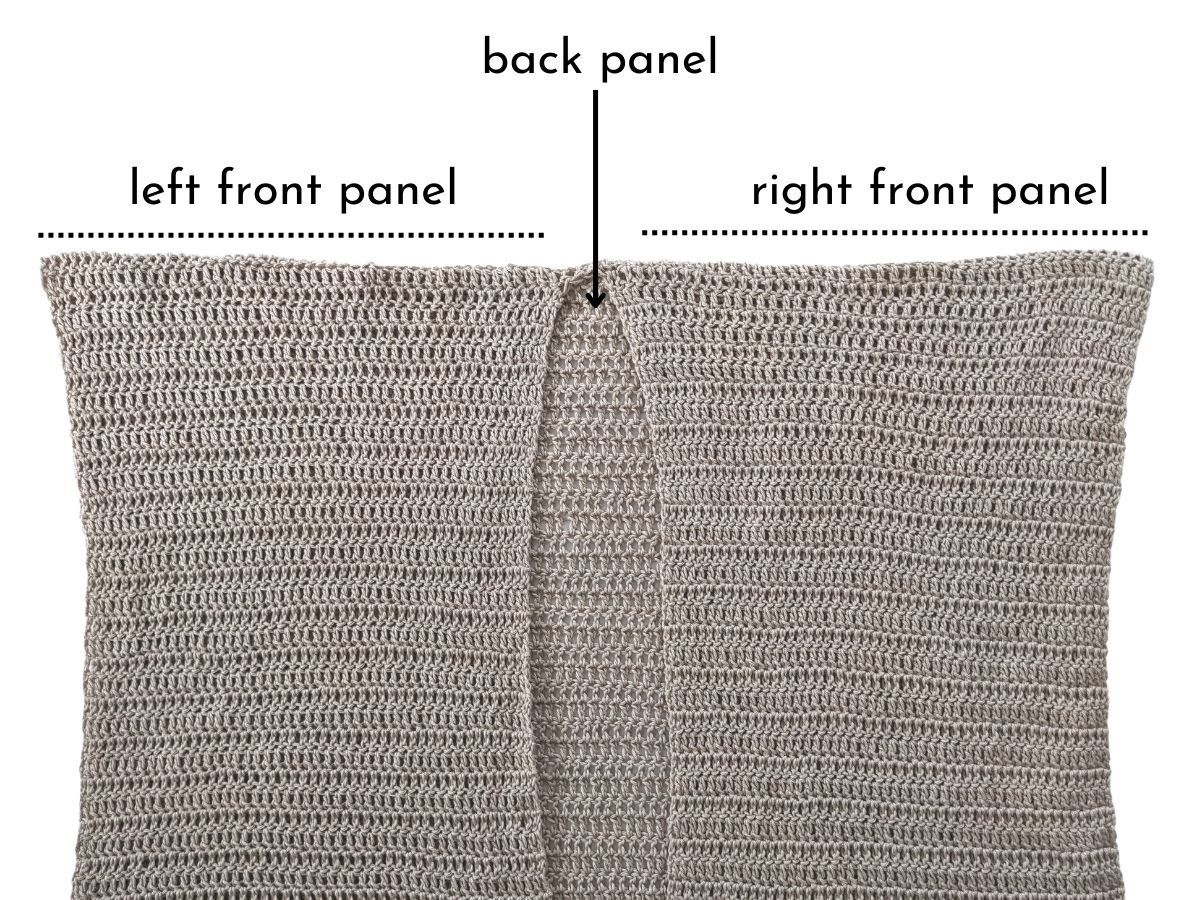
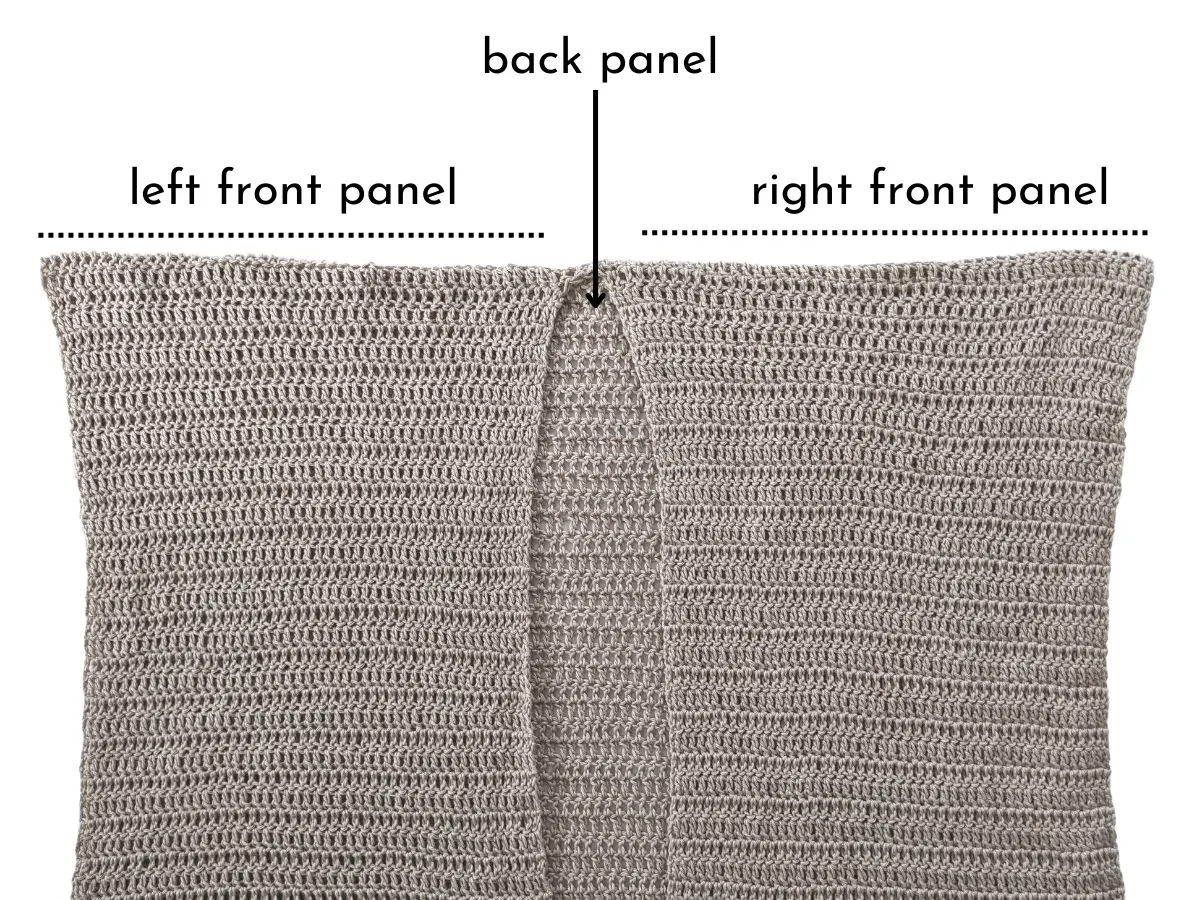
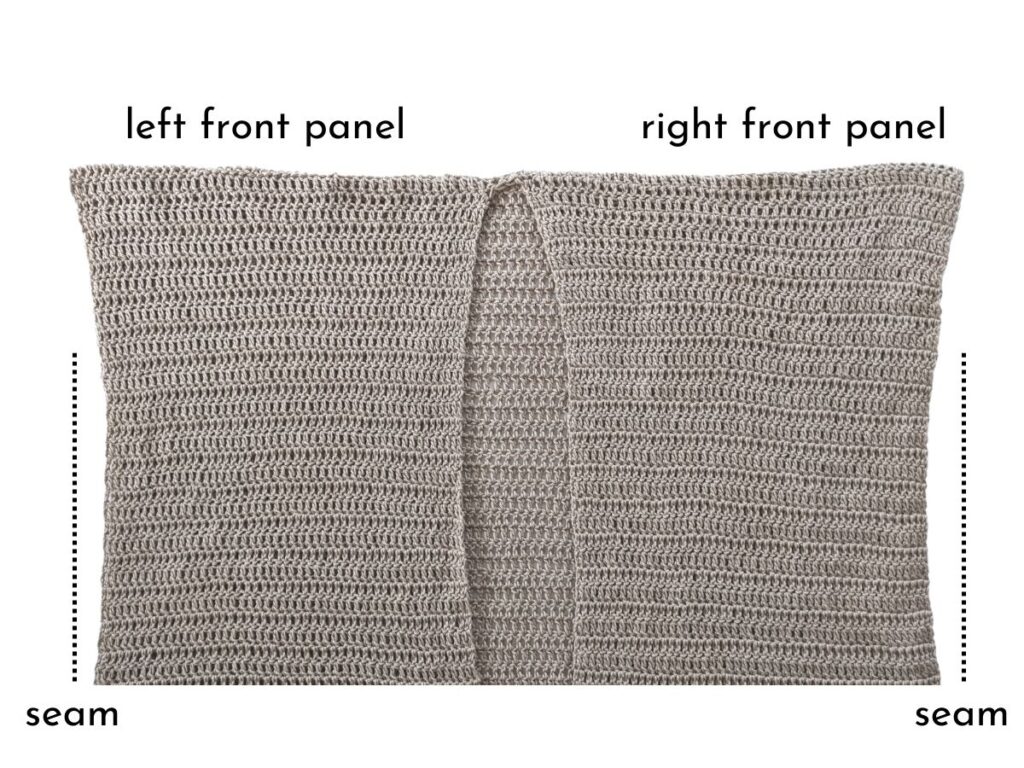
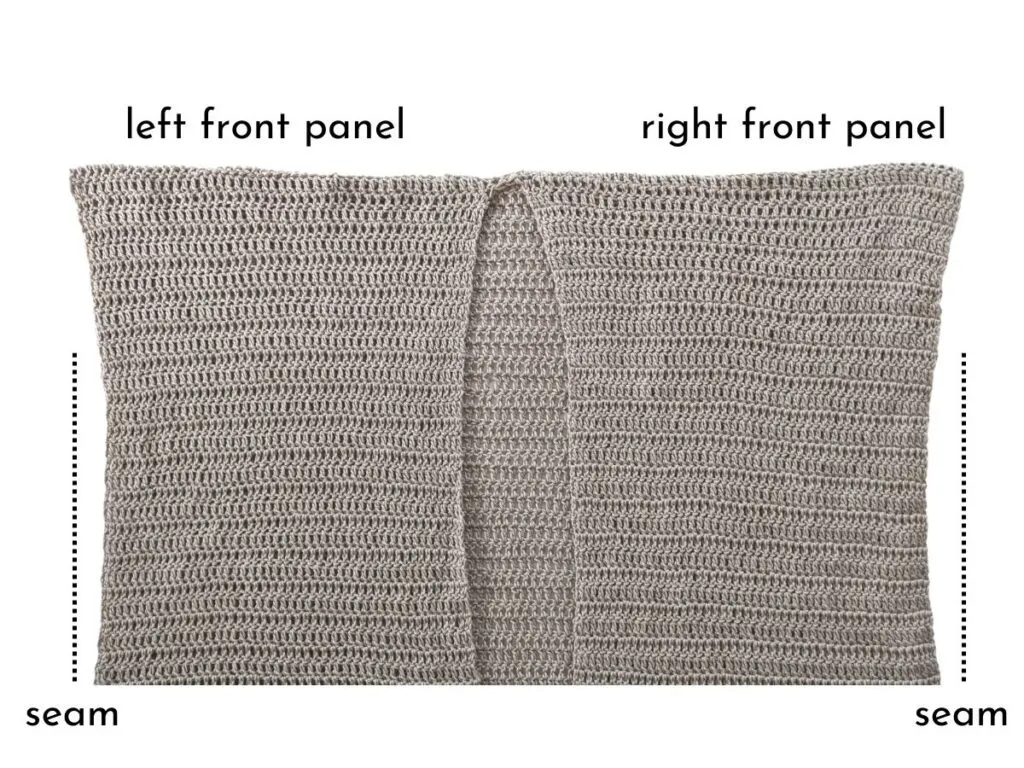
I also wanted this cardigan to have minimal seaming, so the only parts that have to be seamed together are the sides of the front + back panel, and the sleeves. That’s it!
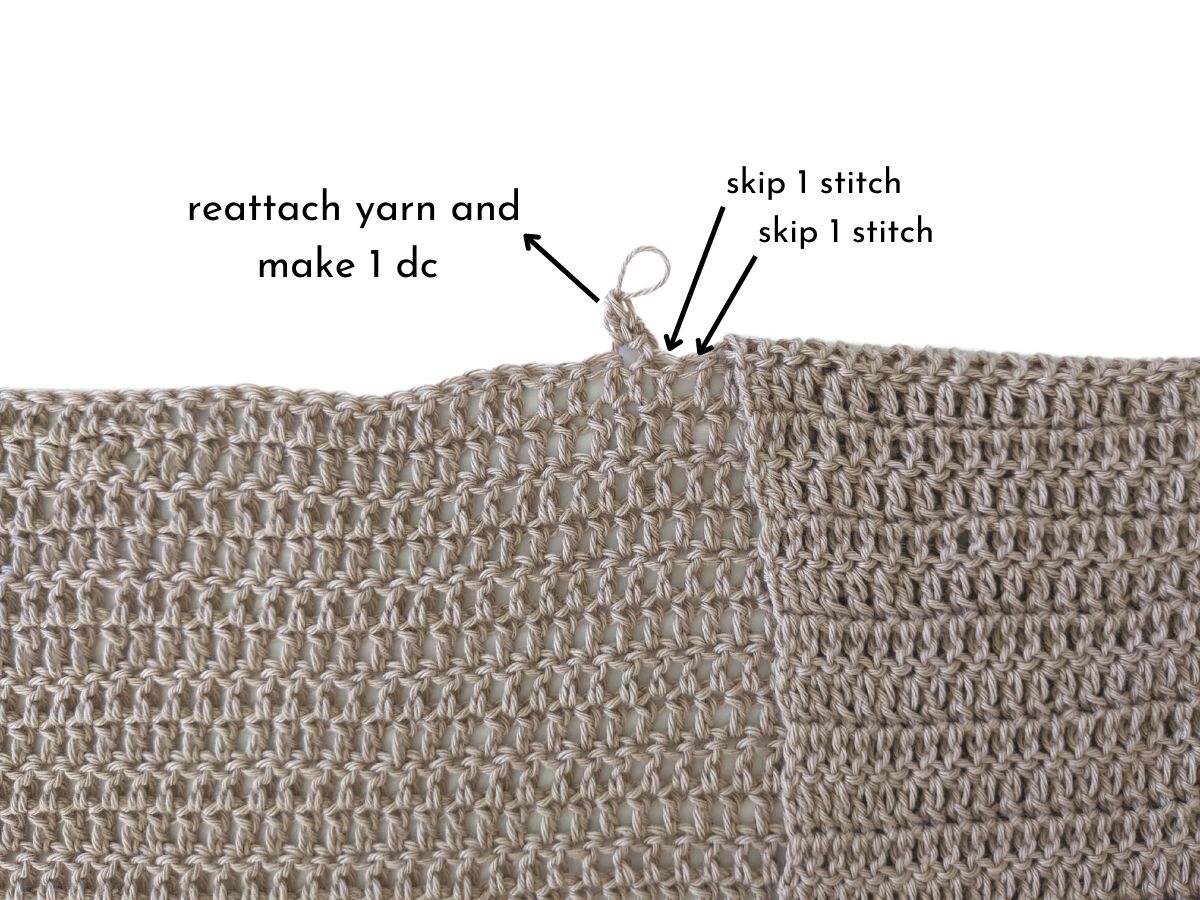
You will first make the back panel and then continue by making the right side of the front panel. Then you will reattach the yarn to the front back panel and complete the left front panel. After you’ve completed the front + back panels, then all that’s left to do is seam the sides together.
Once this is done, you will make two sleeve panels, seam them together, and then seam those to the cardigan. So that’s it for the seaming part.
The last step in the cardigan is to make the braided strap which will wrap around your waist. I think it looks really cute, but it’s totally optional.

The Yarn You’ll Use for This Cardigan
For this crochet pattern, I used WeCrochet’s Comfy fingering weight yarn in the color Parchment. It’s a lightweight blended yarn that’s made from cotton and acrylic.
It’s a very soft drapey yarn with great stitch definition. I loved using it for this pattern and highly recommend it. Plus, there’s a total of 19 colors to choose from, so there’s something for everyone.
How much yarn do I need to crochet a cardigan?
This crochet cardigan has more of an oversized fit, so you can make it either in a small to medium size or a large to extra large size. For the small/medium size, you will need about 7 skeins and for the large/x-large size, you will need about 8 skeins.
Other Free Crochet Patterns
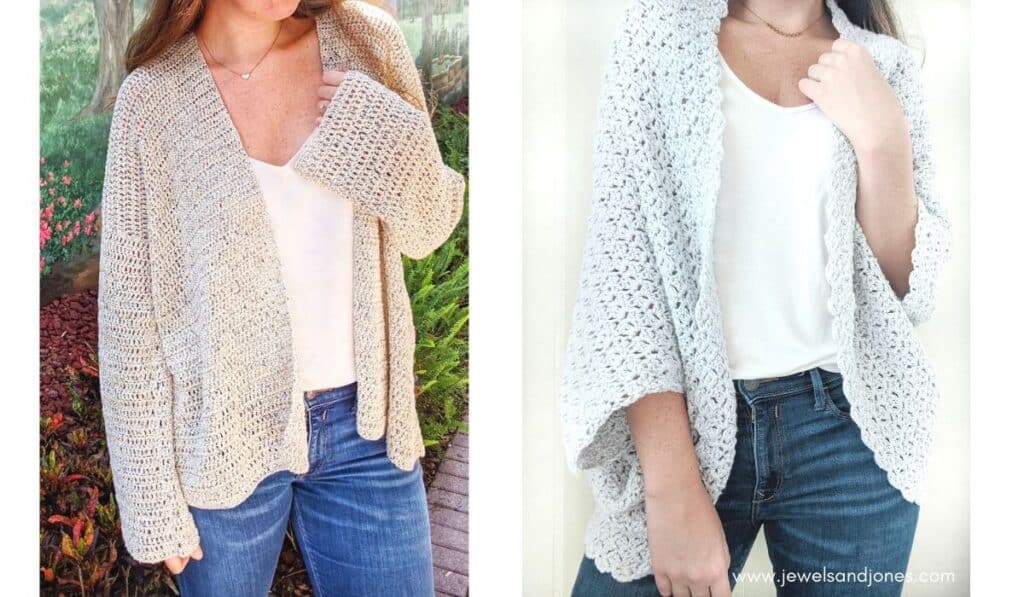
Interested in making other easy crochet wearables, then you might like this simple crochet cardigan pattern on the left and this basic crochet shrug pattern on the right.

Free Crochet Cardigan Pattern
Description:
Elevate your wardrobe by adding this simple lightweight crochet cardigan to the mix. This crochet cardigan is cozy, comfy, and perfect to pair with some jeans or a dress.
With it’s simple constuction and minimal seaming, you’ll have your cardi ready in no time!
Materials:
- WeCrochet Comfy Fingering Yarn in the color Parchment (Weight 1/light, 50 grams, 218 yards) or another fingering weight yarn. Adult Small/Medium – approximately 1,526 yards or 7 skeins. Adult Large/X-Large – approximately 1,744 yards or 8 skeins.
- 1 ball of Aunt Lydia’s Crochet Thread (Size 3) in the color Copper Mist for the tie strap.
- Size 4.0 crochet hook.
- Stitch markers.
- Darning needle.
- Scissors.
Finished Sizes:
Adult Small/Medium: 50″ chest, 24″ length
Adult Large/X-Large: 54″ chest, 26″ length
Gauge:
10 rows x 16 stitches = 4″ inch square in double crochet.
Abbreviations:
ch – chain: Yarn over, pull through loop on hook.
dc – double crochet: Yarn over, insert hook into stitch and pull through, yarn over and pull through first two loops on hook, yarn over and pull through last two loops on hook.
Pattern Notes:
- Pattern written in U.S Terms.
- ch 2 does not count as a stitch.
- Cardigan is shown in size S/M, model is 5’9 and bust measures 36″.
- The cardigan is designed to be more of an oversized, relaxed fit.
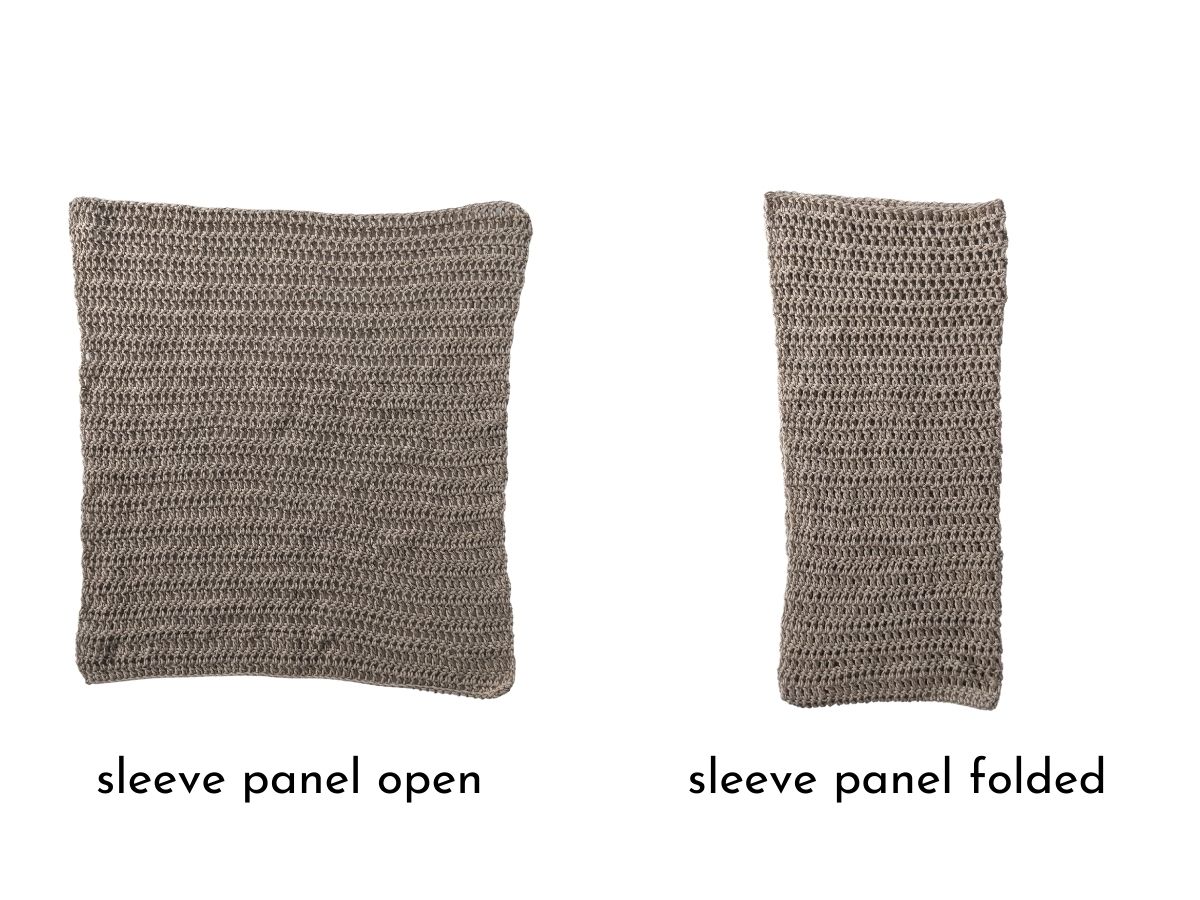
- The sleeves of the cardigan are a bit longer, so you can fold them over. Or you can easily make it shorter by subtracting rows.
- Cardigan is made by first making the back panel and then crocheting the two front panels directly onto the back panel. Then you will make 2 smaller panels for the sleeves and seam them onto the cardigan.
- This pattern has an optional tie strap that wraps around the waist of the cardigan.
Pattern
Back Panel
- Make 1 back panel
ch 100 (108)
Row 1: dc in 3rd chain from hook, dc in next stitch and across till end of row. 98 (106).
Row 2: ch 2, turn, dc in first stitch and across till end of row. 98 (106).
For size S/M: Rows 3 – Row 48: Repeat row 2
For size L/XL: Rows 3 – Row 52: Repeat row 2
Once you have finished your last row, chain 2, and flip your work. You will now work on the right front panel. (front panels are made directly onto the back panel by reattaching the yarn)
Front Panels
Right Front Panel:
Working on the front right side of your panel, make 1 double crochet in the first stitch, and then continue by making 47 (51) more double crochets. You should have a total of 48 (52) double crochets for the first row.
Row 2: ch 2, turn, dc in first stitch and across till end of row. 48 (52).
For size S/M: Rows 3 – Row 48: Repeat row 2
For size L/XL: Rows 3 – Row 52: Repeat row 2
Break yarn and weave in ends.
Left Front Panel:
You will now reattach your yarn to the last row of the back panel, skip 2 stitches from where the last stitch of the right panel is and make 1 double crochet. Continue to make double crochets in each stitch till the end of the row. 48 (52).

Row 2: ch 2, turn, dc in first stitch and across till end of row. 48 (52).
For size S/M: Rows 3 – Row 48: Repeat row 2
For size L/XL: Rows 3 – Row 52: Repeat row 2
Break yarn and weave in ends.
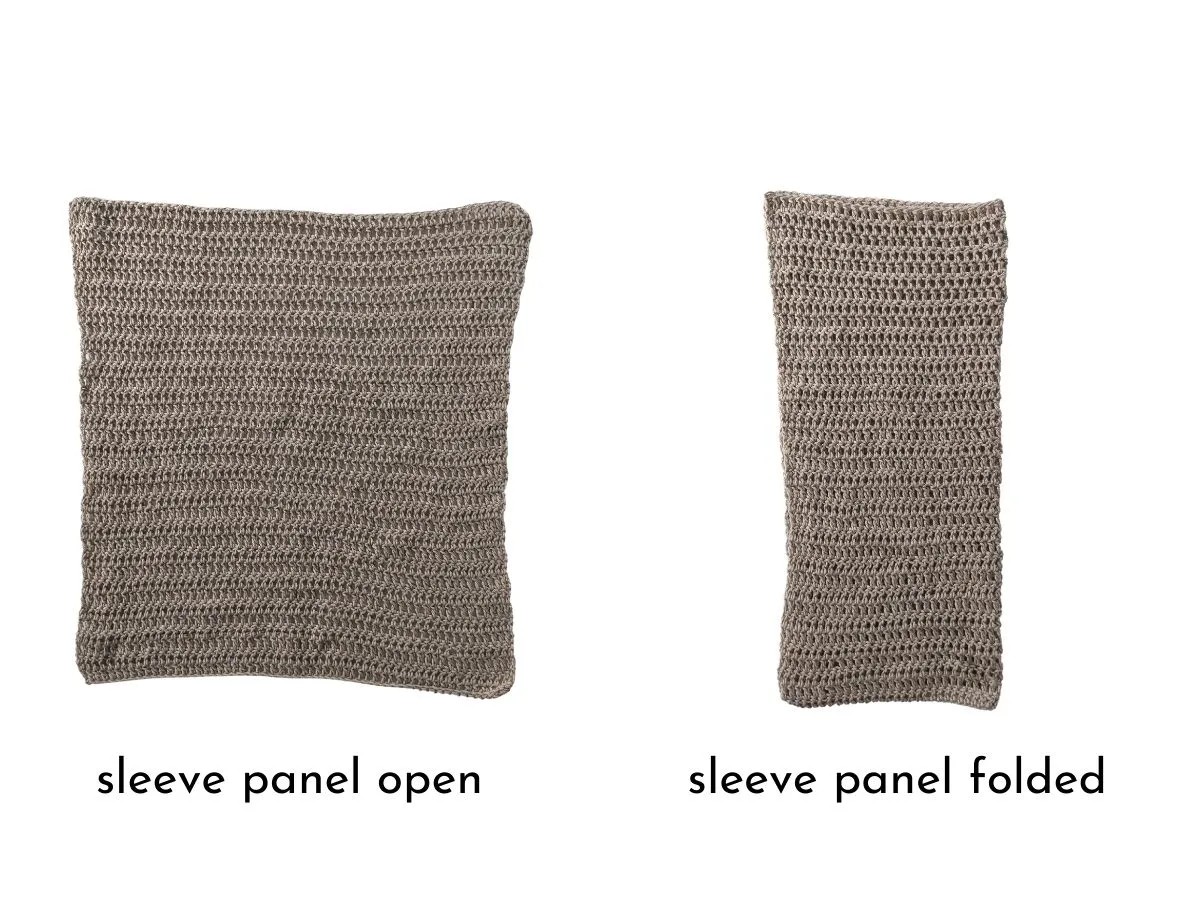
Sleeves
- Make 2 sleeve panels
ch 60 (68)
Row 1: dc in 3rd chain from hook, dc in next stitch and across till end of row. 58 (66).
Row 2: ch 2, turn, dc in first stitch and across till end of row. 58 (66).
For Size S/M: Rows 3 – Row 36: Repeat row 2
For size L/XL: Rows 3- Row 37: Repeat row 2
Finish off, but leave an extra long tail end to sew the seam of the sleeve.
Note: Sleeves are a bit longer, so you can fold them over. If you want your sleeves to be shorter, decrease the number of rows.
Tie Strap
For the tie strap, you will need 6 strands of WeCrochet Comfy Fingering Yarn and 3 strands of Aunt Lydia’s Fashion Crochet Thread (Size 3). You want to cut each strand a total of 80″ inches.
Once you have each strand cut, put them together in groups of three and start braiding your strands together. When you have finished braiding your cord, tie a knot and trim any ends.
Assembling Your Cardigan Together
To begin assembling your crochet cardigan, grab your back panel and two front panels. Lay them out on a flat surface and make sure that they are evenly lined up row by row.
Then cut a long piece of yarn that is twice the size of your panel and seam the sides together (according to your size, down below) using the whipstitch method.
For sizes s/m: Seam up to row 33, leaving a gap of 7.5 inches.
For sizes l/xl: Seam up to row 35, leaving a gap of 8.5 inches.
With the body portion of your cardigan sewn up, it’s time to sew on the sleeves.
Take your sleeve panel and fold it together. Using your long tail end from your panel, seam the sides at the edge together. Now you have a sleeve, repeat this process for the other sleeve panel using the whipstitch method.
Once you have seamed your sleeve panels, it’s time to connect them to the body of the cardigan. Keeping your body piece wrong side out and turning your sleeves right side out, insert your sleeve on the inside of the armhole.
Then using the whipstitch method, sew the sleeves onto the armhole opening of the front and back panel. Making sure to seam only the edges together. Repeat this process for the other sleeve.
Once you have finished the last sleeve, all that’s left to do is add the optional tie strap. You can either seam it on to the sides or you can put it through the back of a double crochet stitch (this makes it removable).
I personally did the second method and use it when I want to close my cardigan. So it’s totally up to you! I hope you enjoyed making your own cardigan and that you get a lot of use out of it.
I would love to see it, so don’t forget to share it with me on either Facebook or Instagram!