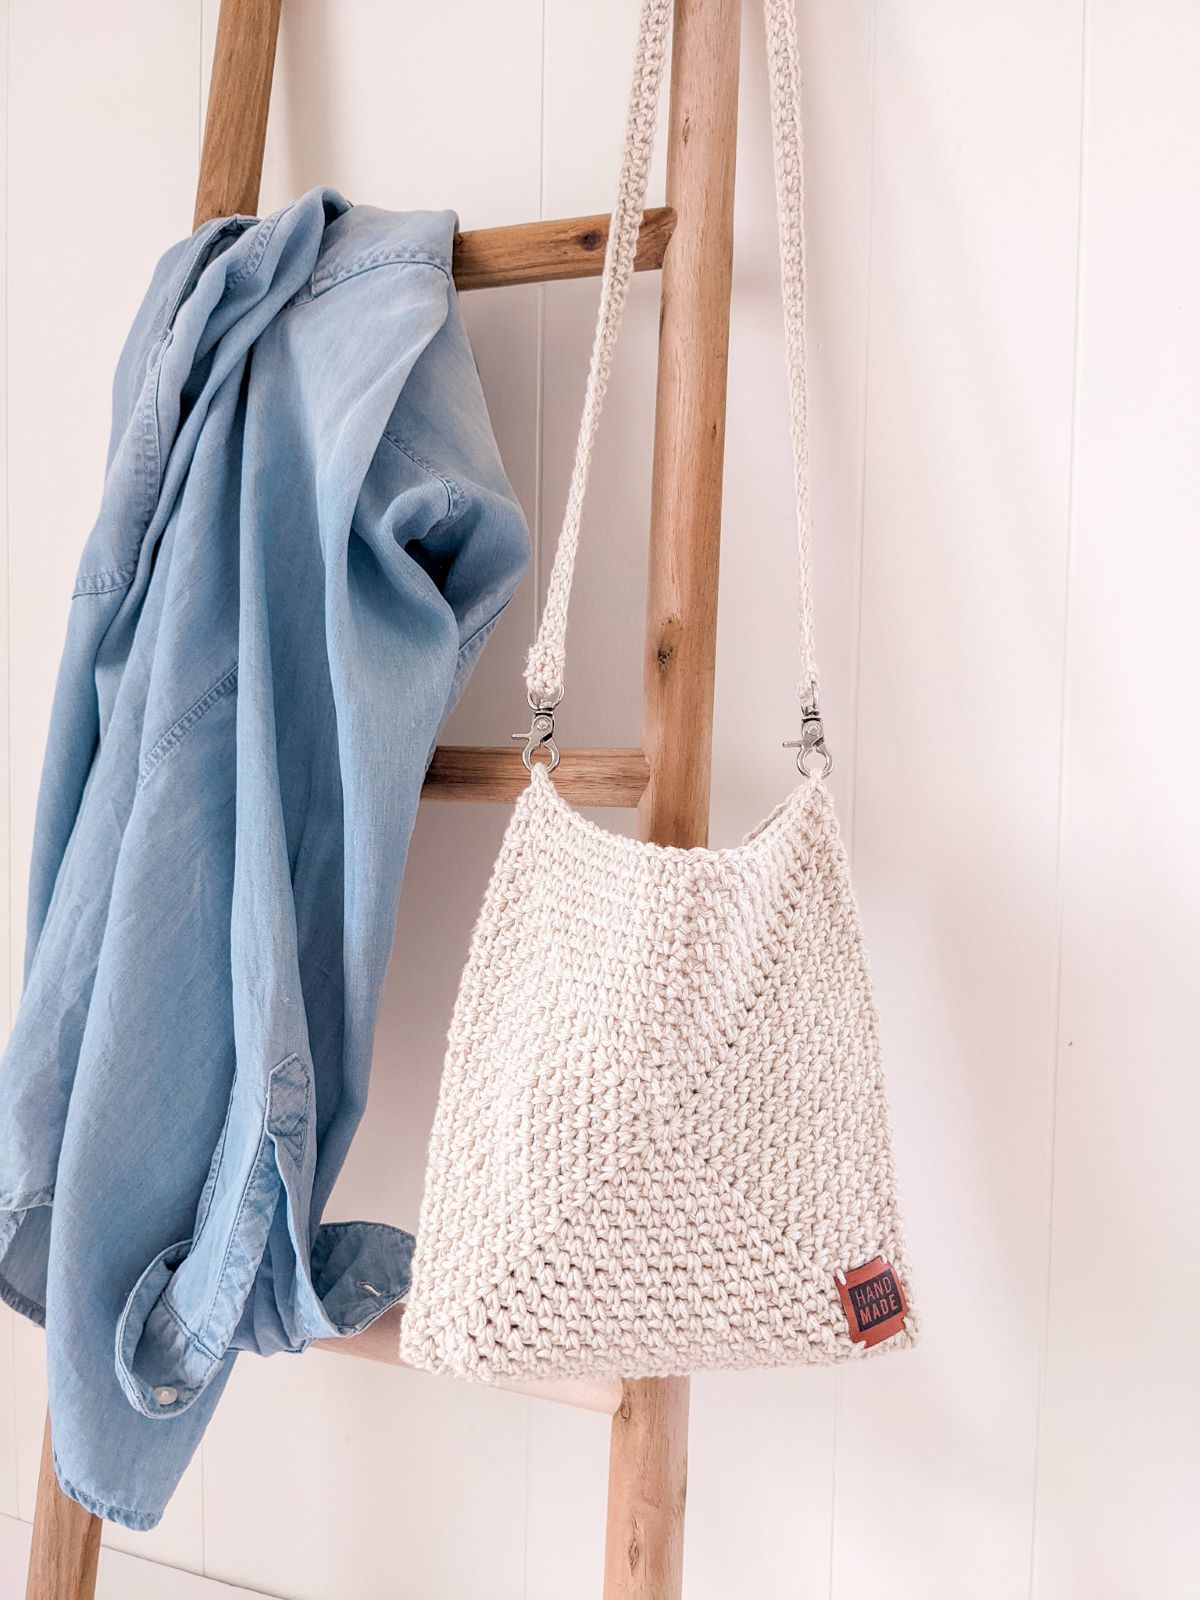
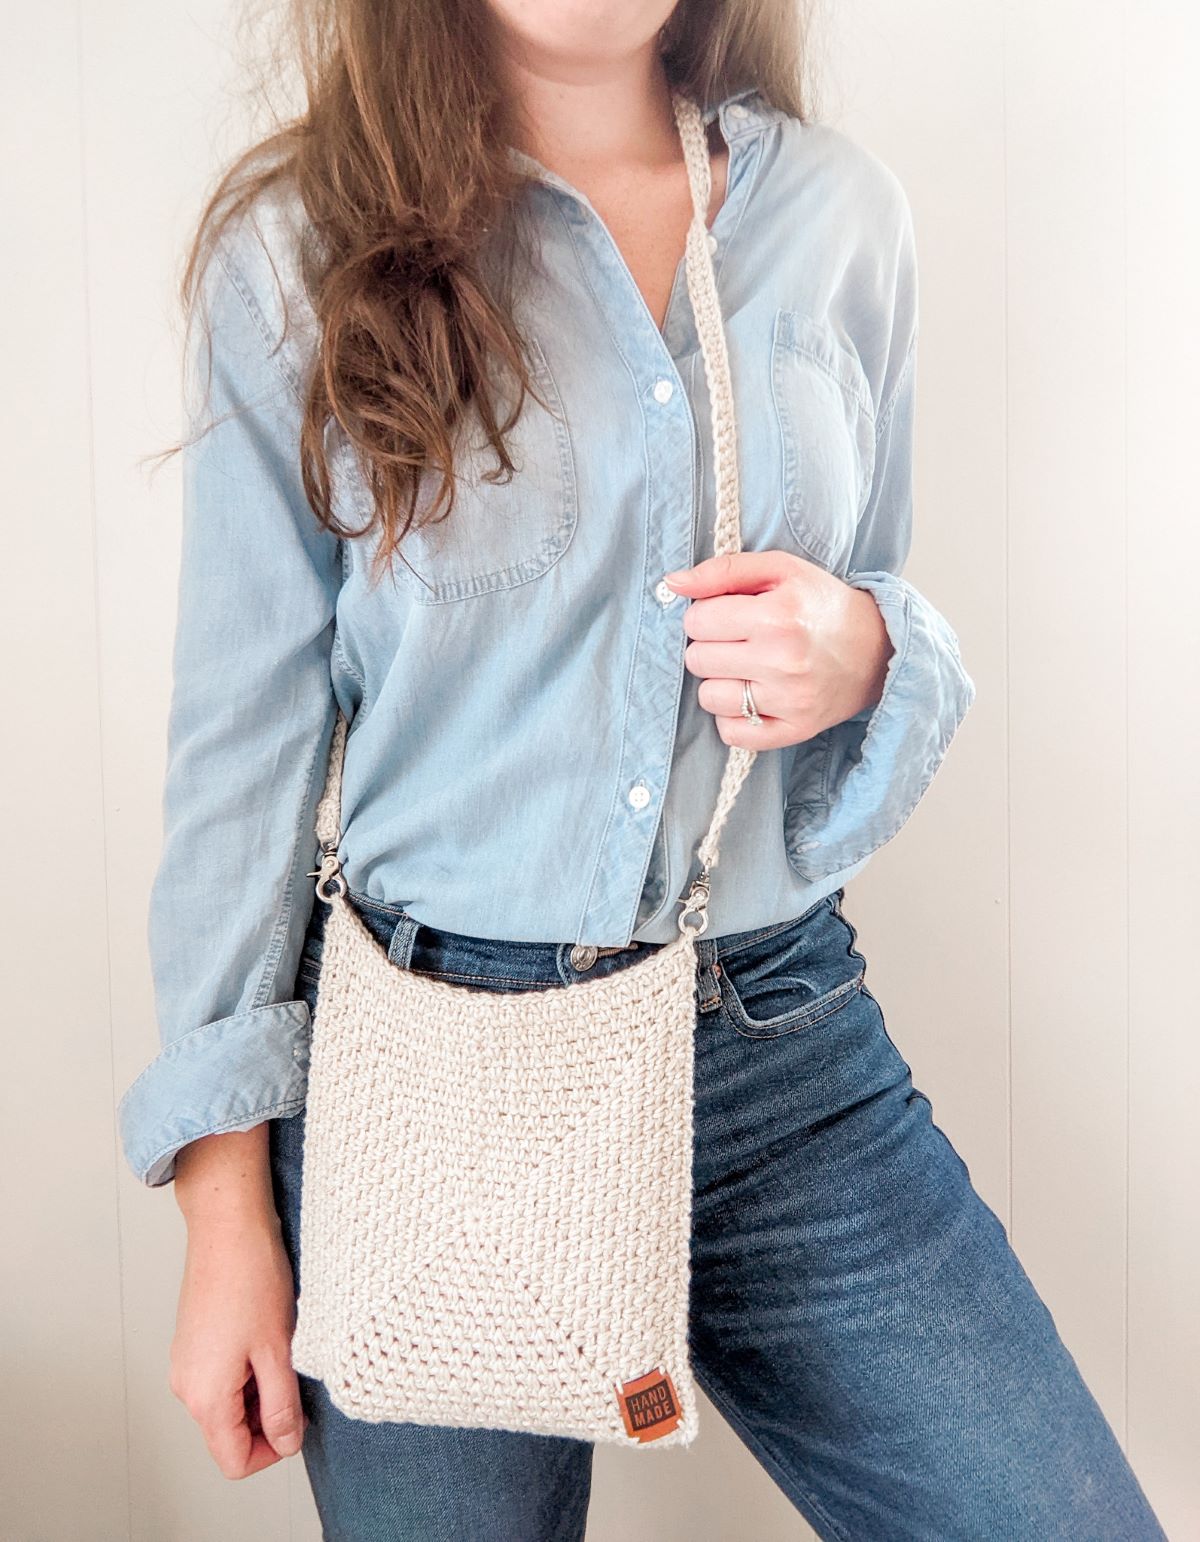
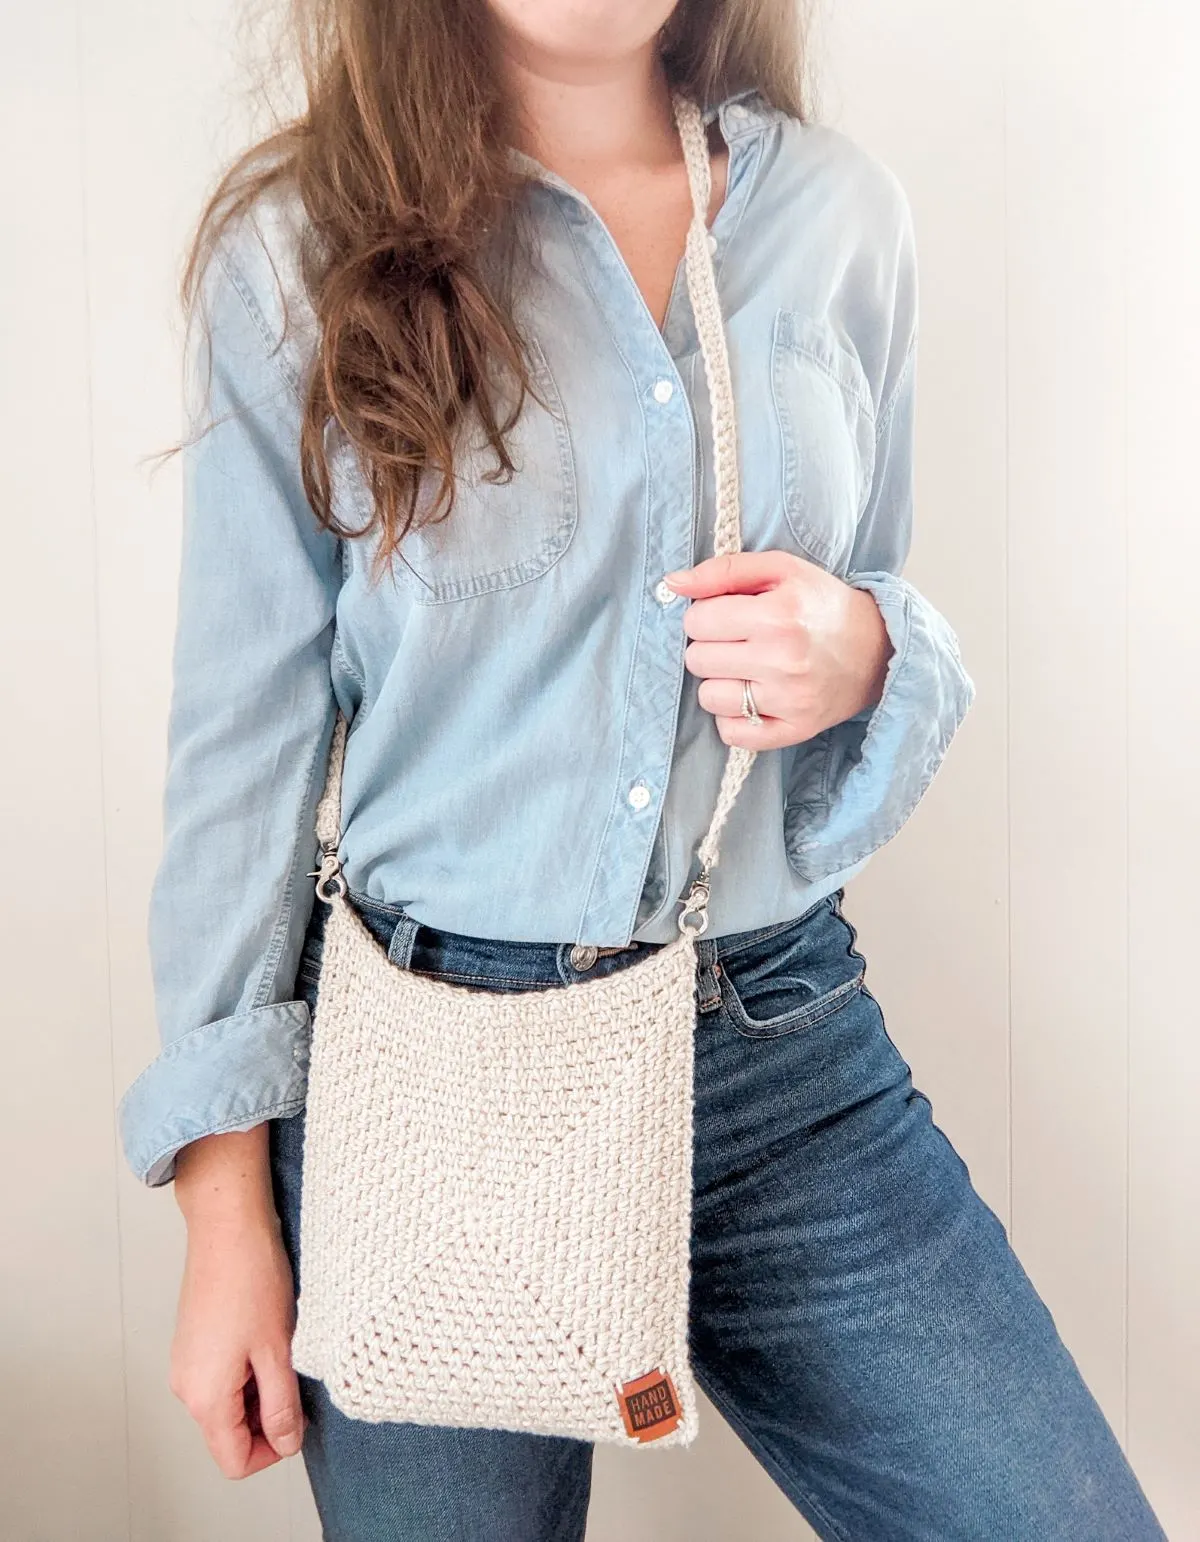
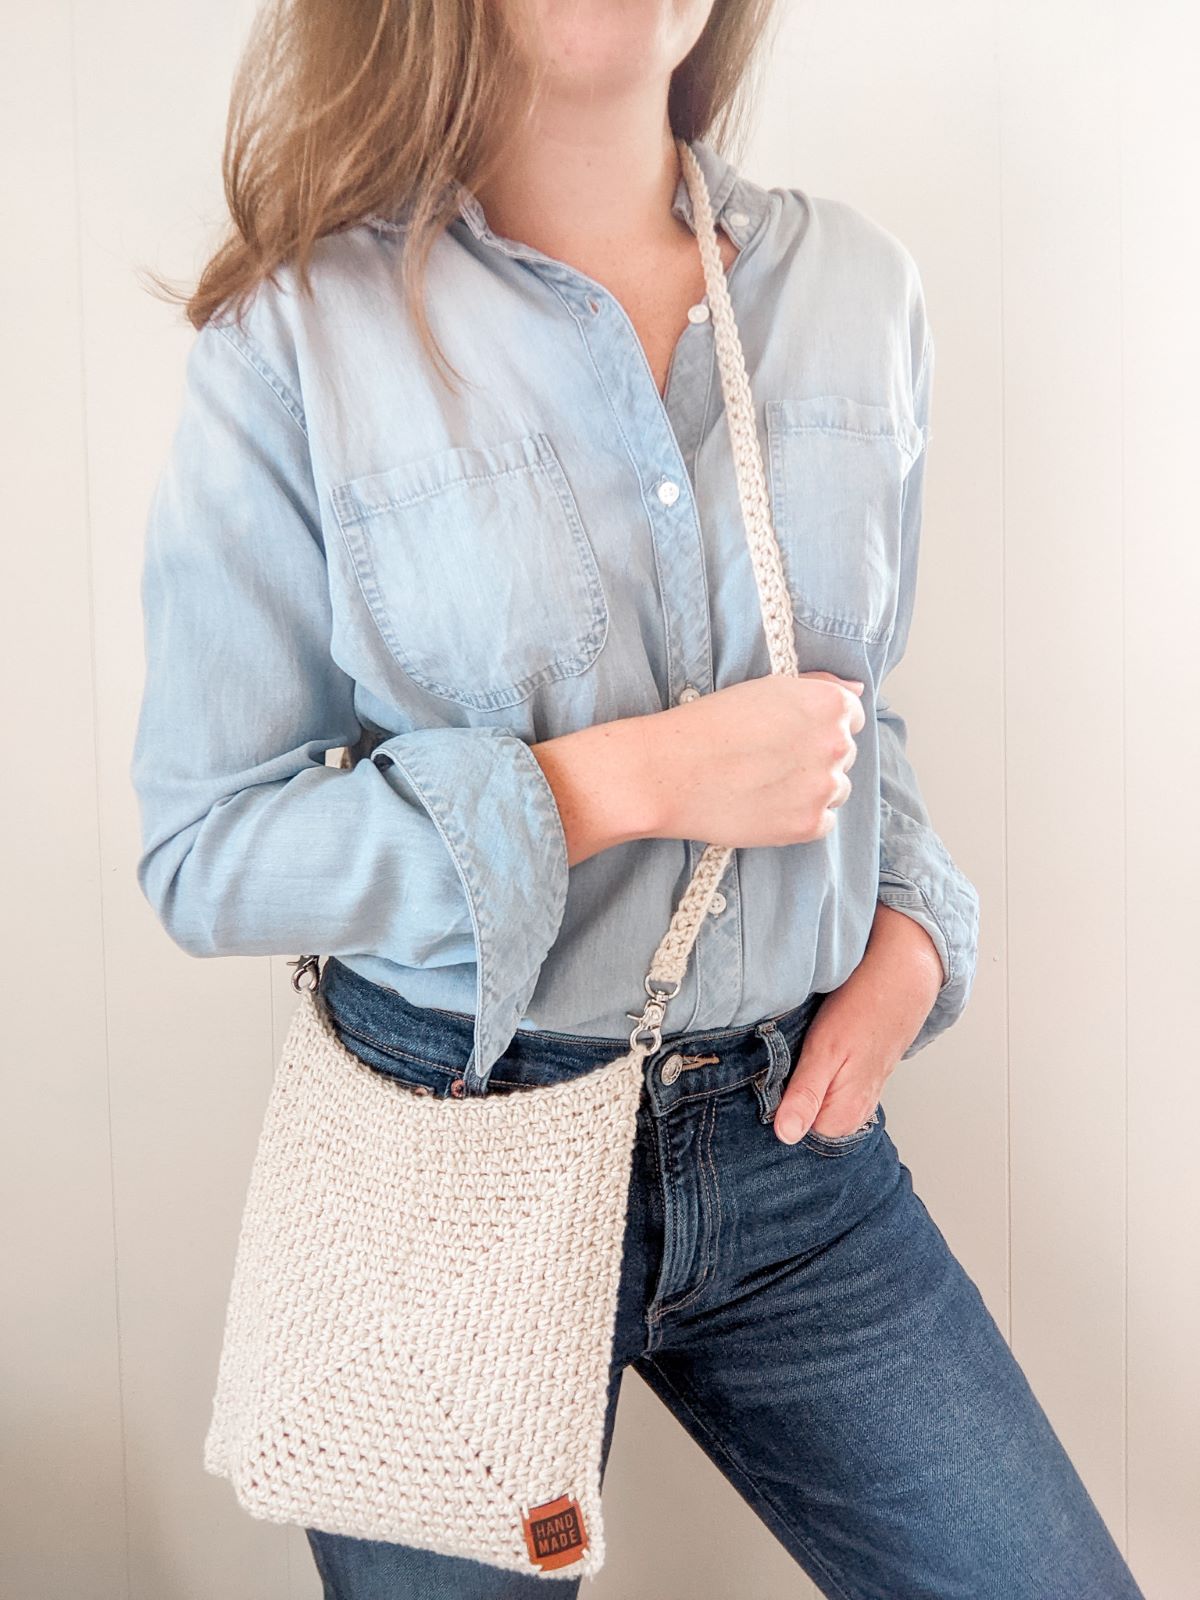
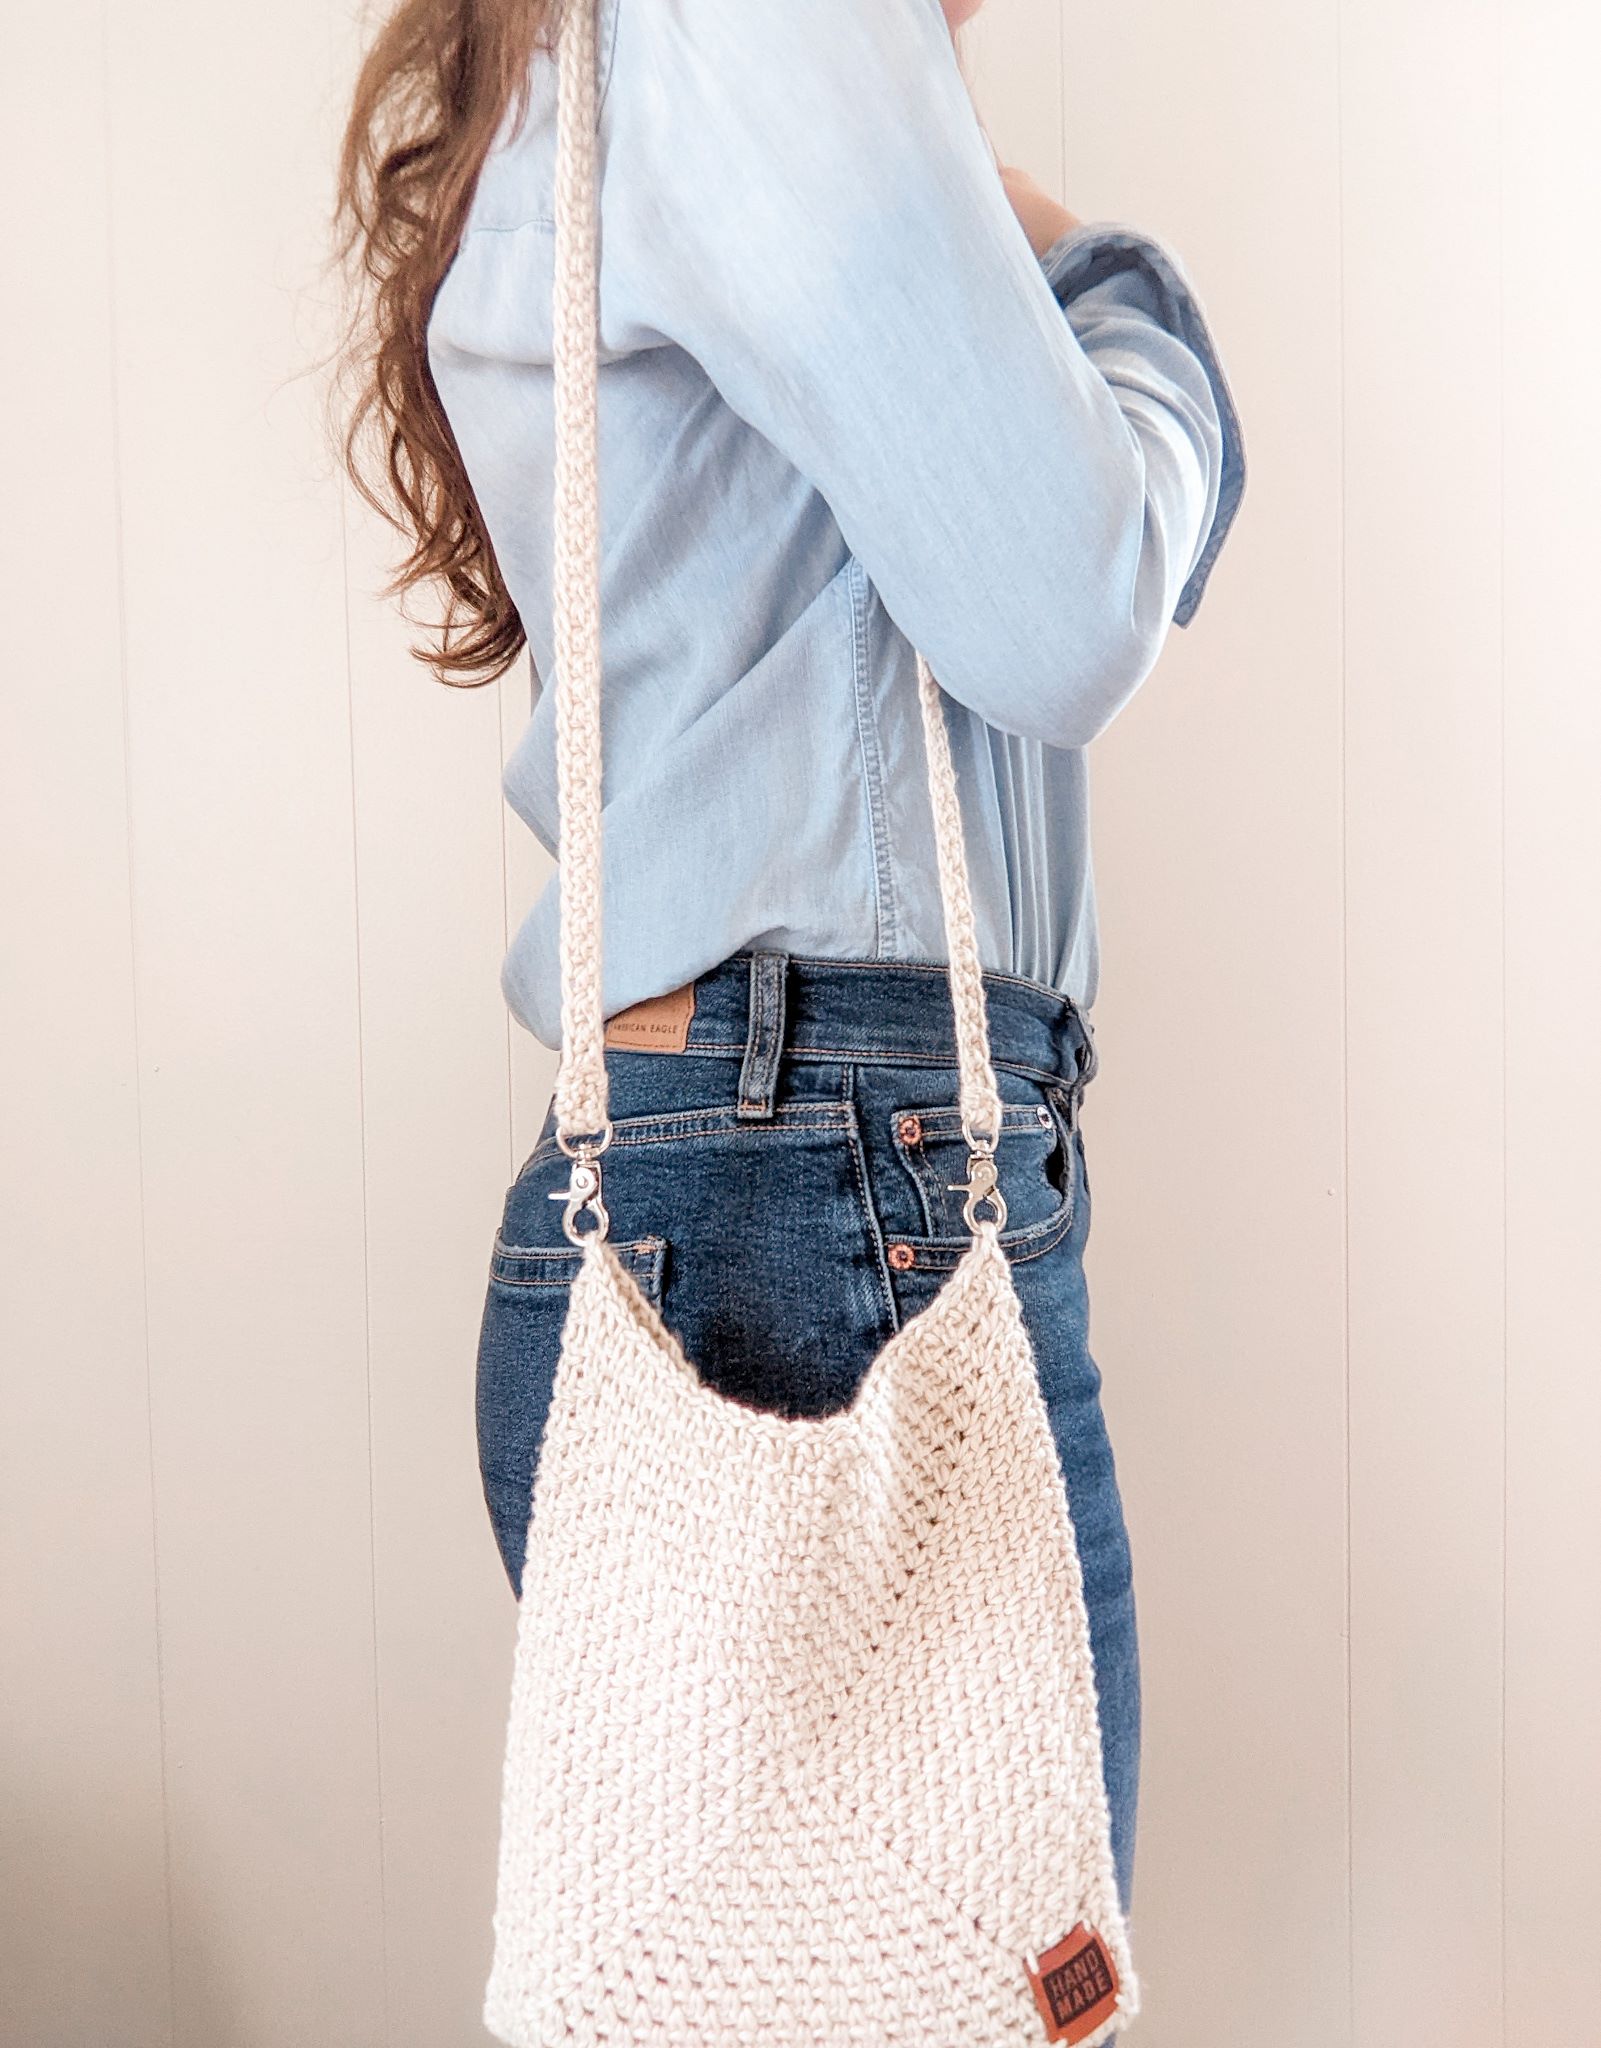
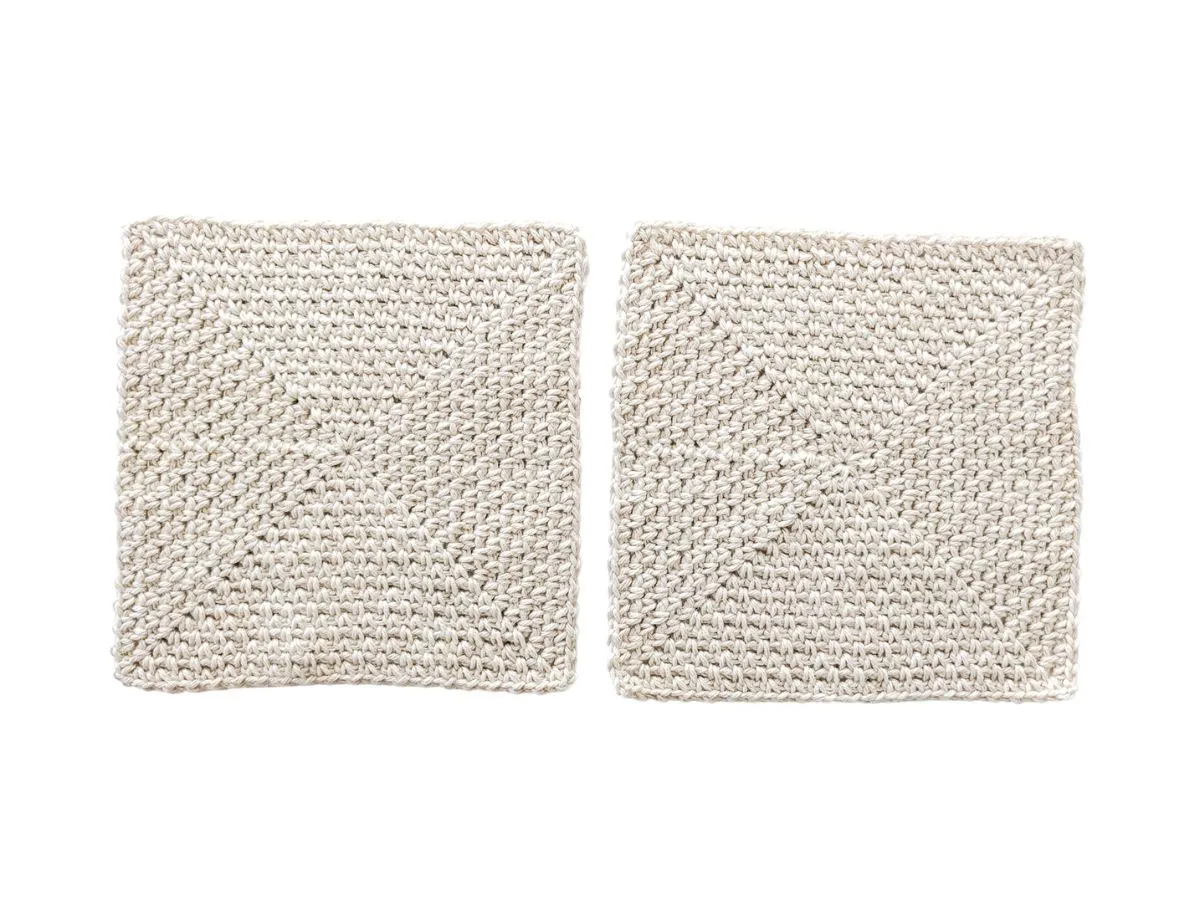
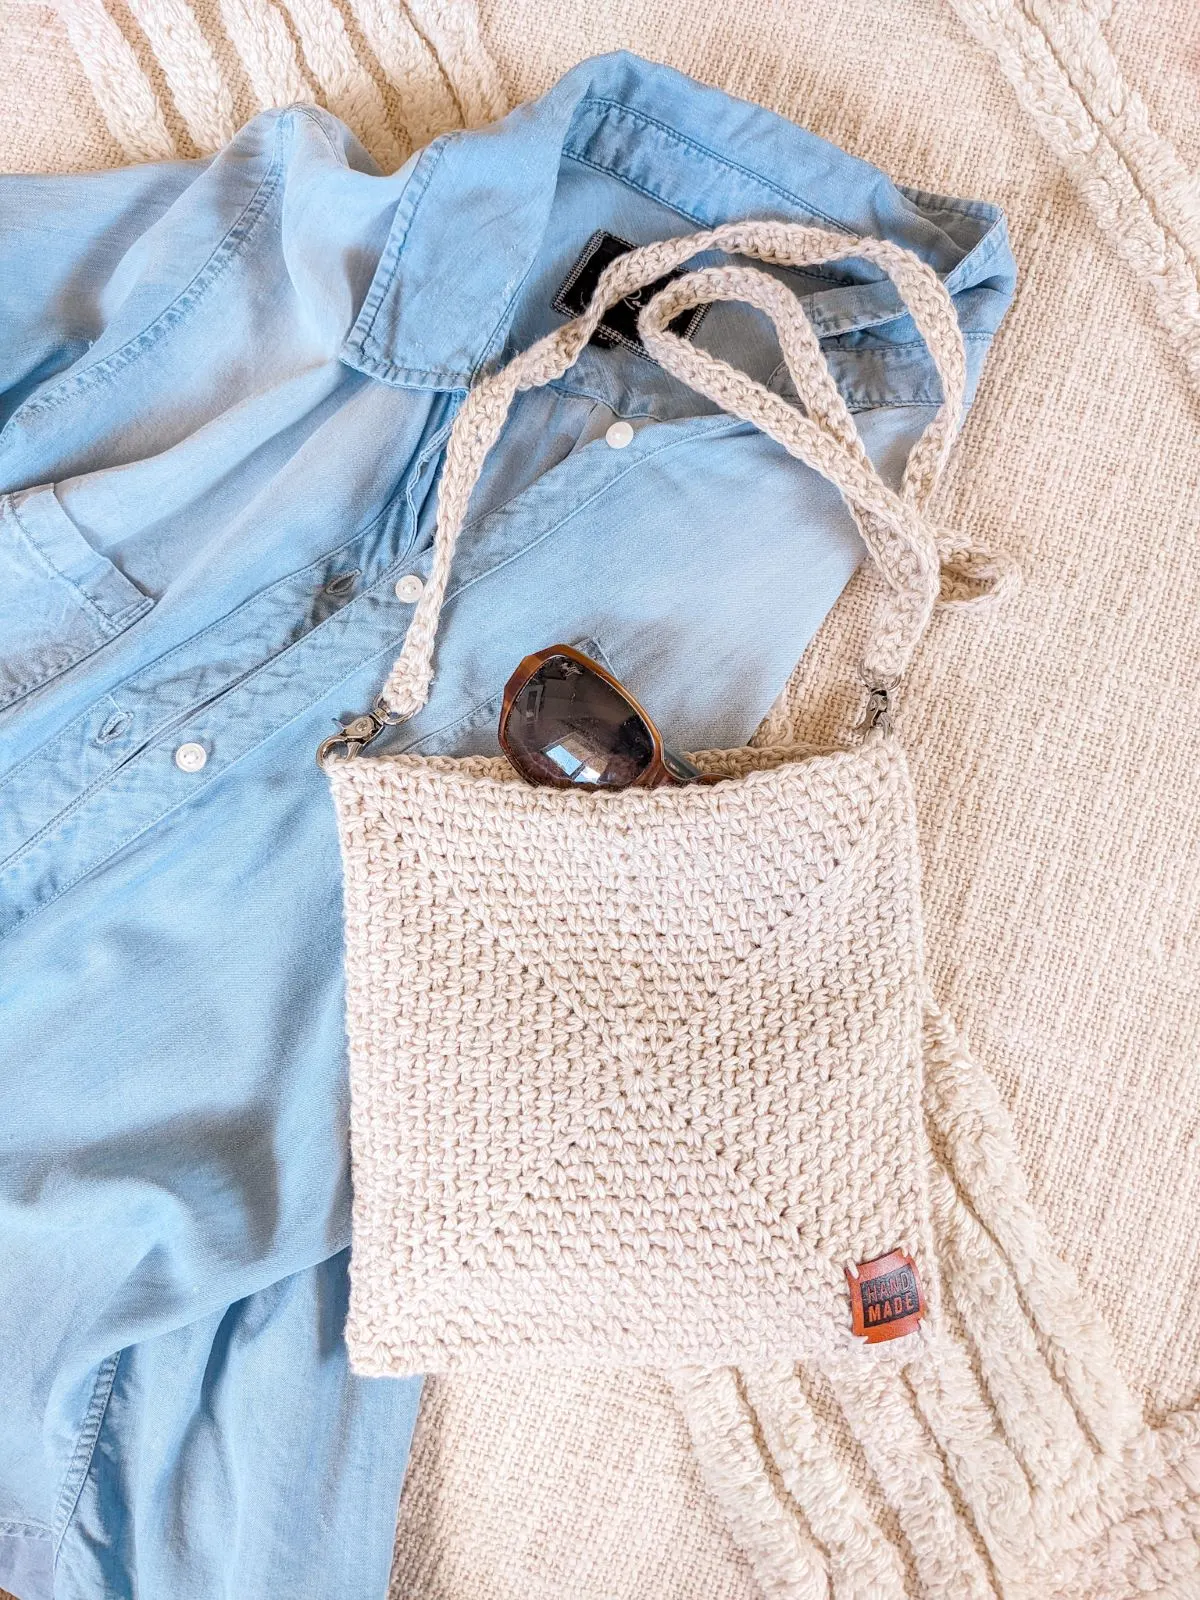
Add some charm to your outfit by adding this stylish crochet crossbody bag. This free crochet bag pattern is simple, cute, and made out of 2 squares. It’s the perfect little bag to tow around if you just want to bring the necessities.
Scroll down for the free pattern + guided video tutorial or continue to read through some of the details behind my latest design.

This post contains affiliate links, which means I make a small commission at no extra cost to you. See my full disclosure here.
Simple Crochet Crossbody Bag Pattern
My latest free crochet pattern is a simple little crochet bag that’s perfect to wear when you only want to bring the necessities; like your wallet, keys, and phone.
A couple of snacks fit as well, so I’ve got you covered (if you like bigger bags then check out the larger granny square version of this bag here).
This pattern also has interchangeable straps, so you could totally swap these straps out for another pair. You could do a leather strap from an old bag or you could make a couple of different colored ones.
So all and all this bag pattern is very customizable and beginner-friendly!
I just loved how it turned out, so I hope you enjoy making this pattern as well!
How to Crochet a Crossbody Bag?
So for this crochet bag pattern, you will first start by making 2 moss stitch squares. Once you have made both squares, you will then seam them together using the whipstitch method.
Once you have seamed your 2 squares together, you will then make a border around the top of the squares. This helps provide some extra security, but it also creates a side hole on the side of your bag.
This is where you will then snap on your crochet straps. So once the border is made, you will then make a crochet strap out of single crochets and then seam each side of the strap onto a swivel hook.
Once this is done, then all that’s left to do is snap your hooks on your bag. It’s a super simple pattern!


The Yarn You’ll Use for This Crochet Shoulder Bag
For this pattern, you will need a worsted weight yarn. I used Hobby Lobby Cotton Et Lin in the color Parchment. It’s a really soft blended yarn that’s made from cotton and linen.
I loved using this yarn for this project, however, you could use any type of worsted weight yarn. Since this pattern is very forgiving, you can also choose to go with a different fiber.
Just make sure that it’s a worsted weight yarn, so the bag comes out the right size. If you choose a different weight yarn, you might have to add additional rows to the square.
Alright, so let’s dive into this pattern!
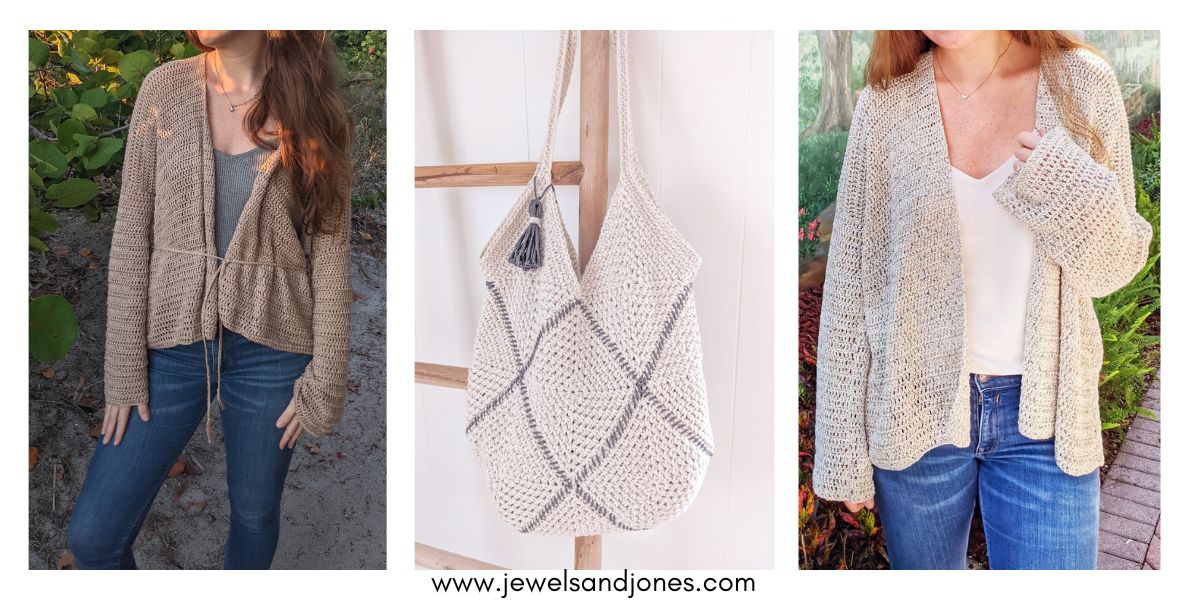
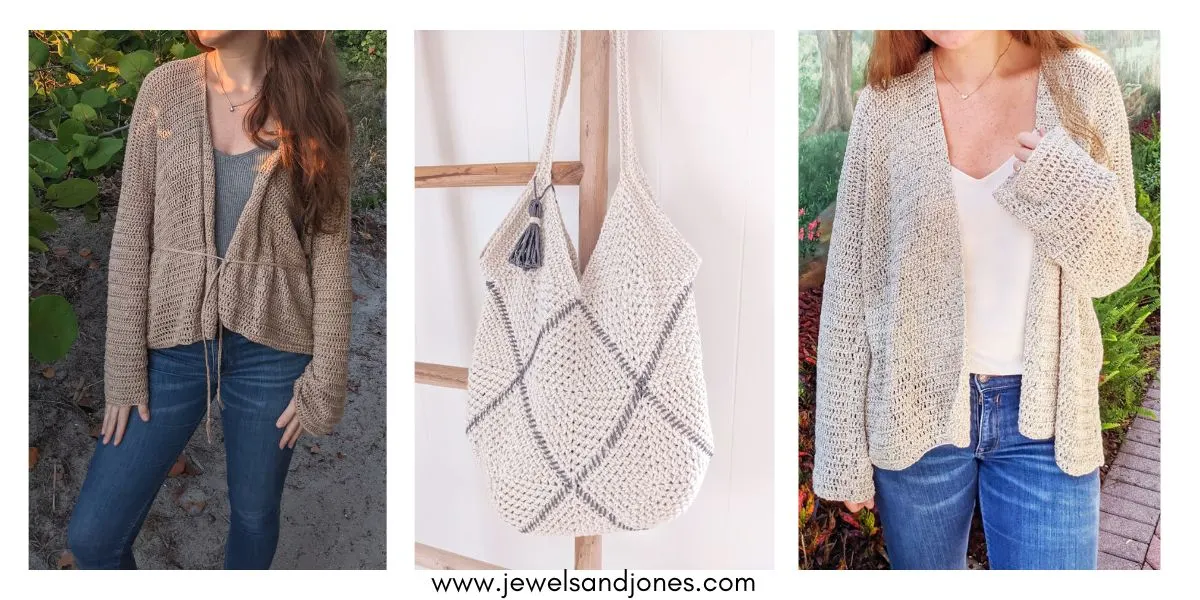
other free patterns you might like

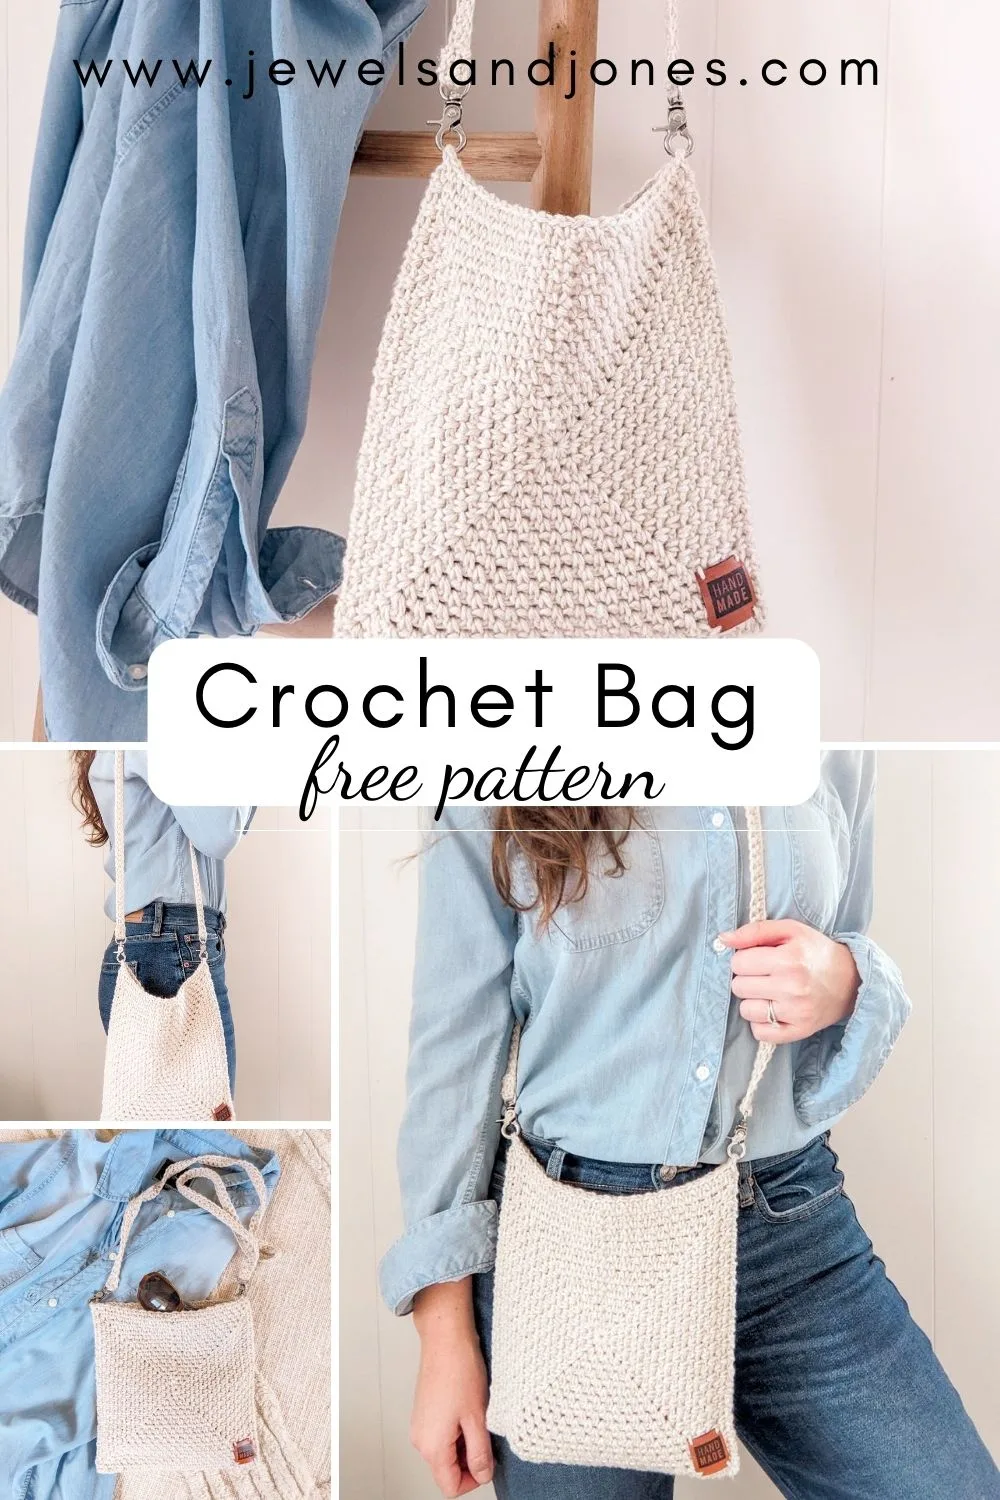
Free Crochet Crossbody Bag Pattern
Description:
Add some charm to your outfit by adding this stylish crochet crossbody bag. This free crochet bag pattern is simple, cute, and made out of 2 squares. It’s the perfect little bag to tow around if you just want to bring the necessities.
Materials:
- 2 skeins of Hobby Lobby Yarn Bee Cotton Et Lin in the color Parchment (Weight 4/ 3.5oz, 180 yds), a total of 360 yards or you can use another worsted weight yarn (like this one here and here).
- 5.0 mm (H) crochet hook.
- Stitch Markers.
- 2 Swivel Snap Hooks ( I purchased mine from Hobby Lobby, similar ones here from Amazon).
- Darning Needle.
- Scissors.
Gauge:
One moss stitch square is approximately: 8 1/2” x 8 1/2” inch.
Bag size: 8 1/2” wide x 81/2″ long.
Length of Strap: 38″ inch long.
Abbreviations:
ch – chain: Yarn over, pull through loop on hook.
sc – single crochet: Insert hook into stitch, yarn over and pull through, yarn over and pull through last two loops on hook.
ss – slip stitch: Insert hook into stitch, yarn over, pull through stitch and loop on hook.
Pattern Notes:
- Pattern written in U.S Terms.
- Bag is worked by making 2 moss stitch squares. Once you have made both squares, you will seam the two squares together using the whipstitch method. The strap of the bag is made separately and will be added on last.
- Straps on the bag are longer so that the bag can be worn over the body, however, you could modify the strap to make it shorter. All you have to do is decrease the number of chains.
- The Moss Stitch Square is made by turning after each completed round (You will bring your working yarn over the stitch and then work the square per the instructions). Each round is joined together by a slip stitch. Click HERE for a step-by-step photo tutorial.
Watch the full step-by-step video tutorial on our YouTube Channel HERE.
Moss Stitch Granny Square Pattern
With Hobby Lobby Yarn Bee Cot Et Lin color Parchment, make 2 Moss Stitch Granny Squares.
Round 1: Chain 2, * Work 1 single crochet in the 2nd chain from the hook, chain 2, make another single crochet in the same chain, and chain 1. Repeat from * 3 more times for a total of 4 corners. Slip stitch to first single crochet of the round to join the work. Turn your work.
Round 2: *Work 1 single crochet in next side space, and chain 1. Then skip the next single crochet and work (1 single crochet, chain 2, 1 single crochet, chain 1) in the corner space. Repeat from * 3 more times for a total of 4 corners. Then slip stitch to first single crochet to join the work. Turn your work.
Round 3: Work 1 single crochet and 1 chain in each chain space, and work (1 single crochet, chain 2, 1 single crochet, chain 1) in each corner space. Then slip stitch to first single crochet to join the work. Turn your work.
Round 4 – Round 18: Repeat round 3.
Finish off and weave in all ends before seaming your two squares together.

Seaming Your Squares Together
Step 1: Grab one of your squares and lay it down on a flat surface. Then grab the other square and put it right on top of the other one.
Step 2: Cut a piece of yarn that is 4 times the length of your square and insert your yarn through the darning needle.
Then starting from the right side, whipstitch the two squares together. Continue to repeat this on the bottom and the left side of the square. Making sure to leave the top part of your square open.
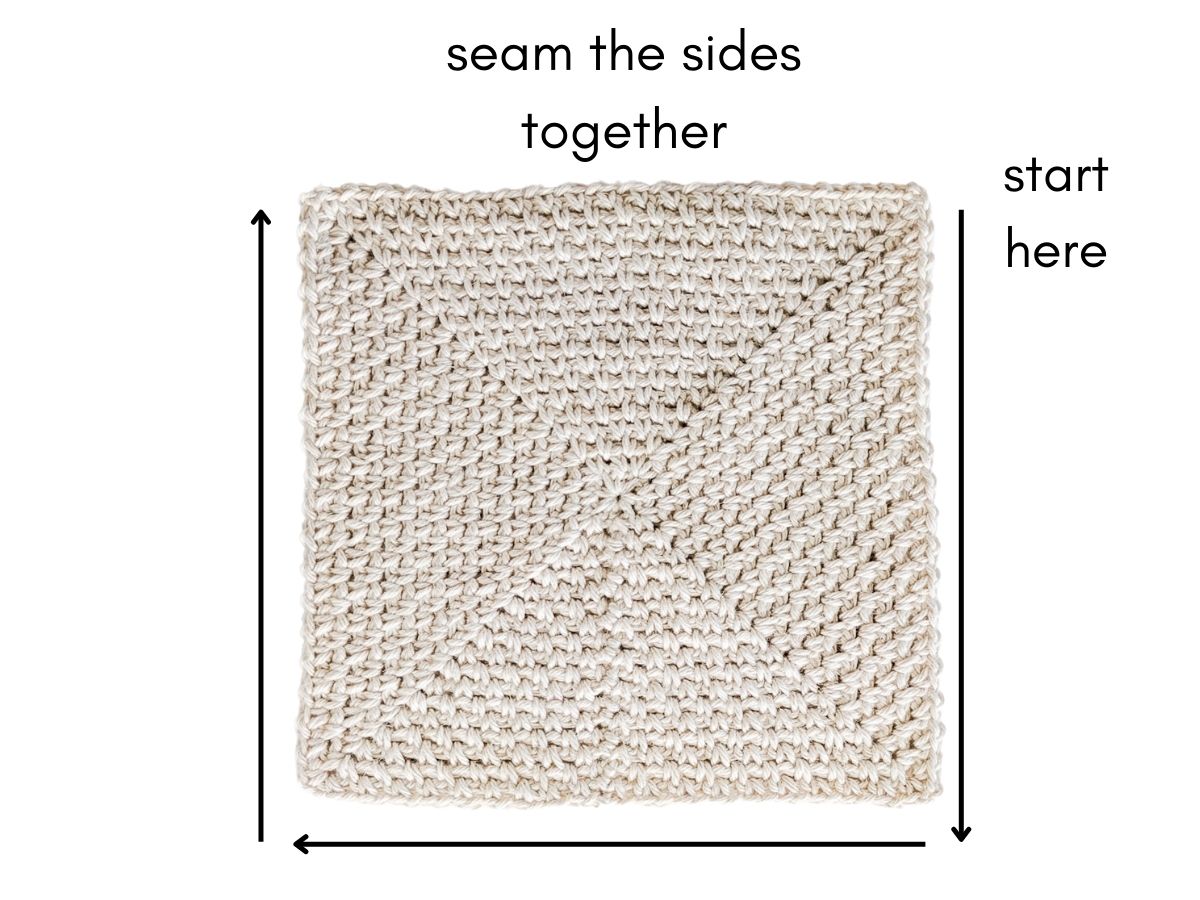

Once you have whipstitched your sides together, cut your yarn, and weave in all ends.
Now you will create a border around the bag.
Step 3: Reattach your yarn to the outer right side of your crochet square and make *1 single crochet in the first space, chain 1, and work 1 single crochet in the next space. Repeat from * all the way around the bag. Make a slipstitch at the end to join the work.

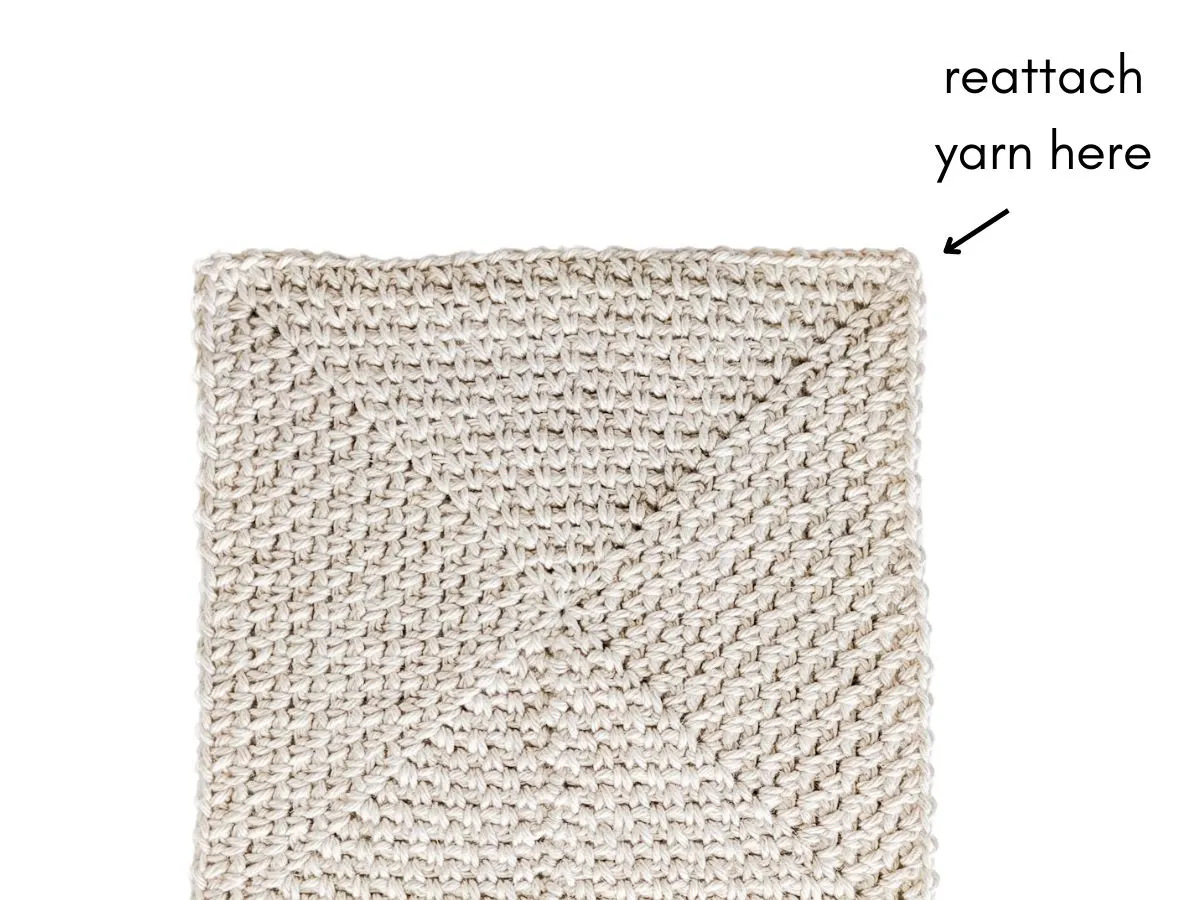
Then finish it off and weave in your ends.
Once you have seamed your square together and made your border, it’s time to make the strap for the bag.
How to Make a Strap for Your Crochet Bag
Step 1: Grab your yarn and crochet 124 chains. Once you have chained 124, make 1 single crochet in the 2nd chain from the hook and continue to make a single crochet in each stitch.
Now work one more row of single crochet by chaining 1, turning your work, and making 1 single crochet in the first stitch and continue by making a single crochet in the other stitches.
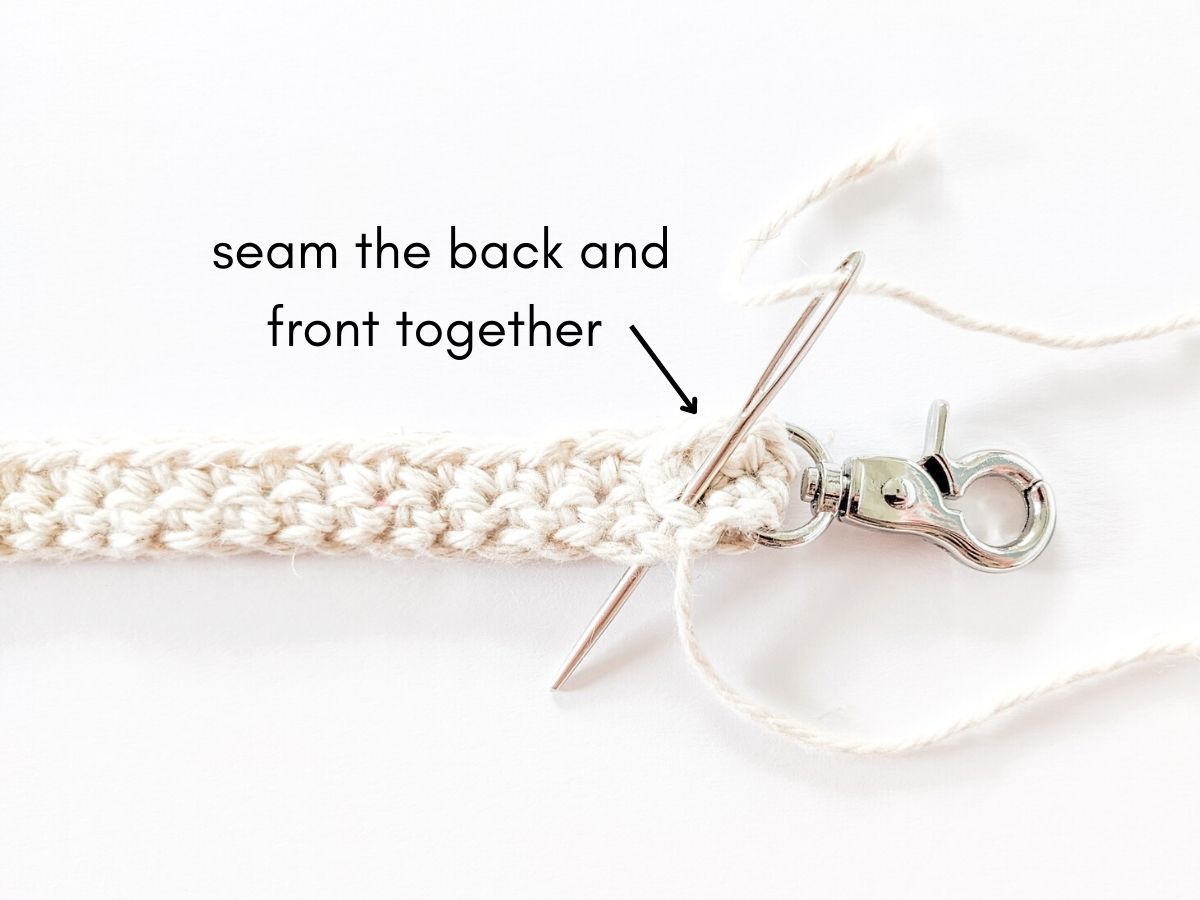
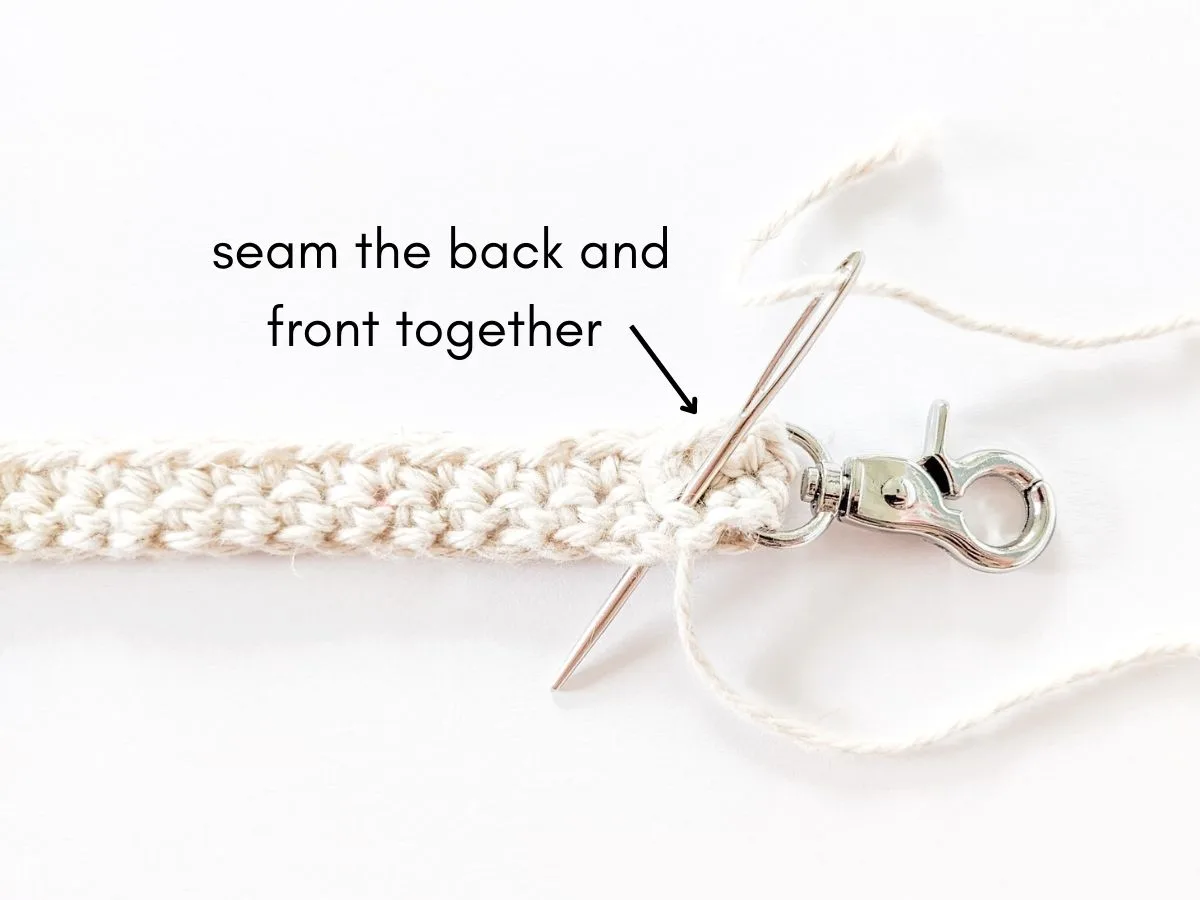
Then finish it off, but leave a long tail end. The tail end will be used to seam your strap to the swivel hook.
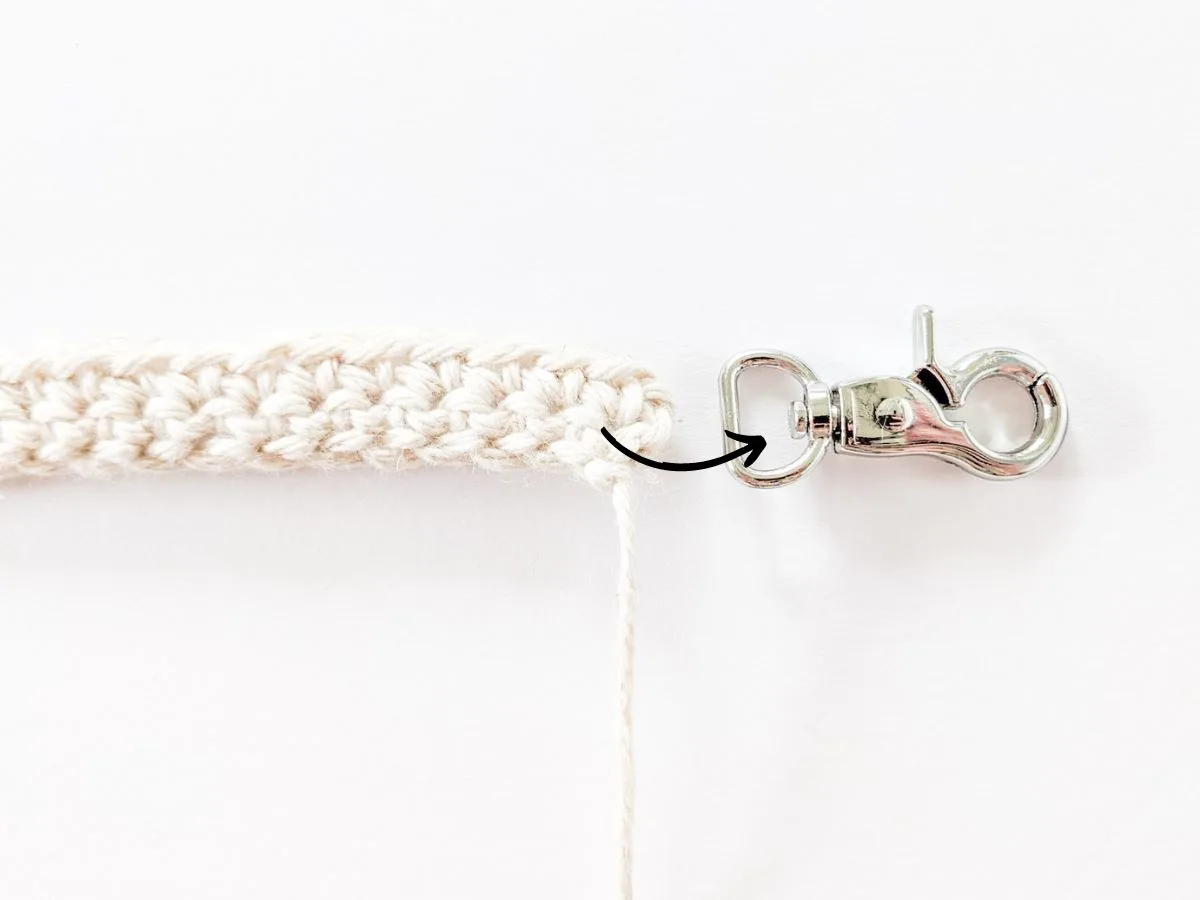
Step 2: Grab one of the swivel hooks, and insert your strap though the bottom of the hook.
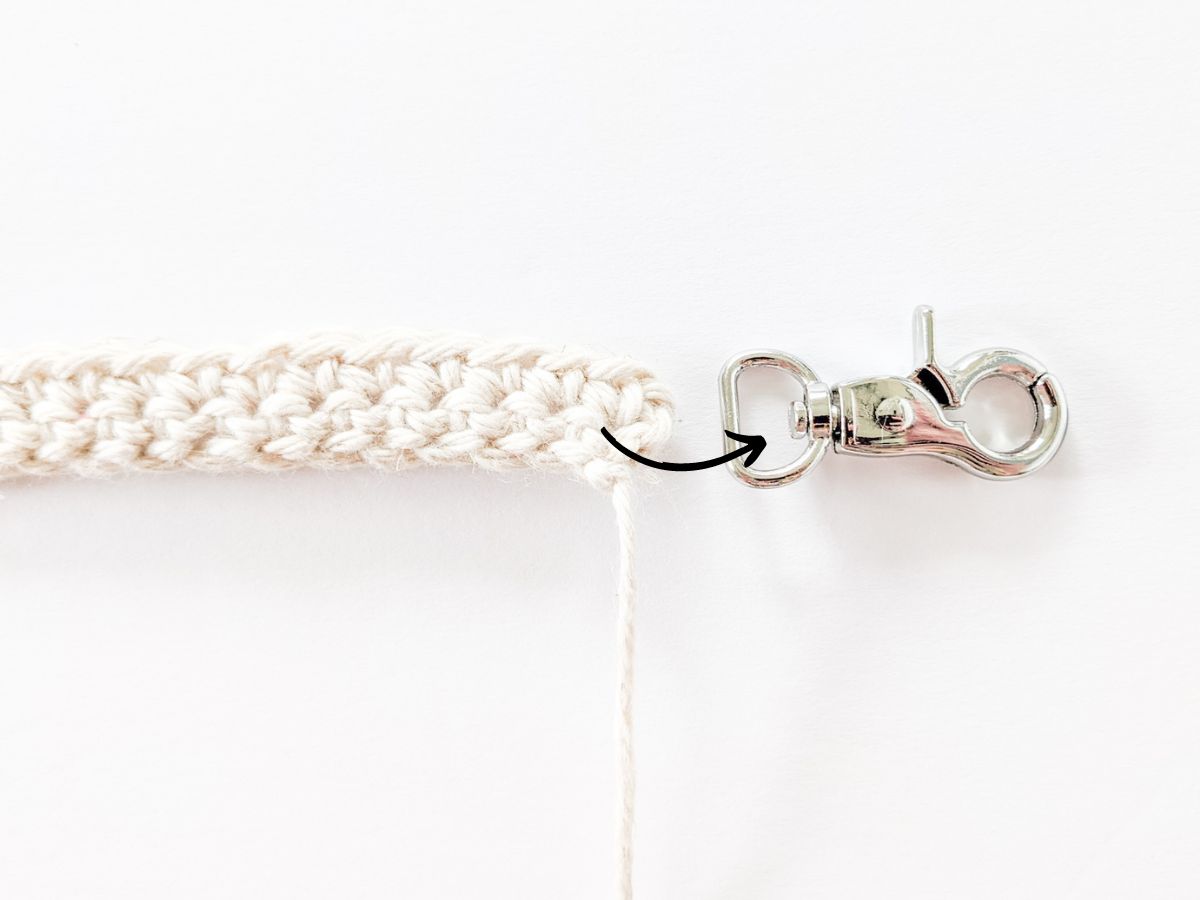
Then fold the strap 3/4″ of an inch over and seam the two sides together.

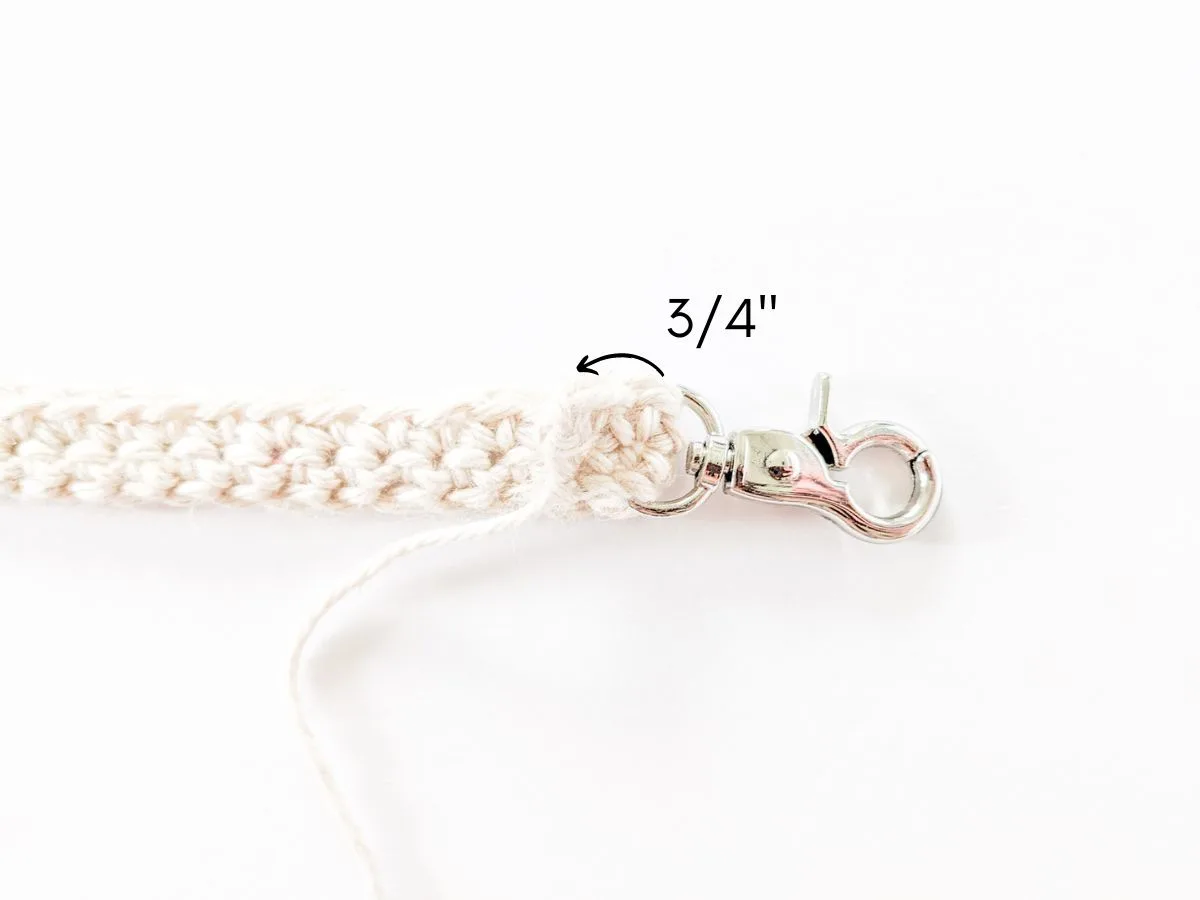
Tie a secure knot when finished and repeat this process on the other side of the strap.
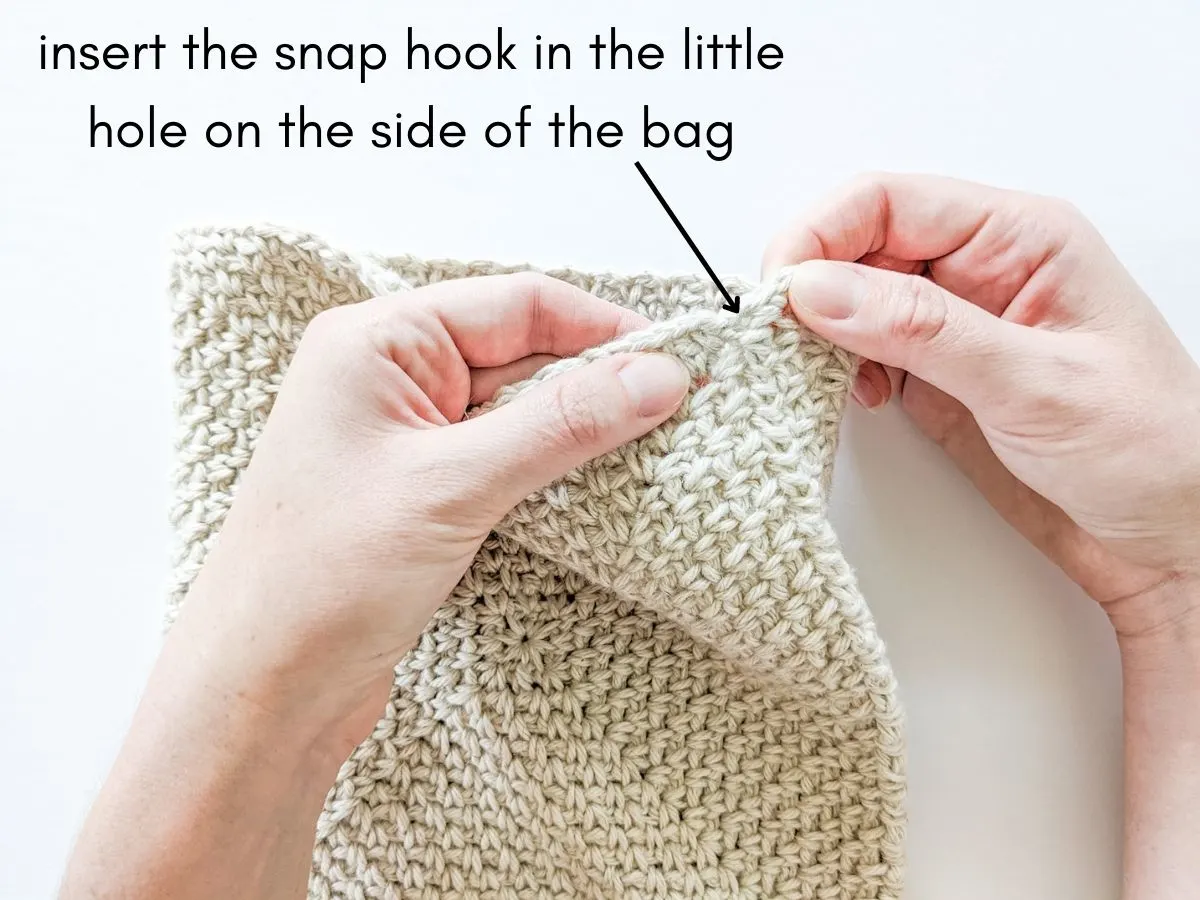
Step 3: Grab your bag and snap your strap onto the mini holes created by chain spaces on the side of your bag.

And you’re finished!
I hope you enjoyed making this simple little crochet bag and get lots of use out of it.

Deanna Staniforth
Thursday 29th of February 2024
Hi I have just started crocheting your cross body bag. Usually when crocheting I like to count my stitches after each row. Do you know how many stitches I should have after each round? Thank you
Deanna Staniforth
Tuesday 13th of February 2024
About to start this project but just wondering what size swivel hook is needed? There are a lot if different sizes out there. Thank you
Nicky
Friday 16th of February 2024
Hi there, here are the dimensions of the swivel hook I used: Length: 1 5/8" Width: 3/4" (small size).
Cynthia
Wednesday 24th of May 2023
This is a lovely purse but I believe there may be a pattern glitch. Everytime I get to about Row 4, it starts to curl up. Do you have any suggestions which may help me Thank you in advance.
Cynthia
Nicky
Thursday 25th of May 2023
Hi there, thanks for reaching out. I think you might be forgetting a chain somewhere in the repeat of the row or it could possibly be your tension as well. If you're adding the right amount of chains, I would go up a hook size and see if that helps with the curling. I've had quite a few people make this bag, so it is correct. Did you check out the step-by-step video tutorial? That may help as well. Goodluck! 😊