
Olive This Cardigan

It’s August. BUT, it’s time to get started on Fall/Winter makes. Right? Who’s with me? I’m actually already ready to start layering my cardigans and fall clothes. That’s pretty typical of me, though. I much prefer the fall to any other season. Cool weather, beautiful nature, all the spices. It all makes me super happy! So, here’s to the the first fall pattern of the year!
ABOUT THIS Design:
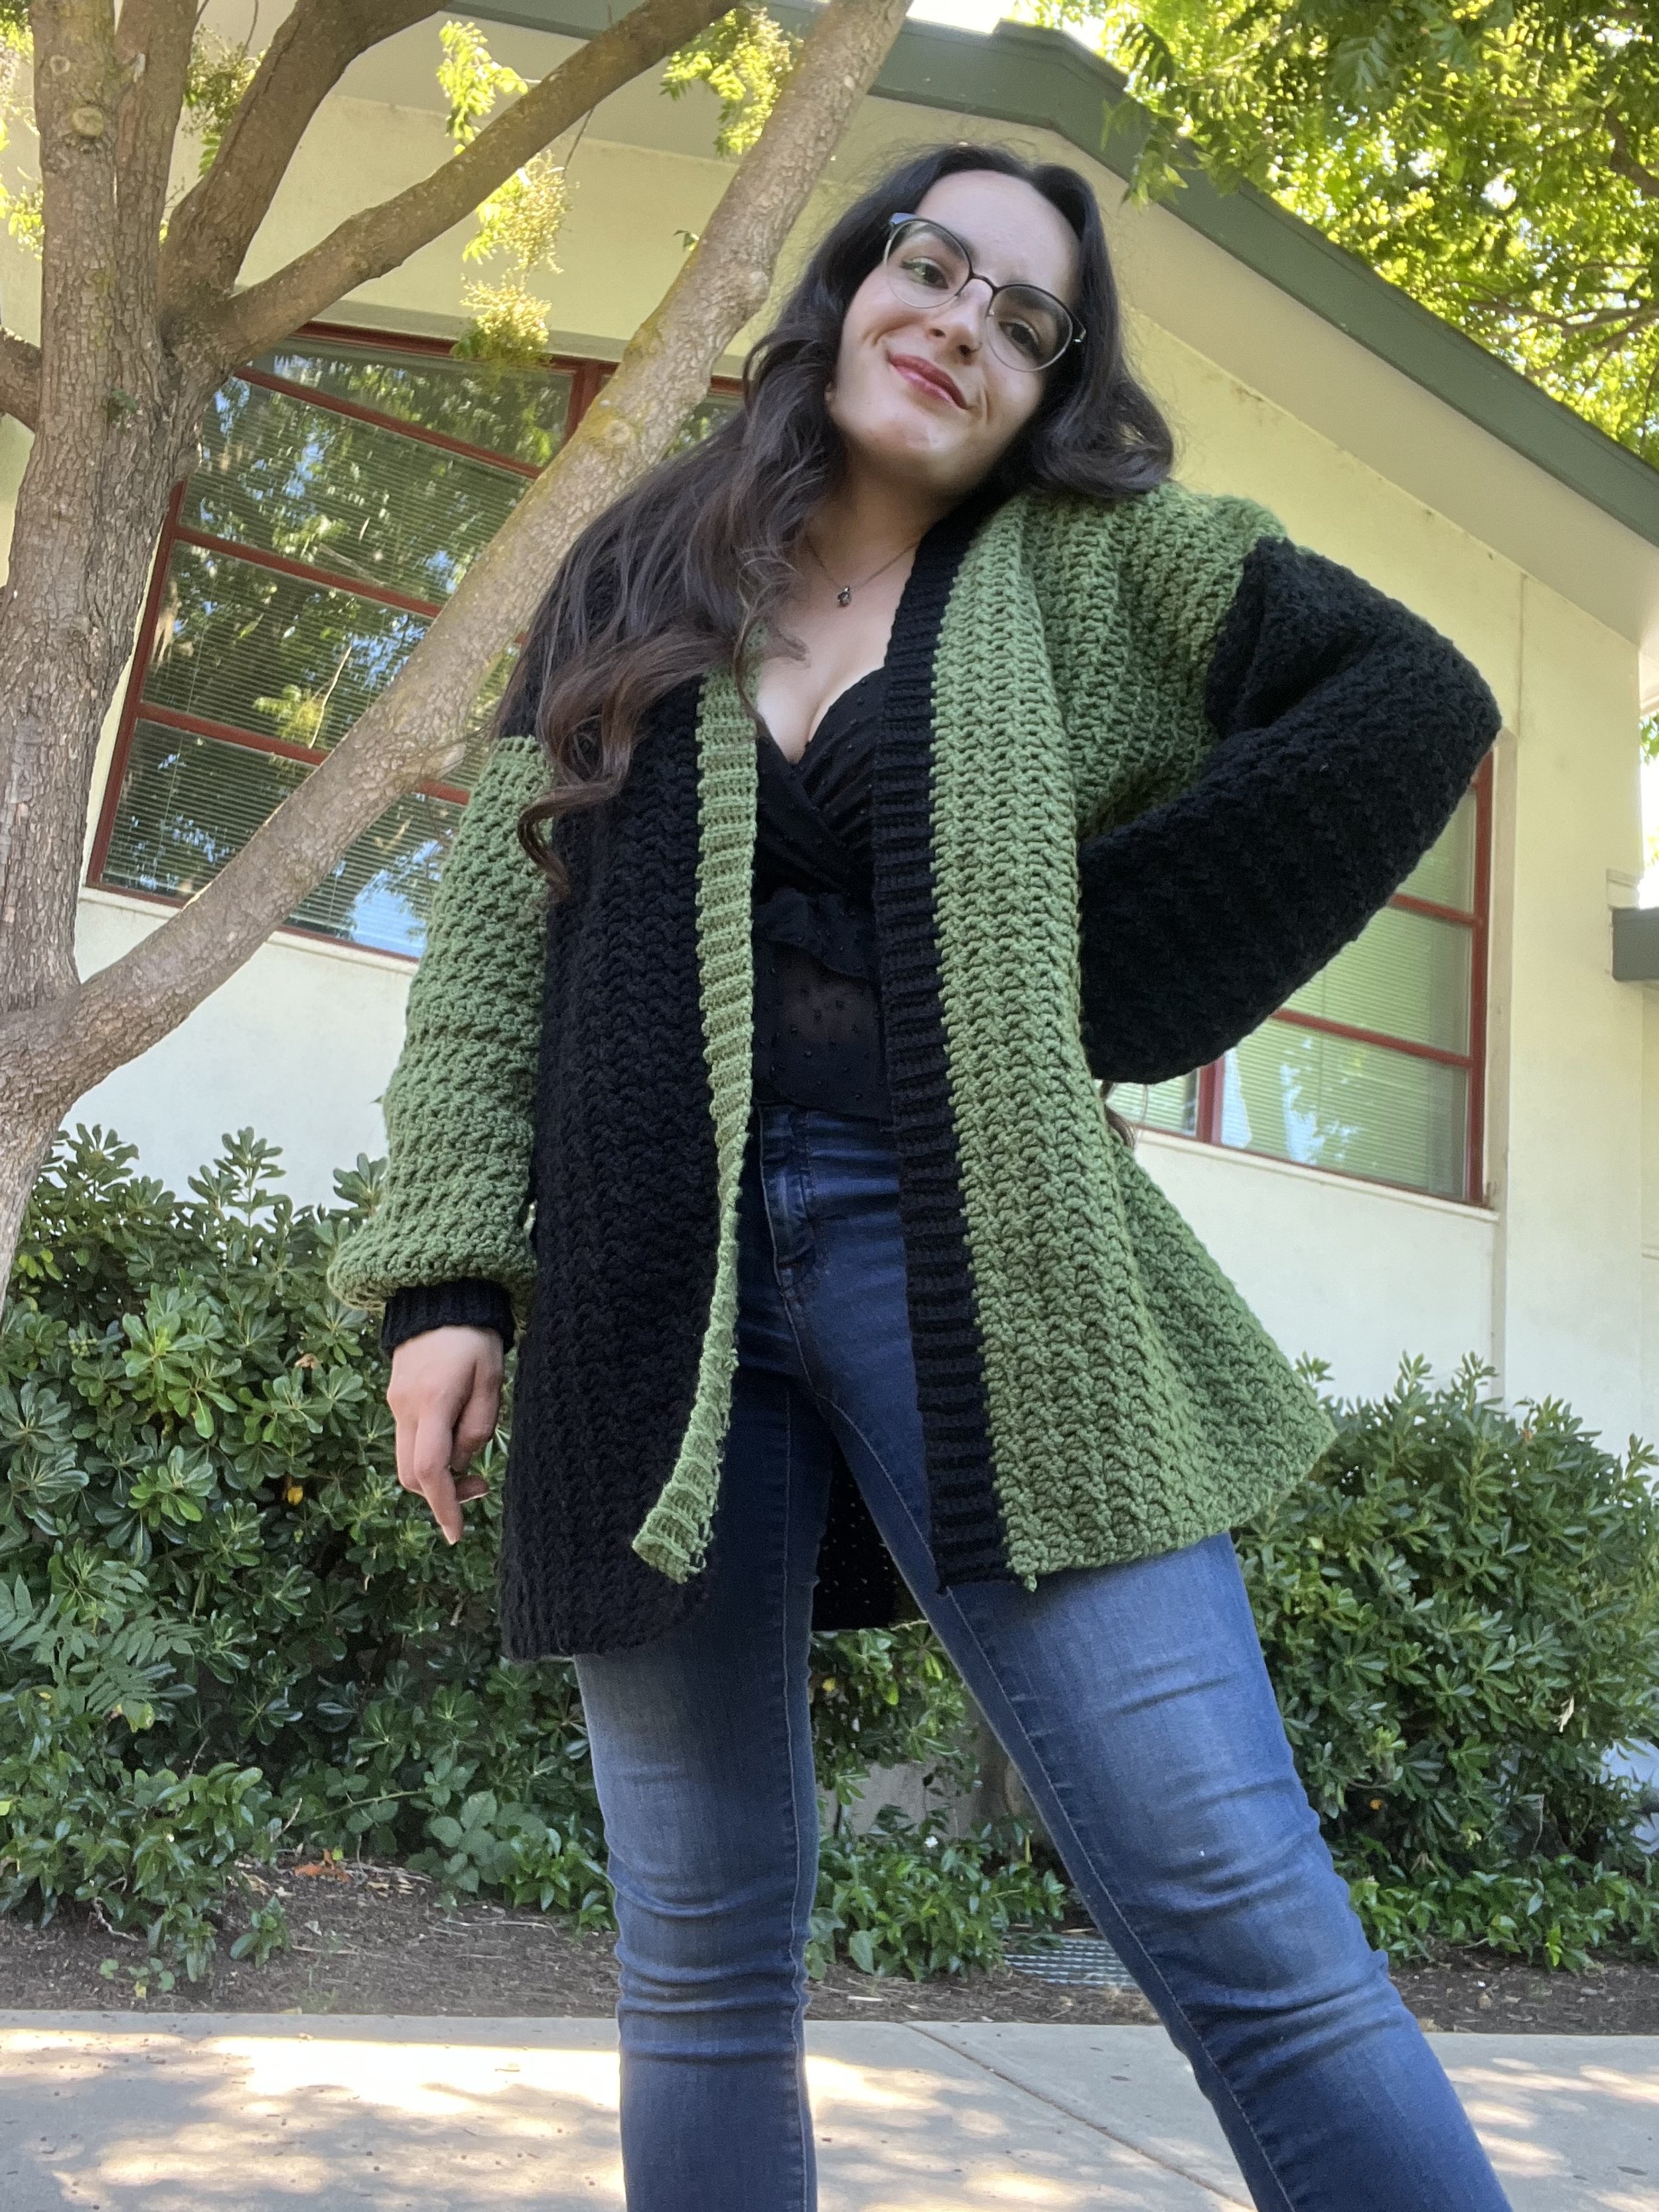
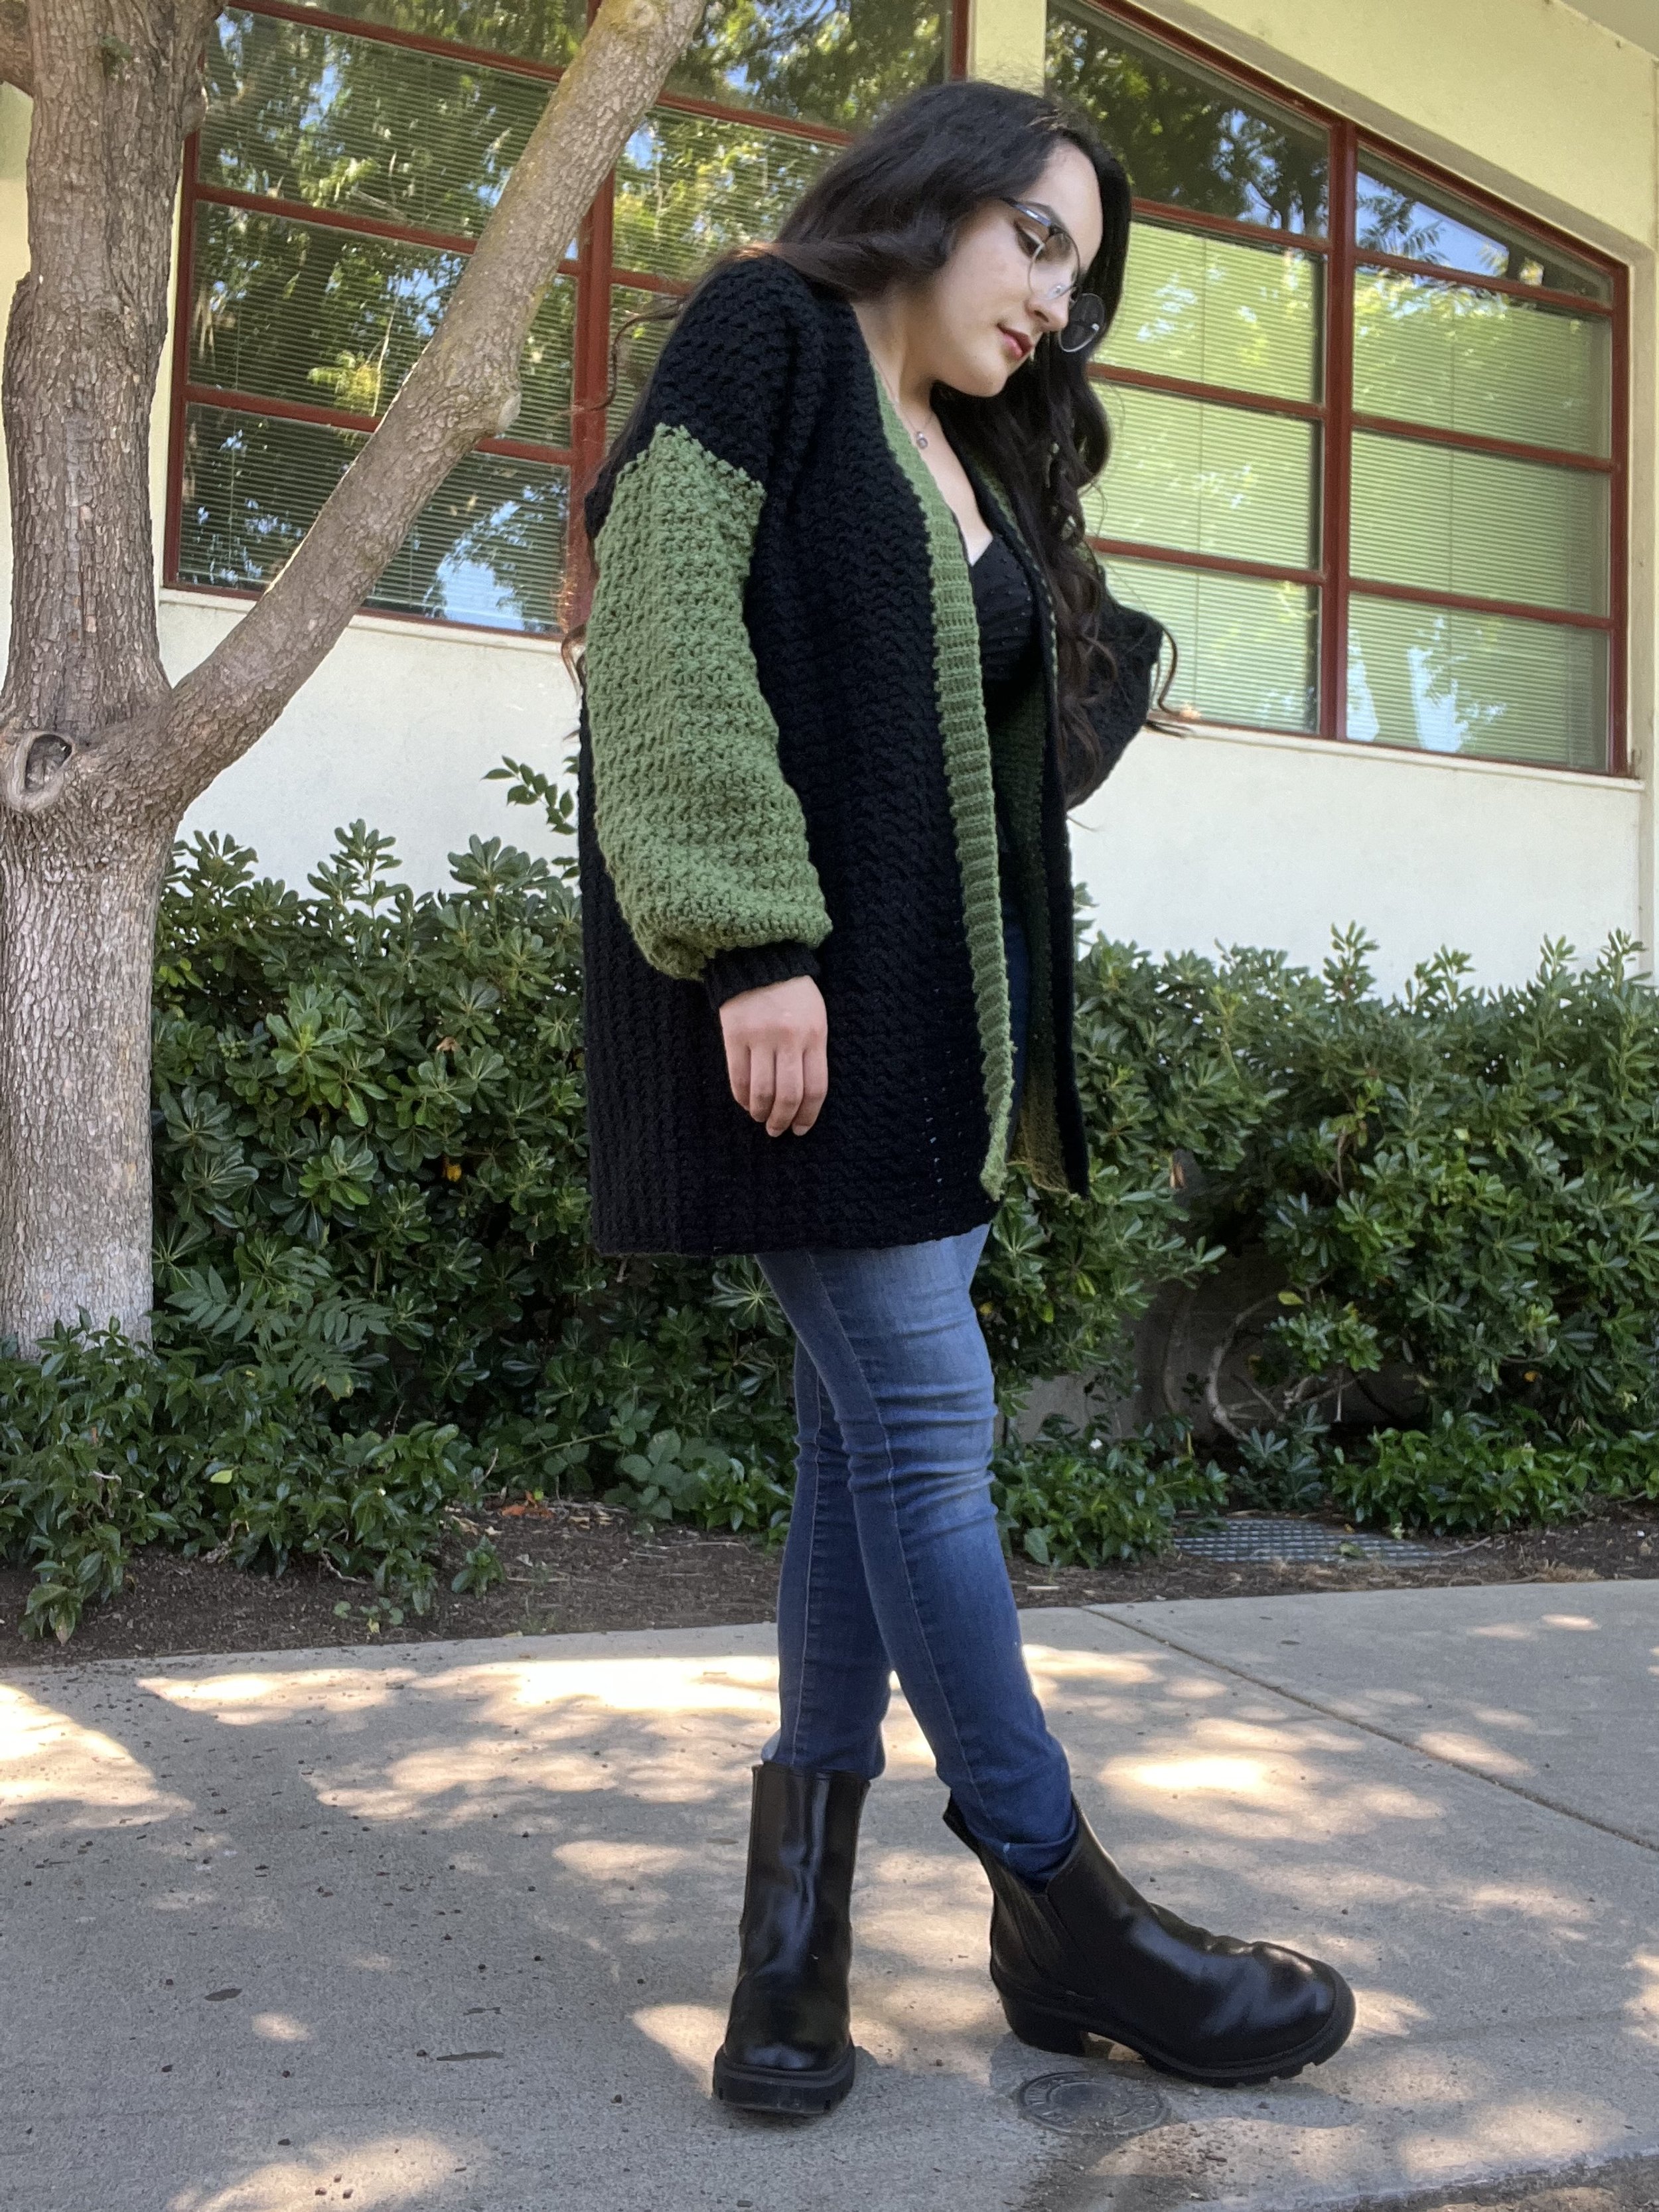
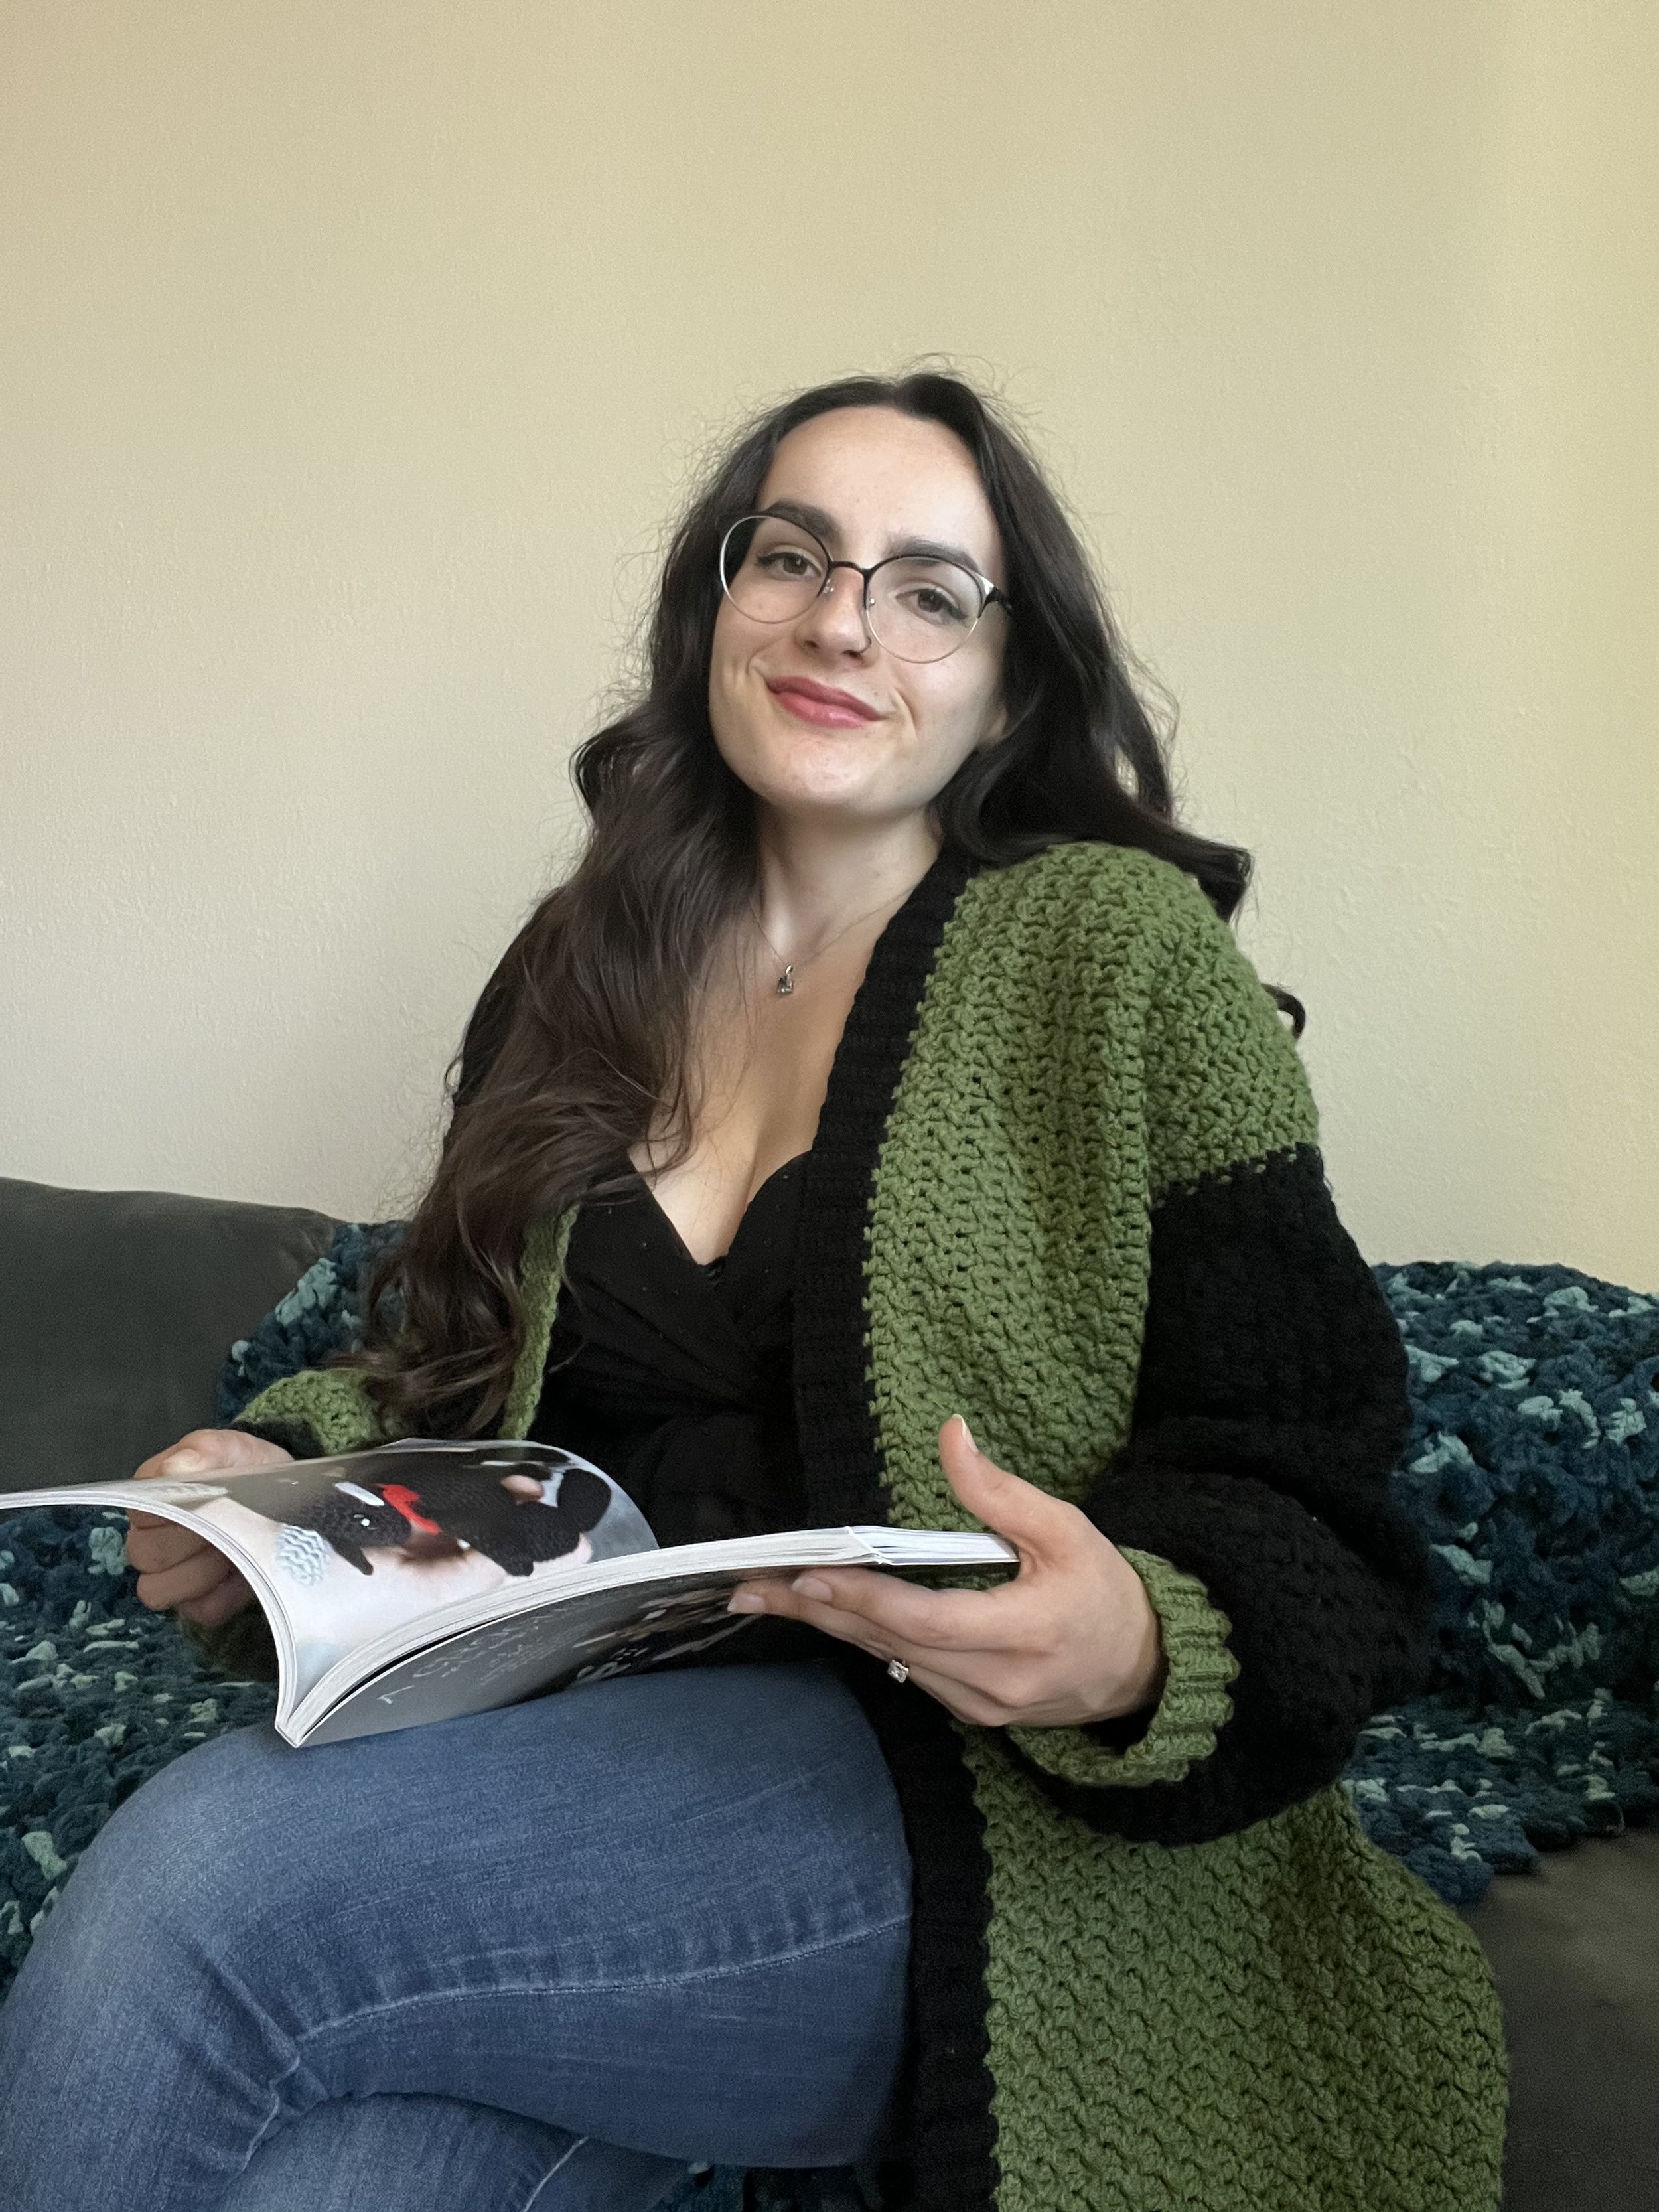
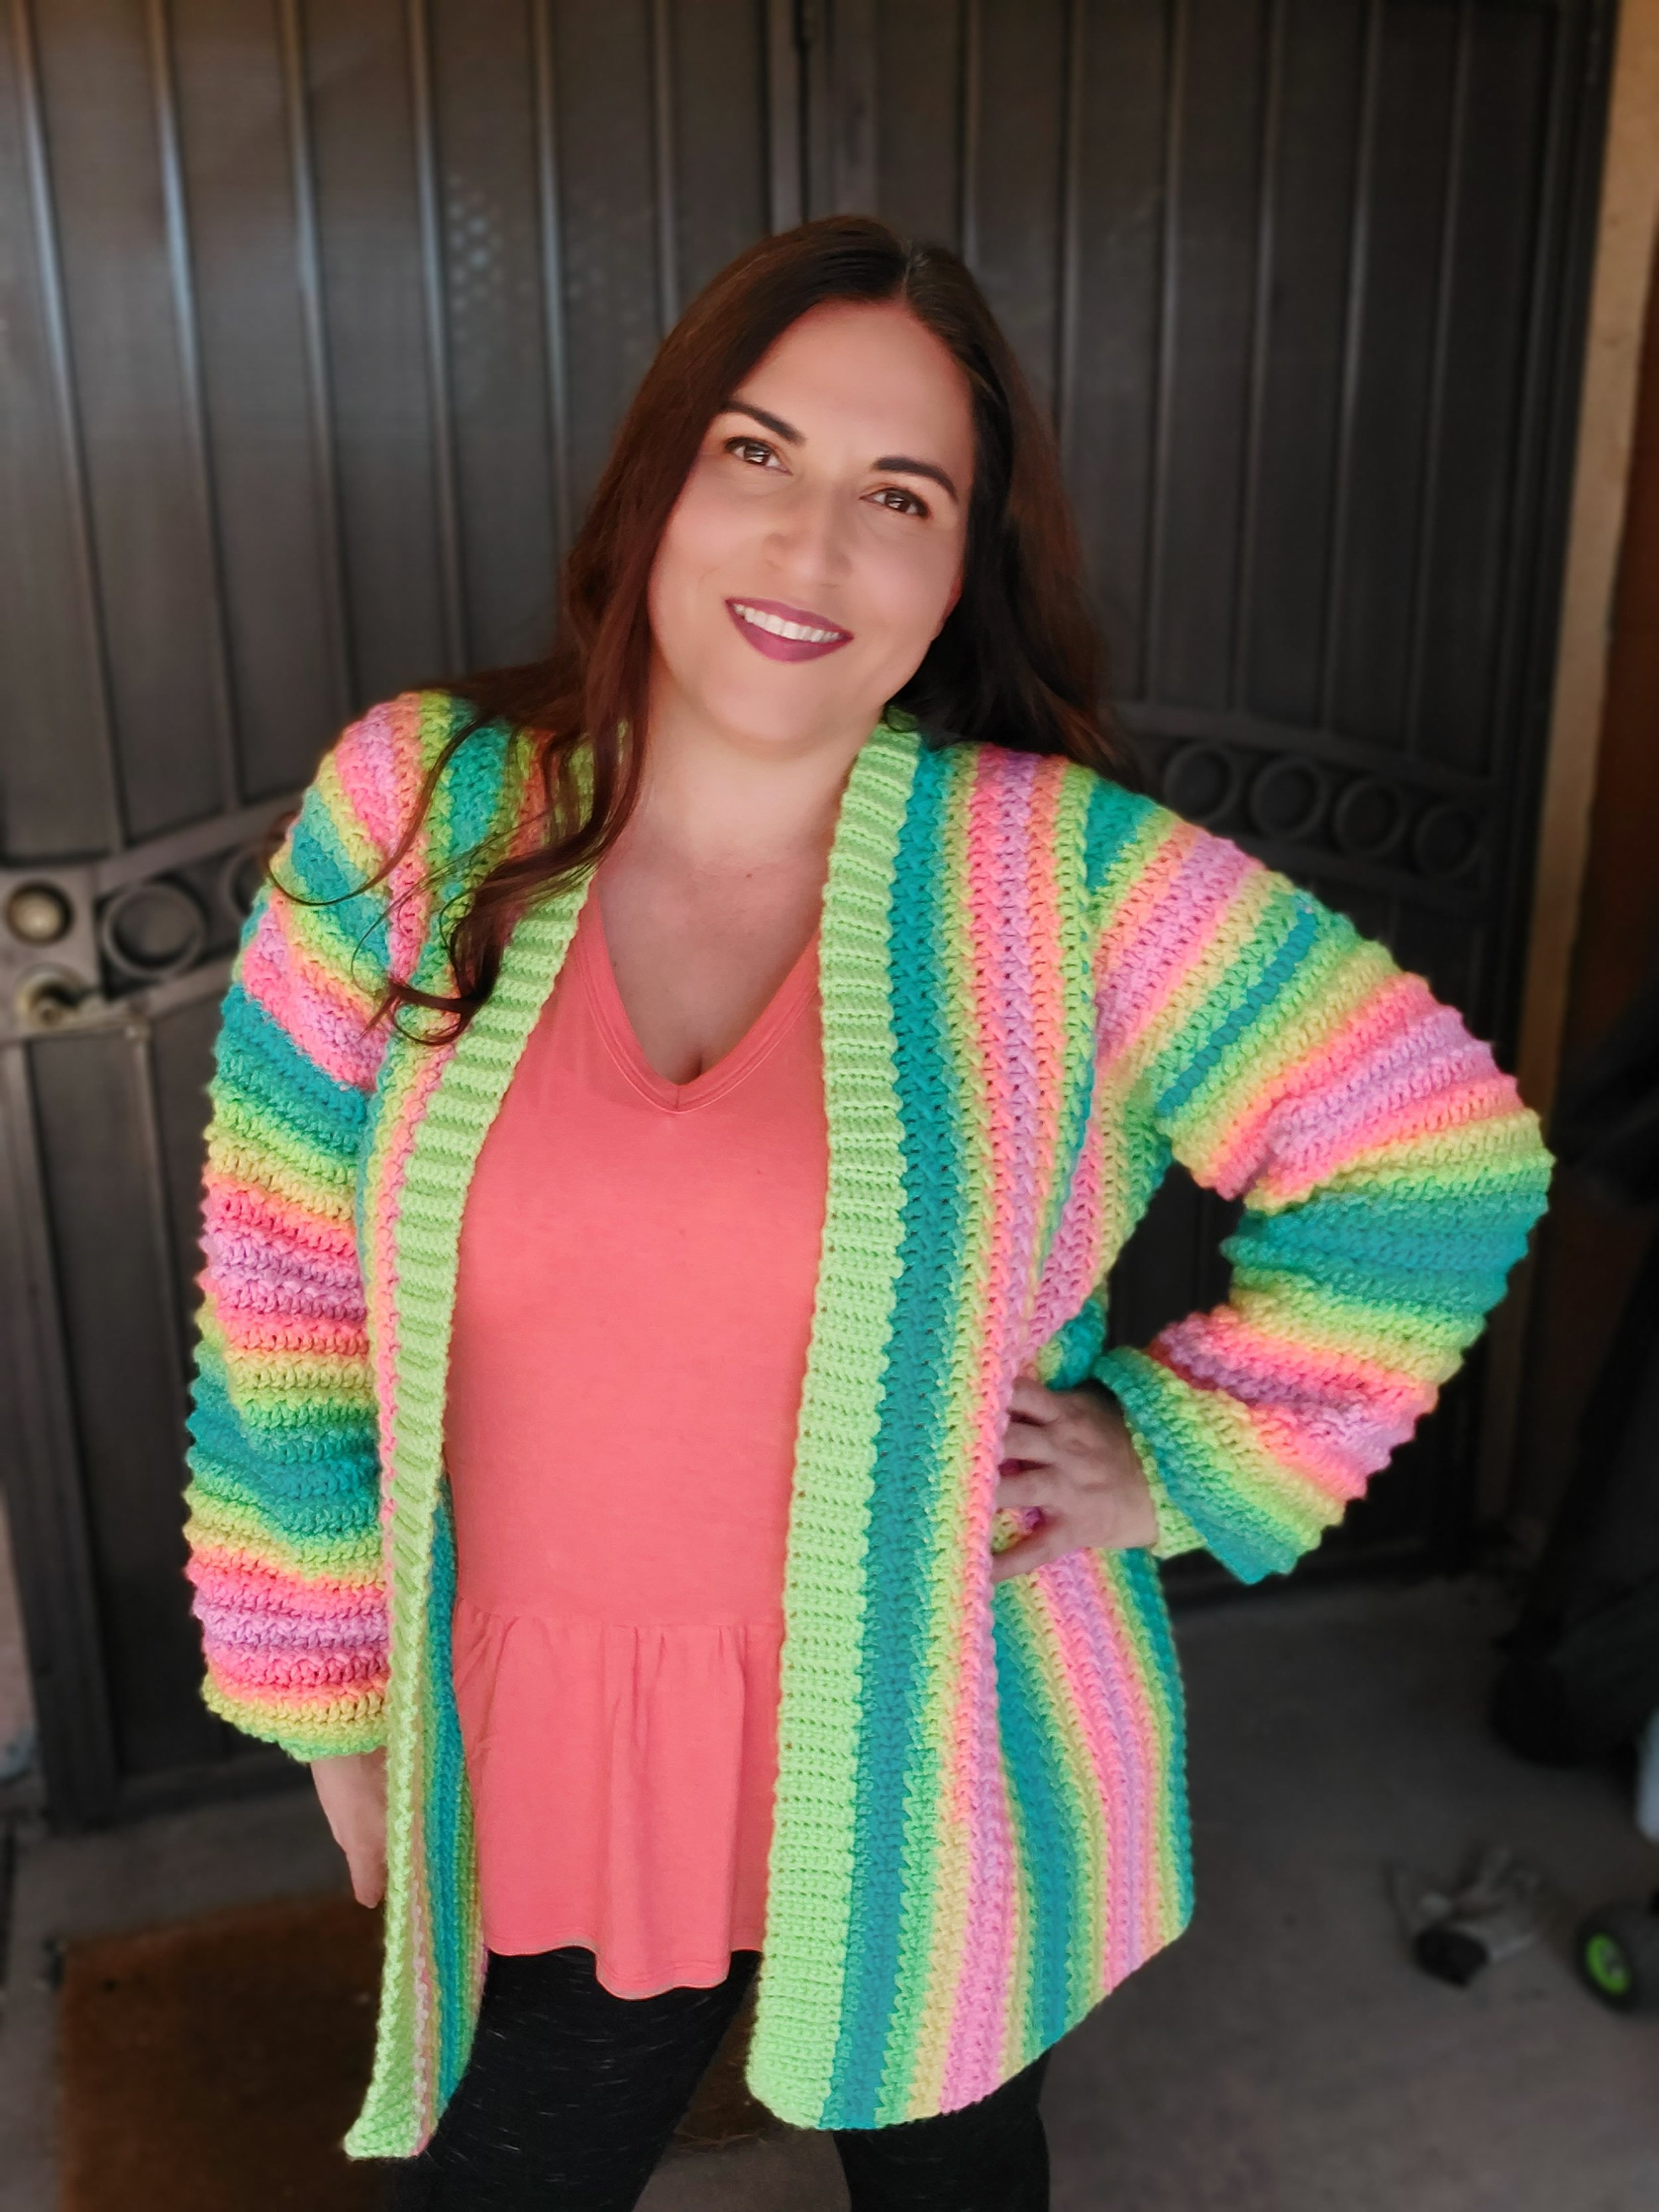
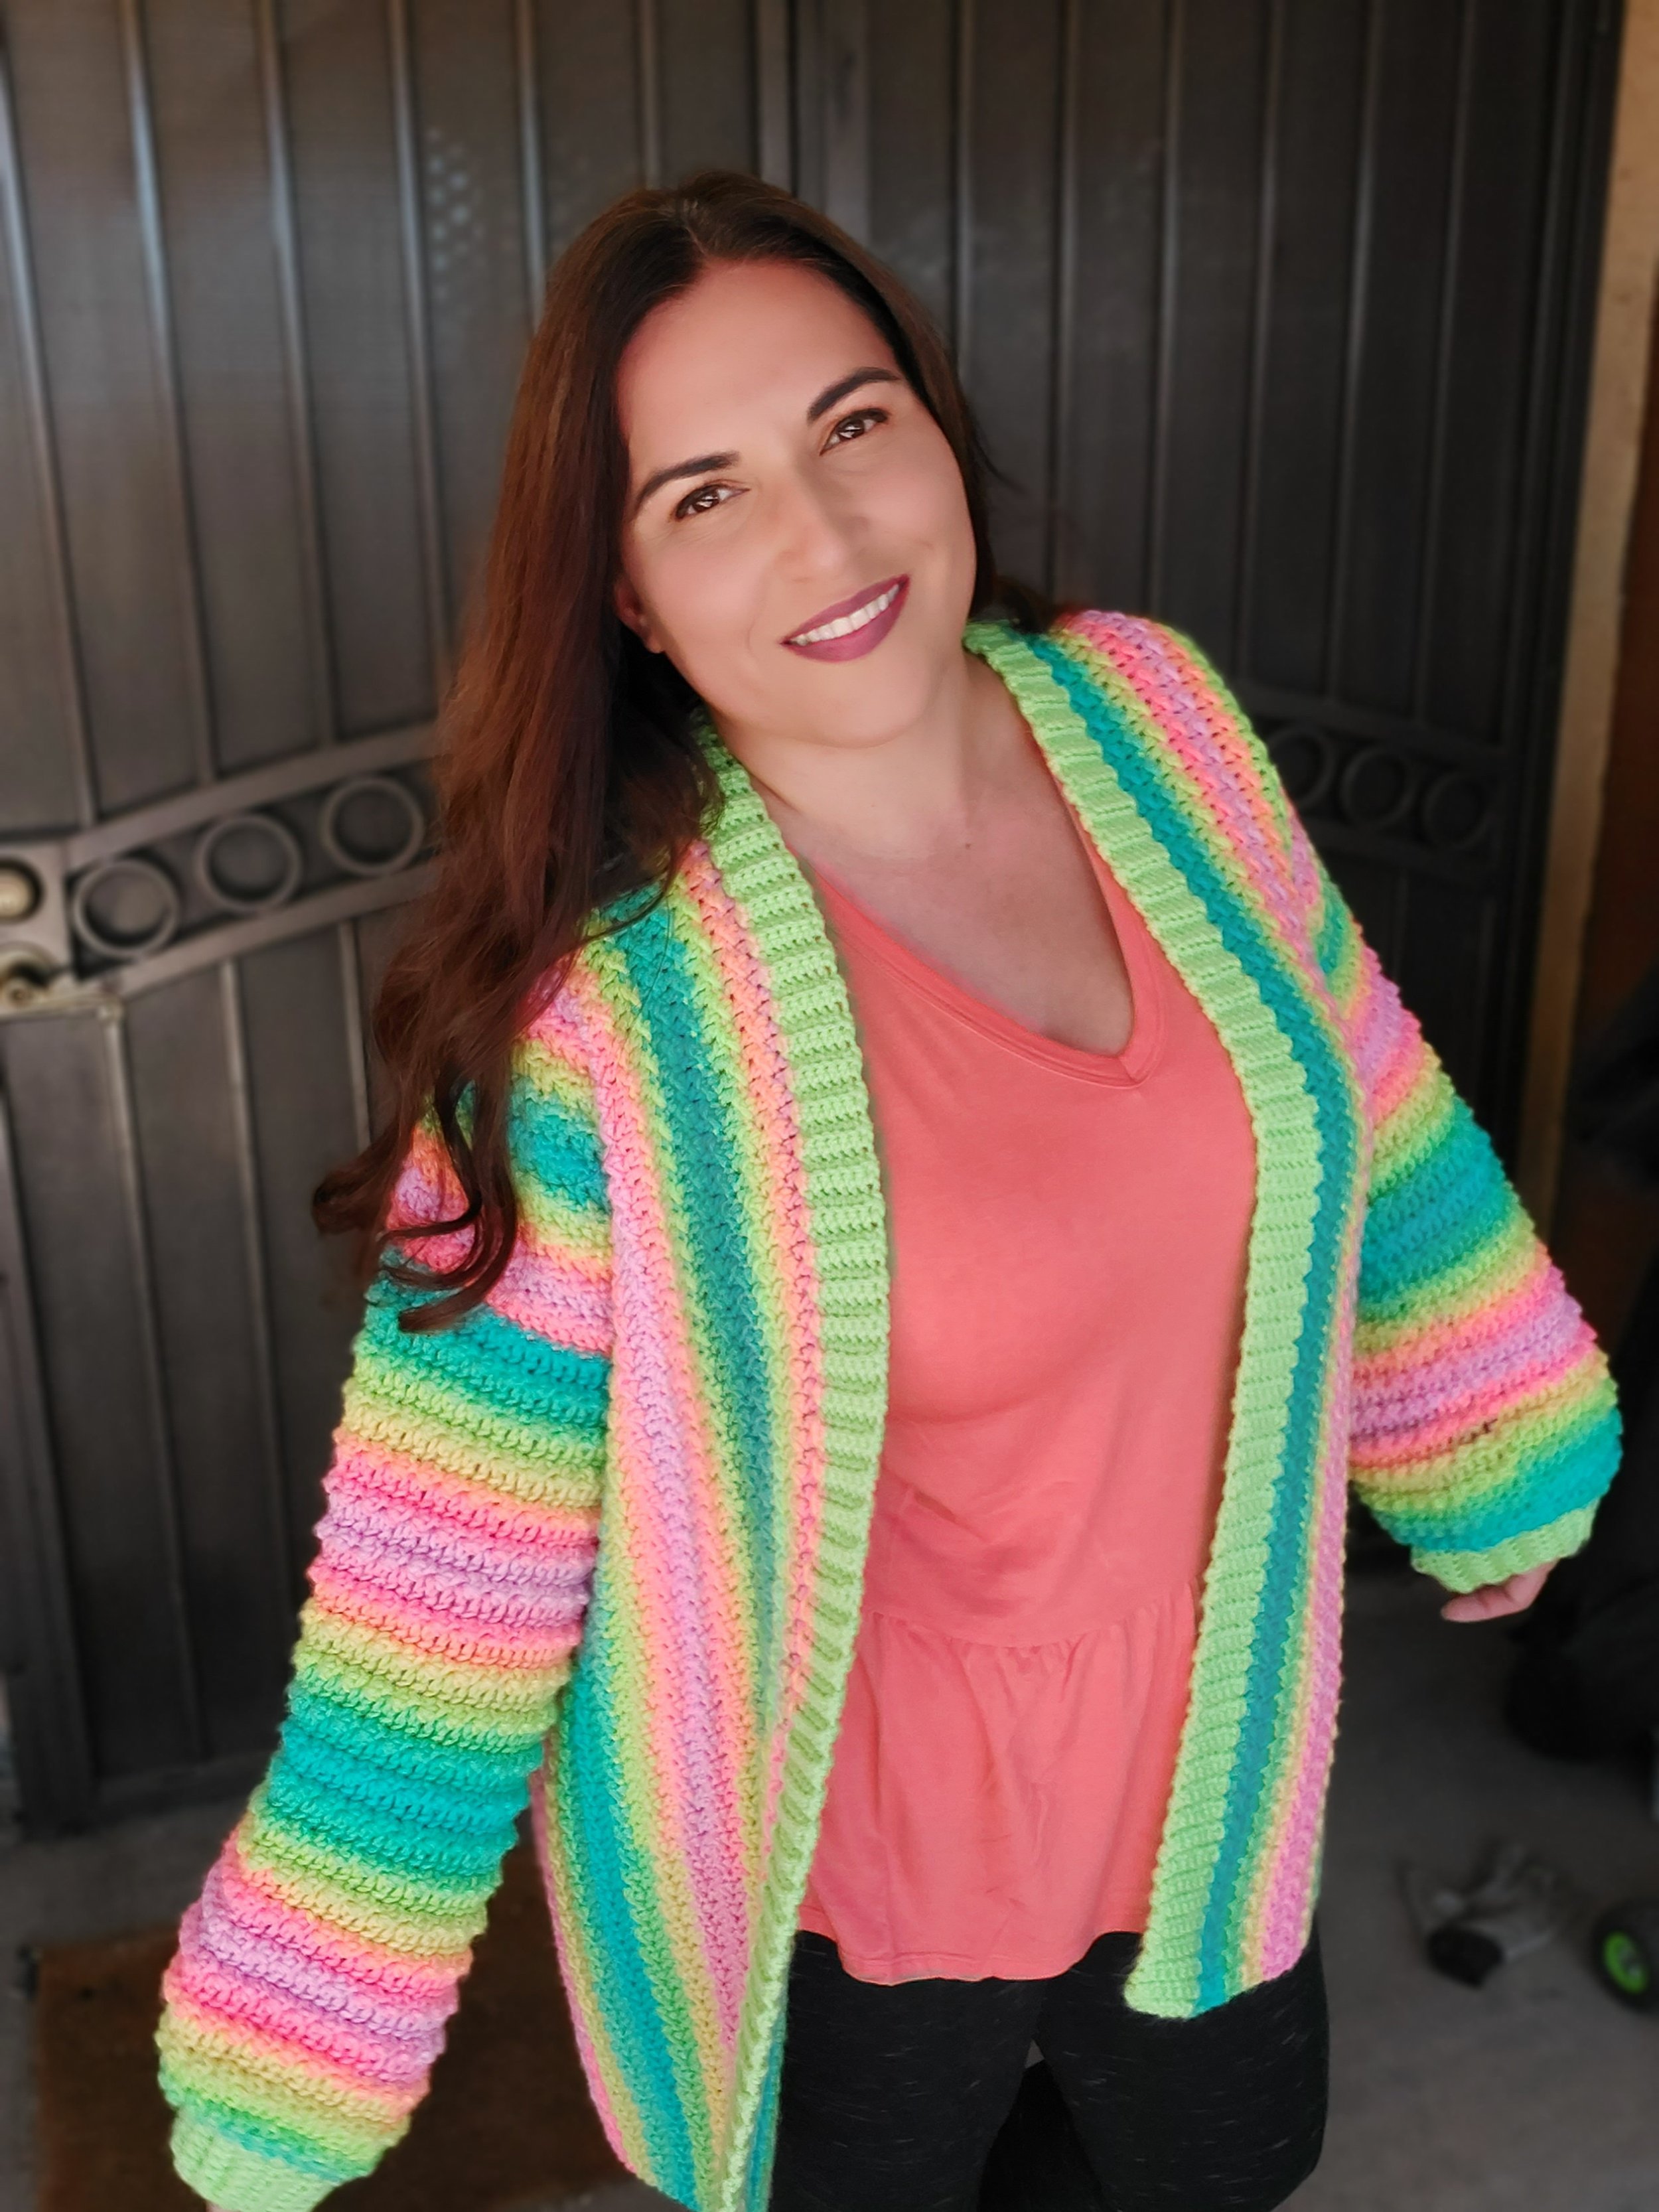
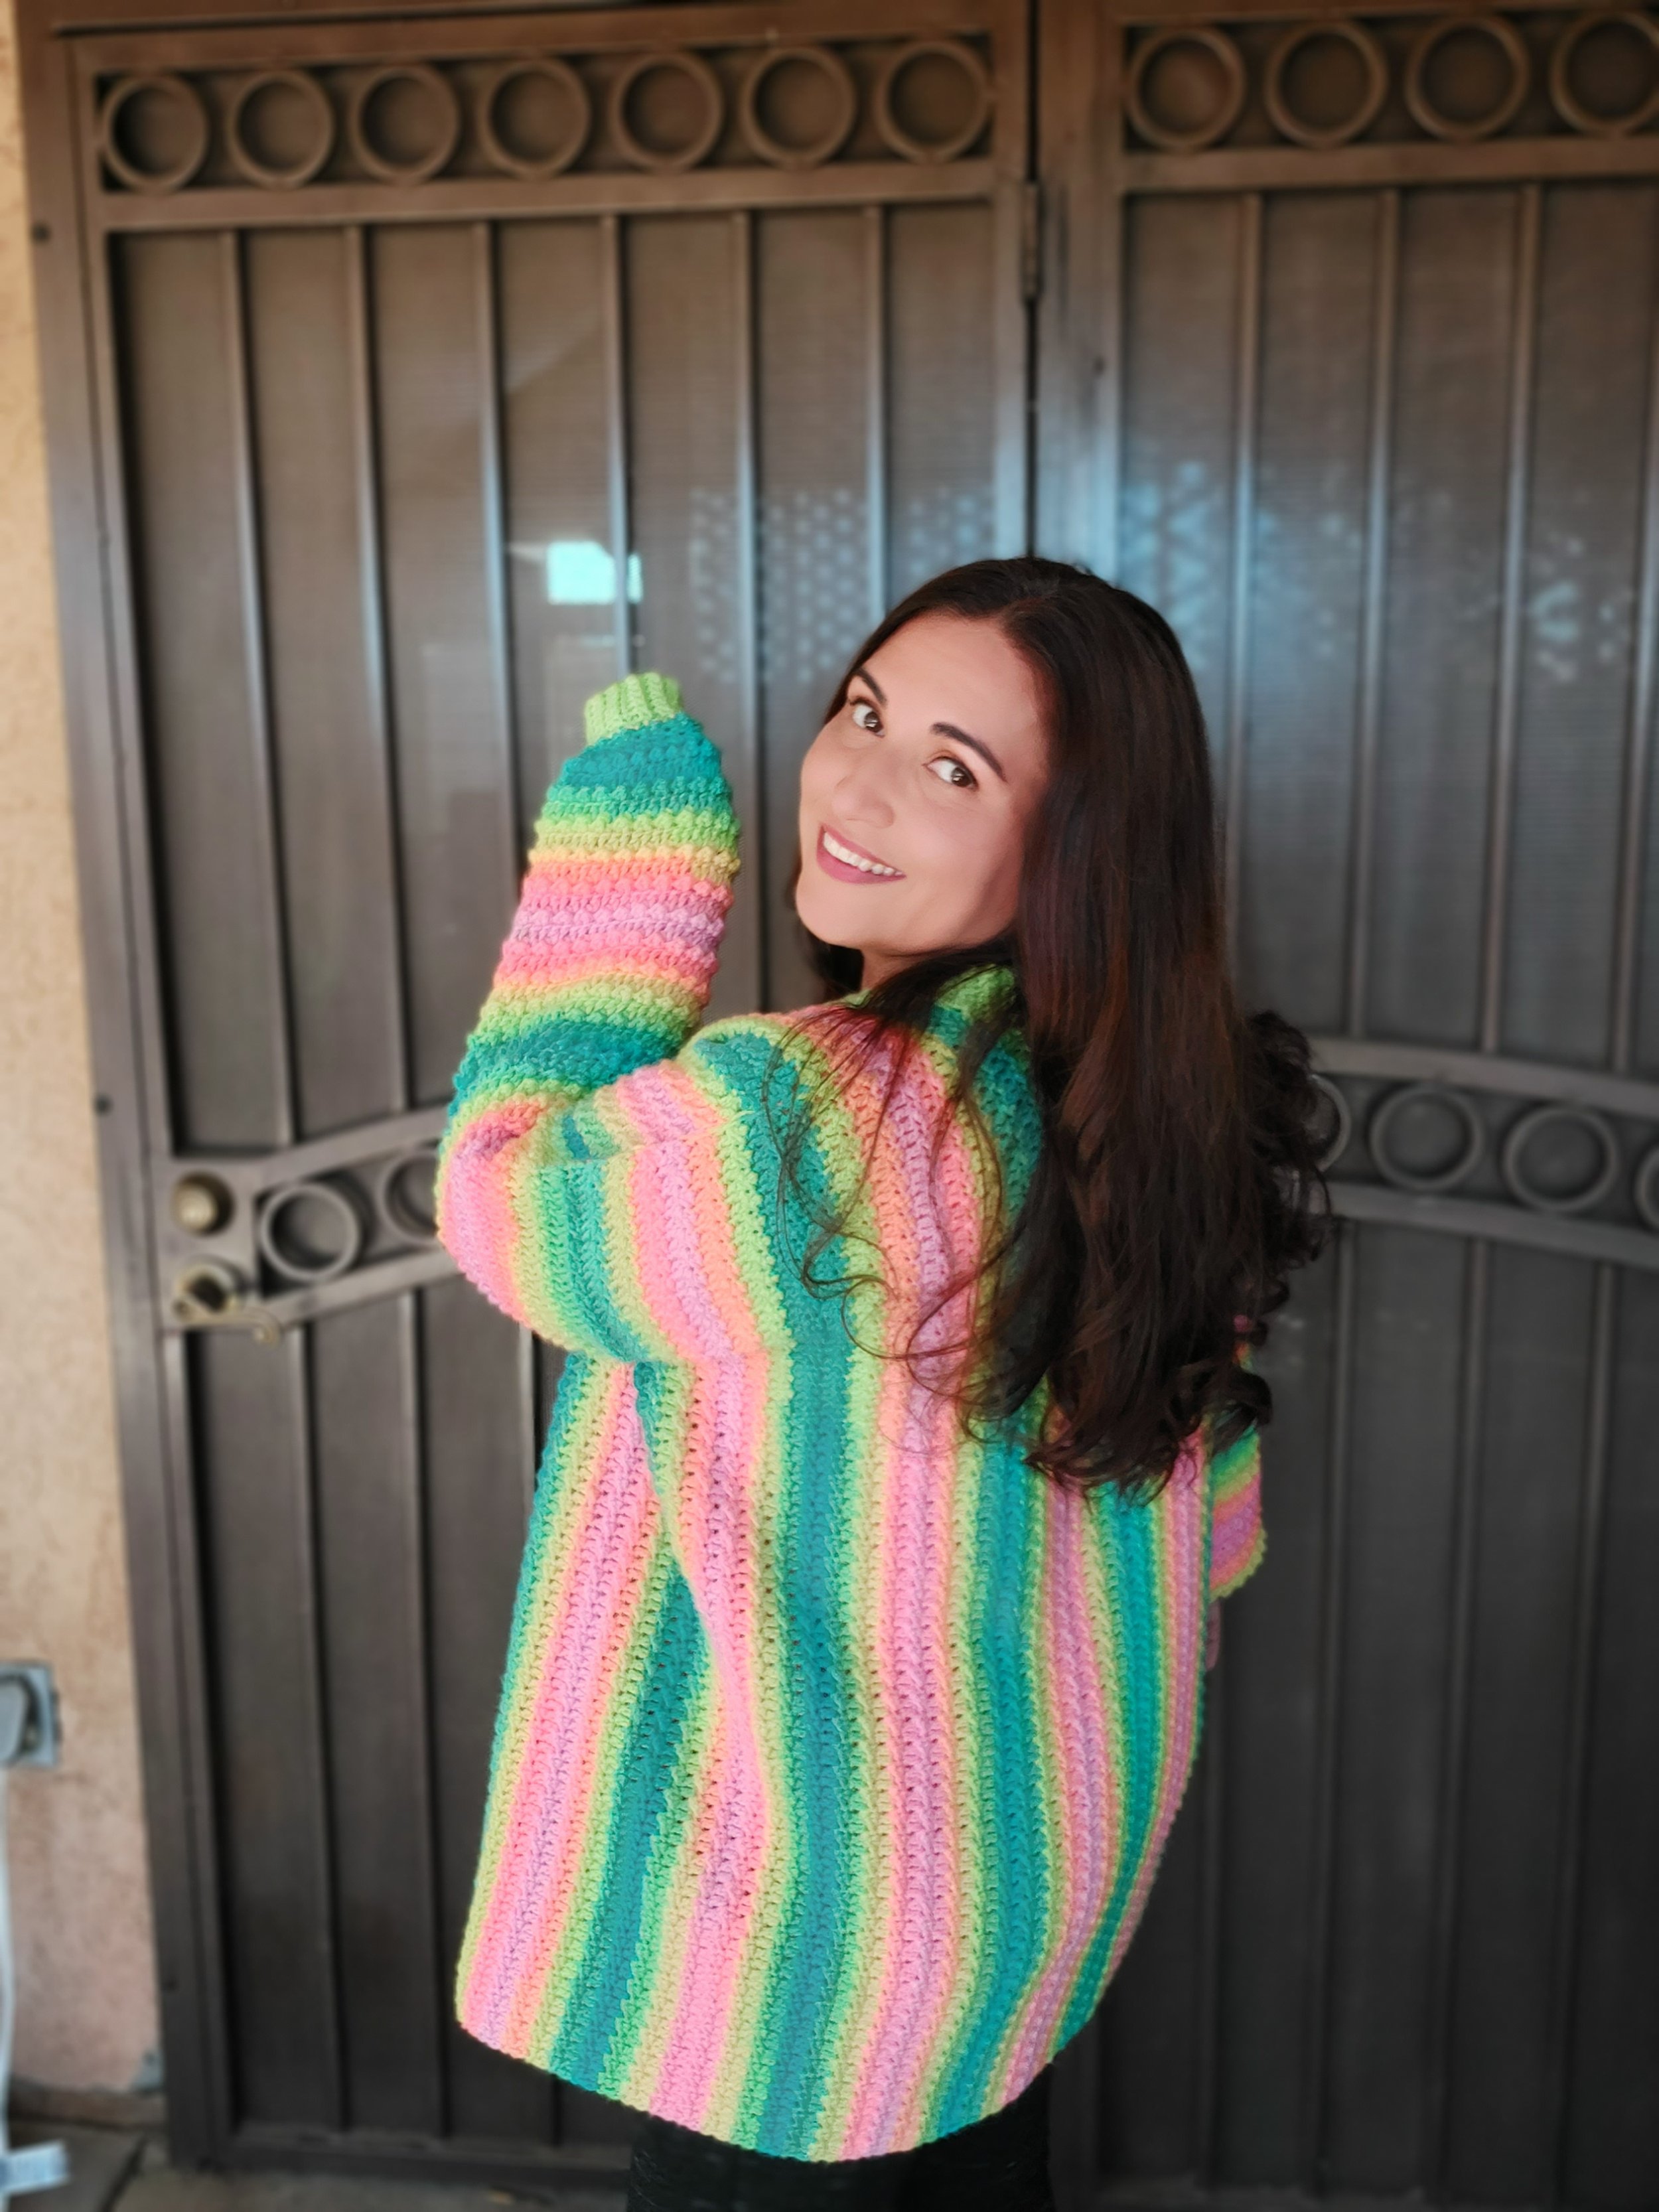
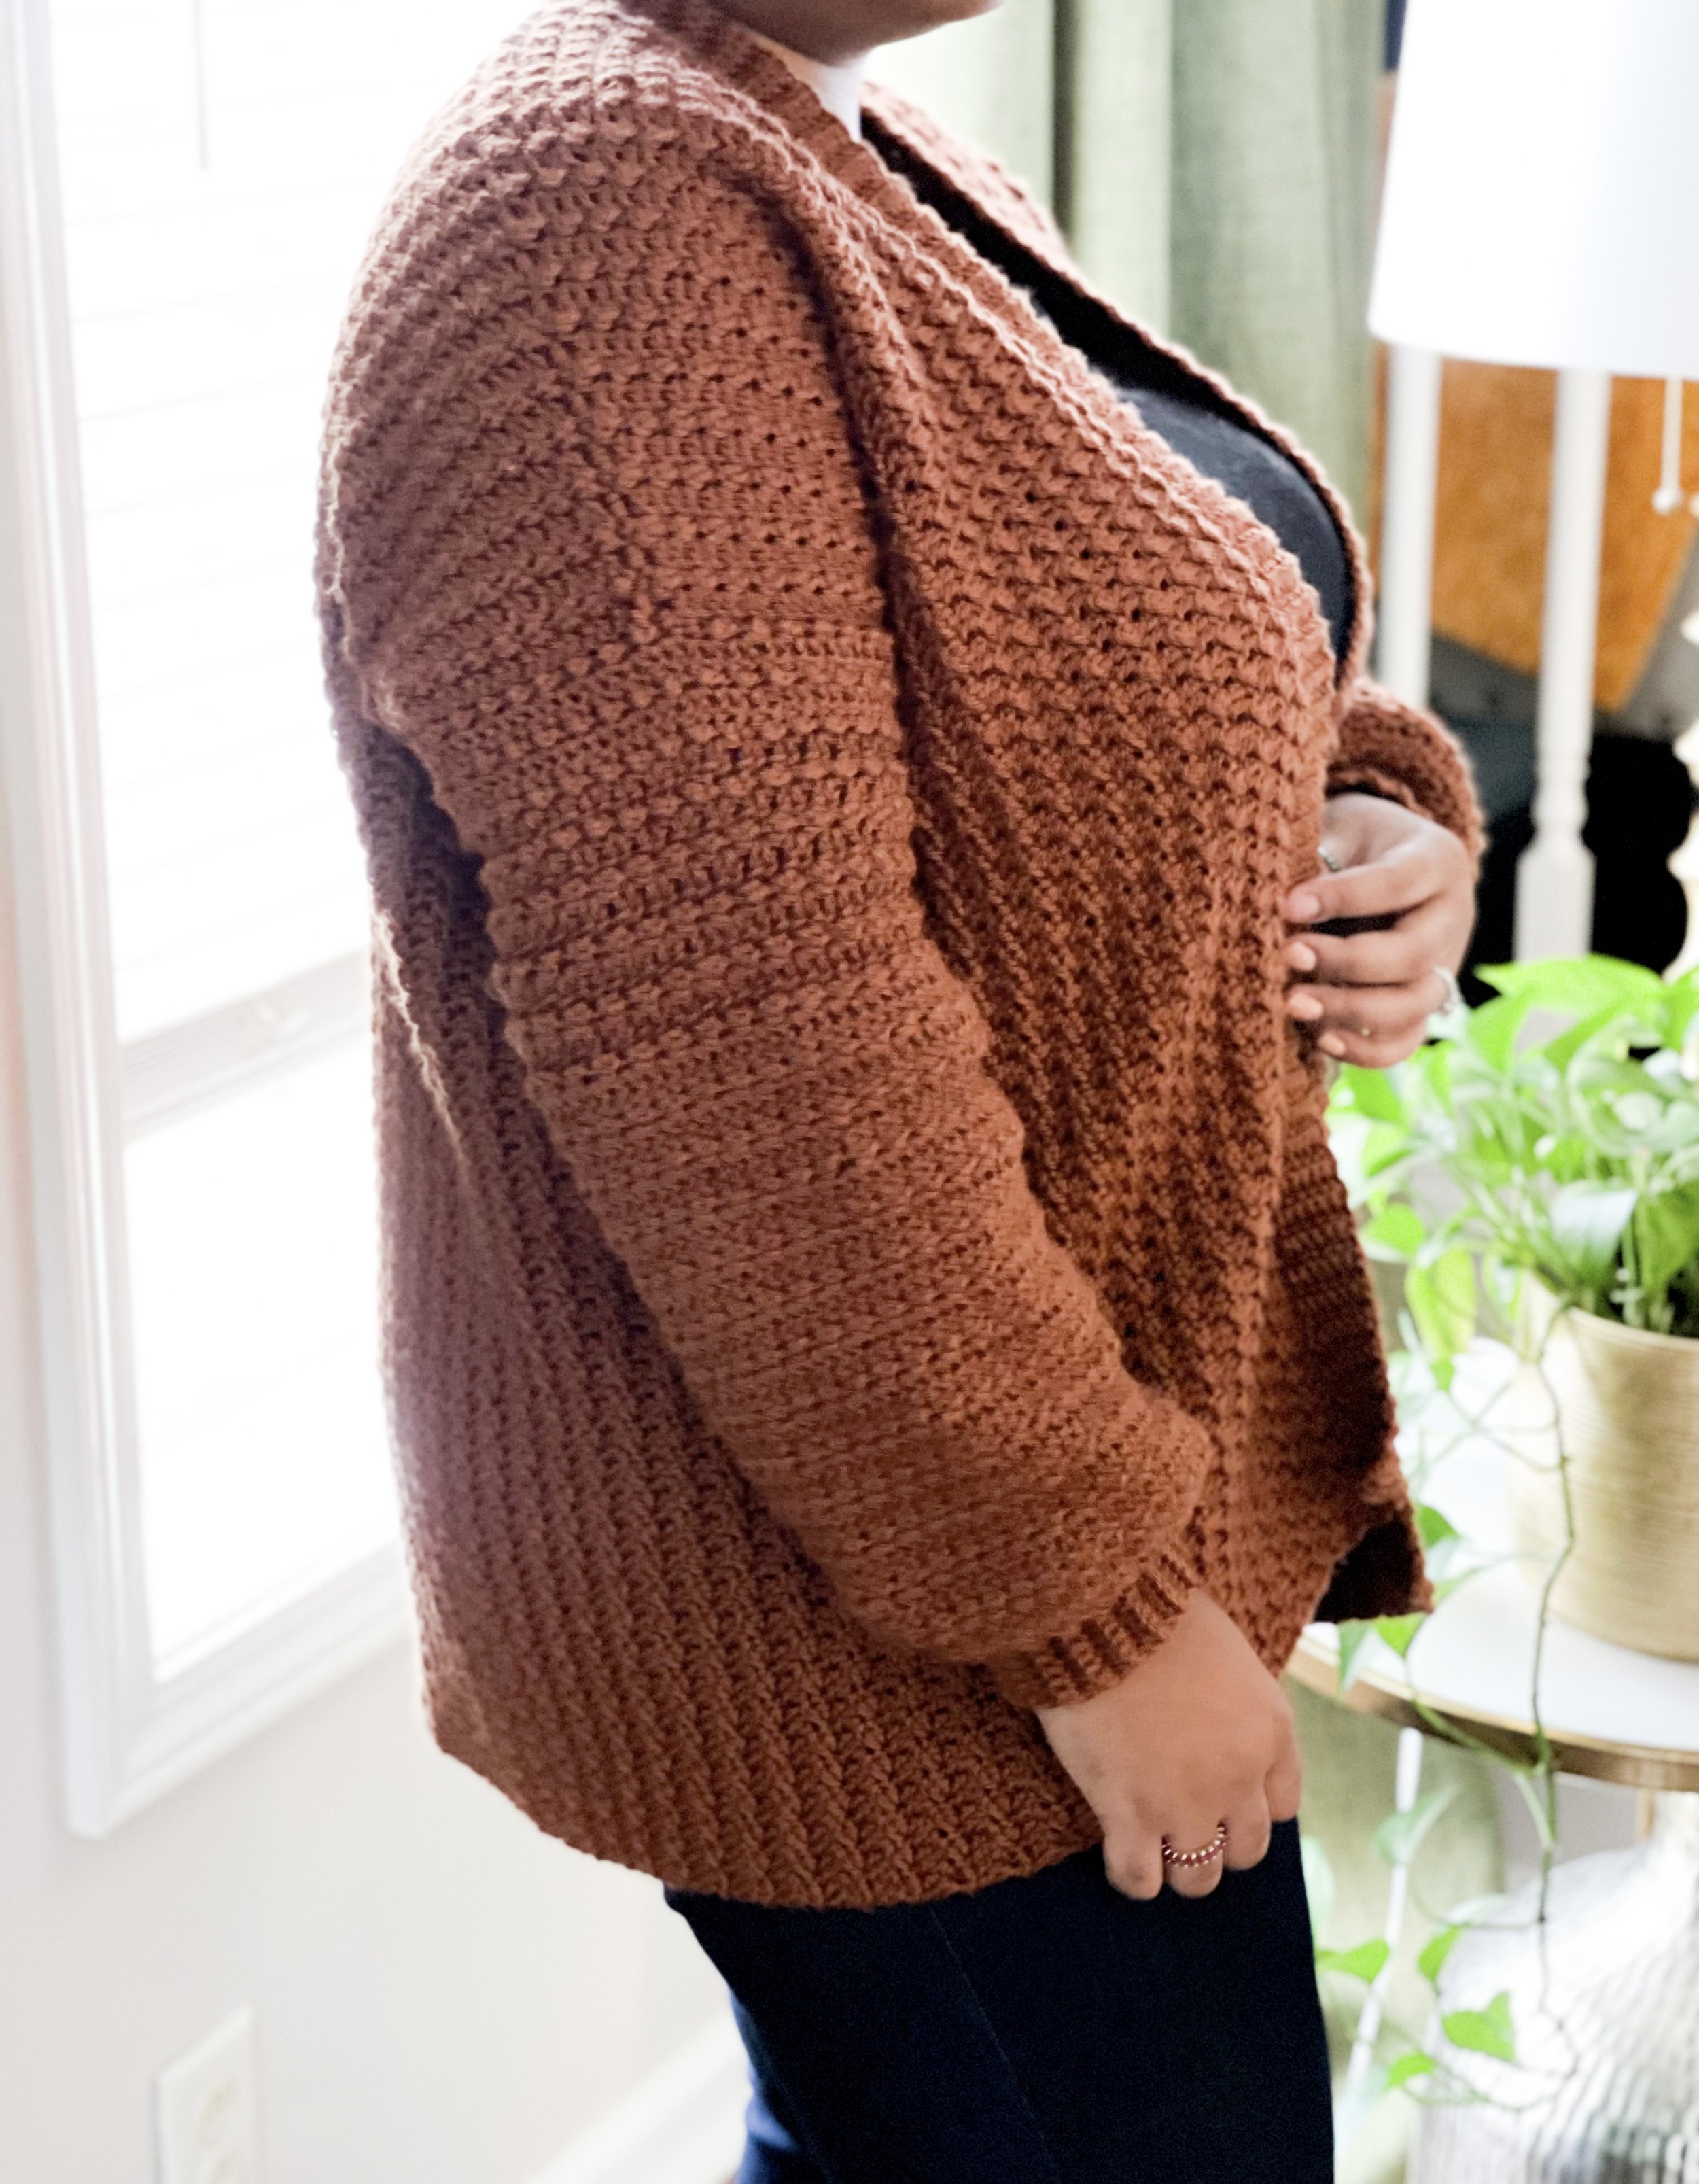
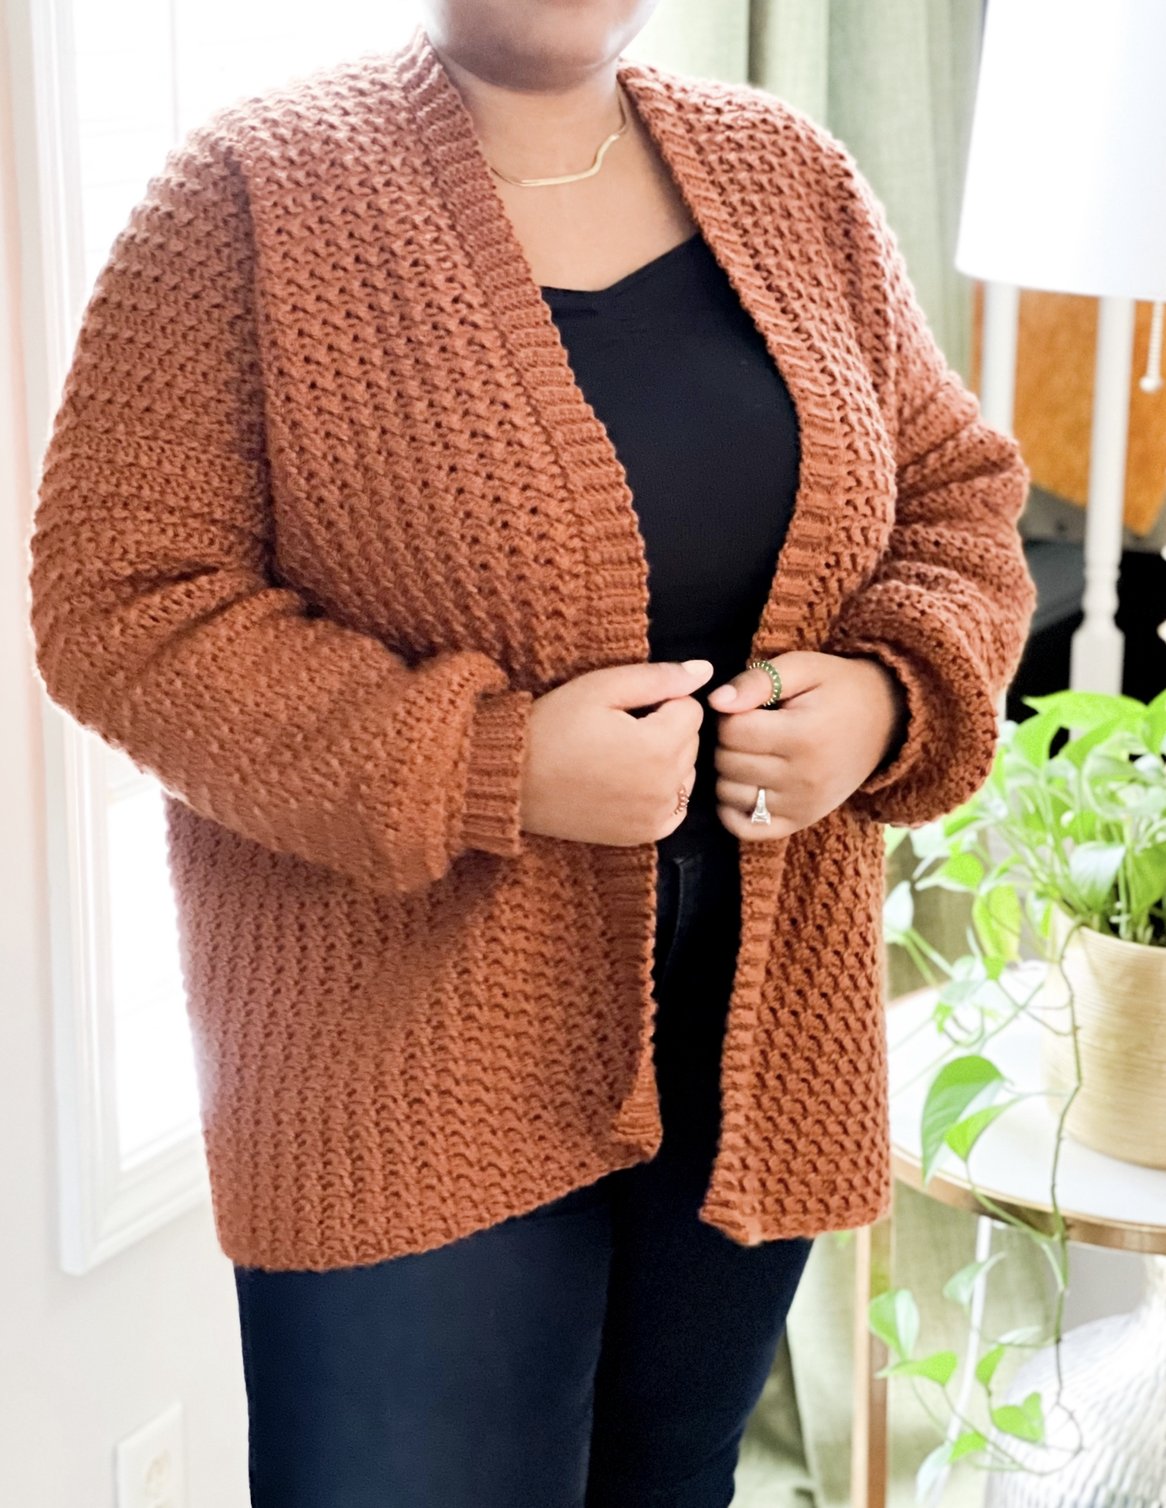
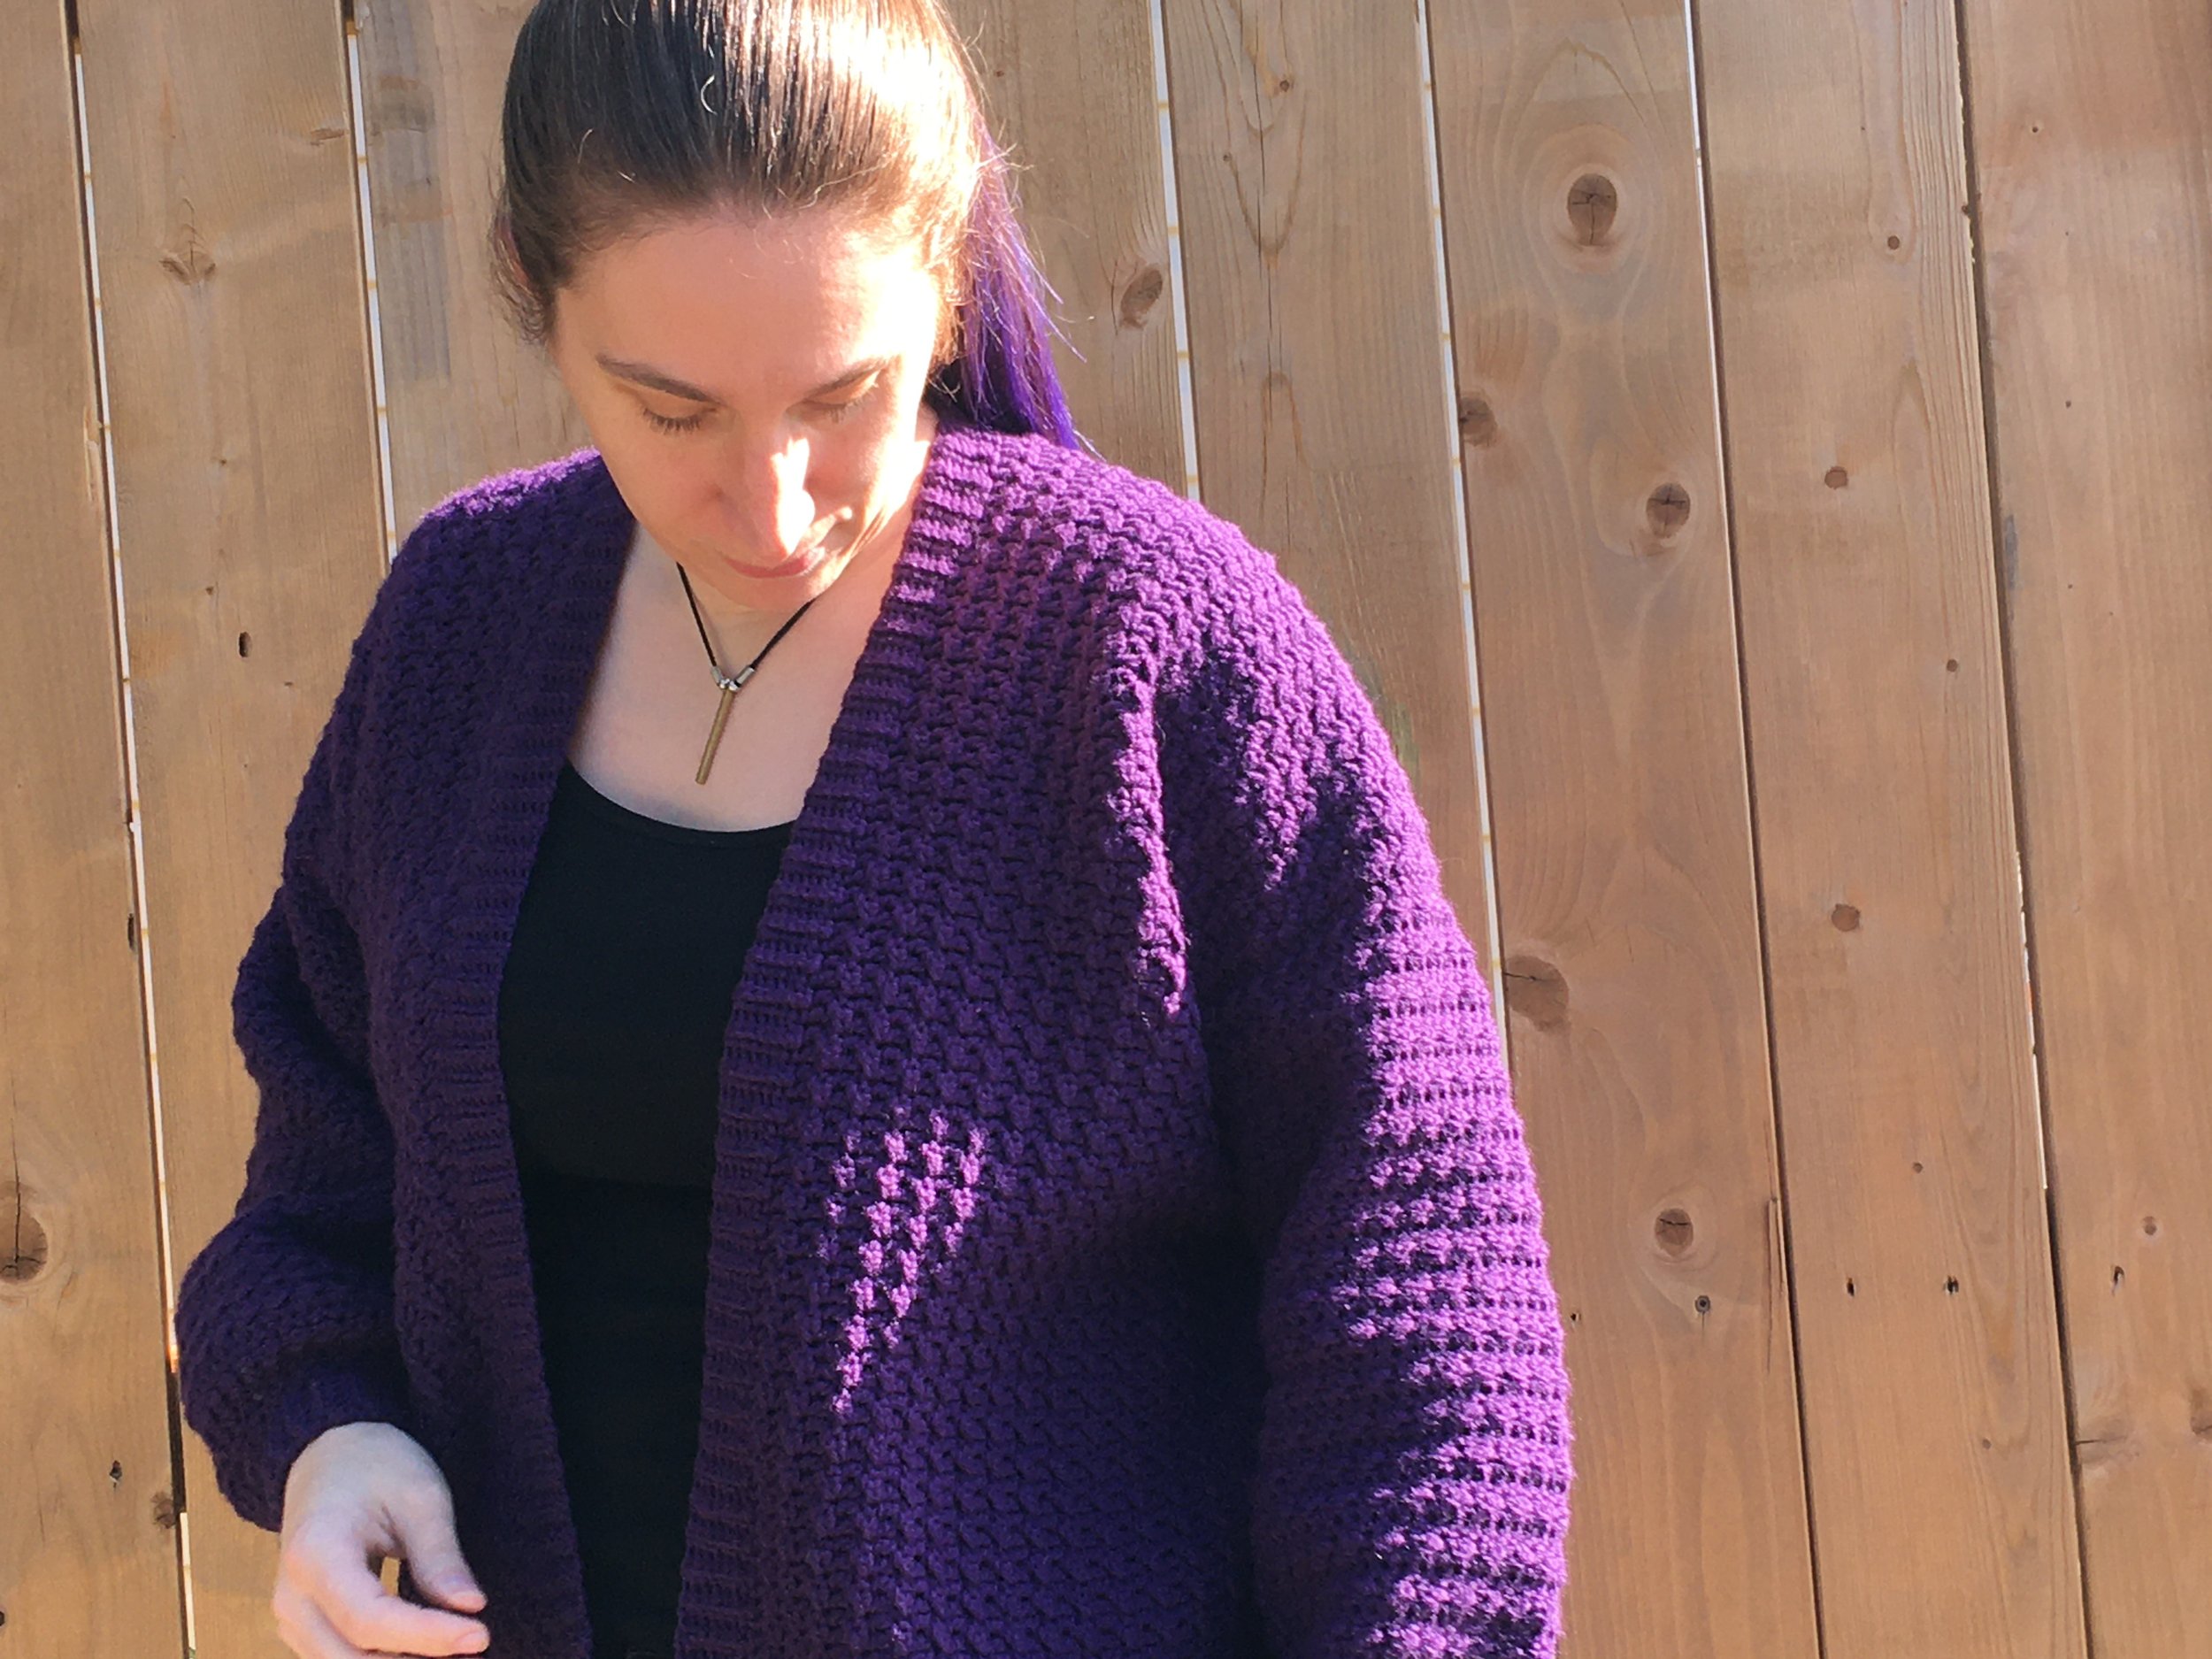
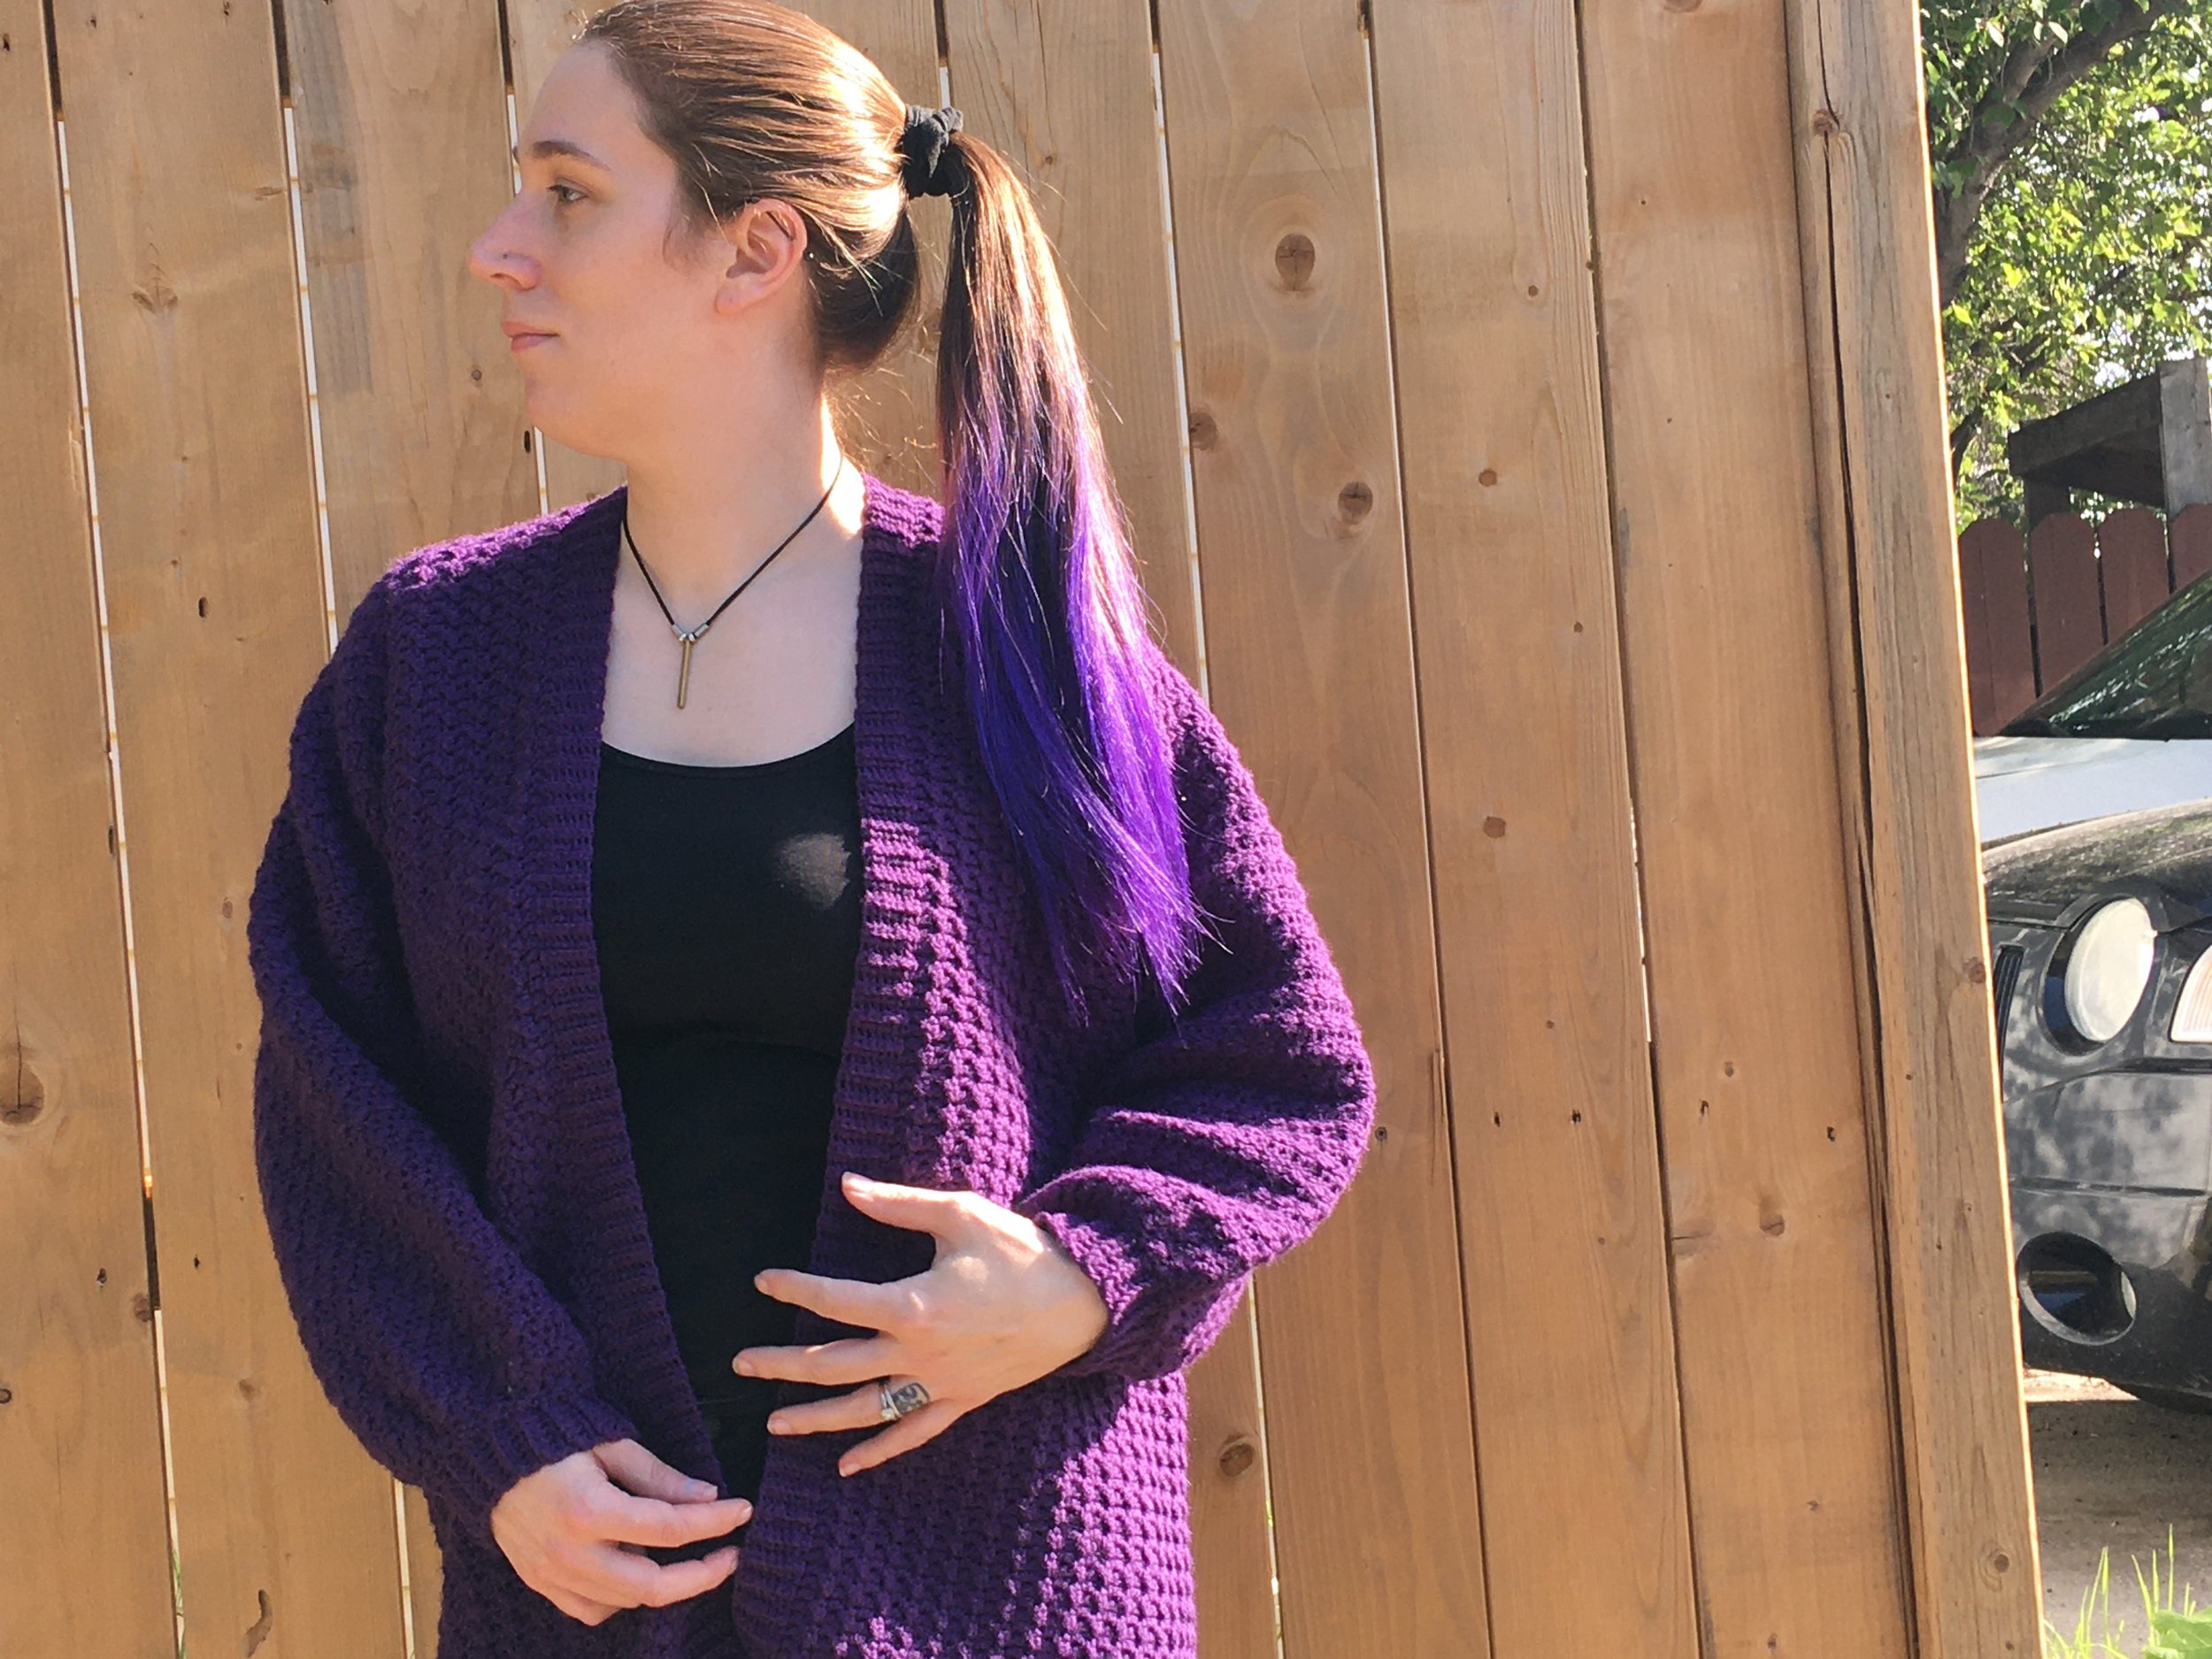
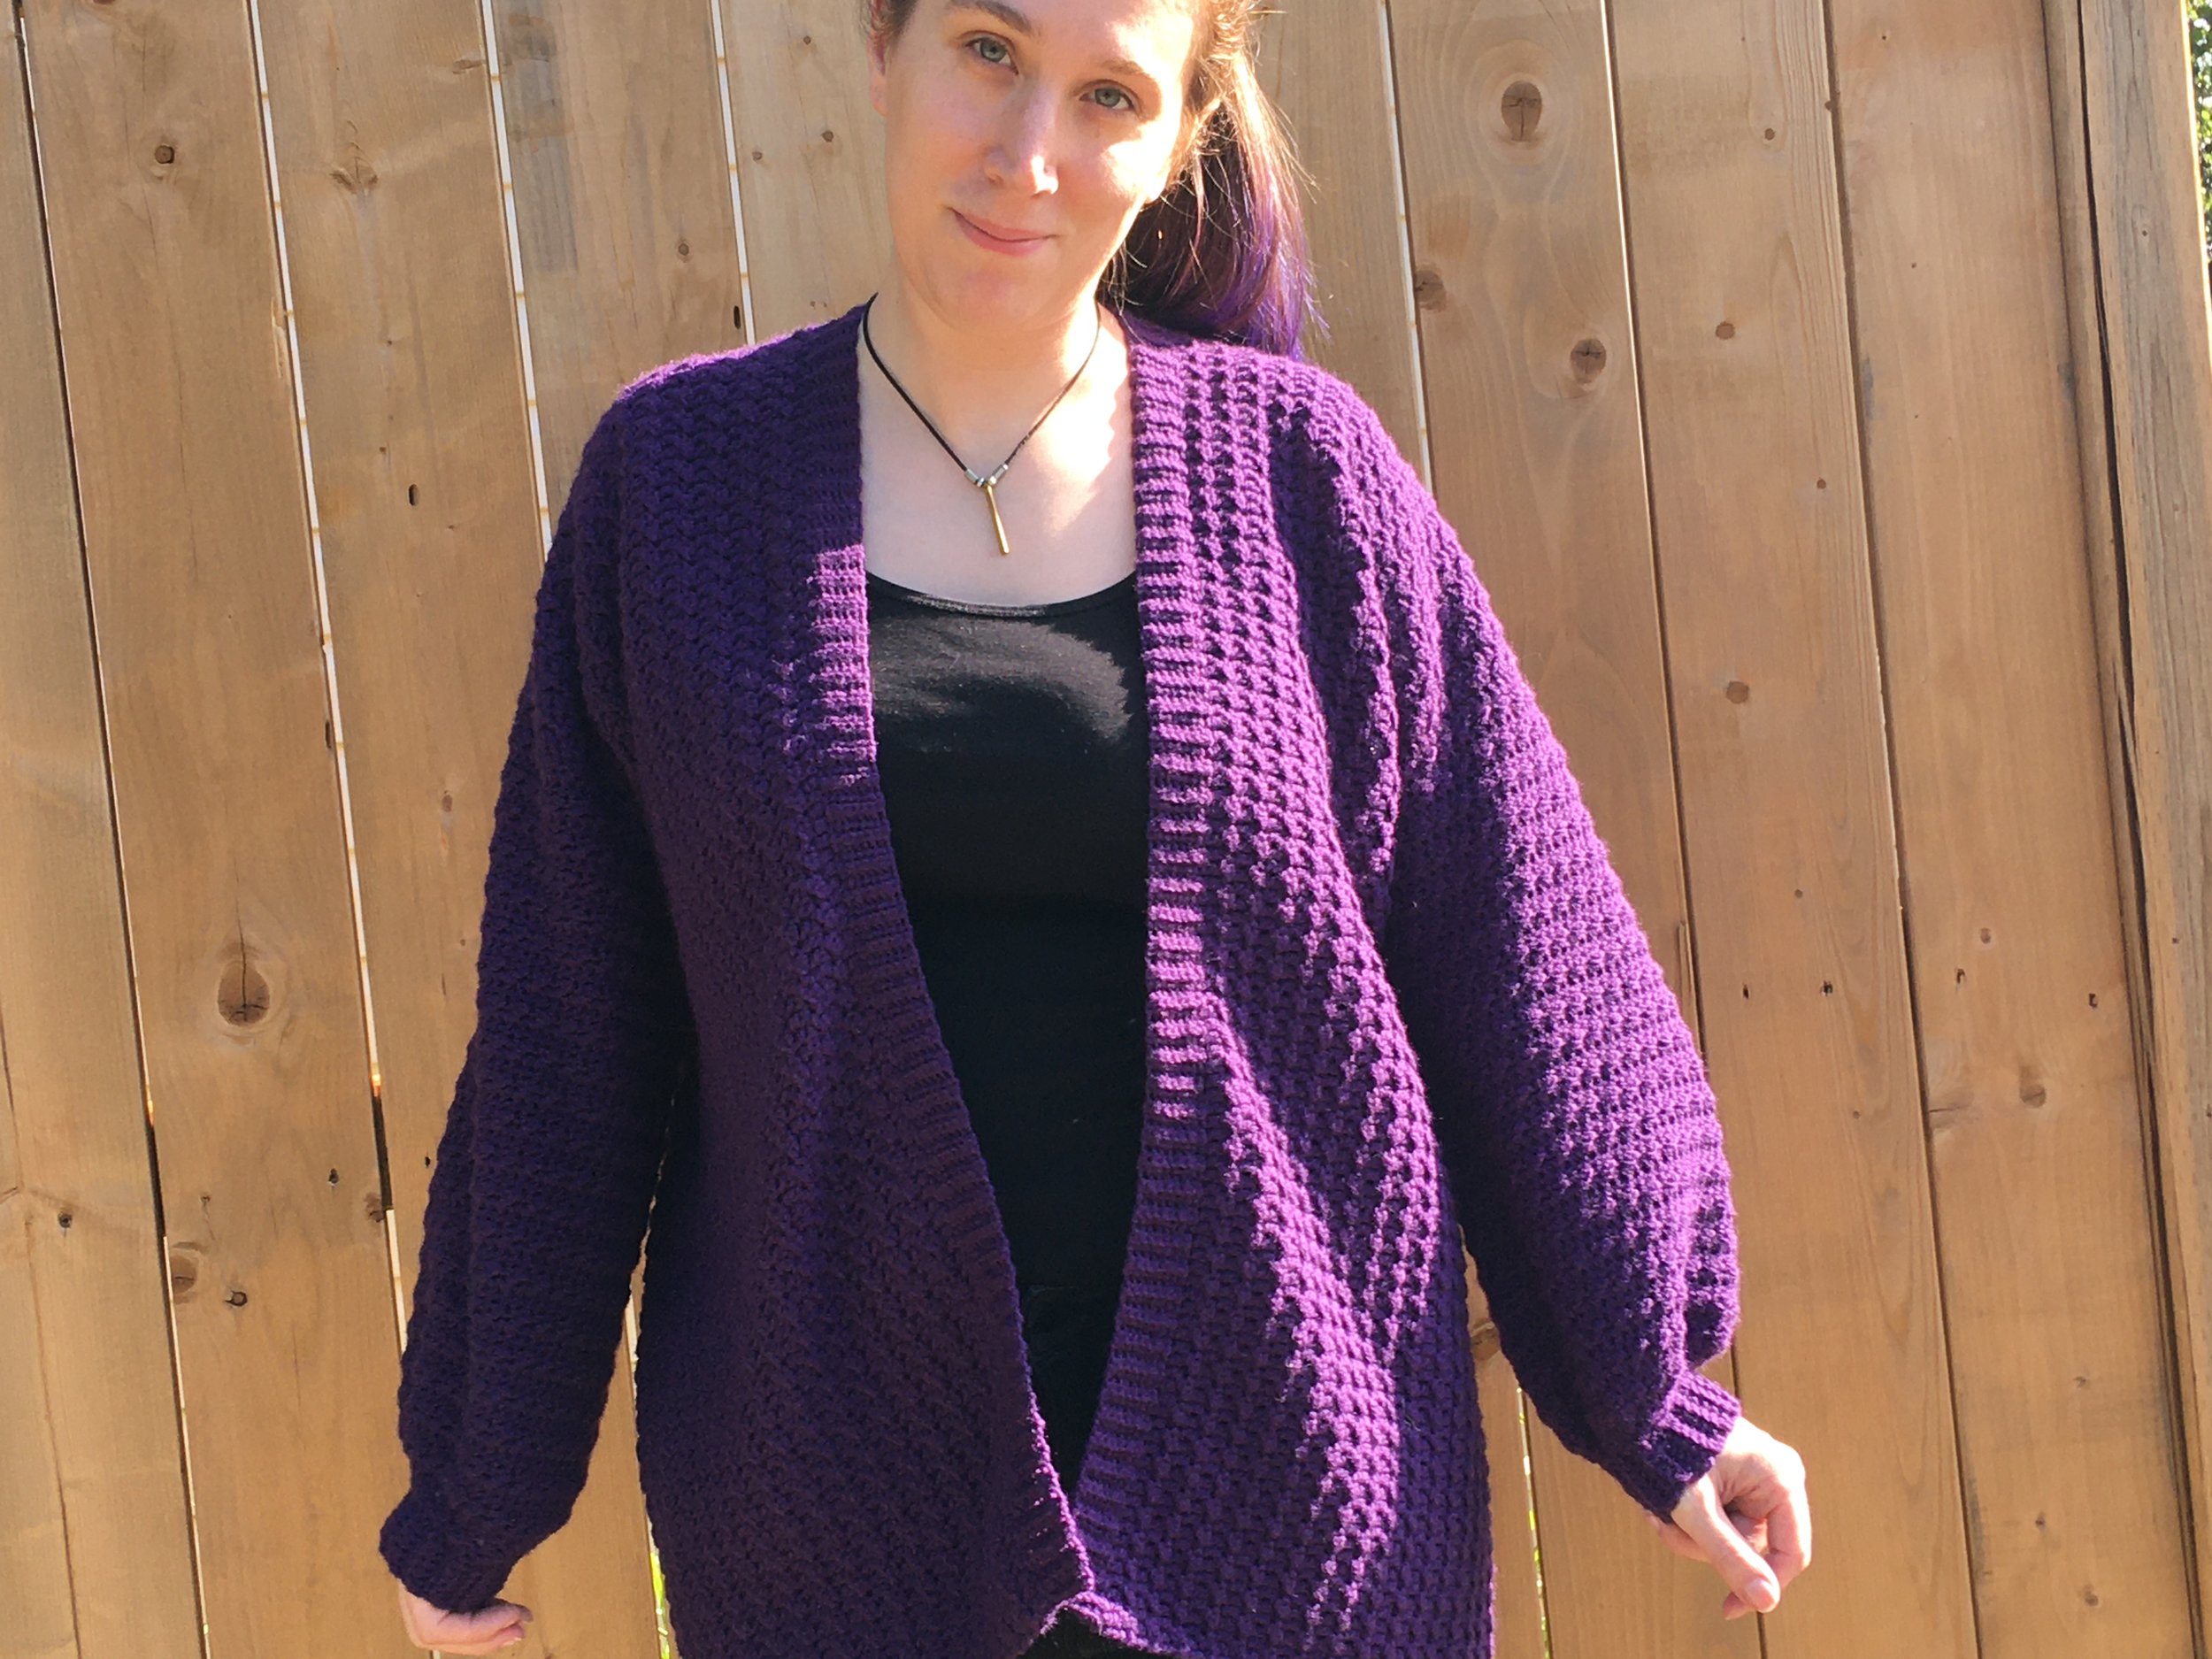
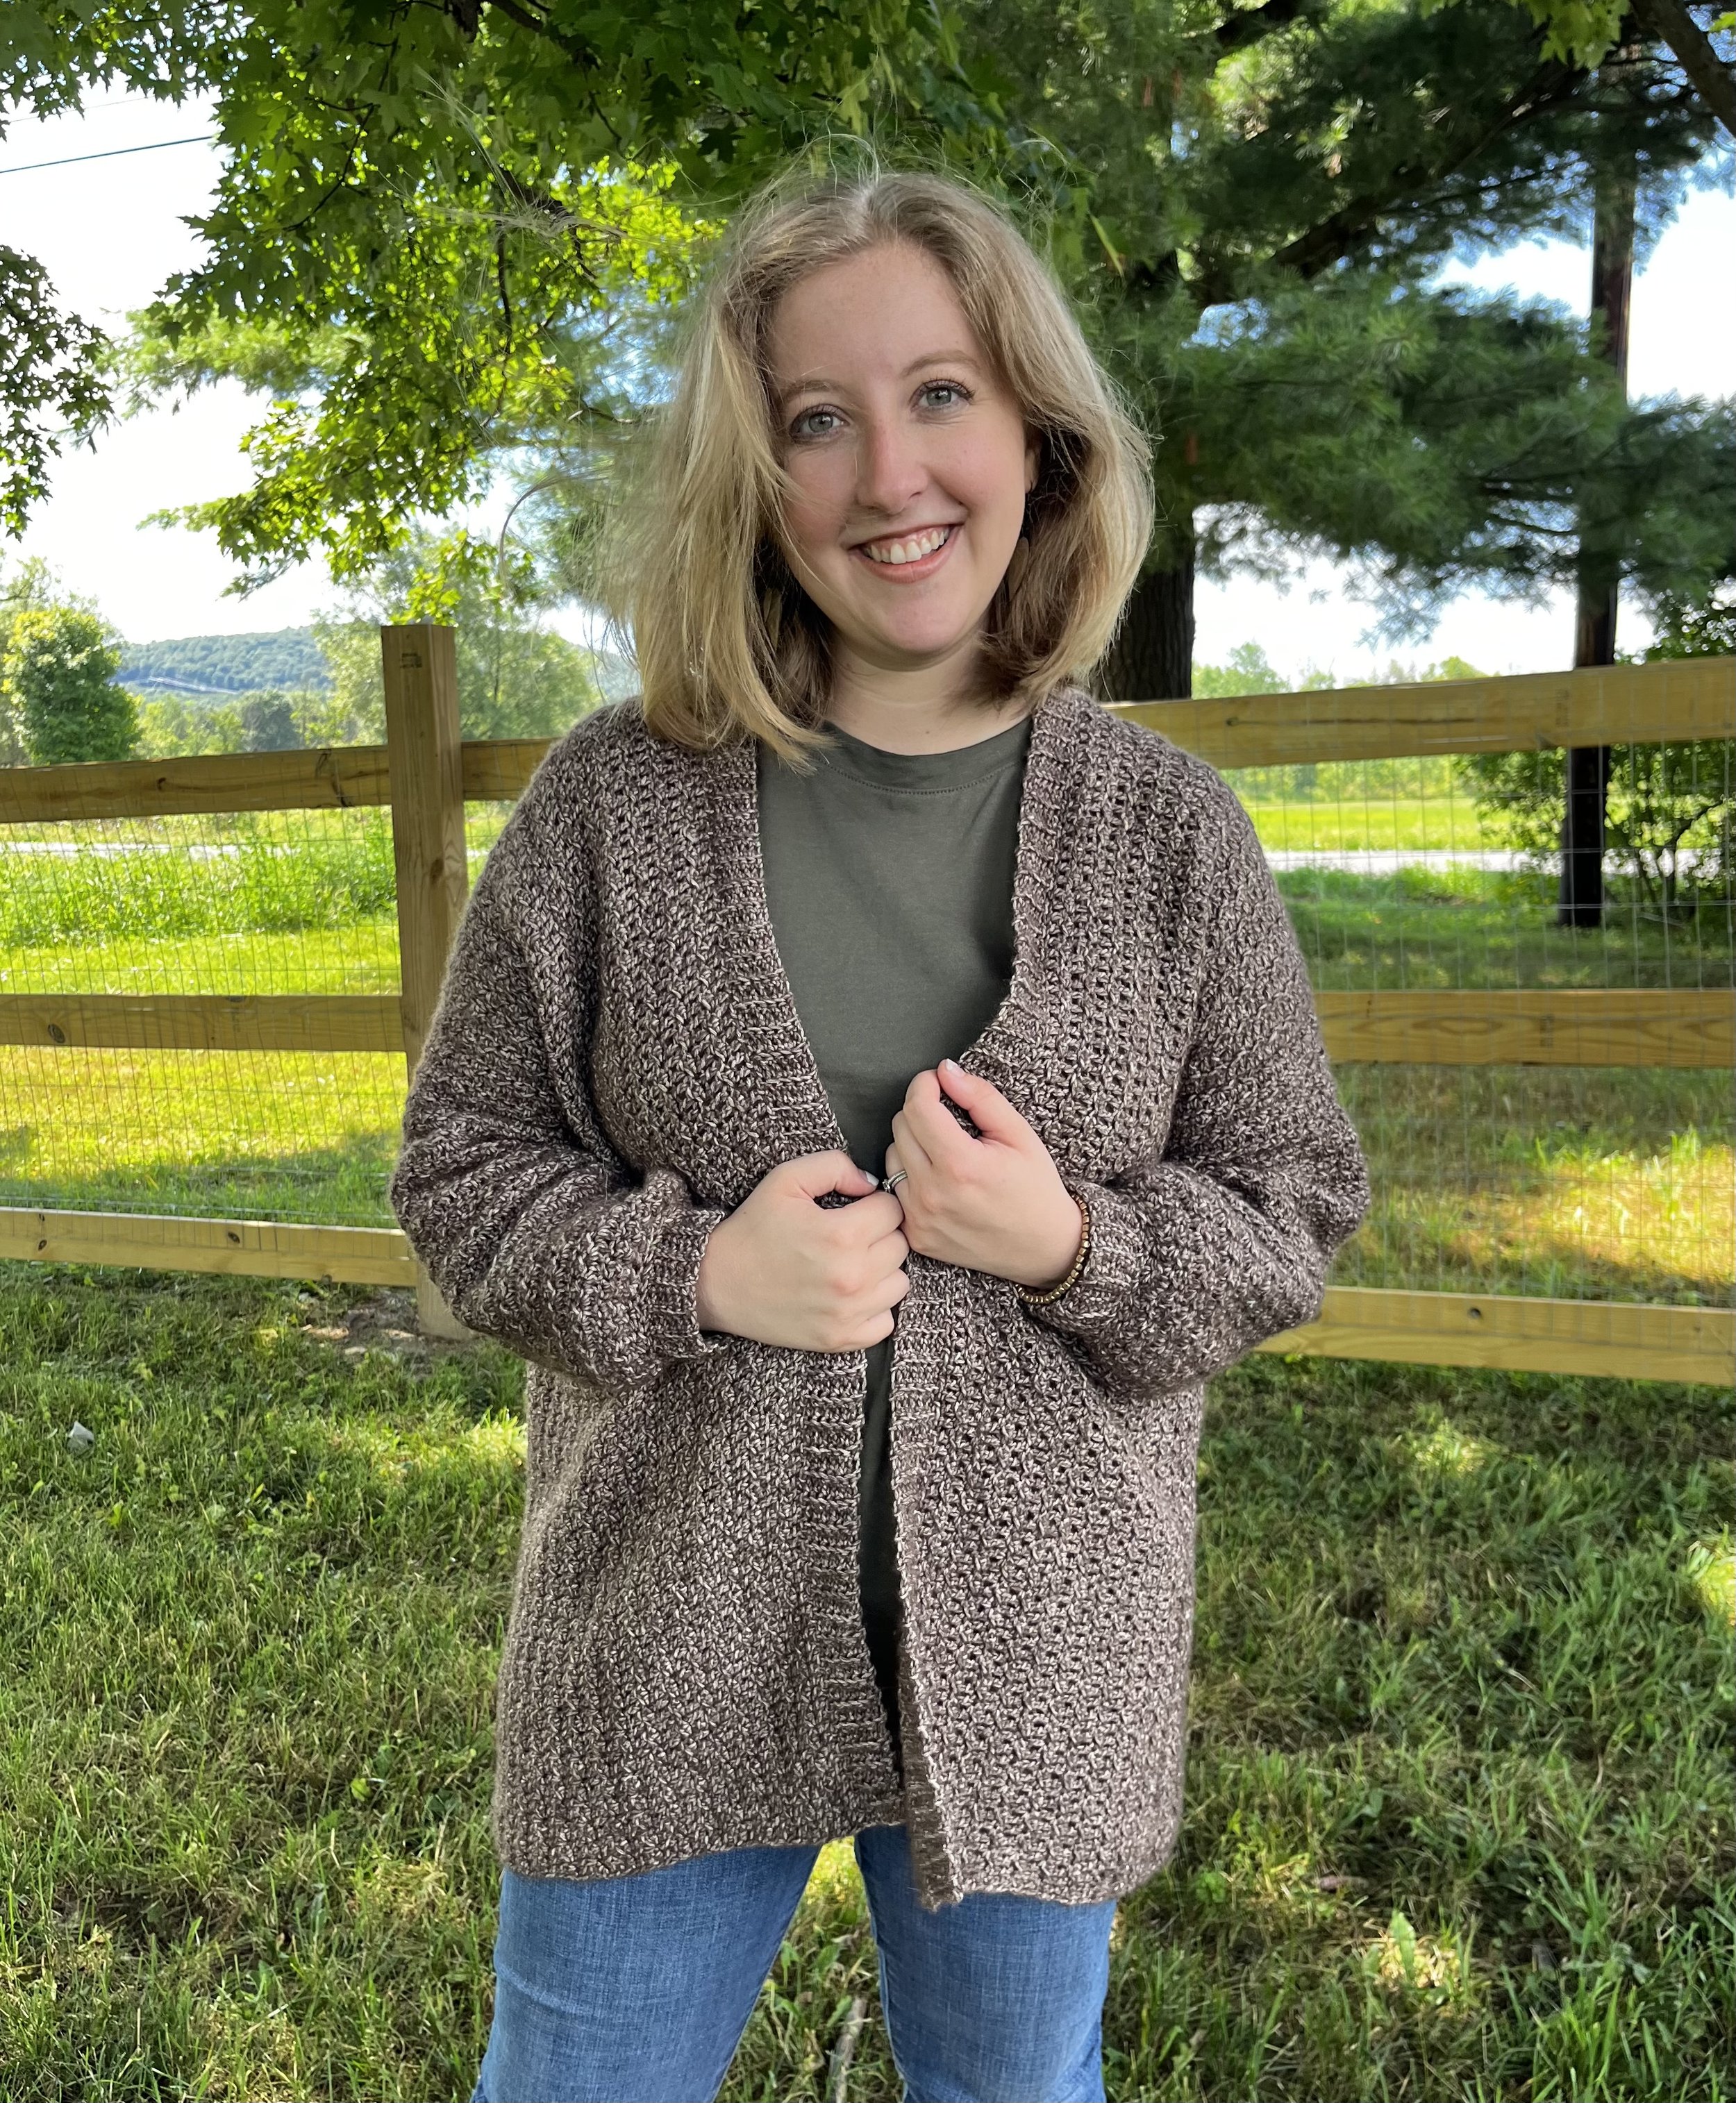
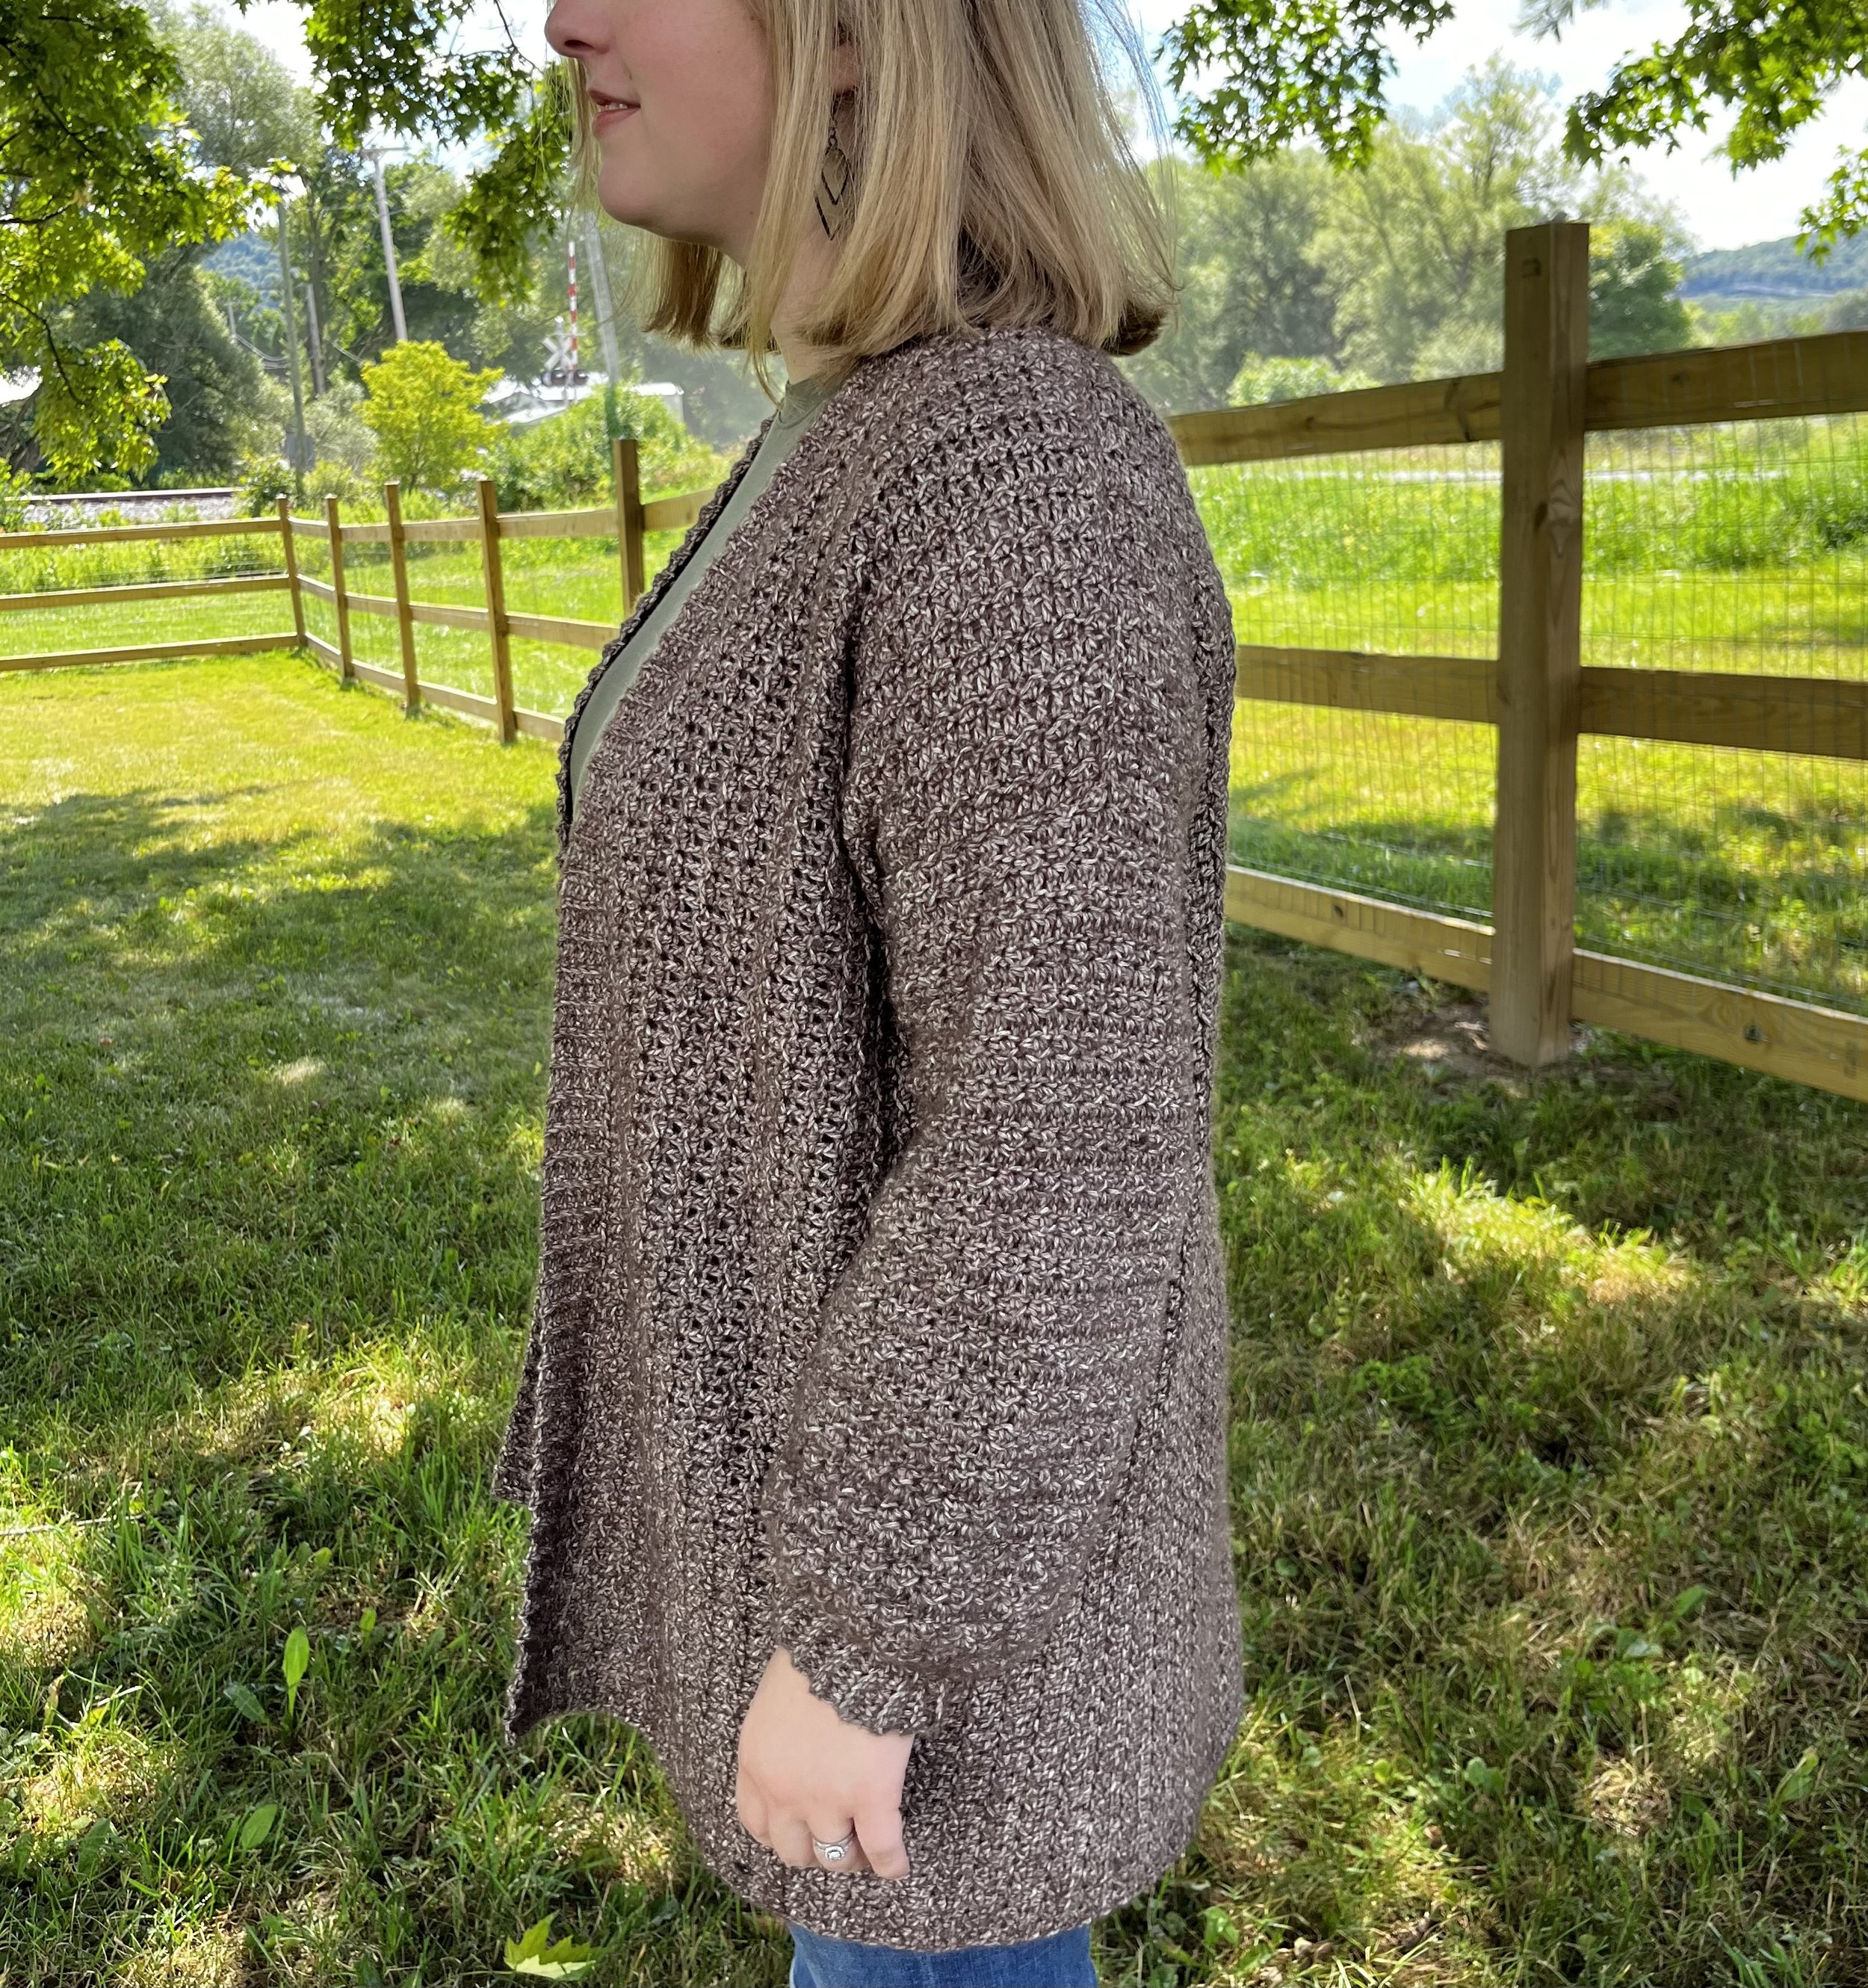
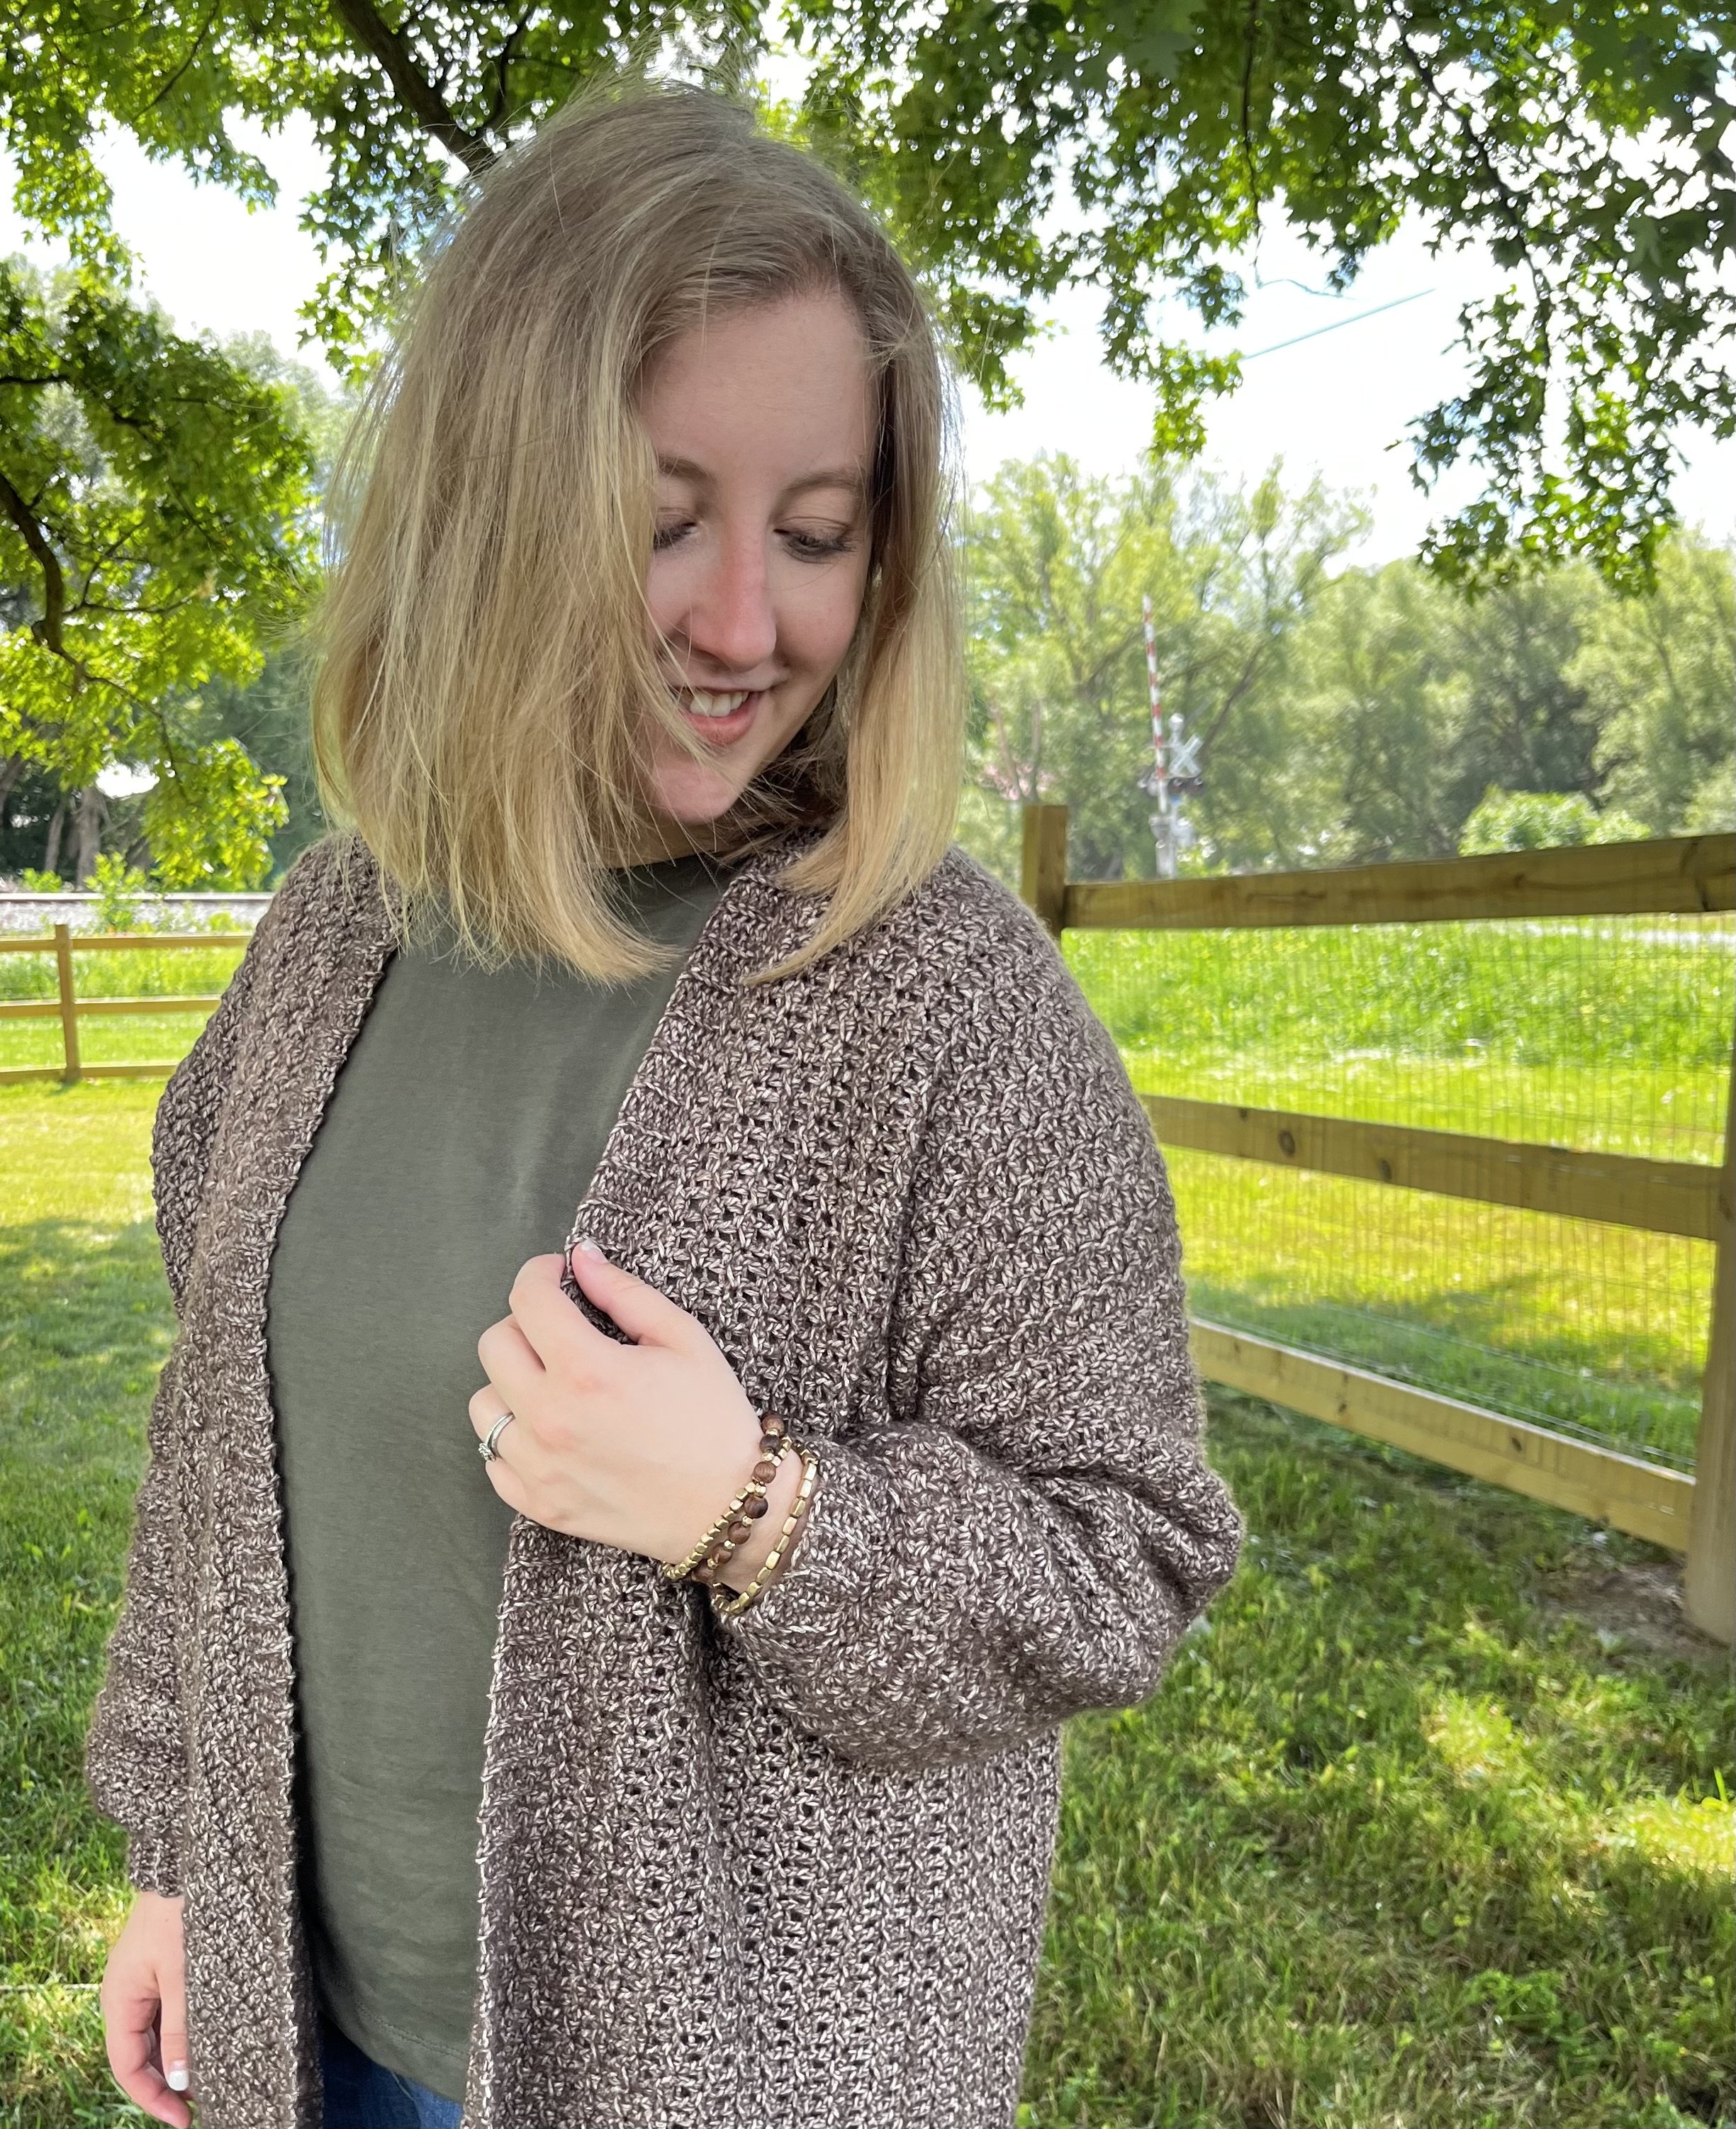
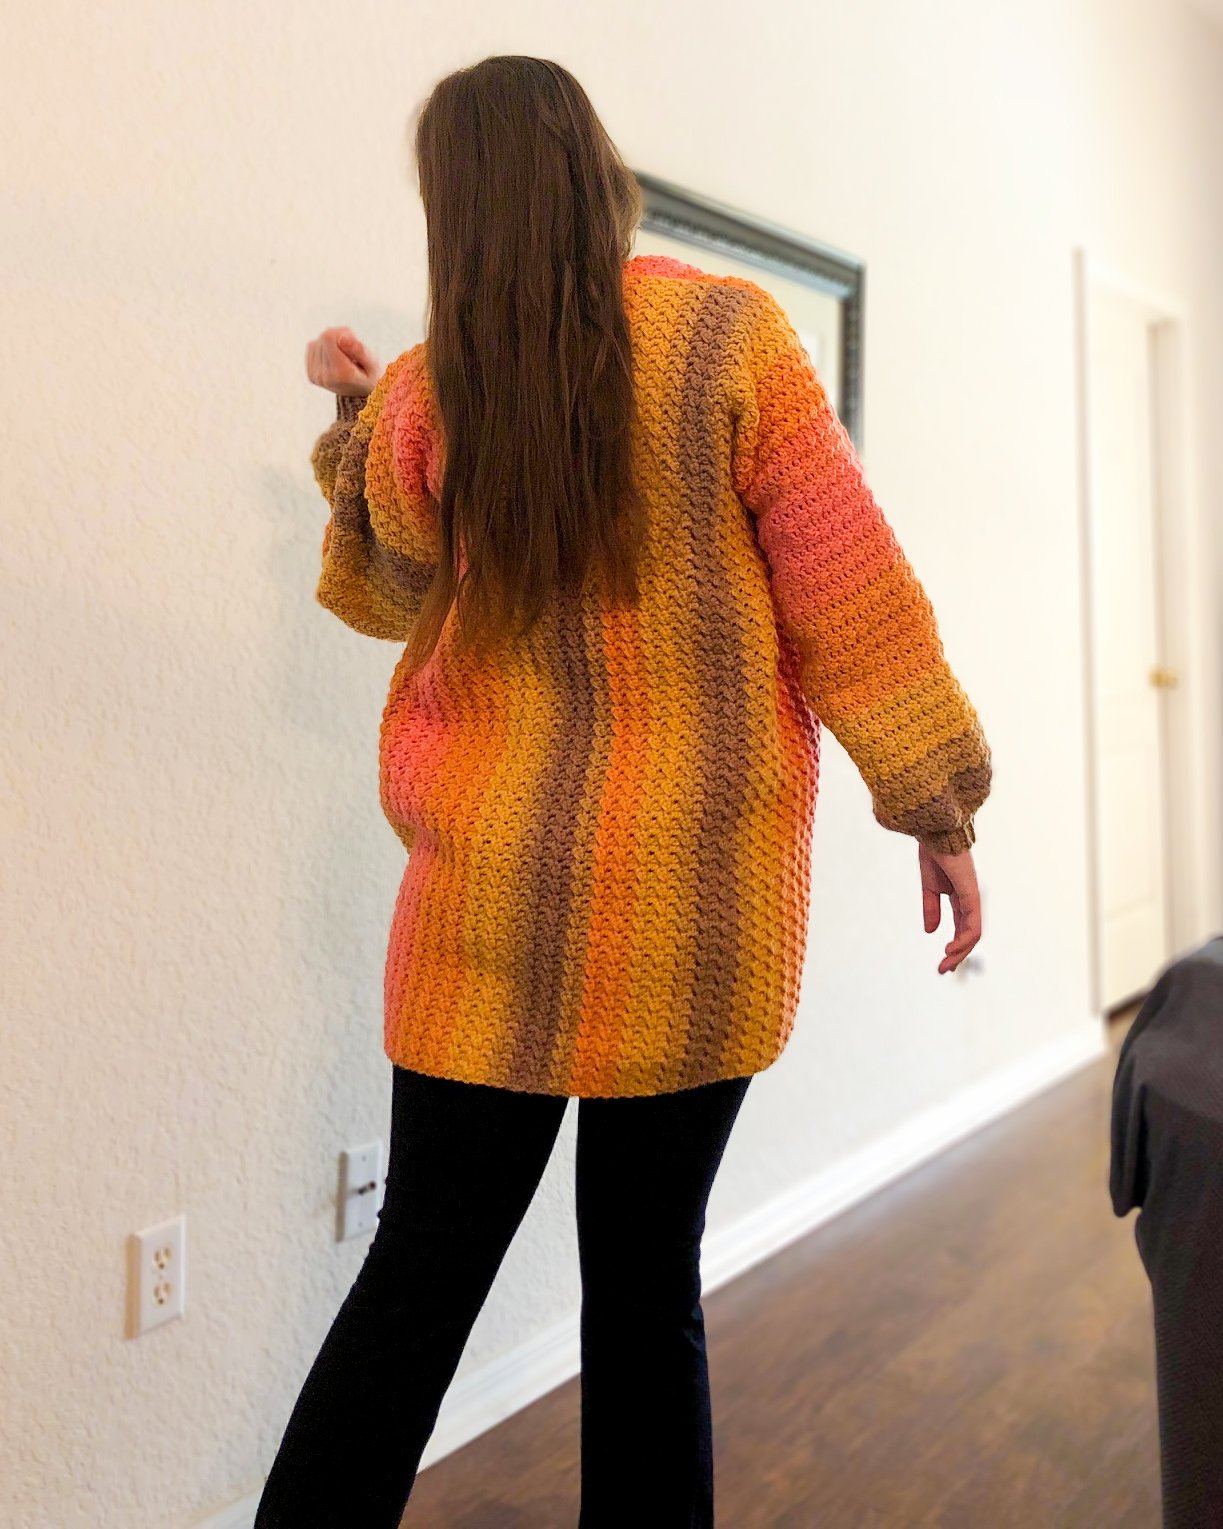
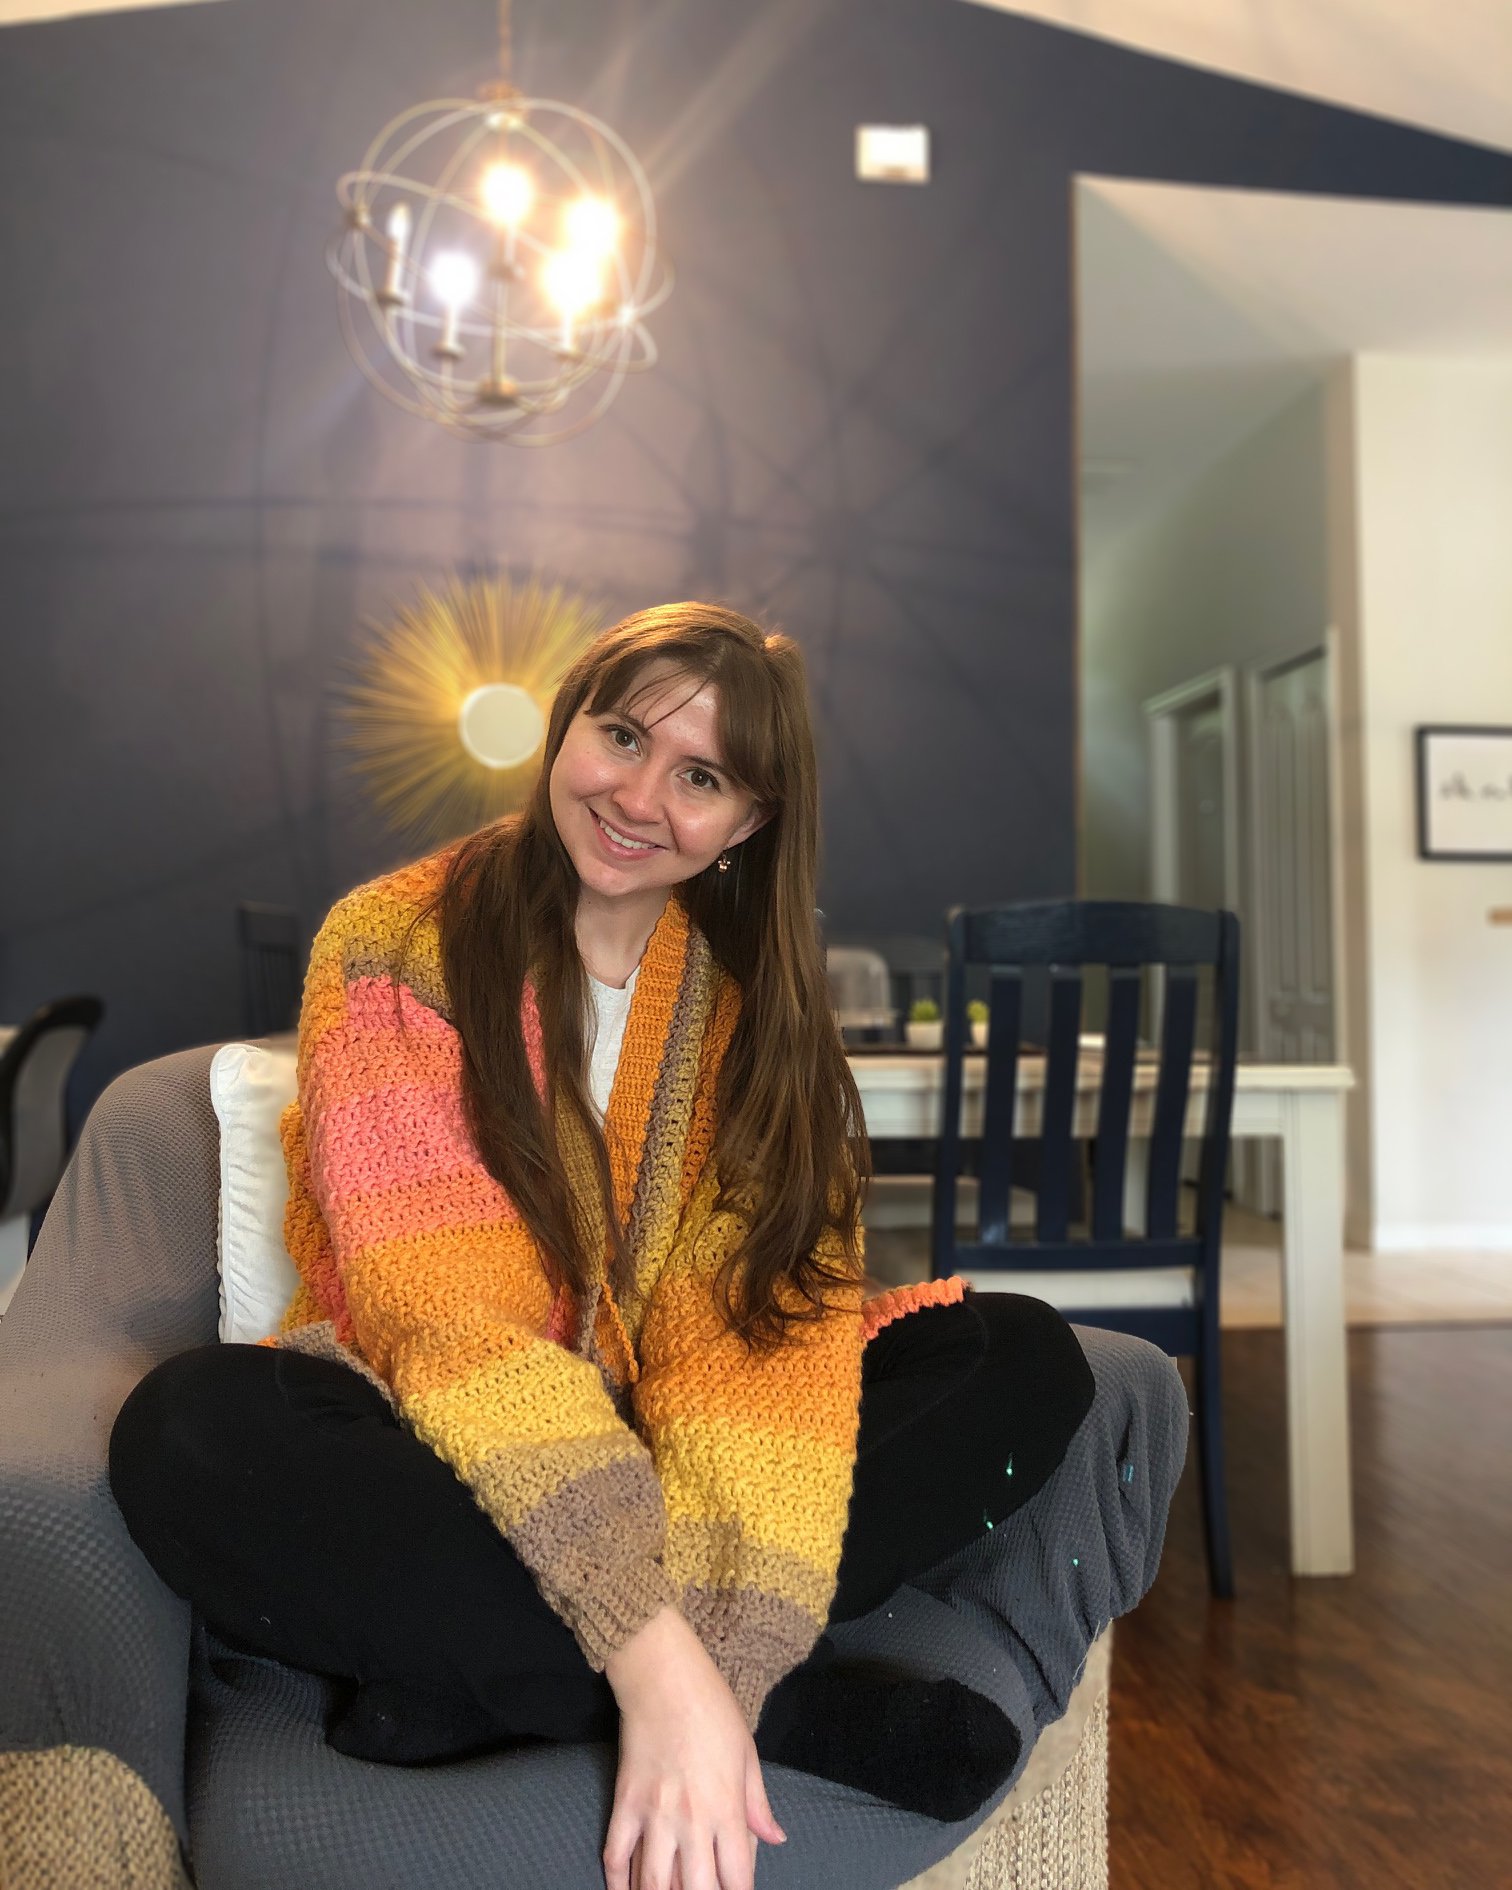
Looking for a cute and stylish oversized cardigan for this fall? Well look no further! The Olive This Cardigan is the perfect match for all your needs.
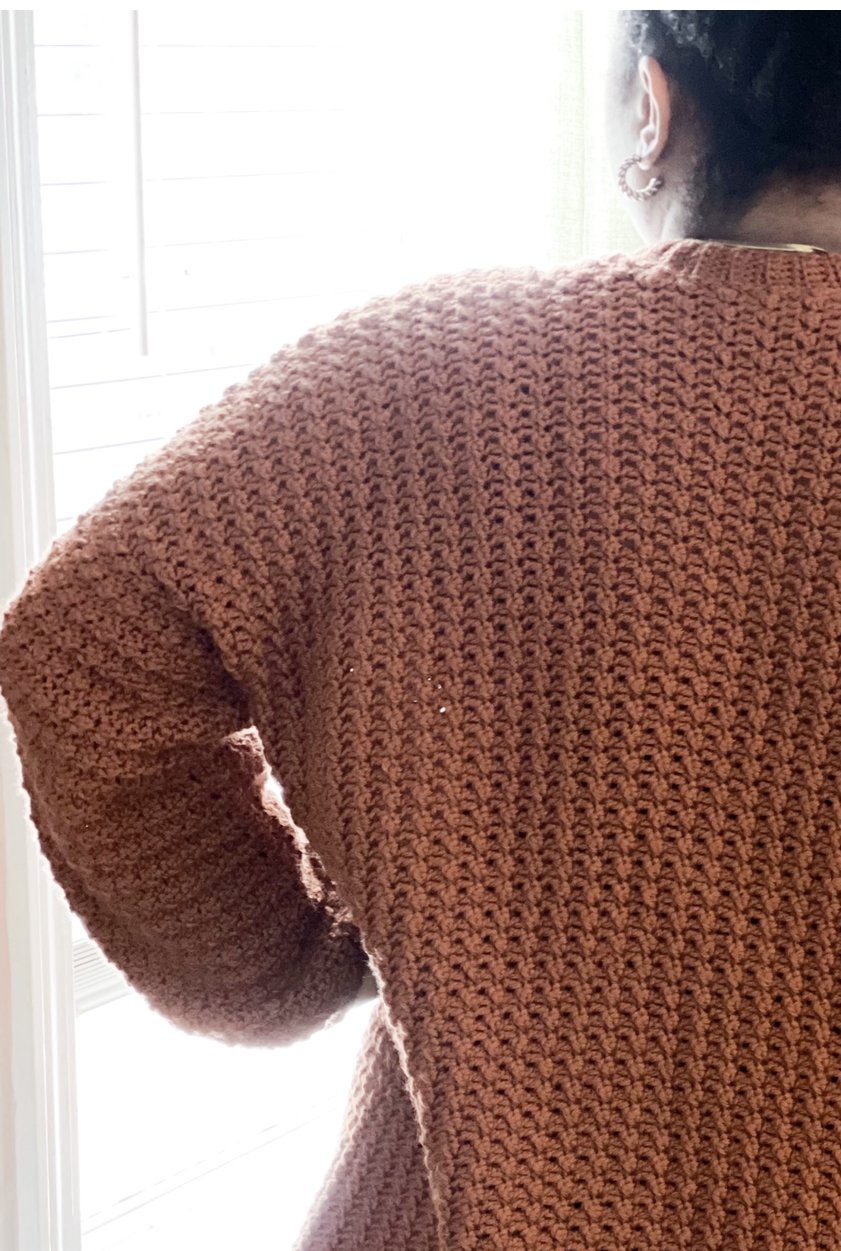
This cardigan is made using the Floret Stitch, which creates the perfect amount of texture for this garment. The design is worked from side to side, and the front panels are folded down so that the shoulders can be seamed. Then, the sleeves are worked directly onto the cardigan. This method means there are fewer seams! So, if you hate seaming as much as I do, this is definitely the cardigan for you!
Worked up with weight 4 yarn and a 5mm hook for the majority of the garment, this cardigan virtually flies off your hook. You’ll have this beauty done in no time at all. And, with how quick it works up, you’ll be able to make them for gifts, too!
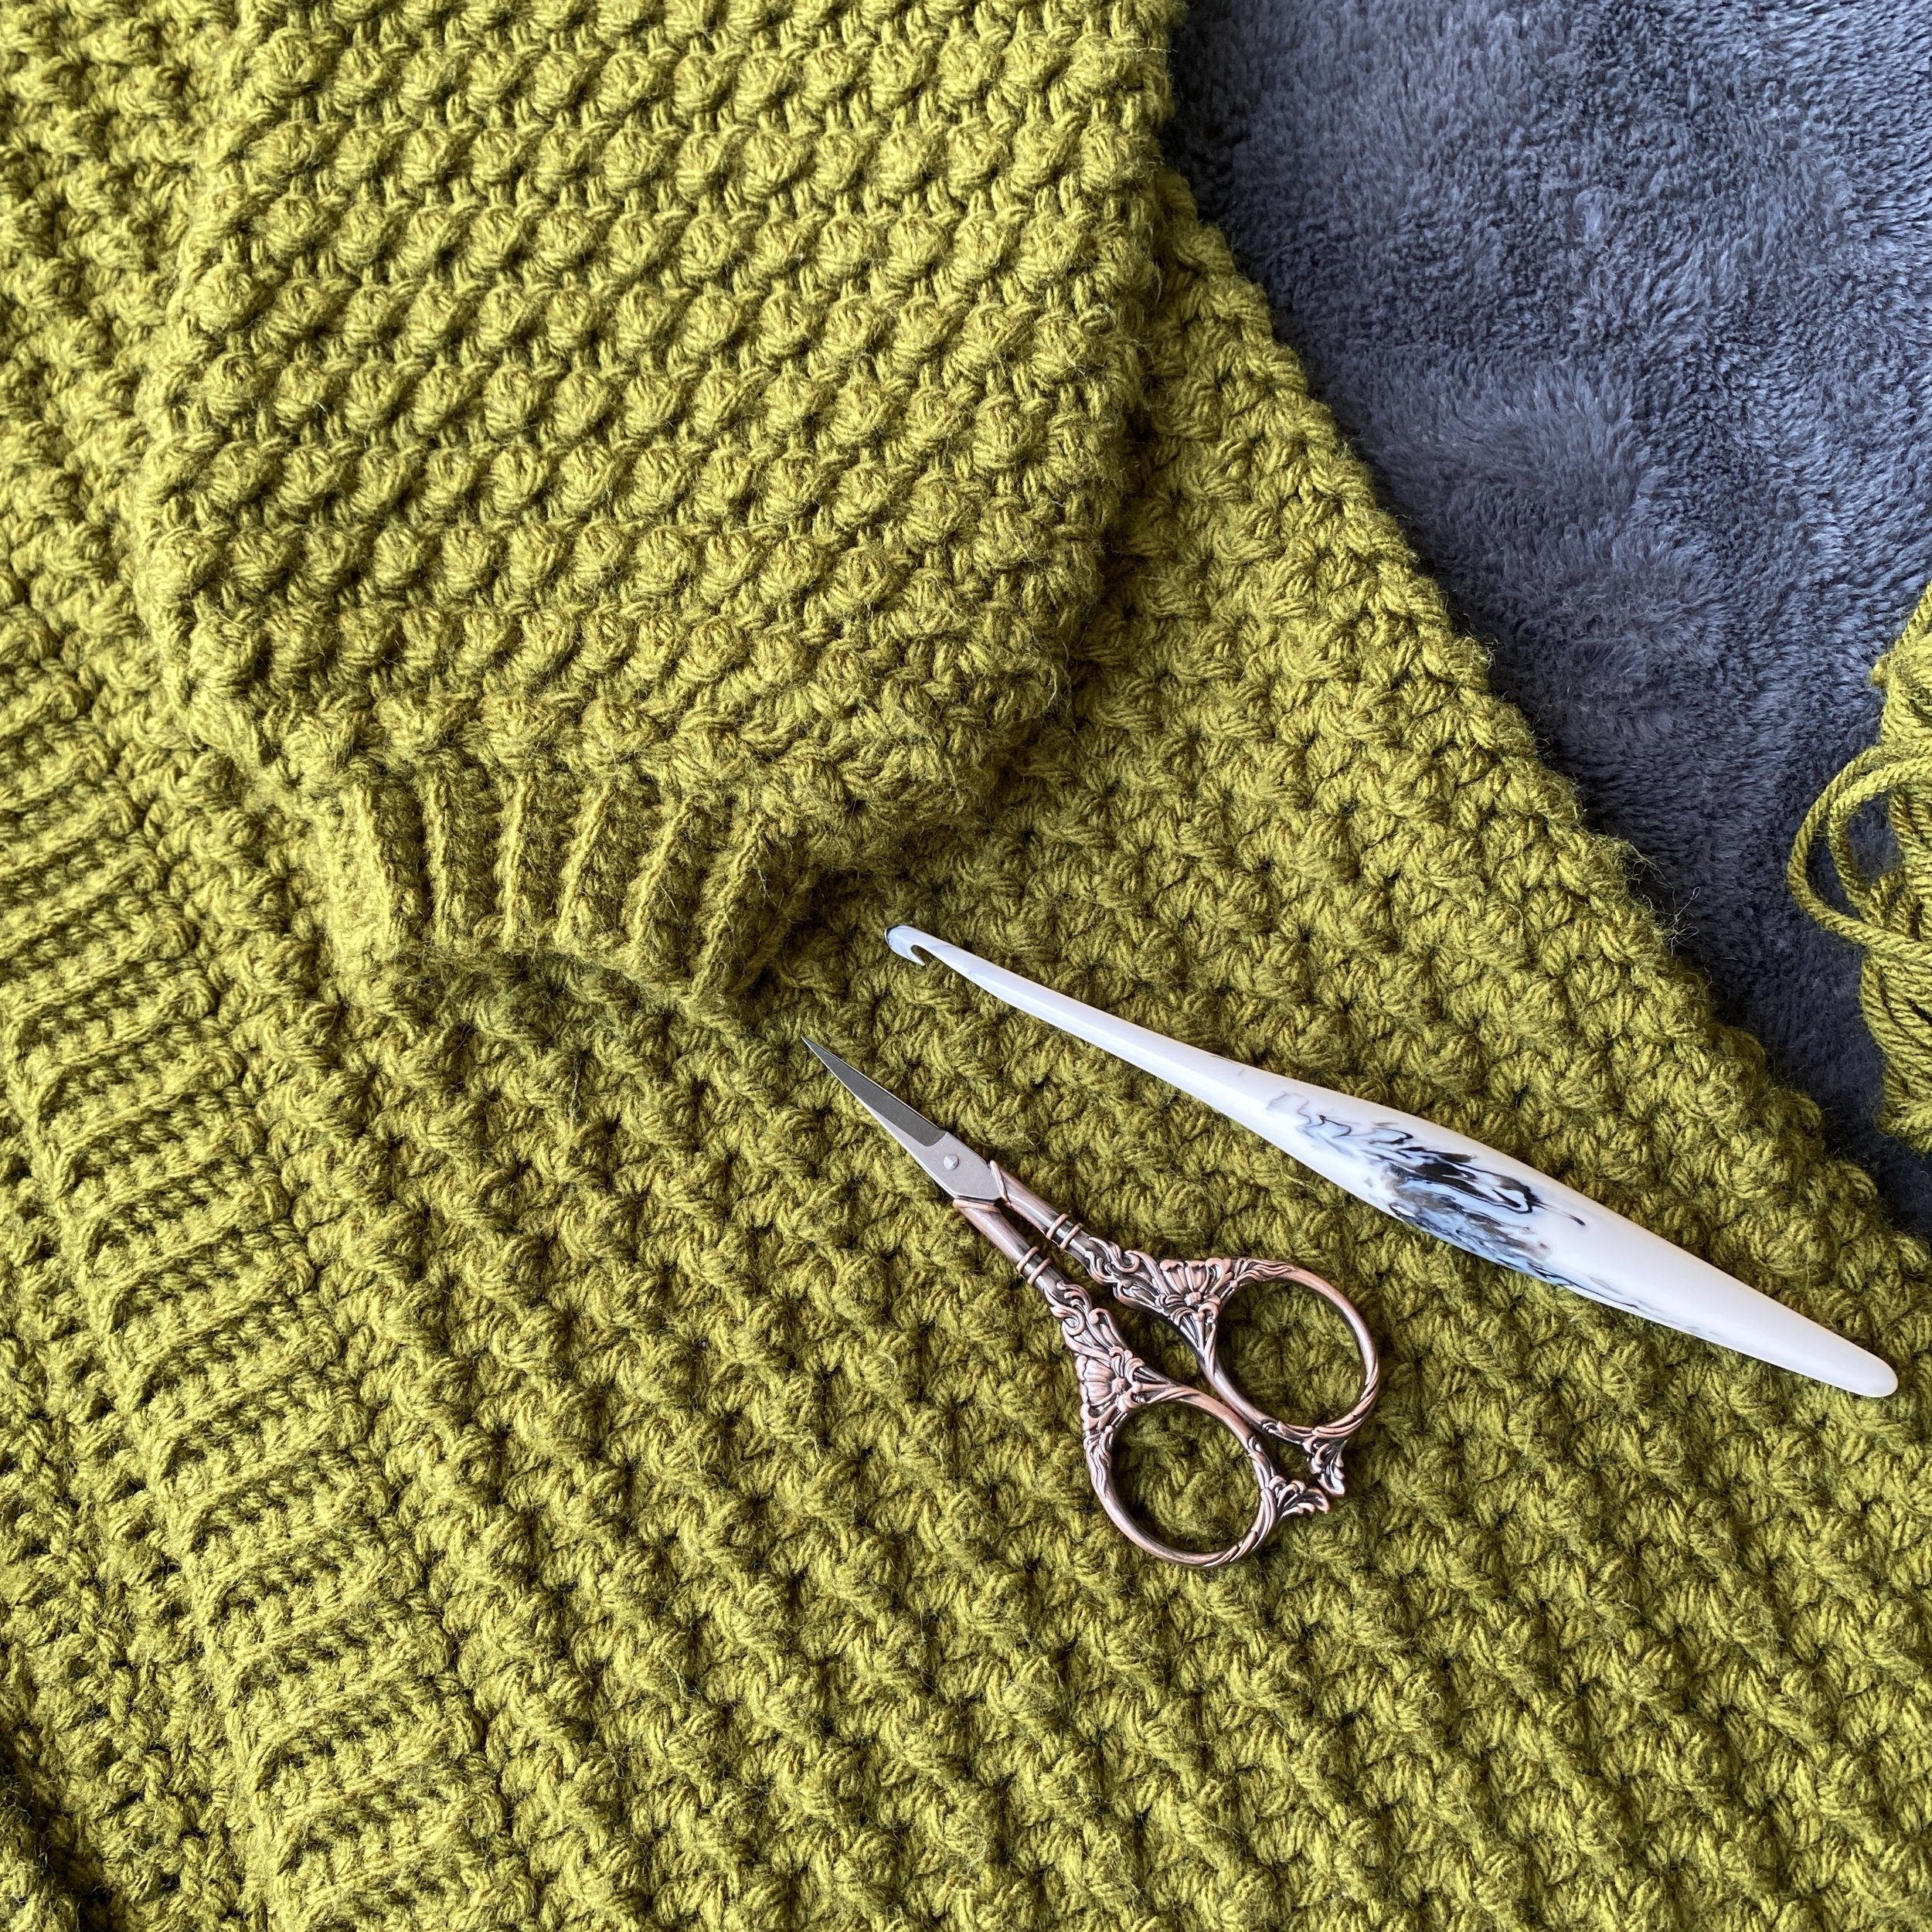
For my sample Cardigan, I used Big Twist Value yarn, which is a lovely acrylic yarn. I chose an easily washable yarn for my cardigan because I know I’m going to be wearing it all the time; however, you can use any weight 4 you desire for this garment. Just make sure you check your gauge measurements!

I LOVE TO SEE WHAT YOU CREATE!
Please share your creations with the community on social media tagging @ravinsekaidesigns and hashtag #olivethiscardigan
I can’t wait to see the beautiful things you come up with!
FOLLOW ME ON SOCIAL MEDIA
Facebook: Ravin Sekai Designs
Ravelry: RavinSekai
Etsy: Ravin Sekai Designs
Instagram: @ravinsekaidesigns
Pinterest: Ravin Sekai Designs
Patreon: Ravin Sekai Designs

WHAT YOU NEED:
Hook Size: 5mm hook and 4.5mm hook (for collar), or size needed to obtain gauge
Yarn: Aran weight 4 yarn. Sample crocheted in Big Twist Value.1725(1830, 2055, 2185, 2425, 2540, 2765) yards
Gauge: 14 sts/11 rows = 4” w/ 5mm hook. Gauge is after blocking.
Suggested Bust Measurements: Measurements will be in inches throughout. Check out the chart on pg. 6 for measurements in cm. S: 32”-35”, M: 36”-39”, L: 40”-43”, XL: 44”-47”, 2XL: 48”-51”, 3XL: 52”-55”, 4XL: 56”-59”
Finished Garment Sizing: Size is after blocking. Worn with 11” - 14” of positive ease. S: bust - 46“ x Length - 18“, M: bust - 50“ x Length - 18“, L: bust - 54“ x Length - 18 “, XL: bust - 58“ x Length - 18“, 2XL: bust - 62“ x Length - 20.25“, 3XL: bust - 66“ x Length - 20.25“, 4XL: bust - 70“ x Length - 20.25“
Model: model is 4’11” tall, 35” bust, 28” waist, 39” hips wearing size small, with 11” positive ease in bust.


ABBREVIATIONS:
Abbreviations in US terms
RS: right side
WS: wrong side
Ch: chain
St/Sts: stitch, stitches
Sl st: slip stitch
Sc: single crochet
Scblo: single crochet back loop only
Dc: double crochet
Dc2tog: double crochet 2 together
Rep: repeat
Sk: skip
Cont.: continue
Sm: stitch marker
FO: fasten off
Notes:
Directions: Where there are different numbers of rows/sts for each size, the pattern is written as follows: S(M, L, XL, 2XL, 3XL, 4XL)
Gauge: ch at least 17 sts and follow the directions for Rows 1-4 below until your swatch reaches at least 11 rows. Check the measurements.
Construction: Cardigan is crocheted side to side, as one piece. Then, shoulders are seamed and sleeves are crocheted directly onto the body.
Counting Stitches: Starting ch1 and ch3 count as stitches throughout; 1 sl st and 1 dc respectively. I did a Chainless Starting Double Crochet instead of a ch3 throughout, because I think it looks cleaner. If you’d like to do this instead, here is a video to show you how. https://www.youtube.com/watch?v=XFK1tTRBugQ
Sleeves: The sleeves are crocheted directly onto the cardigan with the WS facing you. That means you will be working with the garment inside out for this portion of the pattern. More about this is explained on pg 4 in the sleeve section
Cuffs & Collar: are made with scblo ribbing. A good tutorial for this method of adding ribbing on the end of a project can be found on Toni from TL Yarn Crafts’ Youtube channel. https://www.youtube.com/watch?v=xsEPLeUSwmg&t=176s

Save It For Later
Pin to Pinterest
THE PATTERN:
For the free pattern of this design please continue on this page. Please consider supporting me by purchasing the 100% ad-free PDF with all extras/charts for this pattern on my Ravelry or ETSY pages. Or consider joining my Patreon for member perks.
Body:
Right Front Panel:
Ch 107(107, 111, 111, 115, 115, 117)
Row 1: dc in 4th ch from hook (this counts as a ch3 and 1st double crochet throughout, 2sts), dc across. Turn. [105(105, 109, 109, 113, 113, 115) sts]
Row 2: ch1 (counts as 1 sl st throughout. See Notes.), *dc in next st, sl st in next* rep * * across placing the last sl st into the top of the ch3. Turn.
Row 3: ch3 (counts as 1 dc throughout. See Notes), dc across placing the last dc in the starting ch1 of the previous row. Turn.
Row 4 - Row 27(29, 31, 35, 37, 39, 43): rep rows 2-3. Turn.
Row 28(30, 32, 36, 38, 40, 44): ch1 (counts as 1 sl st), *dc in next st, sl st in next* rep * * across for a total of 77(77, 77, 77, 77, 77, 77) sts ending with a sl st, ch 30(30, 34, 34, 38, 38, 40). Turn.

Back Panel:
Row 29(31, 33, 37, 39, 41, 45): dc in 4th ch from hook, 26(26, 30, 30, 34, 34, 36) dc across chain, 77(77, 77, 77, 77, 77, 77) dc, placing the last dc in the starting ch1 of the previous row. Turn. [105(105, 109, 109, 113, 113, 115) sts]
Row 30(32, 34, 38, 40, 42, 46): ch1, *dc in next st, sl st in next* rep * * across placing the last sl st into the top of the ch3. Turn.
Row 31(33, 35, 39, 41, 43, 47): ch3, dc across placing the last dc in the starting ch1 of the previous row. Turn.
Row 32(34, 36, 40, 42, 44, 48) - Row 91(99, 107, 115, 123, 131, 141): rep rows 2-3. Turn.
Row 92(100, 108, 116, 124, 132, 142): ch1, *dc in next st, sl st in next* rep * * across for a total of 77(77, 77, 77, 77, 77, 77) sts ending with a sl st, ch 30(30, 34, 34, 38, 38, 40). Turn.
Left Front Panel:
Row 93(101, 109, 117, 125, 133, 143): dc in 4th ch from hook, 26(26, 30, 30, 34, 34, 36) dc across chain, 77(77, 77, 77, 77, 77, 77) dc, placing the last dc in the starting ch1 of the previous row. Turn. [105(105, 109, 109, 113, 113, 115) sts]
Row 94(102, 110, 118, 126, 134, 144): ch1, *dc in next st, sl st in next* rep * * across placing the last sl st into the top of the ch3. Turn.
Row 95(103, 111, 119, 127, 135, 145): ch3, dc across placing the last dc in the starting ch1 of the previous row. Turn.
Row 96(104, 112, 120, 128, 136, 146) - 119(129, 139, 151, 161, 171, 185): rep rows 2-3. Turn
FO
Seaming:
Block to measurements. Fold the 2 front panels over and seam the shoulders like in the diagram (seam at the green lines). I used the mattress stitch, because I think it looks the cleanest, but you can use any seaming method you prefer. However, be aware that if you use something like sl st, you will need to finagle your sts a bit for the sleeves to get the right amount of sts around.

Sleeves:

Now we will be working the sleeve directly onto the body of the cardigan by working in rounds. Because of the nature of the Floret st in the round, we will be working with the cardigan inside out. So, flip your cardigan with the WS facing you. The stitches for the sleeves should be fairly easy to pick up as they are the stitches left unworked and the backs of the chains on the panels. For my sleeves, on the even rows, I did a variation of the regular dc where I put my hook through the fabric from the back to the front instead of the front to the back to ensure that the RS of the fabric of the sleeves looks the same as the RS body. This is not mandatory, I just liked the way it looked. This youtube video shows what I mean, but she is using a half double crochet stitch instead of a dc. The concept is the same, but we will be using the dc stitch. https://youtu.be/uMCN_sx0yok
Round 1: Re-attach yarn to the bottom of the sleeve opening in the first unworked st with a sl st and ch1 (make sure this ch1 is loose as we will be ending the row with a sl st into this ch1), *dc in next st, sl st in next* rep * * around until the last st, 1dc, sl st into ch1. You should have 56(56, 64, 64, 72, 72, 76) sts around.
Round 2: ch3, dc around. Sl st into the top of the ch3. [56(56, 64, 64, 72, 72, 76) sts]
Round 3: ch1, *dc in next st, sl st in next* rep * * around until the last st, 1dc, sl st into ch1.
Round 4 - Round 41: rep Rows 2 - 3
Try your cardigan on and check the length of the sleeve. It should reach to just after your wrist. If you need to add a couple more rounds, do so now. Make sure you end on an odd round (dc/sl st round).
Round 42: ch2 (does not count as a st) starting in the same st, dc2tog around, sl st into the 1st dc2tog. [28(28, 32, 32, 36, 36, 38) sts]
Round 43: ch1, *dc in next st, sl st in next* rep * * around until the last st, 1dc, sl st into ch1. [28(28, 32, 32, 36, 36, 38) sts]
Do Not FO
Cuff:
ch 7
Row 1: sc in 2nd ch from hook, 5 sc down ch, sl st in the next 2 sts on the sleeve. Turn. 6sts
Row 2: ch1, 6 scblo back up. Turn.
Row 3: ch1, 6 scblo back down, sl st in the next 2 sts on the sleeve. Turn.
Rep Rows 2 - 3 around the cuff until you come back around to the start. Seam the 2 sides of the cuff together. See notes for more info
FO
Rep from Sleeve for the opposite side.
Collar:
With 4.5mm hook and the RS facing up, re-attach yarn to the bottom of the right side of the cardigan with a sl st. (Right side when wearing, left side when looking at it).
Ch 7
Row 1: sc in 2nd ch from hook, 5sc down ch, sl st in the next 2 sts on the collar. Turn. [6 sts]
Row 2: ch1, 6 scblo back up. Turn.
Row 3: ch1, 6scblo back down, sl st in the next 2 sts on the collar. Turn.
Rep Rows 2 - 3 around the collar until you reach the bottom of the other side. Sl st into the last st.
FO
Weave in ends and block cardigan to measurements again if desired.

Happy Creating!
IF YOU LIKED THIS PATTERN, PLEASE SUPPORT ME ON PATREON OR BUY ME A COFFEE!

BUY ME A KO-FI

SUPPORT ME ON PATREON
I LOVE TO SEE WHAT YOU CREATE!
Please share your creations with the community on social media tagging @ravinsekaidesigns and hashtag #olivethiscardigan
I can’t wait to see the beautiful things you come up with!
FOLLOW ME ON SOCIAL MEDIA
Facebook: Ravin Sekai Designs
Ravelry: RavinSekai
Etsy: Ravin Sekai Designs
Instagram: @ravinsekaidesigns
Pinterest: Ravin Sekai Designs
Patreon: Ravin Sekai Designs

Hi! I’m Rachel.
I’m a quirky world traveller, avid knitter, crochet lover, pattern maker, and all around nerd! I spend a lot of time clowning around, and I often have the goofiest smile on my face. This website is the landing place for my new patterns, random thoughts, and general craziness. I hope you enjoy my randomness and my yarnie goodness!
Archive
- LGBTQ+
- PRIDE
- accessories
- accessory
- asymmetrical
- autumn
- backpack
- bag
- beach
- beanie
- bias shawl
- blanket
- blog hop
- blue
- bobble
- bookbag
- boyfriend
- cardigan
- case
- celtic weave stitch
- clutch
- clutch bag
- collaboration
- color block
- color work
- cover
- cover-up
- cowl
- crochet
- crochet pattern
- crochetpattern
- crop top
- croptop
- decor
- diy
- dress
- ds case
- duster
- earwarmer
- easy
- fall
- festivaltop
- free pattern
- gauge
- ghost
- granny squares
- halloween
- handbag
- hat
- headband
You Might Also Like:


