This post may contain affiliate links. Please see my full disclosure and privacy policy for details.
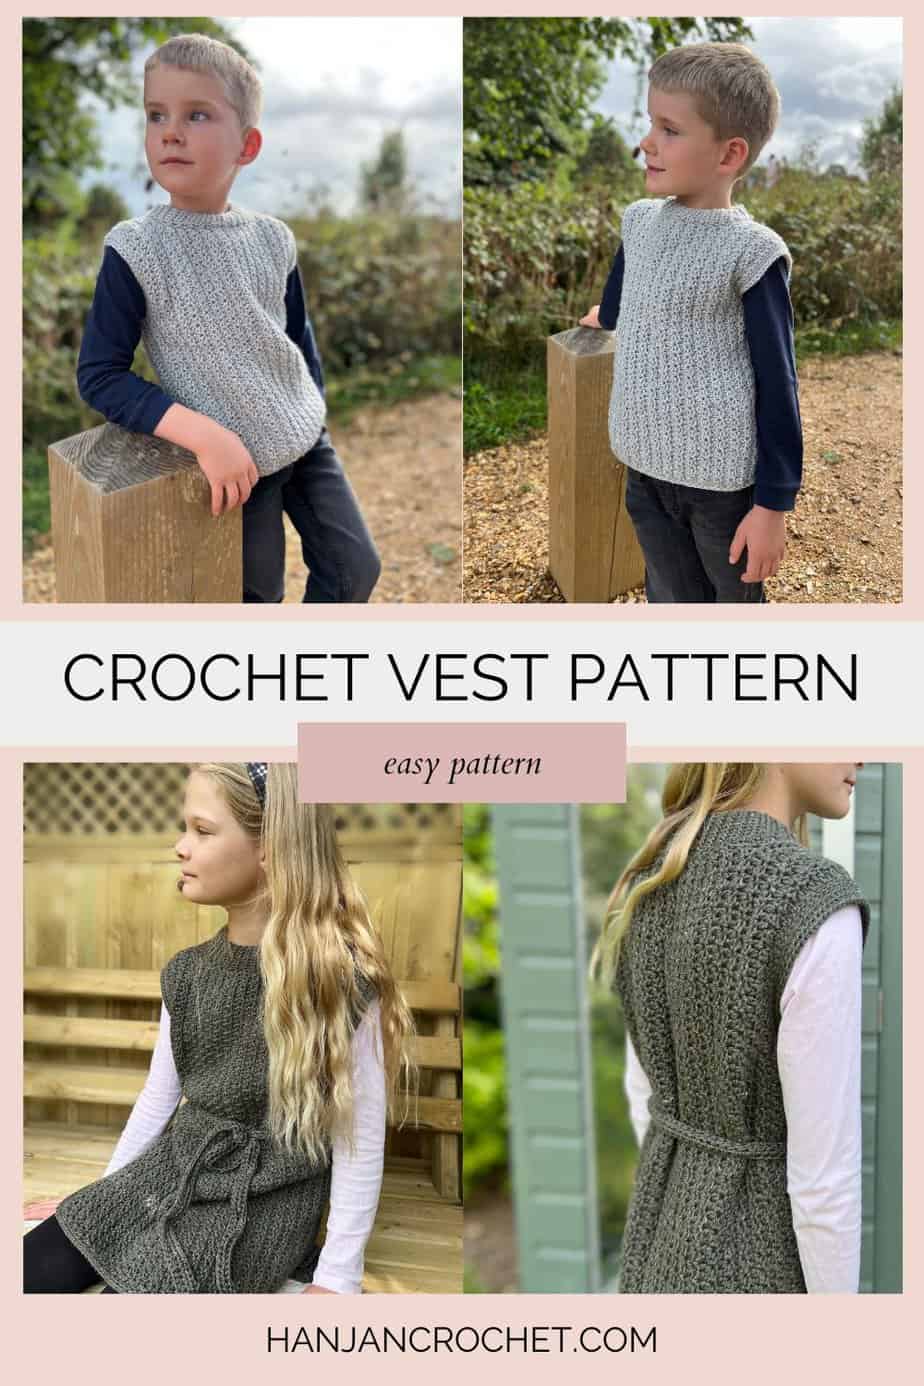
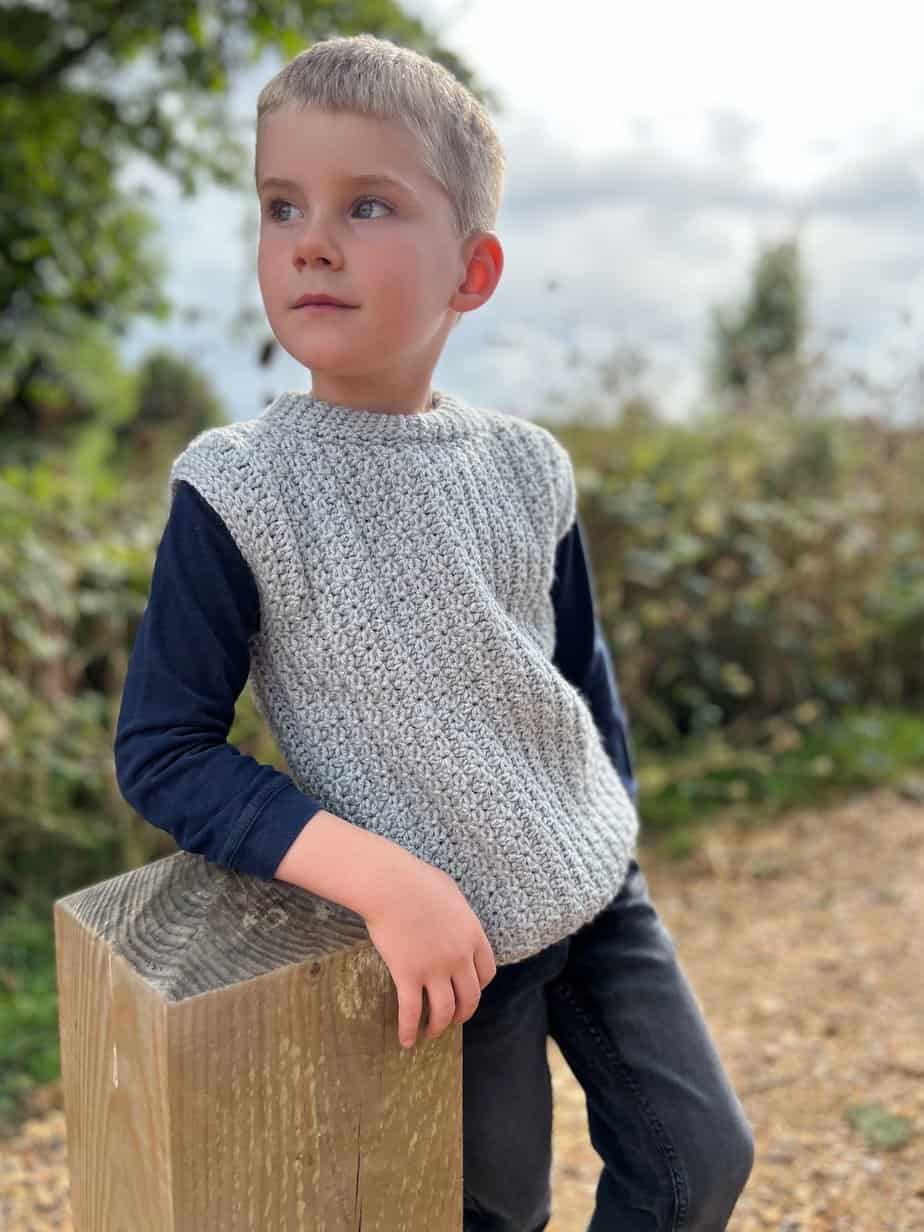
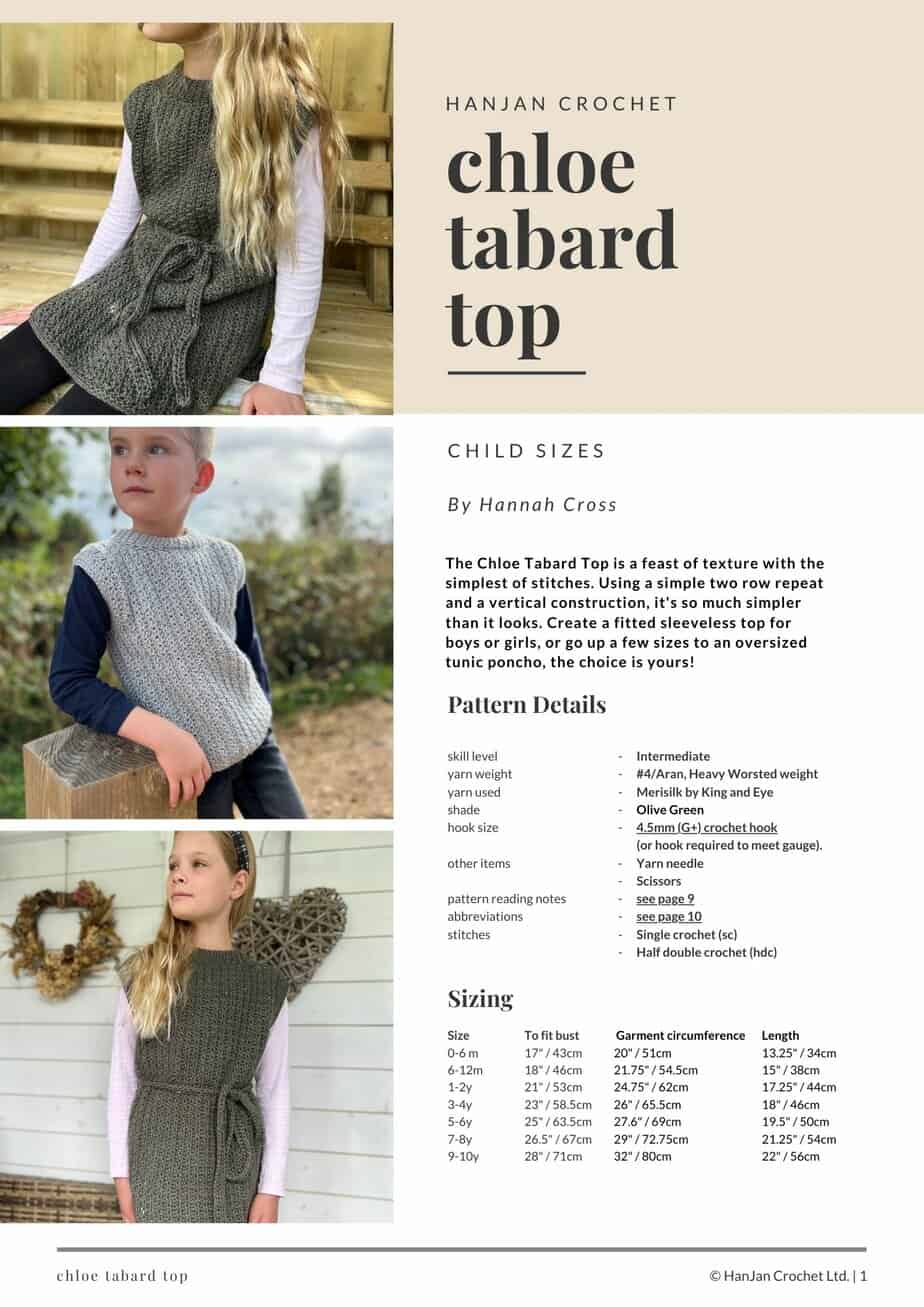
The Chloe Tabard is a fabulous sleeveless crochet baby vest pattern that comes in sizes newborn to age 10 so is perfect for older children too. Using a simple two row repeat and a vertical construction, it’s so much simpler than it looks and is a feast of texture with the simplest of stitches.
Create a fitted crochet sleeveless top for boys or go up a few sizes to an oversized crochet poncho for kids, the choice is yours!
In sizes newborn baby to 10 years, a full video tutorial and easy to follow construction diagrams you’ll find everything you need even if you’re not experienced in crochet garments for kids.
You can purchase an ad-free, printable PDF version in my stores here:
This post may contain affiliate links. Please see my full disclosure and privacy policy for details.
About this Crochet Baby Vest Pattern
At the beginning of the year my niece Chloe asked me to design and make her a crochet tunic top in olive green that she could wear over skinny jeans and leggings. So I set about the task.
Whilst I was designing I thought I’d just try it on myself (knowing that it was much smaller than my measurements) and I loved how it looked!
So I launched the adult crochet sleeveless top pattern first and then have finally got around to publishing the child vest pattern now too!
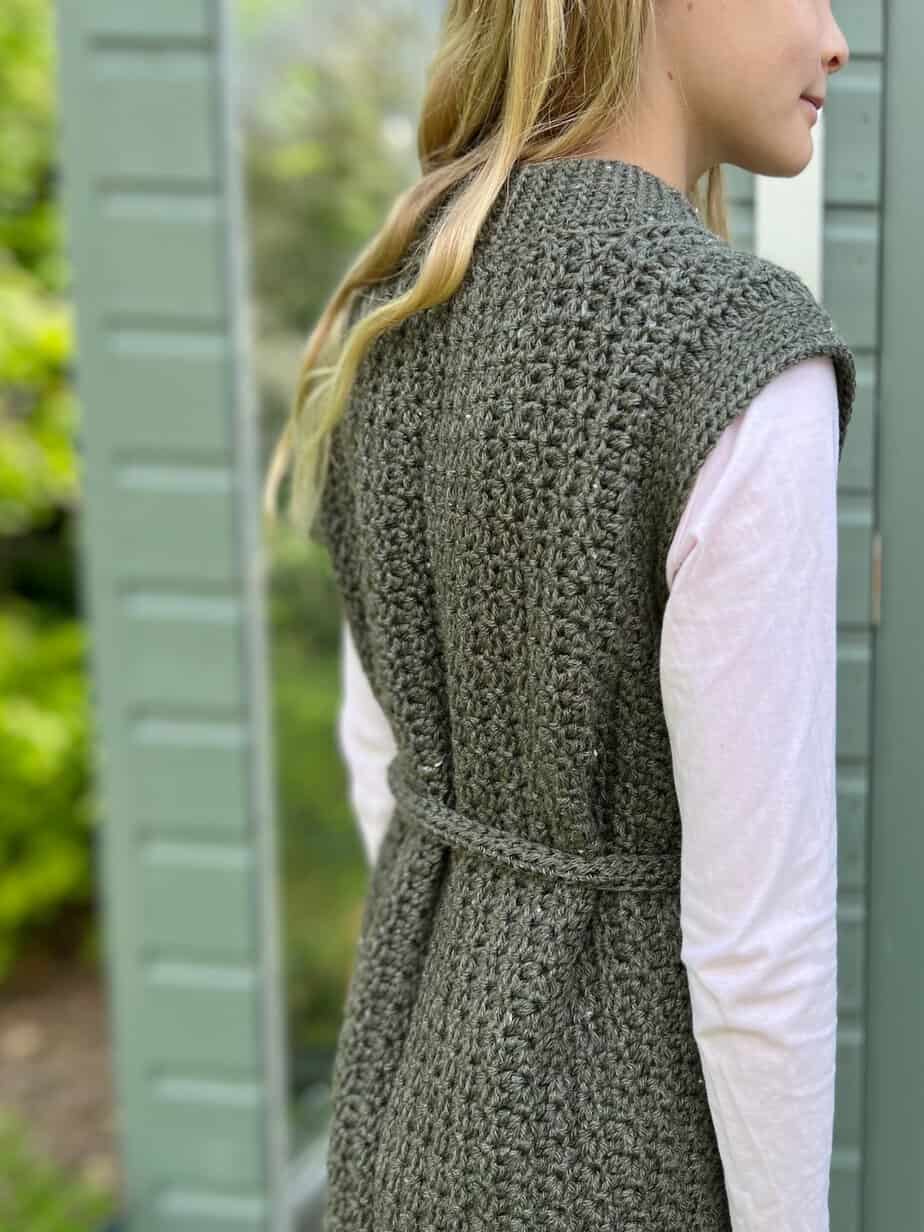
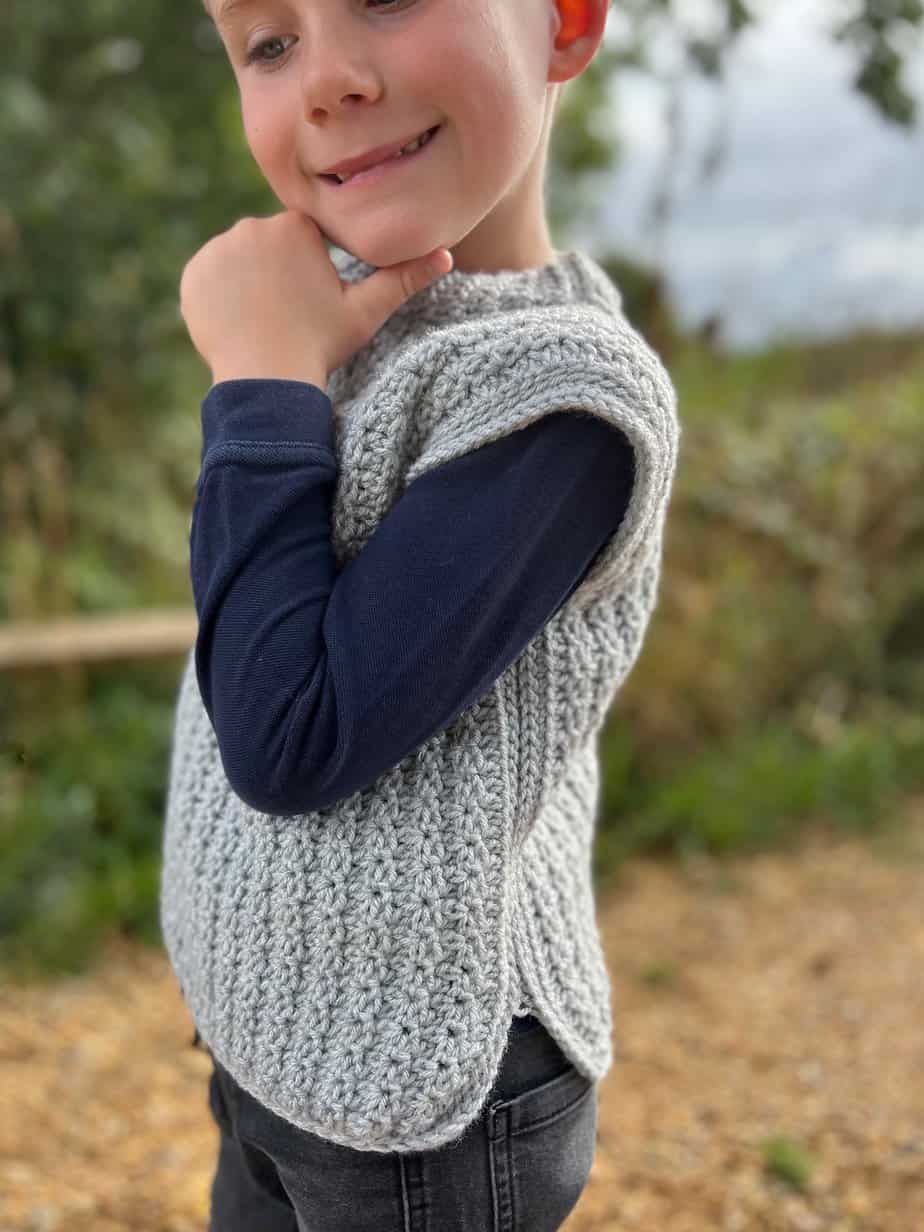
Just like the adult version you can add an optional tie (like Chloe is wearing in her pictures) but the younger sizes are slightly shorter to create more of a crochet vest pattern rather than a tunic so a tie isn’t necessary if you don’t want to add it.
a Rafflecopter giveaway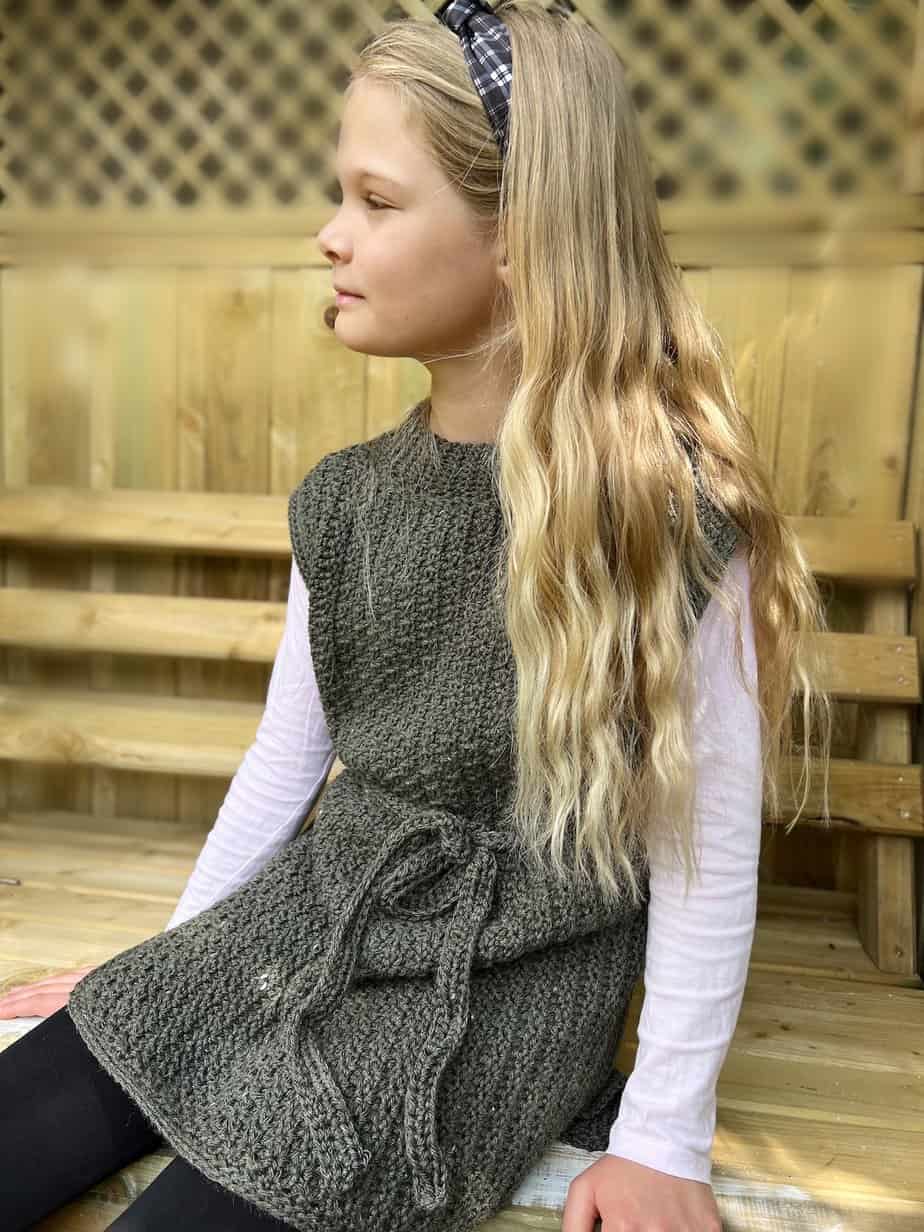
How to crochet a vest top for children
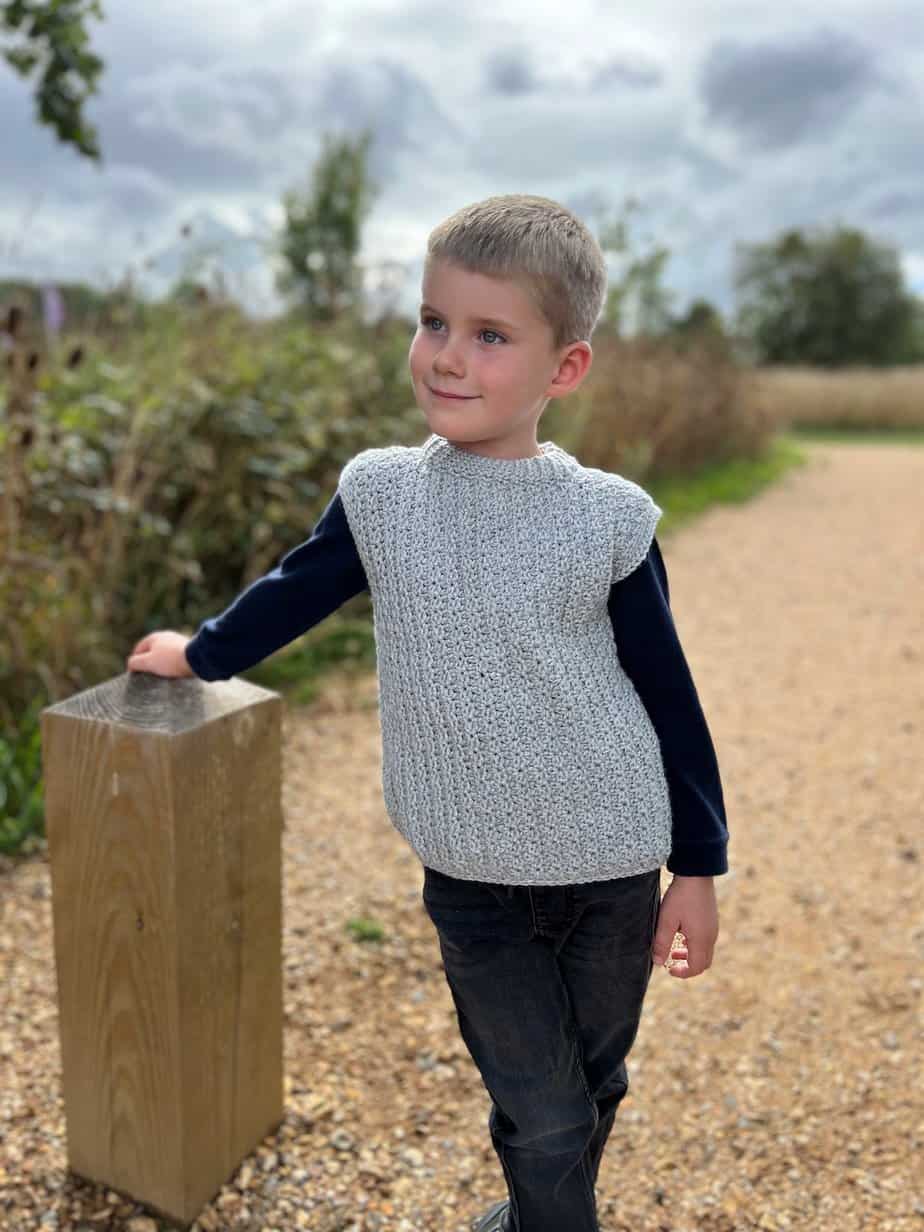
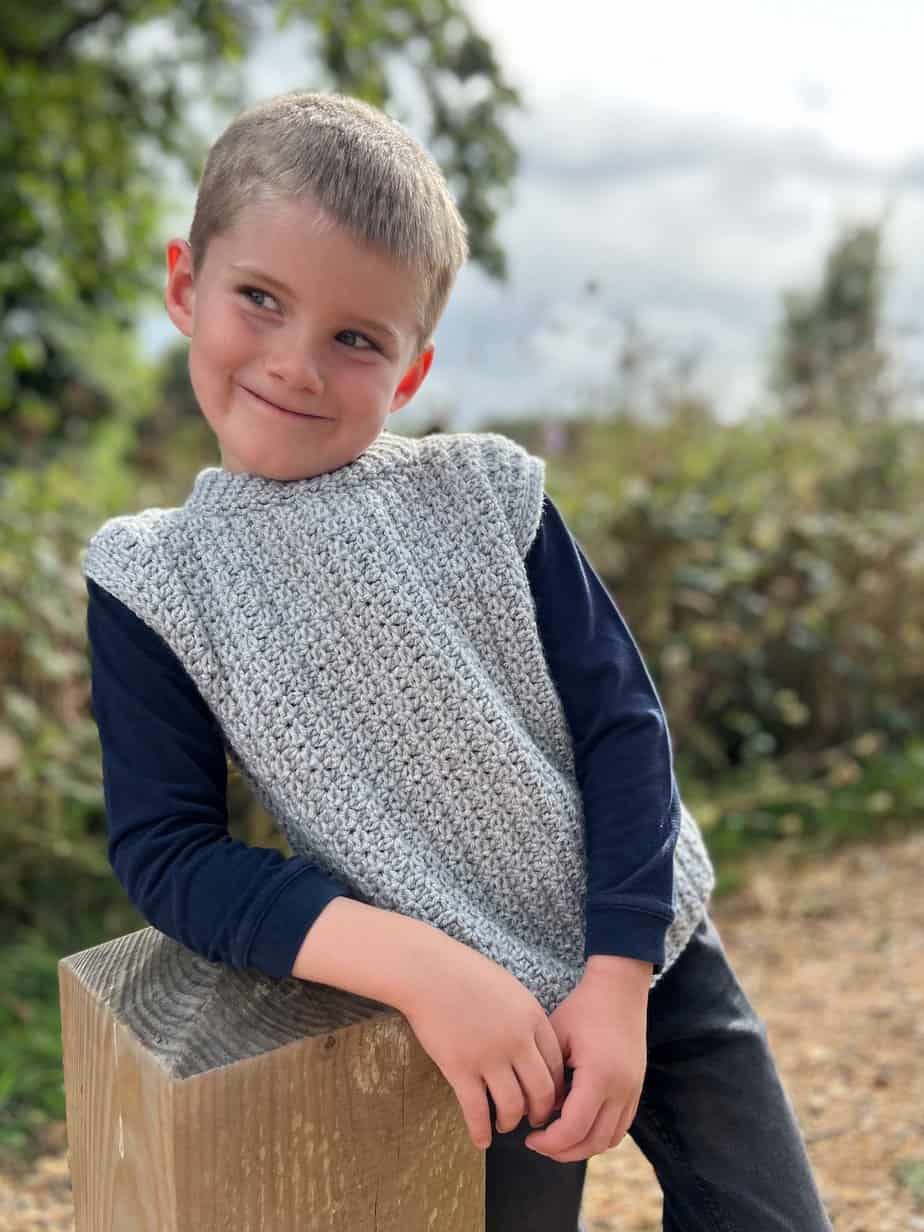
Recently I’ve been really enjoying designing crochet garments for children. My Harris Sweater which is a great crochet sweater pattern for beginners has been a huge success this year and so with my two boys and niece happy to wear them I can’t stop making!
There are so many ways to crochet a top for children and let me tell you a secret – it’s just as easy as making one for adults!
I think people worry that because the dimensions are smaller they might be more fiddly but in reality they use less yarn, take less time and are all round easier to do!
If you’re new to crochet garment making then please don’t worry! I have a fabulous guide on how to start your perfect crochet wardrobe and also learn garment making with 12 free crochet top patterns for different skill levels.
The sideways crochet method I used for this child’s top means that you work in long vertical rows and this vest can be worked all in one piece. The only seams are down the sides unless you want to leave it as a poncho then there are no seams at all.
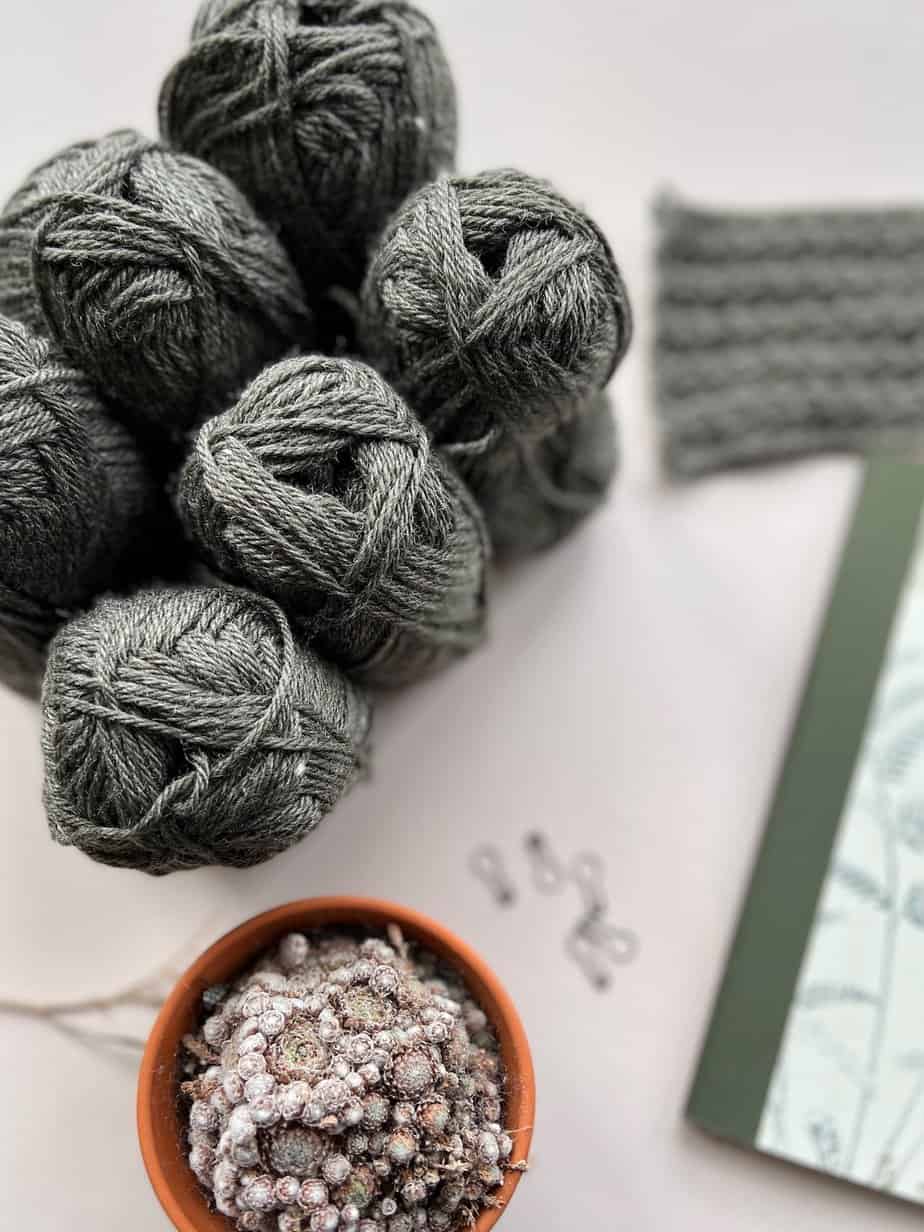
Yarn for the Kids Crochet Vest Top
To make the kids crochet top that Chloe is wearing I used Merino Silk by King and Eye; 80% Merino, 20% Silk; 110m / 120yds/50g.
This yarn is really luxurious and I trust her completely with it but for the size I made for Elliot I went for an acrylic yarn that I know washes well because he can be so messy (completely normal at 5 I suppose!)
I used Brava Worsted by WeCrochet which is 100% premium acrylic (208yds/100g).
Yarn Quantities: 0-6 months (6-12 months, 1-2 years, 3-4 years, 5-6 years, 7-8 years, 9-10 years)
Approximate yds – 285 (340, 443, 492, 563, 640, 732)
I often get asked about ideas for alternative yarns. Here are some that I think would work really well for this crochet pattern in various price ranges:
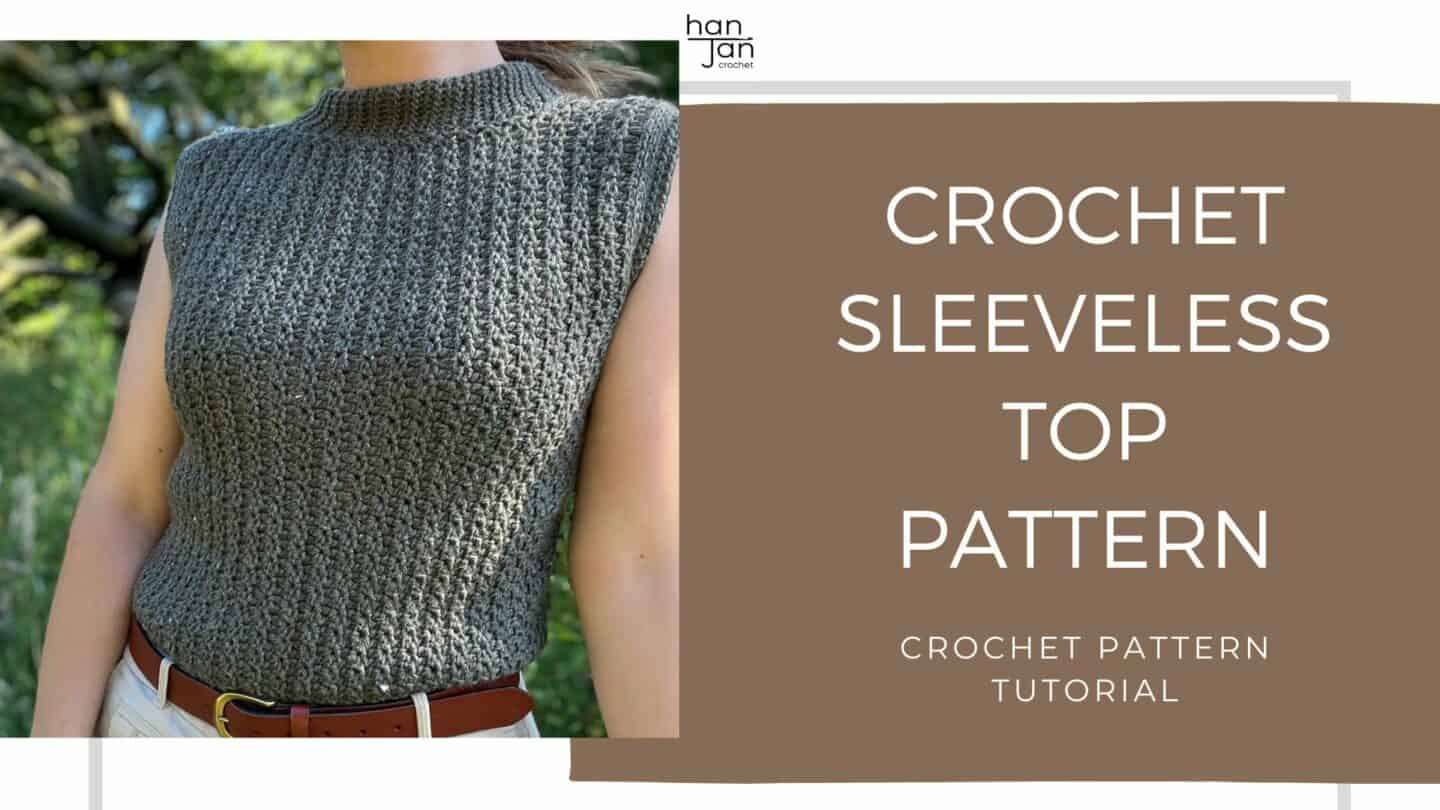
I really liked making a top for myself in Heartland by Lion Brand; 100% Acrylic; 252yds / 230m/140g.
Another great alternative yarn choice is Swish Worsted by WeCrochet; 100% Superwash Merino Wool; 110yds / 100m /50g.
Tension and Sizing
The pattern contains a full schematic and sizing details but this might help you decide which size to make too.
The crochet vest pattern for children is designed for sizes newborn baby to 10 years with the following finished garment measurements:
(0-6 months (6-12 months, 1-2 years, 3-4 years, 5-6 years, 7-8 years, 9-10 years)
Width: 10 (11, 12.25, 13, 13.75, 14.5, 16)inches
Length: 13.25 (15, 17.25, 18, 19.5, 21.25, 22) inches
Armhole Depth: 4.75 (5.5, 5.5, 6, 6.5, 6.75, 7.25) inches
Garment circumference: 20 (21.75, 24.75, 26, 27.5, 29, 32) inches
You’ll see that the tunic style top version is slightly oversized on Chloe and the crochet vest version on Elliot is more fitted.
You can easily change the style of the top by selecting either a size bigger or smaller than the child’s chest size.
Gauge: 15 sts x 11 rows = 4″ x 4″ / 10 cm x 10 cm measured over main set pattern (blocked).
Materials to make the child crochet vest
Along with your yarn, you will need the following:
- A 4.5mm(G+) crochet hook- my favourites are Furls Streamline Swirl crochet hooks or Clover Amour crochet hooks.
- Scissors
- Tapestry Needle
Pattern Options
You can purchase the ad-free, printable PDF in US terms with added extras in my pattern stores:
Purchase and Print
Get the ad-free, printable PDF with added extras in my pattern stores:

Don’t forget to join HanJan Crochet to receive regular discount codes (and more free patterns!) and Pin this crochet baby top pattern to your crochet Pinterest board!
Glossary and Abbreviations
ch(s) – chain(s)
sp – space
ss – slip stitch
RS – right side
WS – wrong side
sk – skip
rep – repeat
yoh – yarn over hook
Crochet Stitches
The pattern uses the following US crochet stitches:
sc – single crochet (a UK double crochet)
hdc – half double crochet (a UK half treble)
Special Stitches
3rd loop:
Extra loop created on hdc from the yarn over. When working in rows this will be the first loop you come to when looking at the stitch.
Exhdc | extended half double crochet:
Yoh, insert your hook, yoh and pull up a loop, yoh and pull through one loop, yoh and pull through remaining three loops.
Foundation Half Double Crochet (fhdc)
Step 1: Ch 2, yarn over, insert hook into second ch from hook, yarn over and pull up a loop. [3 loops on hook]
Step 2: Yarn over and pull up another loop i.e. ch 1. This creates the first “chain” in your foundation row. [still 3 loops on hook]
Step 3: Yarn over and pull through all three loops to complete the first fhdc.
Step 4: Next stitch and subsequent stitches: Yarn over, insert hook into “chain” created in Step 2, yarn over and pull up a loop. [3 loops on hook]
Step 5: Yarn over and pull up another loop i.e. ch 1. This creates the next “chain” in your foundation row. [still 3 loops on hook]
Step 6: Yarn over and pull through all three loops to complete the next fhdc.
Repeat Steps 4, 5 and 6 as required.
Video Tutorial for the crochet top pattern
You can watch a full video tutorial of me making the adult cream version of this crochet top here:
Kids Crochet Vest Pattern Notes
Ch 1 at the start of a row does not count as a st.
Turn at the end of every row.
Instructions are given for the smallest size, with larger sizes in parentheses ( ) e.g. 0-6 (6-12, 1-2, 3-4, 5-6, 7-8, 9-10)
If an instruction does not apply to a size, it will appear in the sizing sequence as a dash (-). Here is an example for something that does not apply to sizes 6-12, and 9-10: 89 (-, 89, 89, 89, 89, -).
Stitch counts are given in [ ] at the end of each row. If no stitch count is given, then the count is the same as the previous row.
Construction
- The Front and Back are made in one piece then a border and collar are added before seaming the sides if desired.
- Each Section follows another as per the diagram.
- The garment is made side to side with the rows sitting vertically when worn.
- An option tie or side ties can be added afterwards.
Child Crochet Vest Pattern
Join HanJan and Share Your Crochet!
It’s an honour to be able to create and share my free crochet patterns with you. I’d love to stay connected and send you regular discount codes and free patterns! Please sign up for my subscriber list to get a free gift right now!
I look forward to seeing your finished crochet projects, especially this easy crochet pattern, so please share them with me in the HanJan Crochet Facebook group or on Instagram and tag #hanjancrochet.
Purchase and Print
Get the ad-free, printable PDF in my pattern stores:
Don’t forget to share your child or baby crochet vest pattern projects on Ravelry!