
Crocheting a blanket is a great project. The joy you feel when you see your Crochet Blanket growing in size is surreal. Once you are finished up the Blanket, then just enjoy snuggling up with your new comfy blanket. Crocheted Blankets make the best gifts for your family and loved ones.
Today am sharing the tutorial for a Super Easy Crochet Texture Blanket Wave Pattern. The textured wave pattern is made with a combination of Front Post and Back Post Double Crochets. This blanket pattern is super easy and works up super quick. You can easily alter the size of the blanket by changing the starting chains.
Materials Used:-
8 Ply Cotton Yarn
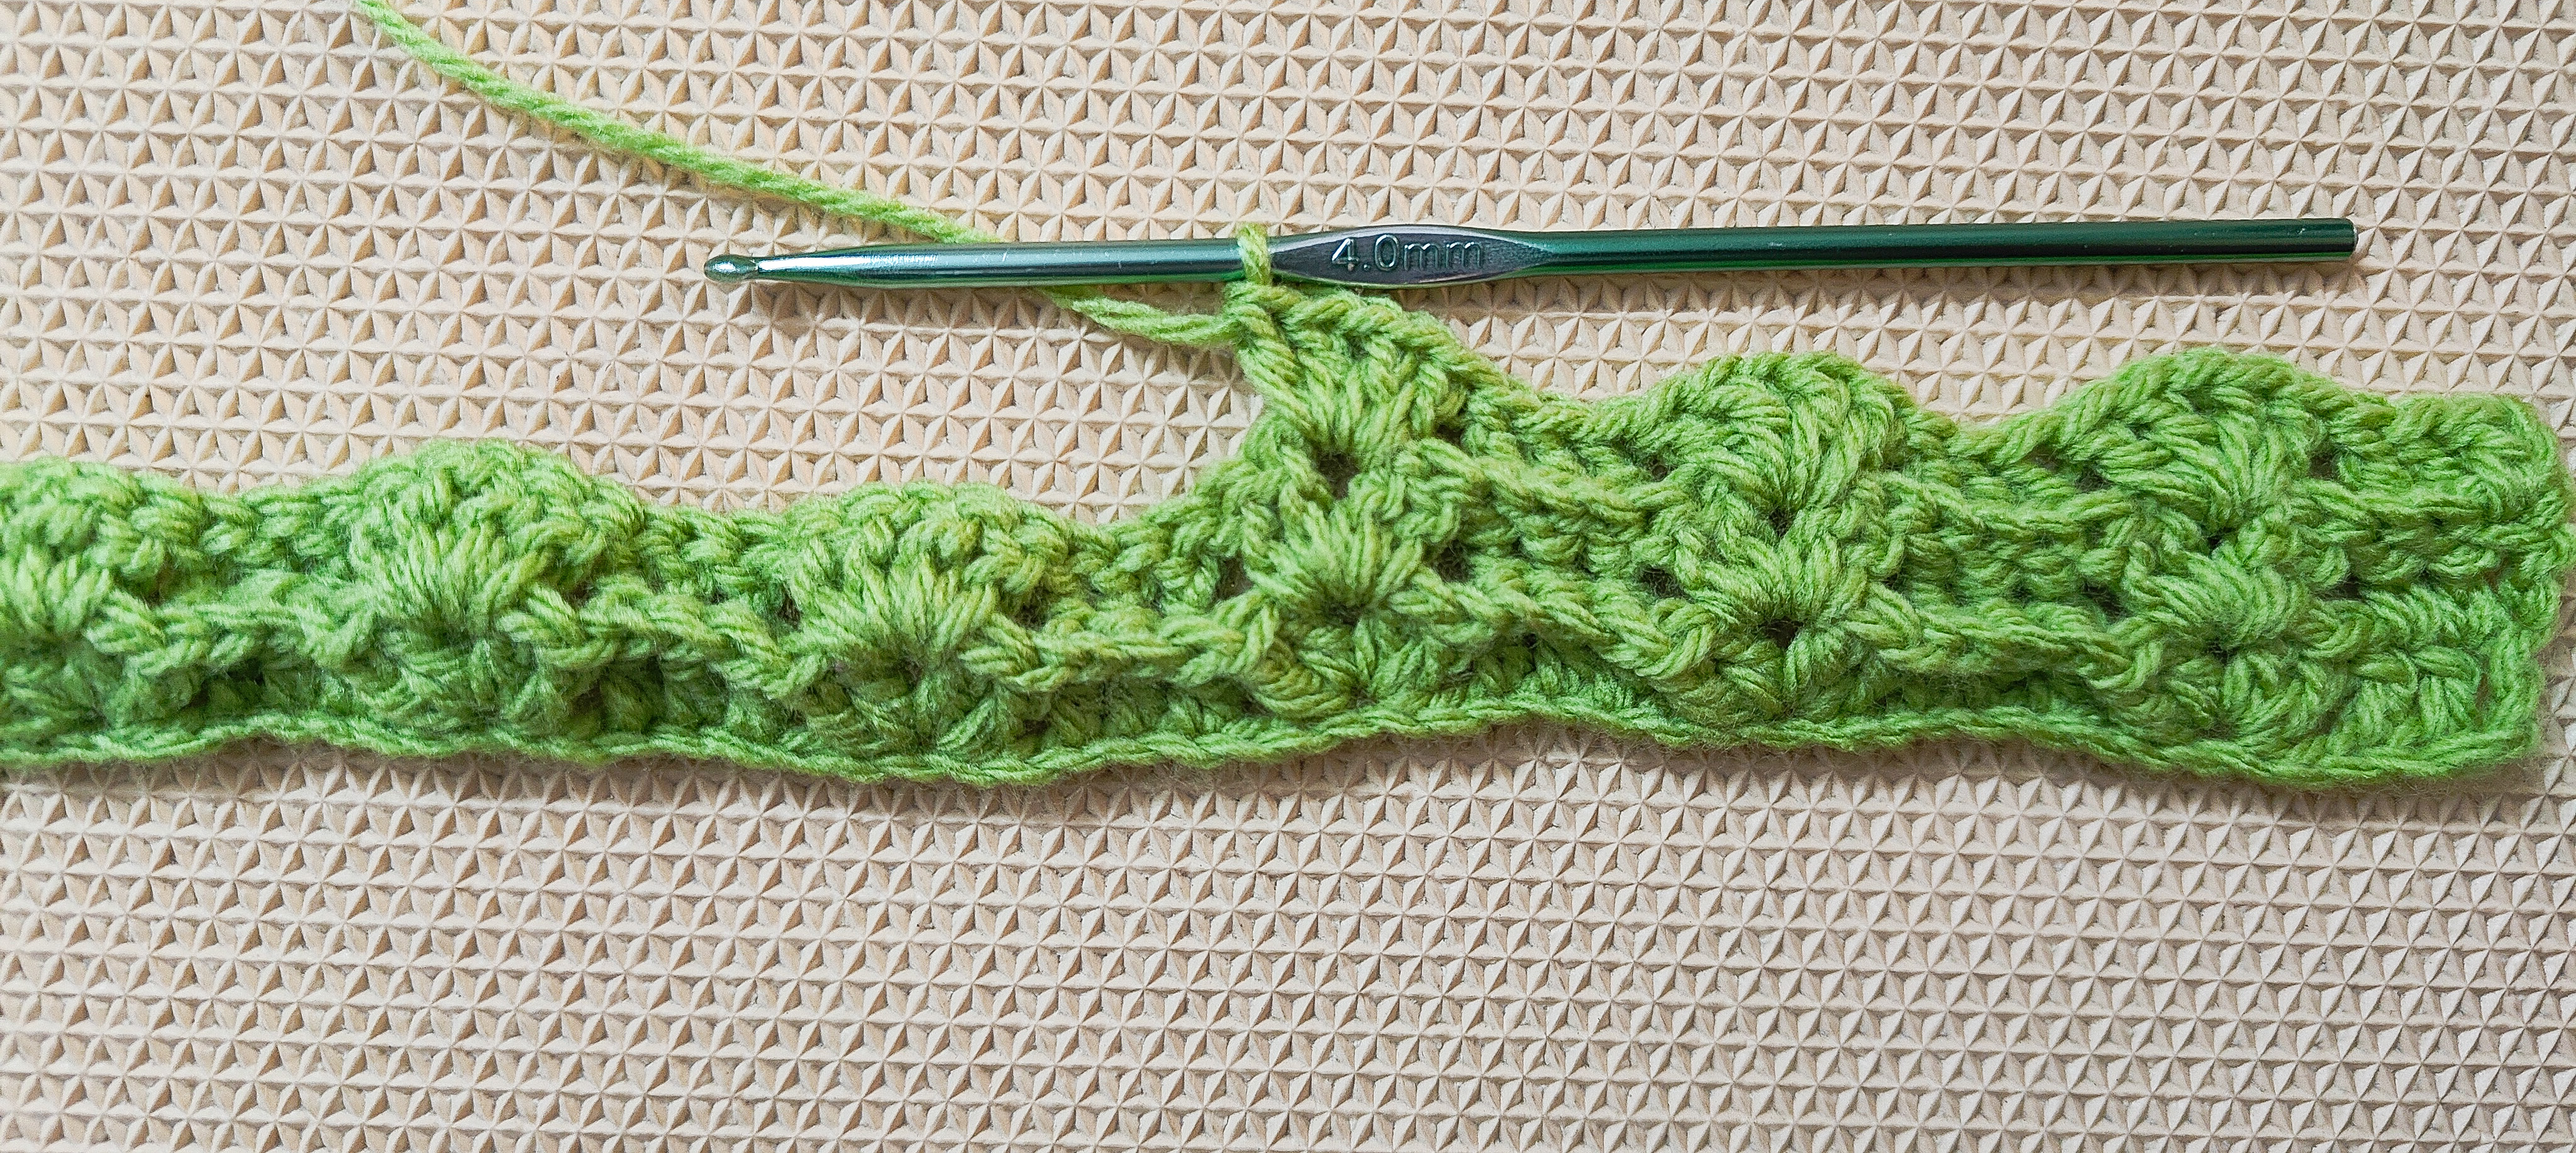
4 mm Crochet Hook
4 mm Crochet Hook
Size:-
38 inches- Customizable to any size
Here is the Video Tutorial:-
You can follow along with this tutorial video. Please be sure to subscribe too!
PIN it and Save for Later:-
Let's Start:-
Round 1:-
Start with a Slip Knot.
Chain 96.
This measures around 38 inches.
You can adjust the size of the blanket by altering these stitches according to your requirement.
Start with any multiple of 6.


1 Double Crochet in the 5th Chain from the hook.
1 Double Crochet in the next stitch.((that's total 3 Double Crochet's made, including the turning chain)
Skip 2.
(2 Double Crochets , Chain 1 , 2 Double Crochets)- all in the same stitch.
Skip 2.
Repeat((1DC*3),Skip 2,(2DC,Ch1,2DC)Skip 2)
Once you reach end, Chain 2.
Straight Edge Turning Chain:-
Usually you would Chain 2, turn and start working the next round. Here is a quick tip to have a nice straight edge .
- Insert the hook into the 1st chain from the bottom.
- Yarn over and pull up a loop. You should have 2 loops on the hook.
- Turn your project and insert the hook into the first stitch.
- Yarn over and pull up a loop. You will have 3 loops on the hook.
- Again, yarn over and pull through 2 loops. You will have 2 loops on the hook.
- Lastly, yarn over and pull through 2 loops.
- This will make one Double Crochet.


Round 3:-
(1 Double Crochet is already made while making the turning chain)
1 Front Post Double Crochet each in the next 2 stitches.
Skip 2.
In the Chain 1 Space make - (2 Double Crochets , Chain 1 , 2 Double Crochets).
Skip 2.
1 Front Post Double Crochet each in the next 3 Stitches.
Skip 2.
In the Chain 1 Space make - (2 Double Crochets , Chain 1 , 2 Double Crochets).
Skip 2.
Repeat((1FPDC*3),Sk2,(2DC,Ch1,2DC),Sk2).
At the end you will have 3 Stitches left- 1 Front Post Double Crochet each in 2 stitches.
1 Double Crochet in the last stitch.
Once you reach end, Chain 2 and use the Straight Edge Turning Chain method mentioned in the previous round to make the turning chain.


Round 4:-
(1 Double Crochet is already made while making the turning chain)
1 Back Post Double Crochet each in the next 2 stitches.
Skip 2.
In the Chain 1 Space make - (2 Double Crochets , Chain 1 , 2 Double Crochets).
Skip 2.
1 Back Post Double Crochet each in the next 3 Stitches.
Skip 2.
In the Chain 1 Space make - (2 Double Crochets , Chain 1 , 2 Double Crochets).
Skip 2.
Repeat((1BPDC*3),Sk2,(2DC,Ch1,2DC),Sk2).
At the end you will have 3 Stitches left- 1 Back Post Double Crochet each in 2 stitches.
1 Double Crochet in the last stitch.
Once you reach end, Chain 2 and use the Straight Edge Turning Chain method to make the turning chain.


Round 5 Onwards:-
Keep repeating Round 3 and Round 4 untill the size needed and weave off.


Round 1:-
Start with a Slip Knot.
Ch 96.
This measures around 38 inches.
You can adjust the size of the blanket by altering these Sts according to your requirement.
Start with any multiple of 6.
Round 2:-
1 DC in the 5th Ch from the hook.
1 DC in the next St.((that's total 3 DC's made, including the turning Ch)
Sk 2.
(2 DCs , Ch 1 , 2 DCs)- all in the same St.
Sk 2.
Repeat((1DC*3),Sk 2,(2DC,Ch1,2DC)Sk 2)
Once you reach end, Ch 2.
Straight Edge Turning Ch:-
Usually you would Ch 2, turn and start working the next round. Here is a quick tip to have a nice straight edge .
Insert the hook into the 1st Ch from the bottom.
Yarn over and pull up a loop. You should have 2 loops on the hook.
Turn your project and insert the hook into the first St.
Yarn over and pull up a loop. You will have 3 loops on the hook.
Again, yarn over and pull through 2 loops. You will have 2 loops on the hook.
Lastly, yarn over and pull through 2 loops.
This will make one DC.
Round 3:-
(1 DC is already made while making the turning Ch)
1 FPDC each in the next 2 Sts.
Sk 2.
In the Ch 1 Space make - (2 DCs , Ch 1 , 2 DCs).
Sk 2.
1 FPDC each in the next 3 Sts.
Sk 2.
In the Ch 1 Space make - (2 DCs , Ch 1 , 2 DCs).
Sk 2.
Repeat((1FPDC*3),Sk2,(2DC,Ch1,2DC),Sk2).
At the end you will have 3 Sts left- 1 FPDC each in 2 Sts.
1 DC in the last St.
Once you reach end, Ch 2 and use the Straight Edge Turning Ch method mentioned in the previous round to make the turning Ch.
Round 4:-
(1 DC is already made while making the turning Ch)
1 BPDC each in the next 2 Sts.
Sk 2.
In the Ch 1 Space make - (2 DCs , Ch 1 , 2 DCs).
Sk 2.
1 BPDC each in the next 3 Sts.
Sk 2.
In the Ch 1 Space make - (2 DCs , Ch 1 , 2 DCs).
Sk 2.
Repeat((1BPDC*3),Sk2,(2DC,Ch1,2DC),Sk2).
At the end you will have 3 Sts left- 1 BPDC each in 2 Sts.
1 DC in the last St.
Once you reach end, Ch 2 and use the Straight Edge Turning Ch method to make the turning Ch.
Round 5 Onwards:-
Keep repeating Round 3 and Round 4 untill the size needed and weave off.
*****


No comments:
Post a Comment
Thank you for taking time to stop by. I would love if you leave some inspiring comments about the post. To avoid spam , your comment will be verified and posted in sometime. Thank you!!!