Crochet / Knit Cotton DishCloths

Welted Leaf Pattern

I really enjoy using a handmade cotton dishcloth for my kitchen and I thoroughly enjoy making them for myself, family, friends and as gifts.  Dishcloths are an ideal way to practice various crocheting or knitting techniques. I’m still trying to better my knitting skills and making dishcloths is a great way to practice.

My preference is about a 9″ or 9 1/2″ square dishcloth. I also like a little texture not only for the scrubbing aspect but I want something that is fun and pretty!! I also prefer to make mine from 100% cotton yarn or a 50/50 blend of cotton and acrylic as it makes a pretty durable and machine washable / tumble dry cloth. I find too that if I block my dishcloth, even with tumble drying, it will hold its shape better.

For my examples, I used LionBrand Cotton Ease, which unfortunately has been discontinued. The yarn was a Category 4, medium and was a 50% cotton and 50% acrylic blend using a little over 100 yards. My crochet hook was a Size I and knitting needles Size 7.

Here are a few patterns that I have really enjoyed crocheting and/or knitting. If the pattern was a little smaller than my 9″ size, I would adjust by adding a few more chains to get to the width I wanted. Sometimes I used a larger needle size too.

CopyCat DishCloth

The Copycat Dishcloth by Leah Michelle Designs (knit) http://leahmichelledesigns.com/free-patterns/copycat-dishcloth/

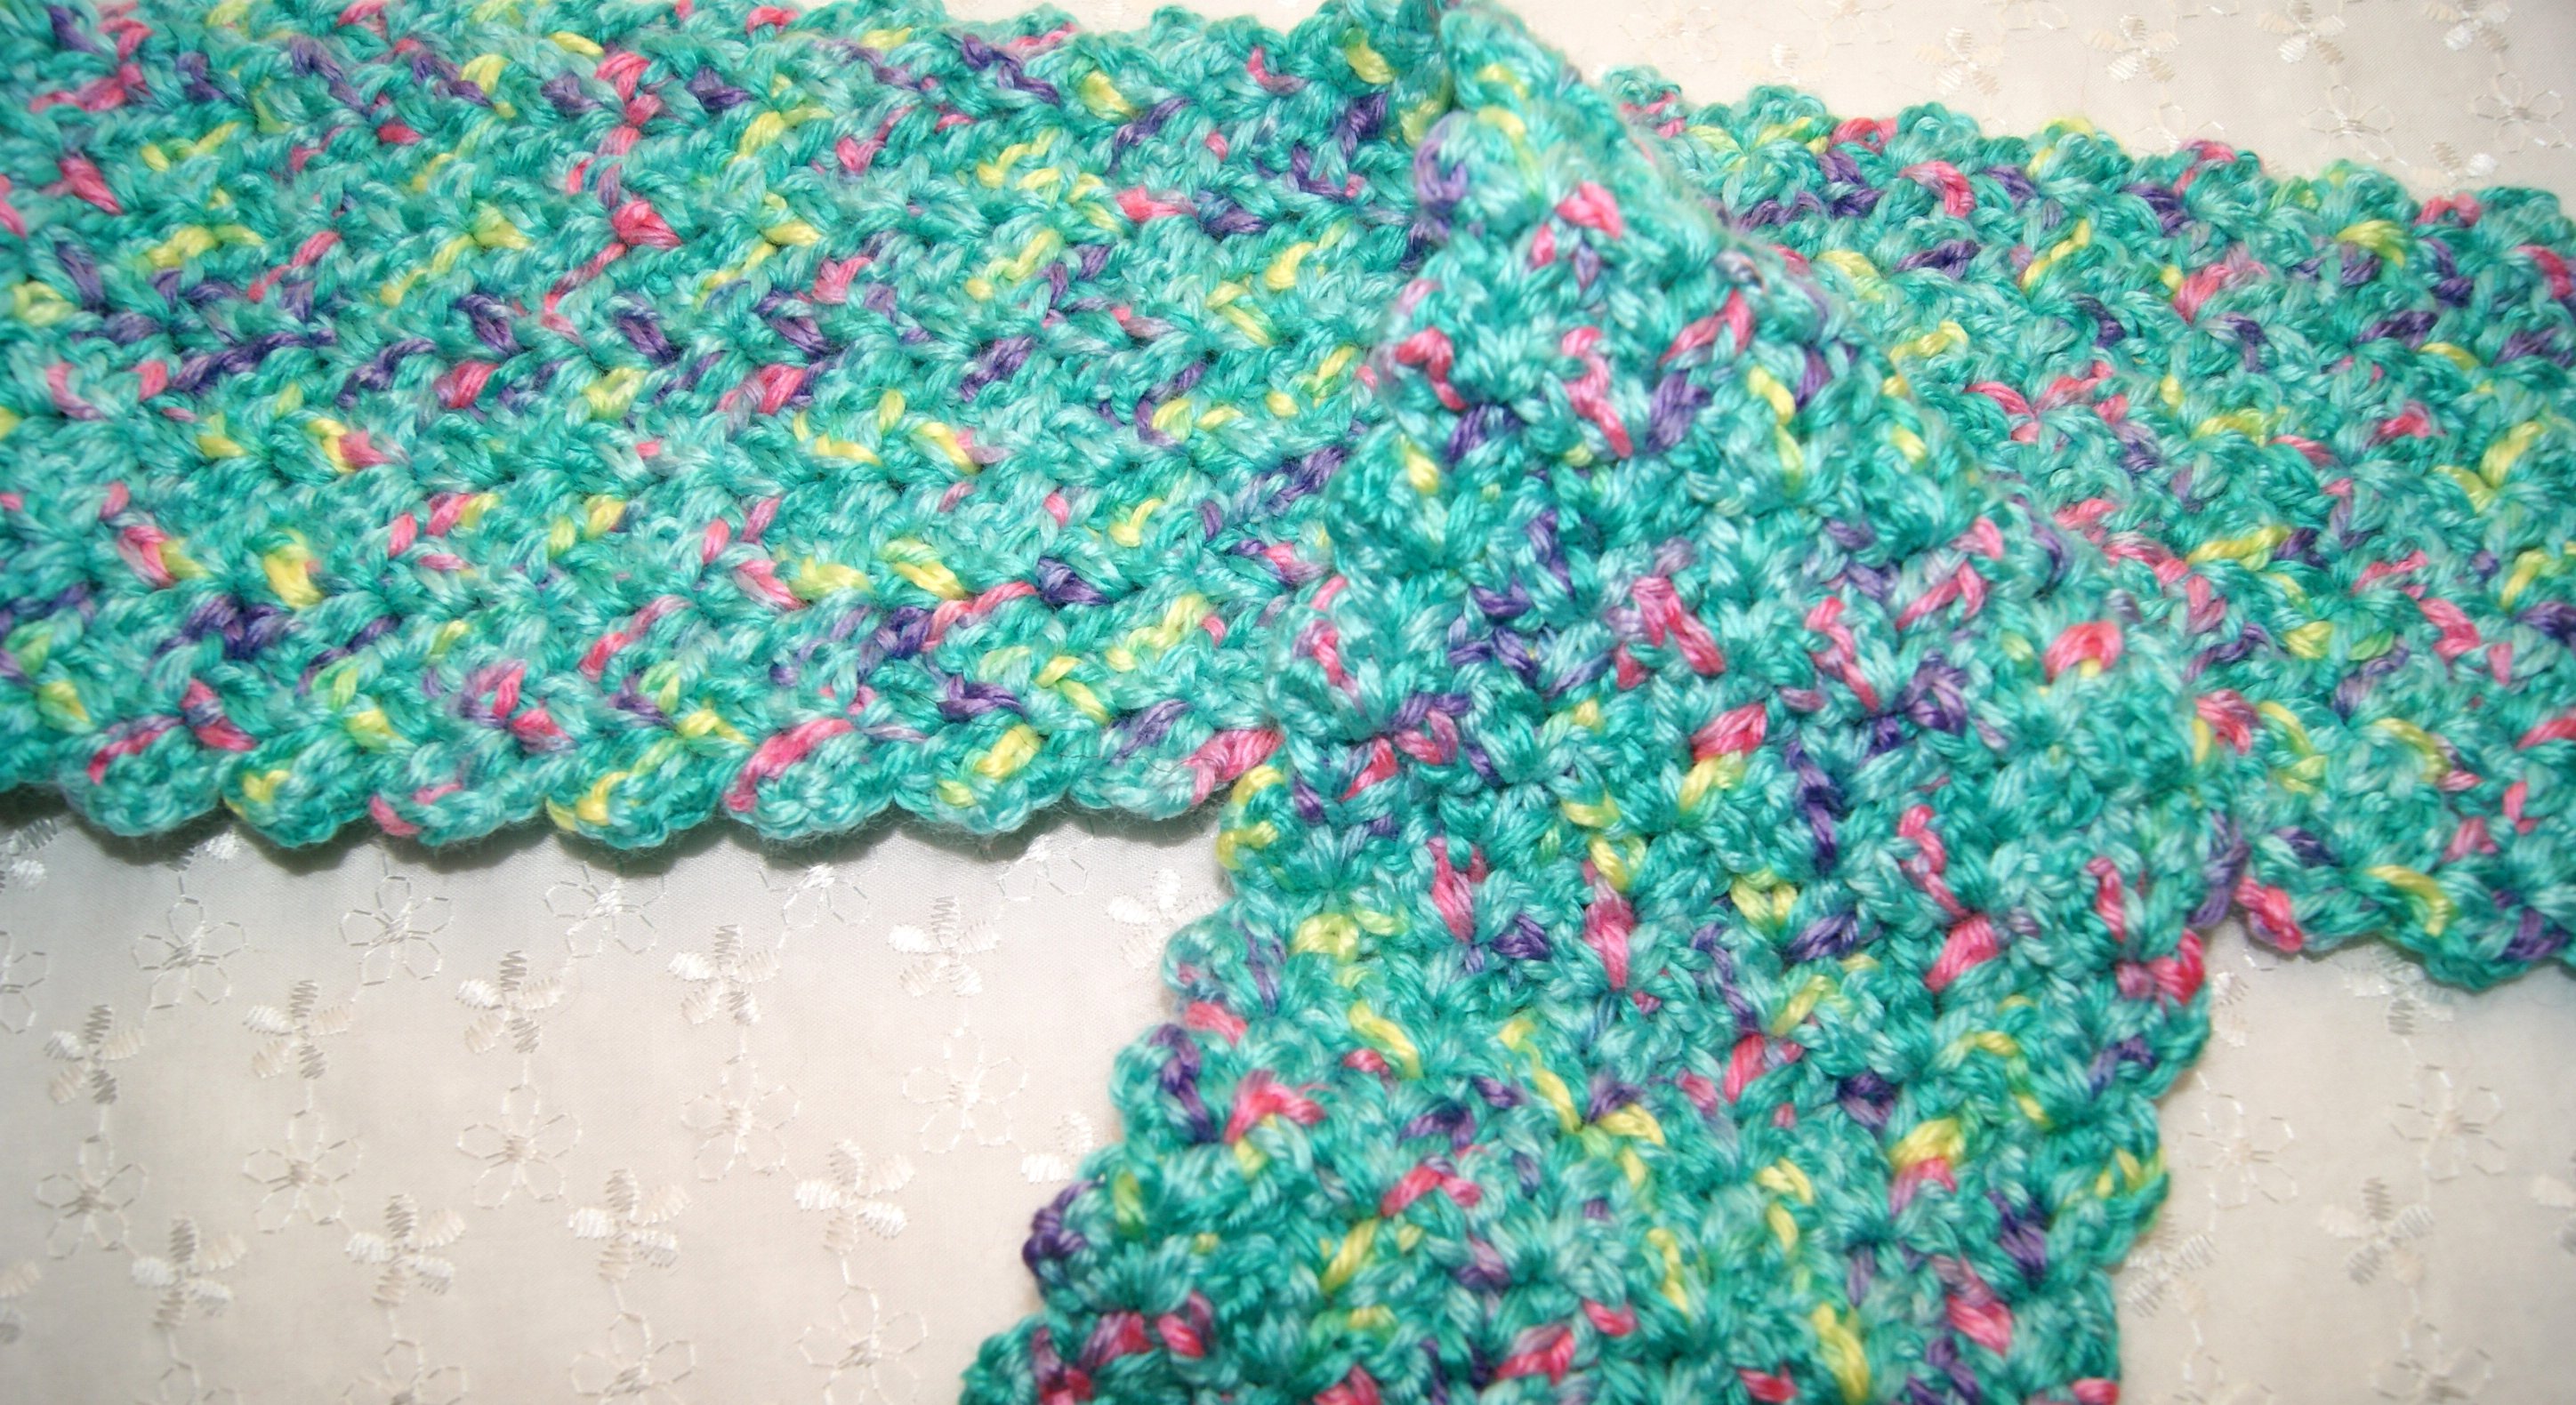
 A great pattern for the beginner knitter as it is 2 basic stitches – knit and purl. As stated “this pattern mimics a traditional dishcloth” but I like the squishy feel of the garter stitch.

Double Bump

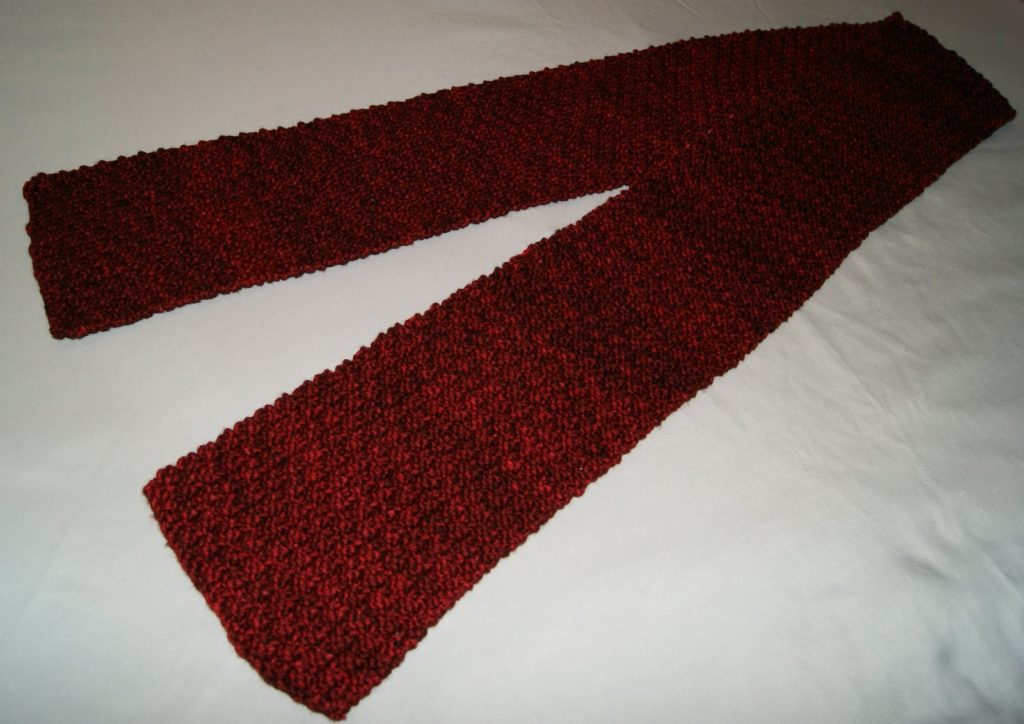
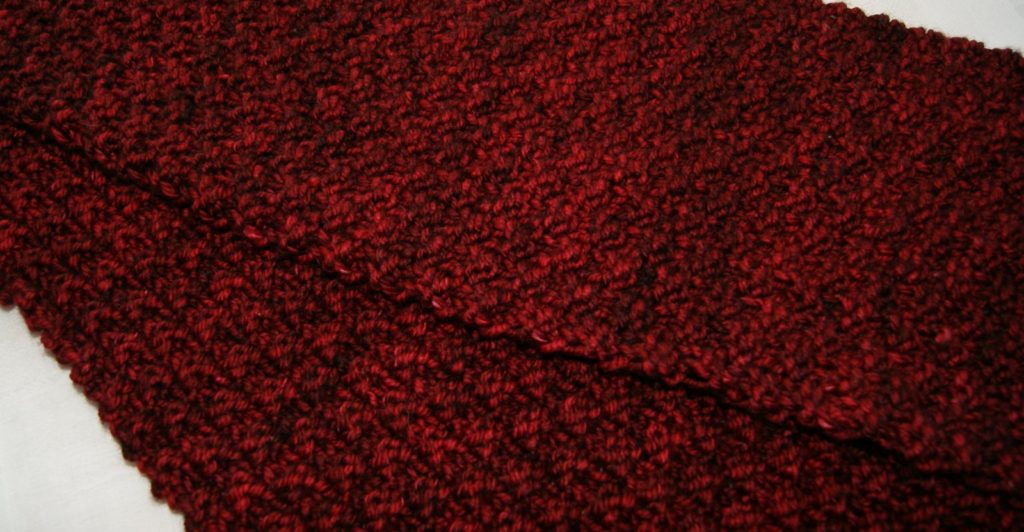
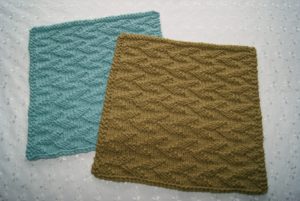
Double Bump Dishcloth by My Jewel Thief (knit) https://myjewelthief.typepad.com/myjewelthief_knits/2008/12/doubel-bump-scarves.html

Again, a lovely pattern for practicing your knitting skills. Just basic stitches (knit and purl) but an interesting combo to create the unique bumps and squares. The texture of this pattern makes for a nice scrubbing dishcloth.

Welted Leaf Pattern

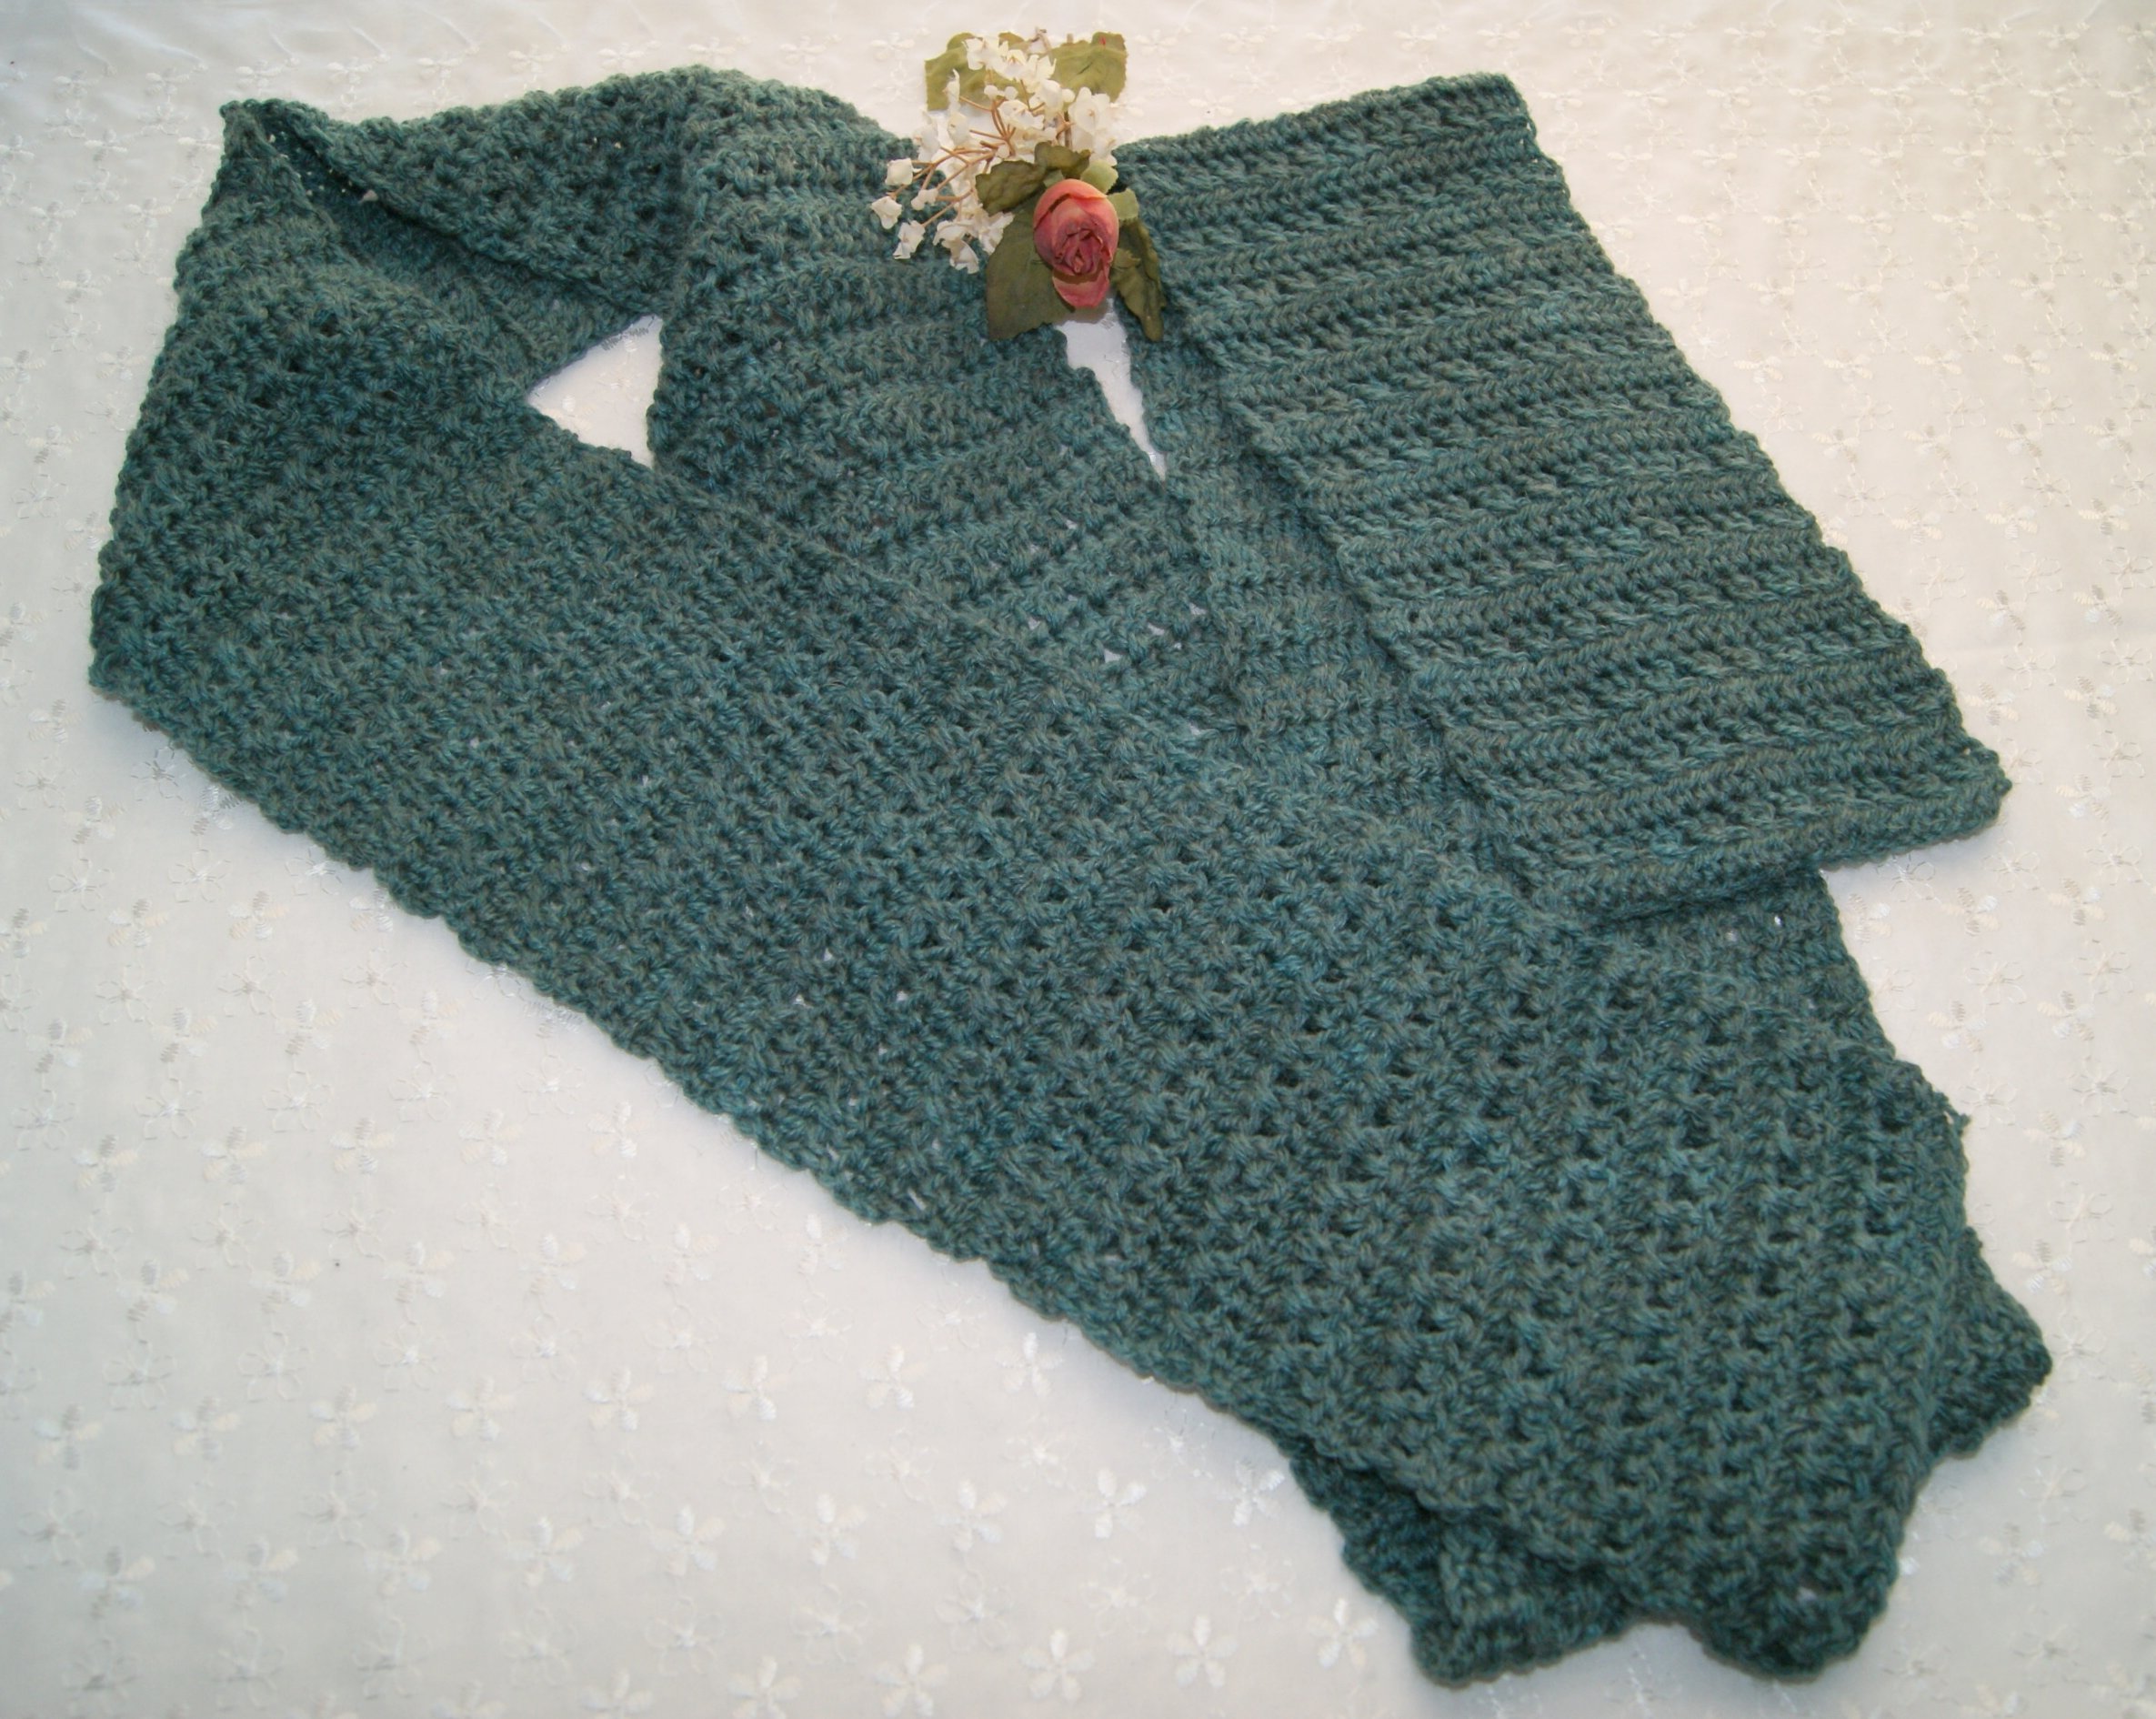
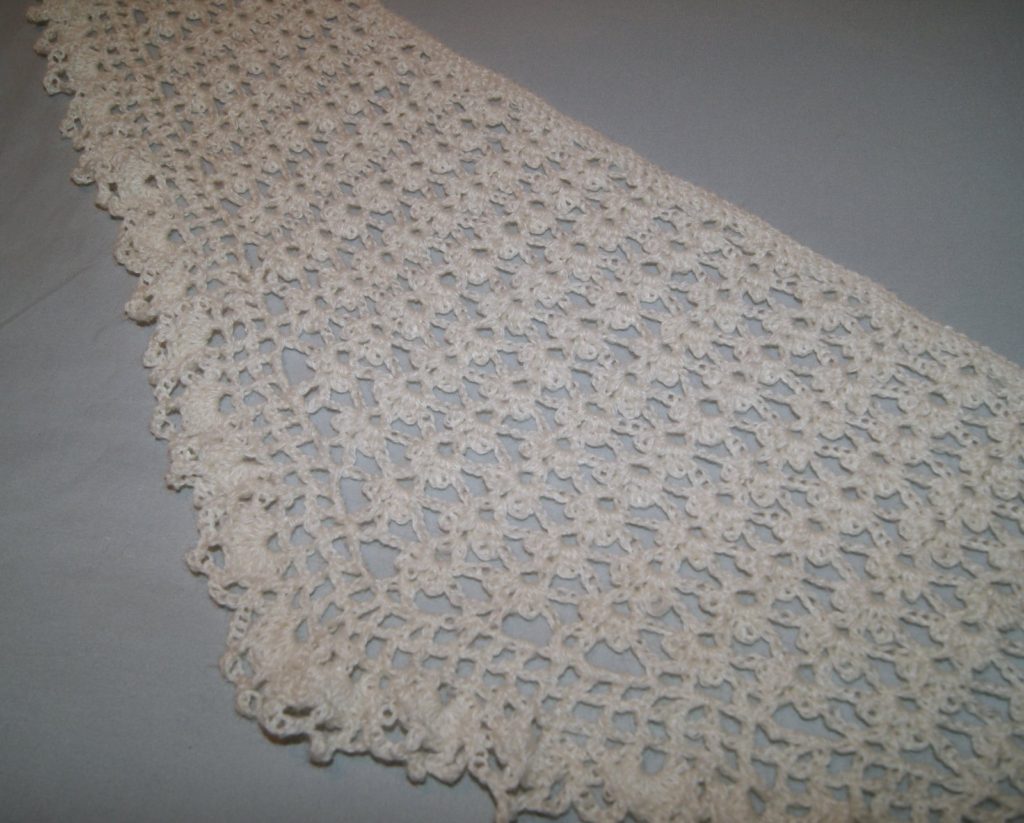
Welted Leaf Dishcloth by Faith Schmidt (knit) https://www.knitpicks.com/patterns/Welted_Leaf_Dishcloth__D56132220.html

I love the look that the knit and purl stitches give to this design.  I thought instructions were easy to follow and the finished product has a good workable feel to it.

Ocean Waves

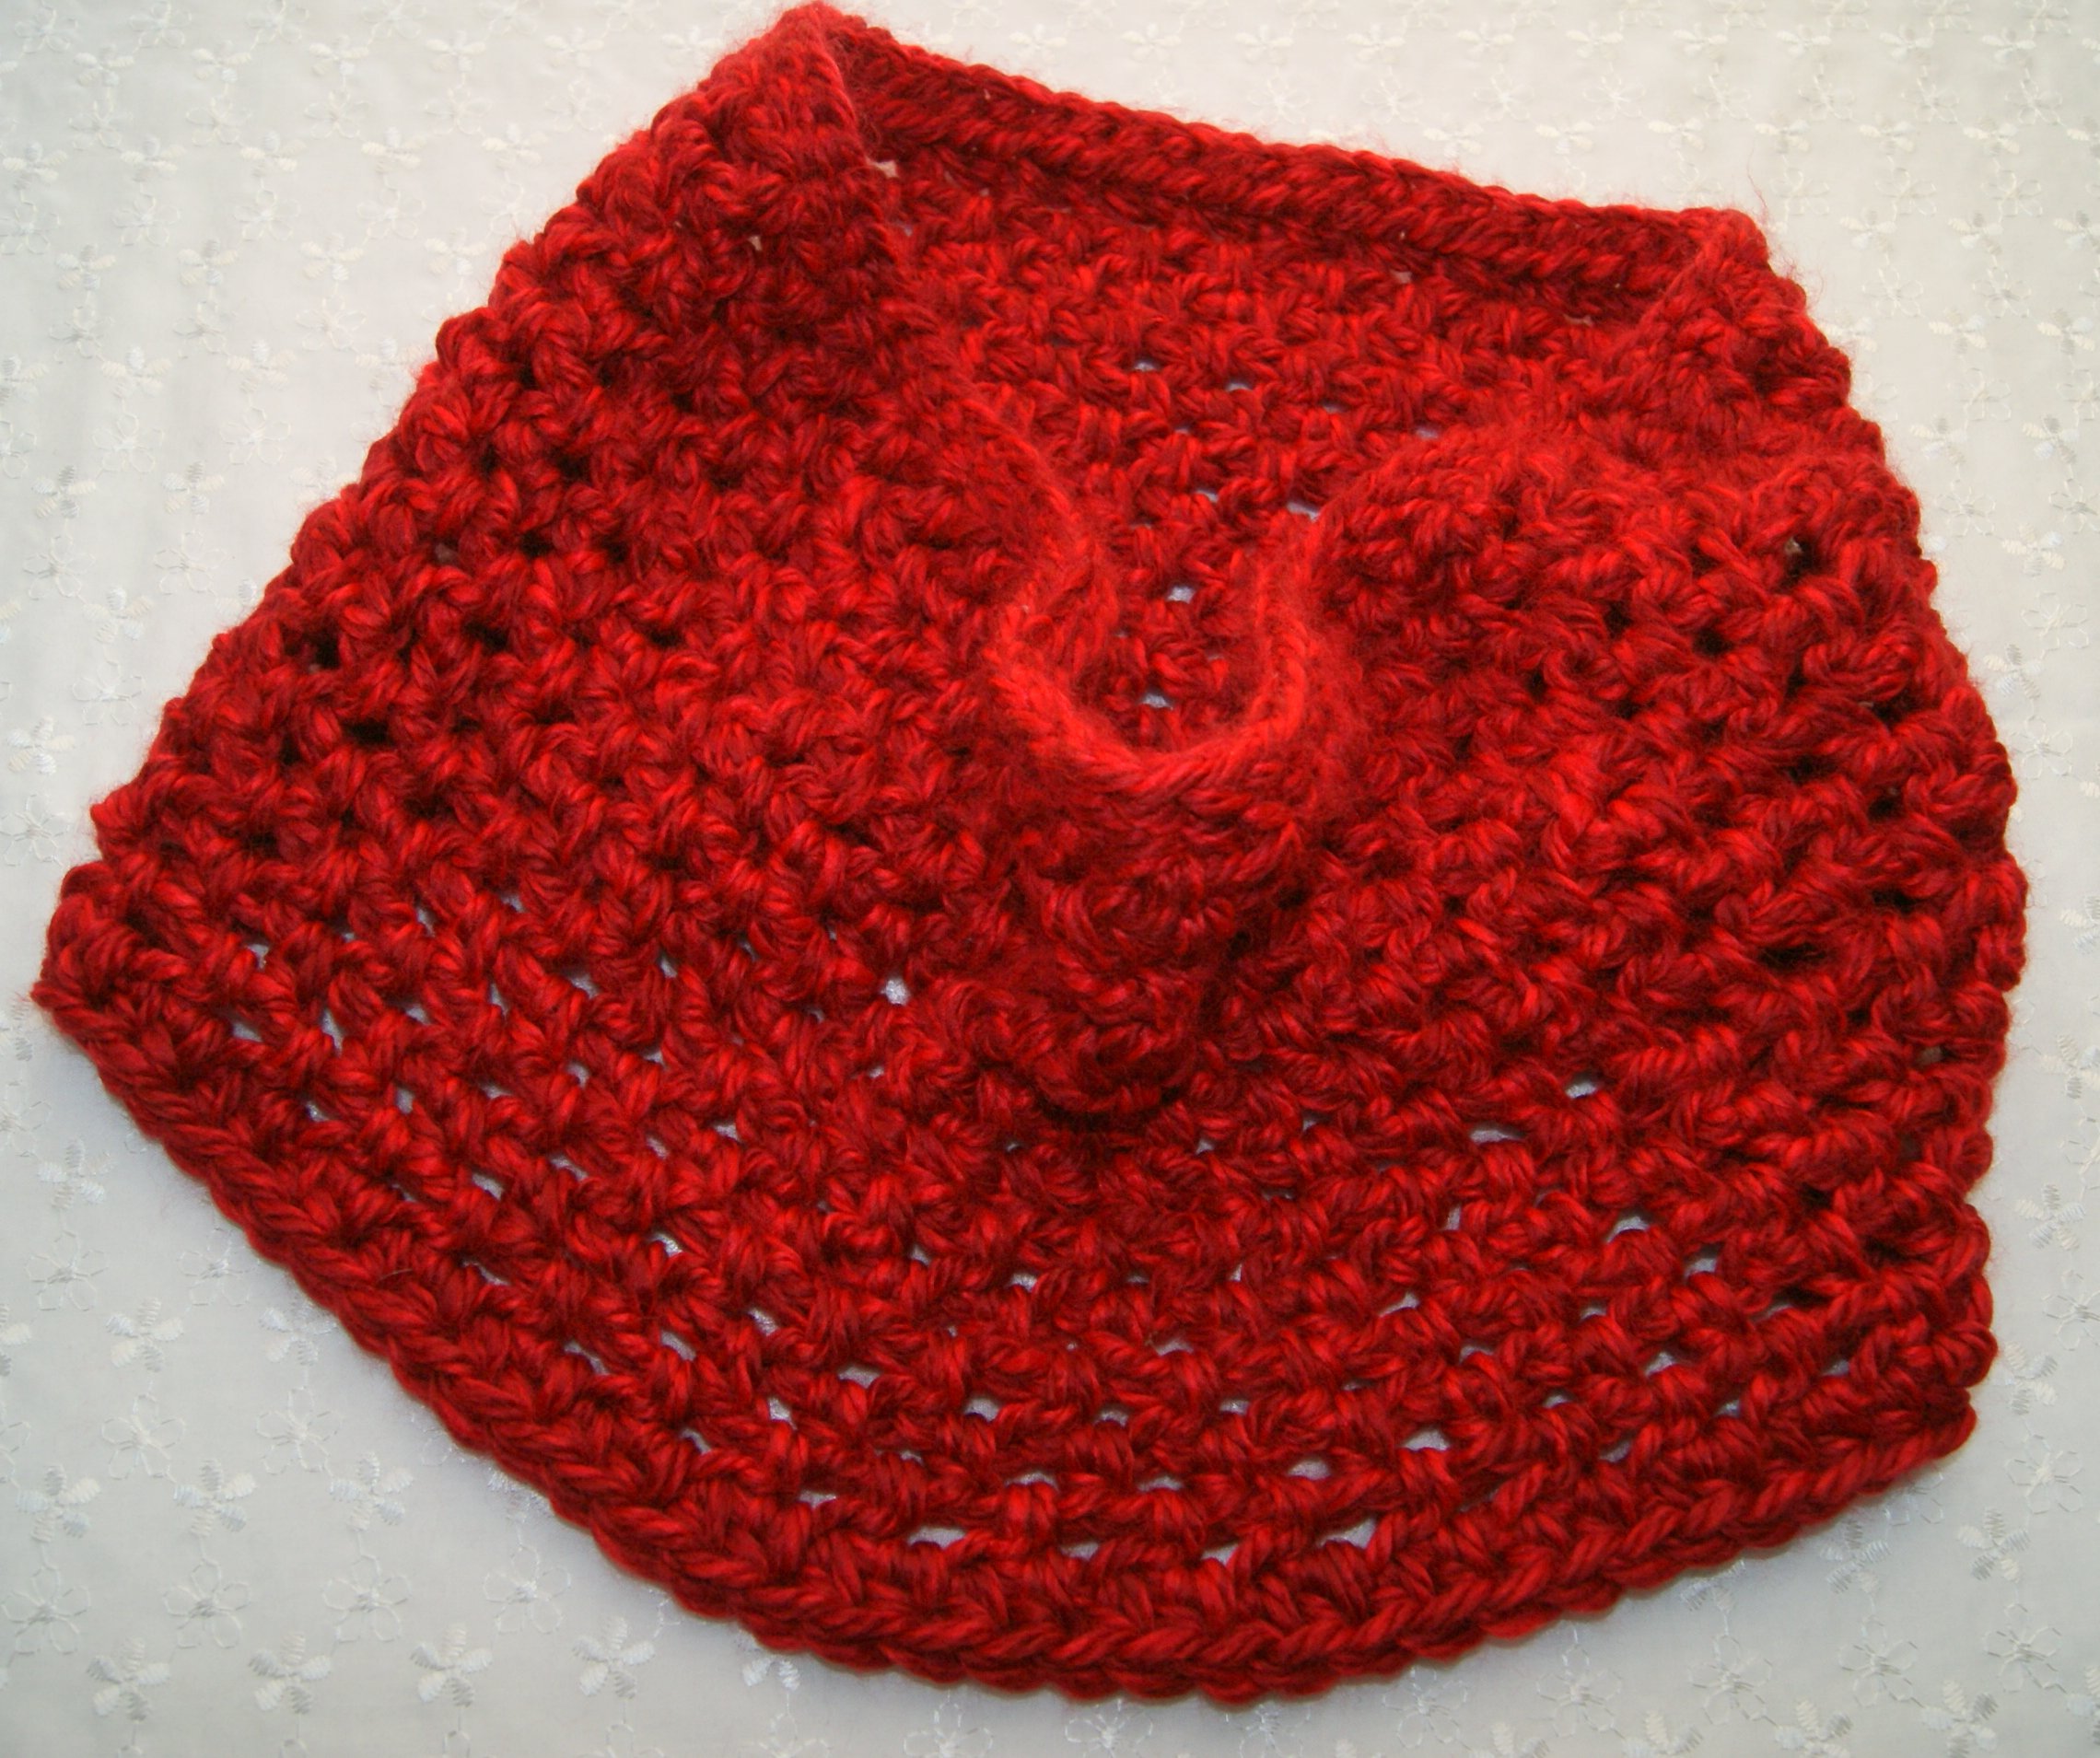
Ocean Waves Dishcloth by Highland Hickory Designs (crochet) https://www.highlandhickorydesigns.com/ocean-waves-washcloth/

This was an interesting crochet pattern and makes a nice wavy texture for a unique look and good feel.

Arruga Stitch

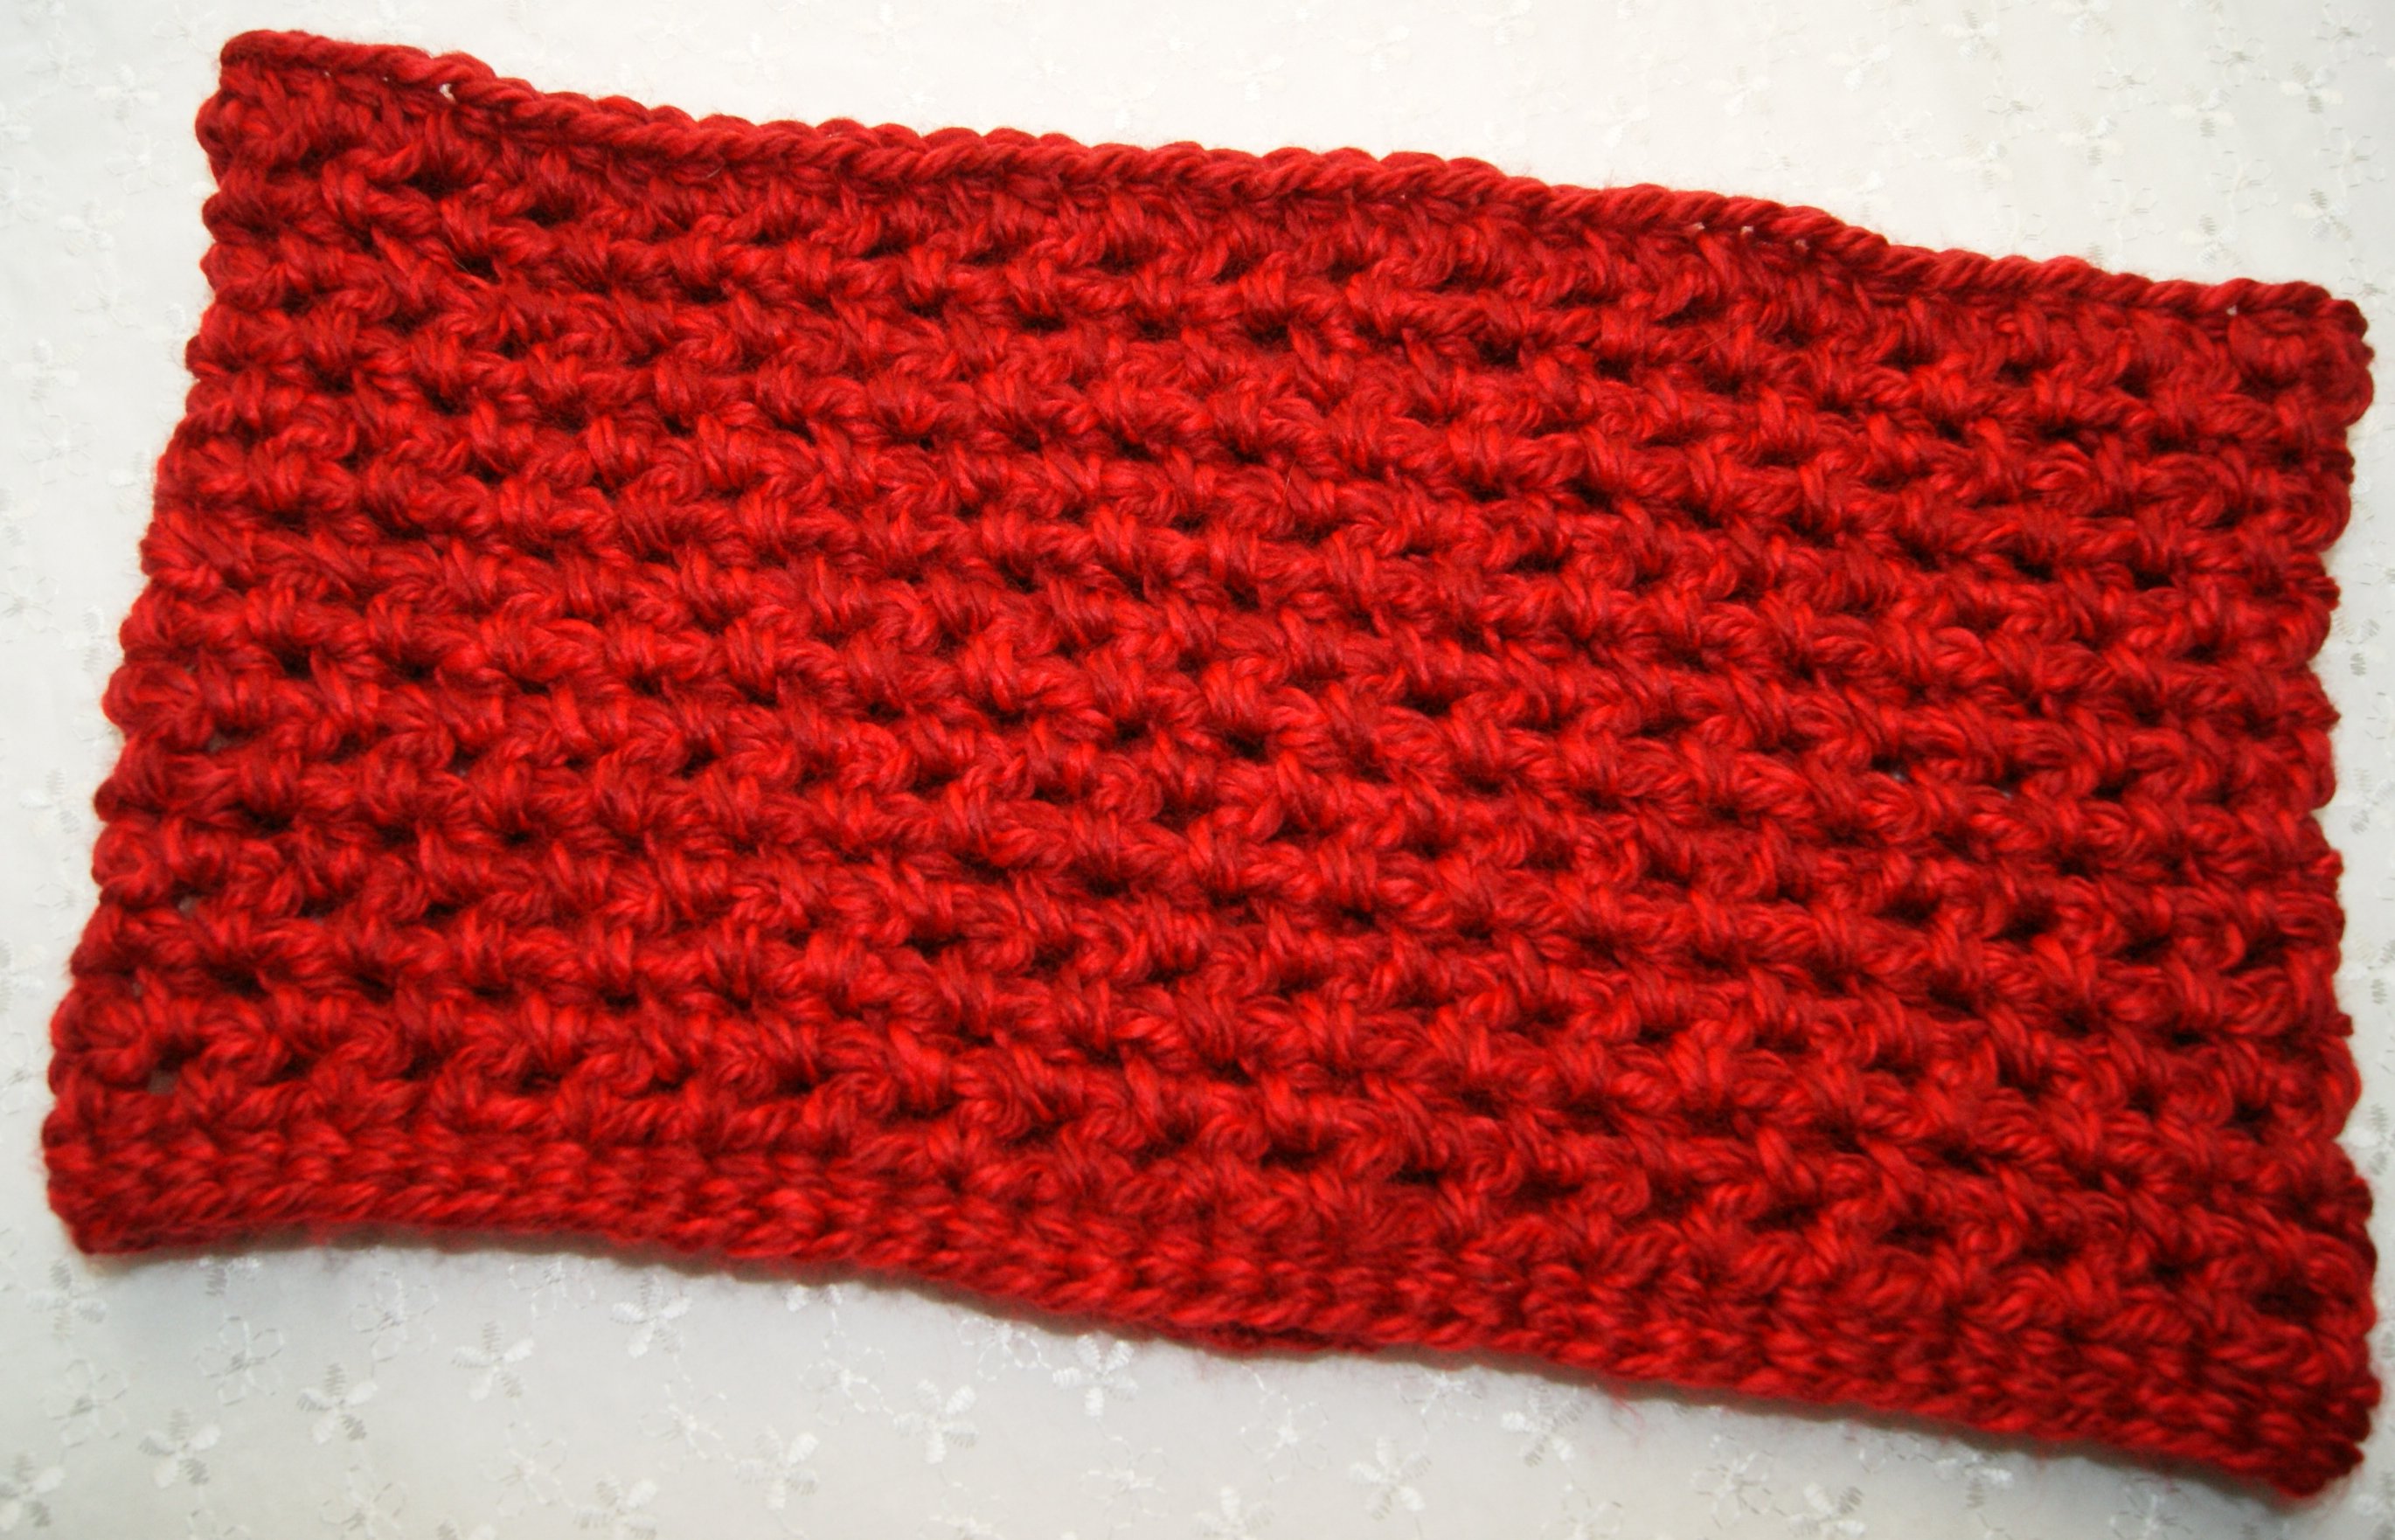
Arruga Stitch Dishcloth (crochet) my design using this stitch https://www.youtube.com/watch?v=3_qotdhVeMk

I really, really like this stitch technique, either side looks awesome. Made up in a super dishcloth, with very good texture, scrubbing abilities and pretty too. For my pattern, I did 36 single crochet (SC) foundation stitches, turned work – made a chainless starting double crochet (DC) https://www.youtube.com/watch?v=aduDzuchP6c, DC in the remaining stitches to continue with 36 stitches, then began the pattern repeat for the Arruga stitch https://www.youtube.com/watch?v=3_qotdhVeMk – crocheting 7 pattern repeats and ending with last row of just SC.

I use blocking wires to shape and block my dishcloths. These are great in the sense I can block about 3 at one time on one set of wires. Now I have to block all the new ones I just made 🙂

Blocking Wires
Blocking Pins

I think some of these patterns would make lovely wash cloths too, paired up with a beautiful handmade soap to be a super thank you gift!! Again, these small items work up quickly and are a perfect way to practice your crocheting or knitting skills or new stitch techniques. These are great patterns for a youngster just learning how to work with yarn too!!!

HAPPY CREATING!!

Disclaimer:  This post contains affiliate links – “Commissions Earned”

,

,

,


Last Minute Easy One Skein Crochet Scarves

Amazing how fast this year has gone and here we are approaching another Christmas!!  And, if you are like me, I always seem to be making gifts at the last minute too.  I just love giving handmade gifts even if they are really small like a simple bowl to put your rings in or hold those small items that seem to gather on your dresser or counters.  At the current time, I’ve been crocheting fun, quick neck warmers to wrap and place under the tree.  Here are some pictures and directions to help you make some of those last minute gifts too!!

DC Cross Stitch/HDC

Chunky Cowl/HDC

Scalloped Edge Scarf

Double Crochet Cross Stitch/HDC The first picture shows my extra long scarf that is perfect for several wraps around your neck.  For this one, I used a lovely Oink Pigment yarn (Helix) and a Size H crochet hook.  The skein of yarn had 400 yards and I used all of it to complete this design.  I started off by making a HDC foundation crocheting 22 stitches. Round 1:  Turn, chain 3, *skip first stitch, make a double crochet in next stitch, then cross over and make another DC in the stitch that you just skipped.  Repeat from * until to reach the last stitch and then make 1 double crochet.  Here’s a great site for the New Stitch A Day cross double crochet stitch – you will complete a total of 10 cross over stitches using 20 stitches. Round 2:  Next row turn, chain 3 (counts as a stitch) make 21 HDC stitches for a total of 22 stitches across. Now repeat rounds 1 and 2 until you reach the desired length of your scarf. Remember, to end you scarf with Round 2.   Chunky Cowl/HDC For this pattern, I basically followed a cool design that I found on one of my favorite sites, Hopeful Honey with just a few changes.  I used a great Heartland yarn, Thick and Quick by Lion Brand (super bulky/category 6) for this cowl and a Size N crochet hook. Total yardage was 125 yards and I used the whole skein.  If you want your cowl to be a little bigger or longer, you might want to use 2 skeins of this awesome yarn.  So warm and soft to wrap up in.  I began with a HDC foundation stitch (55 stitches, like pattern directions).  Then followed the directions but I only completed 14 rows and the last row I completed 55 HDC in each stitch.  This Basic Chunky Cowl pattern works up super quick too.   Scalloped Edge Scarf I used my scalloped edge pattern but this time I started off with 21 stitches (multiples of 3) and had 6 scallops along the bottom and top edges.  I found a cute yarn by Red Heart called Gumdrop (color Smoothie) that I loved – nice bright, cheery colors and thought this would be perfect for a child’s scarf.  This yarn had 204 yards (worsted weight/category 4) and I crocheted this with a Size H hook. Came out soft and cuddly.  If you want this a little longer,  follow the pattern beginning with 15 stitches and use a Size G hook.   Again, I  just crocheted using up the entire skein of yarn to complete this fun, colorful scarf.  Now I need to go and get some more yarn to make a matching beanie 🙂 Enjoy these quick and easy patterns and hopefully they will help you complete those last minute gifts too!!

HAPPY CREATING!!

Disclaimer:  This post contains affiliate links – “Commissions Earned”     , , , ,

Valentine’s Day Heart – Updated Pattern

Here’s another quick (a little different) version to my fun, little crocheted applique heart pattern. SONY DSC My example here, I have used a size G crochet hook and some acrylic yarn. SONY DSC With this pattern, I began by crocheting the “magic loop” and making 12 HDC. SONY DSCSONY DSC Slip stitch in the 1st HDC to join your loop making a circle.  You can pull a little bit on the magic loop tail but don’t pull it totally closed until you  have completed your heart. SONY DSC Make another slip stitch (SL) in the next HDC stitch.  Chain 4 and crochet 2 treble crochets in that same space. In 3rd HDC ~~ crochet 3 treble crochets In 4th HDC ~~ crochet 1 half treble crochet then 1 double crochet In 5th HDC ~~ crochet 2 double crochets In 6th HDC ~~ crochet 2 double crochets SONY DSC In 7th HDC ~~ crochet 1 half treble stitch, 1 treble stitch, 1 half treble stitch (this creates the bottom point of the heart) In 8th HDC ~~ crochet 2 double crochets In 9th HDC ~~ crochet 2 double crochets In 10th HDC ~~ crochet 1 double crochet then 1 half treble crochet In 11th HDC ~~ crochet 3 treble crochets In 12th HDC ~~ crochet 2 treble crochets, chain 3 (this is one chain less than the beginning chain which will help create a better curve for the top of your heart), and 1 single crochet. SONY DSCSONY DSC Cut your yarn and pull it all the way through the stitch leaving a yarn tail on the right side of your heart.  Now flip your heart to the wrong side and slipping your hook through the very first slip stitch that you made, pull your yarn tail to the back. SONY DSCSONY DSCSONY DSCSONY DSC Now you want to take the tail from your magic loop and pull that tight to your liking.  Make a square knot with your two tails and weave in the ends. SONY DSCSONY DSCSONY DSC What I love about this pattern is that it lends itself to almost any time of yarn and size hook.  I hope you enjoy this pattern as much as I do and send some pictures of what you have done with your hearts 🙂 SONY DSCSONY DSC Please remember that this is my pattern not for your use to reproduce or redistribute in any way!!  Crocheting your own hearts can be used in any way you want but it would be greatly appreciated if you could give me credit for the design ~ www.stitch4ever.com.    Thanks so much 🙂

HAPPY CREATING!!

Disclaimer:  This post contains affiliate links – “Commissions Earned”

Whoooooo Goes There??

Wow, Summer is moving right along.  Actually starting to make some stocking stuffers !!!
SONY DSC

Crochet Owl Pouch

I did come across a really cute little owl pouch pattern, which I found at 1dogwoof.com.  Here’s one of mine!!  Makes up fast but best of all, I came across the best striping techniques for crochet to keep those stripes looking nice and even when you are joining. One of my favorite websites, PlanetJune has a couple of videos  you can watch to see her striping techniques.  I really like the invisible joining method as the outcome is fantastic.  It also makes for a wonderful fastening off technique so that you have a continuous looking stitch edge. SONY DSC SONY DSC If you are wanting to perfect your crochet striping, take a moment and check out these websites.  I know you won’t be disappointed 🙂

HAPPY CREATING!!

Disclaimer:  This post contains affiliate links – “Commissions Earned”

                                Nancy

A Wee Bit Irish

SONY DSC Almost Leprechaun time so I just wanted to share again my Shamrock pattern (free) since St. Patrick’s Day will be coming up soon.  This is a really easy pattern and is perfect to adhere a pin back for a cute clothing accessory or attach a small piece of a self-adhesive magnetic strip and you have a fun magnet for your refrigerator, etc. Turning it into a key chain charm with just a few extra chain stitches would be super so you could it hang from a backpack or zippered pouch.  Or just use it as a simple applique and sew it to a pillow, headband, cup cozy, napkin ring whatever you choose. SONY DSCSONY DSC Have fun with this design and I would love to see your pictures too.  Remember that the pattern is my own original design and selling it is not acceptable.  However, I have no problem with you sharing or selling your finished product.  It would be fantastic if you could refer back to this website if you post pictures on-line.  Thanks so much 🙂

HAPPY CREATING!!

Disclaimer:  This post contains affiliate links – “Commissions Earned”   

Crochet Pumpkin with Leaf Tutorial

I found this fantastic free pattern on Knit Picks by Hannah Maier, I believe it can be found also on Ravelry.  It is actually two patterns – one for knitting and one for crocheting.

SONY DSC

I created the crochet version, which was called the Clove Pumpkin.  The yarn that I chose was Lily, The Original Sugar ‘n Cream cotton.  I crocheted one using a Size H hook and the other one I used a Size E.  I didn’t vary from the directions given but wanted to add a leaf to my pumpkin as well as that little curly Q feature you sometimes see on a real pumpkin.  So I spent an evening designing this little leaf that I really like.

SONY DSC

Here are the directions for the leaf:  I used the same yarn type as I did for the pumpkin and made my leaf with a Size H crochet hook.  In the smaller version, I used a Size E hook for my leaf.

Chain 22, skip first two chains then SL (slip stitch) in next 9 chains.  In next chain complete 1 HDC, 1 DC, 1 TRB, in next chain – 2 TRB, next chain – 2 TRB, next chain – 2 HTRB, next chain – 2 HTRB, next chain – 2 DC, next chain – 2 DC, next chain – 1 HDC, next chain – 1 HDC, next chain – 1 HDC, last chain – 3 SC.

Now you want to basically reverse that stitch pattern on the back side of the chain stitches.  1 HDC, 1 HDC,  1 HDC, 2 DC, 2 DC, 2 HTRB, 2 HTRB, 2 TRB, 2 TRB, last chain 1TRB, 1DC, and 1 HDC.  Viola, you end up with this really cute leaf.  I just stitched it to the center of the pumpkin along with the stem.  SONY DSC

Also, in my smaller version, I created 8 pumpkin ridges just for some variations.  I have been placing them around my house and will use some for a table centerpiece for Thanksgiving!!

Thank you Hannah Maier so much for sharing such a cute pumpkin pattern.  Love it 🙂

HAPPY CREATING!!

Disclaimer:  This post contains affiliate links – “small commission earned”

Sewing Knit Cuffs Picture Tutorial

With cooler weather somewhere around the corner, you might be thinking of sewing some pj’s for the little ones or maybe a pair of “comfy” pants to lounge around in the house.  Adding ribbed knit cuffs to a pattern or even to an already made piece of clothing is not too difficult.

SONY DSC

I particularly like to add them to pajamas to help keep you warmer and I think they are a lot more comfortable than elastic around the wrist or ankle.  You can convert any pattern that calls for elastic at the wrist and make yourself a ribbed cuff in its place.

Measure your wrist and/or ankle and add 1″ to that figure.  That calculation will be your width measurement when cutting out your ribbed knit fabric.  The length measurement is kind of a personal preference thing  –  I like to have a finished cuff measure 3″ long, so I will cut my length measurement 7″ long.  This 7″ allows for my cuff to be folded in half ( 3 1/2″) and then allows for a 1/2″ seam allowance.  So whatever your desired finished cuff length is, double that measurement and add 1″ to it for a 1/2″ seam allowance.

SONY DSC

Now that you have your width and length measurements, cut out a paper or pellon pattern to use on the ribbing fabric.  You want the fabric ribs to be going vertical on the cuff with the stretchiest part going horizontal which will be placed along the sleeve or pant edge.  You will need one fabric pattern piece per sleeve or pant leg and cut out 2 of each.

SONY DSC

With right sides together, fold your cuff pattern together with the width end measurements touching.  Sew a narrow 1/4″ seam using a stretch stitch.  Now serge along that same seam or use a narrow zigzag stitch or overcast stitch if you don’t have a serger.  Fold in half, wrong sides together (seam lines matching).   You actually have a cuff ready to be sewn to your garment.

SONY DSC SONY DSC

Sew your sleeve or pants together according to your pattern directions, no need for hems or elastic if you are adding the cuffs.   To insure your cuff is evenly spaced around, you will want to mark off your sleeve/pant as well as the cuff into fourths.  Place a pin at the sleeve/pant seam, place another pin at the opposite side of the sleeve/pant, then find center between those two spots and place two more pins one on the top and one on the bottom of the sleeve/pant.  You now have four evenly spaced pin placements to use to match your cuff.  You will do the same thing on the cuff, place a pin at the seam, one directly across from it and then find center on top and bottom of cuff.  Place right sides together matching your pins.   Now you are ready to sew the cuff to your sleeve or pant leg.

SONY DSC

Sewing the cuff to the sleeve/pant itself can be a little tricky because you will need to stretch the cuff but not the sleeve/pant  fabric.  You will keep your sleeve/pant wrong side of fabric against your sewing machine.  The right side will be inside and you will place your cuff inside the sleeve/pant garment for stretching the cuff while your sew.  Match your pin placements with right sides together.

SONY DSCSONY DSC

Beginning at one of the matching pin placements, begin sewing a 1/2″ seam allowance.  Stretch the cuff while you sew so that the second pin placement on the cuff matches to the second pin placement on the sleeve and continue around matching all four pin placements with each other and joining stitching line.  To give your seam a clean finished look, you can serge the seam or stitch with a narrow zigzag or overcast stitch on the edge.

After you have sewn in your cuff, I like to add a decorative stitching on the outside to help hold the serged seam in place.  I sew from the wrong side, holding down the seam and making sure the fabric underneath is smooth and flat.

SONY DSCSONY DSC

Turn your sleeve right side out and you now have a wonderful cuff attached that will keep cool air out and help sleeve to stay in its place and not fall down over your hand.  I like to add cuffs to pant bottoms too for the same reasons.  If sewing for a child, you can add a little extra length to your pant pattern to allow for growth and the cuff will help to keep that extra length from dragging on the floor.

HAPPY CREATING!!

Disclaimer:  This post contains affiliate links – “small commission earned”

How to use Fusible Adhesive for Appliques

Getting your applique design ready to be placed on your garment is fun and exciting because you are almost completed with your project and can start visually seeing your creation.

I personally like to us a pellon paper-backed product called Wonder Under.  It is an excellent fusible web that works for just about any type of fabric for making appliques on wearable or home decor projects.  Wonder Under will come will good directions on how to use it but here are a couple of hints to help you have a truly successful outcome.

When you open your Wonder Under, you will feel one side is smooth like thin paper and the other side you can feel a slight roughness which is actually the adhesive side.

Your first step will be to trace your applique design onto the smooth paper side with a nice sharp pencil.  Cut out the design leaving about 1/8 inch extra Wonder Under from your pencil lines on the outer edges.  Doing this will ensure that you have the fusible adhesive covering your entire applique right to the edges of  the fabric.

Pencil traced applique design onto paper side of Wonder Under

Now you are ready to iron your applique design onto the WRONG SIDE of the fabric that you want to make the applique from.   Most of the time, I keep my trusty iron on the cotton setting unless I am really using a fine, delicate fabric.  I also use a pressing cloth that I place over my applique design before I place the hot iron onto the fabric.  An old cotton tea towel, smooth cloth napkins or muslin fabric works great as a pressing cloth for all my projects.

Personally, I really enjoy using these white, cotton kitchen tea towels as a pressing cloth.  You can see through them easily, they are large and leave no lint.

Because my iron is always set with the steam feature on, I leave it that way for pressing the Wonder Under to my fabric.  Never can remember if the directions tell you not to use steam but I have no problems leaving it on.  I just don’t give an extra burst of steam when pressing the applique design.

Pressed design onto WRONG side of applique fabric

Now place your iron onto your applique design and hold it in place for about 5 seconds.   Remove the pressing cloth and check out how the Wonder Under looks like – is it adhering.  If you feel like you need to apply a little more heat, just cover your design again with the pressing cloth and hold the hot iron onto your applique for maybe another 3 to 5 seconds.  Sometimes when using a thicker fabric for the applique design (like denim), you will need to allow for a little extra heating time.  I will do the first pressing and check things out and if I feel like I need a little more heat, flip your applique design over and press from the opposite side of your fabric.

Let cool to the touch and cut out your applique design following your pencil marks.  Lift a corner of the Wonder Under and slowly remove it from your fabric.  You will have a smooth flexible feel to the wrong side of your fabric that is now going to be your applique.

Right side of cut out applique design

Now for the fun part, place your applique design with the adhesive side down (wrong side of  applique fabric to right side of project) and centered onto the right side of your garment.  Press the applique design onto your garment following the same directions as above using the pressing cloth and holding in place for about 5 seconds.  Viola!!

Ironed applique design onto shoulder of T-shirt

If you cut your design out using Pinking Shears or used a tightly woven fabric like twill, canvas, denim, felt or fleece (which either doesn’t fray or very little fraying occurs) your applique design could be set to go.  But a narrow, close, zigzag stitch gives a professional finish look and helps to keep the fraying to a minimum.  Also, applying a little fray check to the edges of your applique helps with the fraying issue too.  If using fray check, apply that to the edges after you have cut out your applique, iron on to your project (pressing cloth recommended), and then sew a narrow, close together, zigzag stitch.

Next blog will be about sewing suggestions for your applique.  In the meantime,  have fun designing appliques and think of all the different uses for them.  Appliques really personalize your project and are a very workable craft to do with a child or young teenager to help them update their room.  The ideas are endless.

  • TIP:  Don’t forget to look at cookie cutters too for great applique designs and ideas!!

HAPPY CREATING!!

Disclaimer:  This post contains affiliate links – “small commission earned”

Some UnConventional Sewing Tools

Sewing, Sewing, Sewing which I do on a daily basis to keep items available for my Etsy shop – www.etsy.com/shop/ToteworthyDesigns – as well as for my personal designs and treasures!!  I “LOVE” to sew and have many unconventional type tools that I use on a day-to-day basis to help make my projects easier and look their best. Looking at the above picture – I will give you a brief idea of what I use some of these household items for to aid me in my sewing endeavors:

  • Flour Sack T-Towels – These are probably my all time favorite item to have on hand.  Not only are they a perfect item for your kitchen or bathroom but these towels make a wonderful pressing cloth.  They are big (26″ x 26″), lint free and you can lightly see through them when you are pressing your project.  The cloth can handle a hot iron and protects your fabric too.  I get them in white so I can bleach them, if need be.
  • Soap Scraps – I collect all those small soap remnants and use them for marking registration lines, sewing lines, notches, etc.  These soap pieces don’t clearly show up on white fabric so then I pull out a quilting type pencil.  All you have to do is steam them and the lines will disappear, however, if you can still see your soap marks, give a spritz of water to the mark and iron it out.
  • Wooden Spoon – These are great to help with turning items to the right side.  The long handle works good on narrow tubes and the rounded spoon side gives good smooth edges for pressing.  Should you get a rough spot on the wooden spoon, you can always smooth it out with an emery board (nail file) or some fine sandpaper.
  • Magnifying Glass – I use this when I sometimes have to verify my sewing needle information or checking out sewing stitches especially black fabric with black thread.
  • Envelope / Letter Opener – This makes for a great stiletto substitute or creating your own bias tape and need to be pressing very close to the edges of fabric and don’t want to burn your finger tips.  Mine is a metal style letter opener  and I just have to watch that is doesn’t get too hot when using with my iron.
  • Painter’s Tape – Great tape to use if you are working with clear vinyl.  You can tape your vinyl to your cutting mat to insure getting a nice straight cut line.  I also will stack several layers together on my machine to have a good edge for my fabric to follow for a straight stitching line especially if it is a really wide seam.
  • Magnet – Need something to help out on those occasions when you drop pins or needles on the rug.  I know they make expandable magnetic pointers too for those tight or out of reach spots that a pin always lands.
  • Cotton Swabs – These little gems work great to get in those small places to remove lint and dust from your machine.  You can always drop a little sewing machine oil on the cotton tip and oil those hard to reach places on your machine.
  • Small Mallet – I use this guy when I need to insert magnetic clasps.  This saves my fingers and nails when you have to push down the tab sides of your clasp.
  • Wire Cutter – This makes fast work of removing a shank on a button.
  • Small Can – I enjoy my Republic of Tea and the tea bags come in these very nice cans, which have a wide variety of uses – pencil holders, scissor keepers, cut Velcro, cotton twill tape, elastic, etc.
  • Old Medicine Bottle – Perfect to hold all my broken needles, bent pins, pins that the heads have come off – I just have punched a hole in the child proof bottle cap and drop those discarded pins into the bottle.  Doing this also saves your fingers when you are rummaging through your sewing trash can looking for scrap fabric to test your stitching.
  • Binder Clips / Paper Clips – Alternate method to hold several fabric layers together when pinning just isn’t the answer.
  • Calculator – Measure twice or three times but cut once.  I use this to double-check my math.
  • Small Flashlight – I keep this by my iron as the cover that houses the water is difficult to see through so I just light it up with my handy-dandy flashlight to see my water level.  I also keep a lint roller on my ironing board to “lint off” those cotton threads that always seem to be on everything.

I know that there are lots of things you can recycle too for helping to stay organized and making your sewing / craft rooms more usable – canning jars for buttons, makeup holders for scissors or rotary cutters, etc.  Please share if you have an “unconventional” sewing tool or idea that is unique to keep those “creative” juices flowing.

HAPPY CREATING!!

Disclaimer:  This post contains affiliate links – “Commissions Earned”


Blocking Your Crochet/Knitting Project

When I was a young girl first learning to crochet and sew, blocking your item was right up there with do I really need to stay-stitch my neck edge within my sewing project – duh, I learned the hard way, you DO need to do these steps to get the desired results and have an item that will last and continue to look good.  Think about it, you have gone to all this work to crochet a wonderful piece, now you need to block it so it will have the necessary shape, curves, points, etc. to look awesome. There are basically 2 ways of blocking – called wet blocking and/or steam blocking.  STEAM blocking is exactly as its name implies.  I do this for small projects and I NEVER do it for anything that has been made with acrylic yarn.  I layout my project on my ironing board, spray it with a little water from my handy-dandy spray bottle that I always have hanging from my ironing board and sort of shape it with just my fingers.  I like to cover it with a pressing cloth, then I hold my iron just above the item but don’t touch it with the iron and steam away.  I usually give it a couple good bursts of steam.  Lift the pressing cloth, check it out and if all looks good just let it stay in place to cool and dry. If you aren’t totally satisfied, maybe an edge isn’t just to your liking, give it another spray of water, cover with your pressing cloth and give it another burst of steam. The steaming method works really well for cotton yarns.  I would be cautious with WOOL items too as heat will do funky things to wool yarn.  As one time my hubby was trying to be so helpful and threw a lovely sweater in the dryer and it shrunk to fit a Barbie doll. WET blocking is probably the best way to block your yarn projects.  Basically, soak your crochet in a nice sink full of cold water, add a very little drop of a gentle soap, give it a nice swish around, and rinse really well to make sure soap is all gone.  Gently squeeze out some of the water, you can let it drain a little in the sink, layout a big towel and place your project on the towel.  You really don’t want to wring or twist – I like to fold up my towel in half and then fold in the sides and press easy on it to help remove extra moisture. Then off to my blocking mats with my rust proof pins and tape measure.  Layout your project and gently stretch it out, finger open those fine details that you have made and pin away.  Use your tape measure to make sure you are getting the size and shape you want.  Again, have that handy-dandy spray bottle at hand if you need to dampen your project during the blocking process.  For a shawl with fine picot points, be sure to place a pin in each one.  Believe you me, it is worth it!! Round shaped items, like booties or hats, I like to shape using wet paper towels.  Put wet paper towels inside your booties to shape them the way you want and let them stay that way until the paper towels are dry.  I use fabric covered styrofoam balls for shaping hats but if they need to be a little fuller, again wet paper towels to fill in those spaces – works great.  Just do final shaping with your hands and let air dry completely. Take a moment and check out Shibaguyz Designz blog.  Some really interesting ideas for blocking here using wire, #10 cotton thread and/or unwaxed kitchen string.  Recommends the string for nice shaping of curved areas.  Another recommendation – block your swatch piece to really ensure you are getting the correct gauge.  Excellent reading 🙂 Here are some pictures of the blocked shawls and scarves that I just did – talked about the patterns on my last blog That’s a Wrap!!  Good examples of how blocking really gives your item that WOW factor.  You’ve spent lots of hours crocheting or knitting that beautiful piece – now spend just one more hour to truly give your item that professional, finished appearance.

Blocking on mats


Before blocking

After blocking

Before blocking

After blocking


 HAPPY CREATING!!

Disclaimer:  This post contains affiliate links – “Commissions Earned”    

That’s a “WRAP”

Well I’ve been super busy “wrapping up” with hooking shawls, scarves and cowls recently so I thought I would share with you some of my projects and what patterns I used.  Can’t quite call them totally “finished” as I still need to complete detailed blocking for everything so that is what is on my agenda for this week.  Plus, all the yarn I used was already in my stash!!  Yeah!!! Before I go further, did want to share with you pictures of my finished knitted seed/moss stitch scarf.  I am very happy with how it turned out – especially since knitting seems to challenge me a bit 🙂

Seed/Moss Stitch

Anyways, take a look and hopefully you will get inspired with a “wrap” of your own 🙂
  1.  These pictures show a lovely summer shawl.  I used a free pattern found on Ravelry called the Dixie Charm pattern by Kathy Lashley. I used 2 skeins of Sunseeker  Multis (color #107) by Cascade Yarns and an I hook (5.5) for this pattern.  I just love the beautiful peachy tones which highlights just a touch of sparkle throughout.  This yarn was a combo of cotton, acrylic, and metallic yarn.  Very nice to work with too and I’m really pleased with how it looks so far.  Blocking will give it that totally finished look!!

    Dixie Charm

  2. Next I liked this great Moogly pattern called Berry Harvest   Bandana Cowl.  Crocheted this one using the pattern recommendations of an H hook and a DK weight yarn.  I chose Rowan Creative Linen (1 skein) which is a nice 50% linen and 50% cotton.  Worked up lovely and the berry design and edging will truly benefit from a good blocking.
  Back to Ravelry again, I found a pretty lacy scarf called Summer Sprigs Lace Scarf by Esther Chandler.  The yarn I decided to go with was Folio by Berroco (blend of Superfine Alpaca and Rayon) but was considered a Light (3) category and her pattern used a Fine Lace yarn.  I only had 2 skeins of this yarn, so I chose a Size E hook (3.5) using the Folio yarn and only chained 232 + 1.  I used 1 full skein and a little more than half of the other skein for my scarf.  It still wraps around your neck nicely and drapes on the sides.  I know too once blocked, it will enlarge the size of the finished scarf.

Summer Sprigs Lace Scarf

I enjoyed making the Summer Sprigs pattern so off to my stash bin again and found 4 skeins of Folio in an awesome charcoal gray color.  So I have started pattern using this yarn, changed hook to a Size C (2.75) and began with the pattern recommendation of 386 +1 chains.  Not very far, but I think  the outcome will still be a lovely, light weight scarf.

Work in Progress

Of course, I just purchased an awesome pattern by Christina Hadderingh called Hotel of Bees shawl from Ravelry and looking forward to participating in the #HOBCAL (Hotel of Bees Crochet Along) through Cherry Heart’s Cozy Corner group. And, That’s A “Wrap”!!

HAPPY CREATING!!

Disclaimer:  This post contains affiliate links – “Commissions Earned”