hello, good to see you again:)
hope you are still interested in the tutorial for the spring bag or – if you like to rename it – summer/autumn/winter bag.
here we go, success with crocheting!


material and stitches
yarn
for making this bag i didn’t buy new yarn but used yarn from my stash:
1. for the body of the bag
this yarn is the same type of yarn that i used for this yellow bag.
it has the name phildar vacances and it is suitable for crochet hook size 4.5-5.0 mm, i used 4 balls and hook size 4.5 mm. see the photos for detailed info about the yarn. i bought it a few years ago at the local market, it is no longer available, but perhaps your yarn supplier can recommend a replacement for the yarn.


i sent an email to phildar with a request for an advice about which yarn from their current range gives a similar effect. this is the response i have received:
“Bonjour Madame Andrée,
In answer to your demand(request), you can replace the quality VACANCES by the quality PHIL THALASSA which has the same criterion of knitting.
He(It) is certain that you will not obtain any more the depiction of origin.
Do not forget that the sample remains essential to obtain a knitting in the good dimensions(size).”
merci beaucoup sophie!
this is the link to phildar’s website, in french
in the netherlands it is possible to buy phildar yarn in several webshops and on local markets. you don’t have to use this label, please just use the yarn you like.
2. for the top part and the handles
cotton 8 – about 1.5 balls:
- in a dark unbleached cotton shade, also from my stash and i used crochet hook size 3.5 mm
- for the cross stitches and to sew the fold and the handles a somewhat lighter shade
- for this you need a needle with a blunt tip.
3. other materials
- i did not provide my bag with a lining, but i have made an inside pocket, explanation at the bottom of this post
- a button for the closure and optional a second button for the inside pocket (my wooden ones are second hand)
- optional 2 snap buttons to be able to close the bag at both sides.
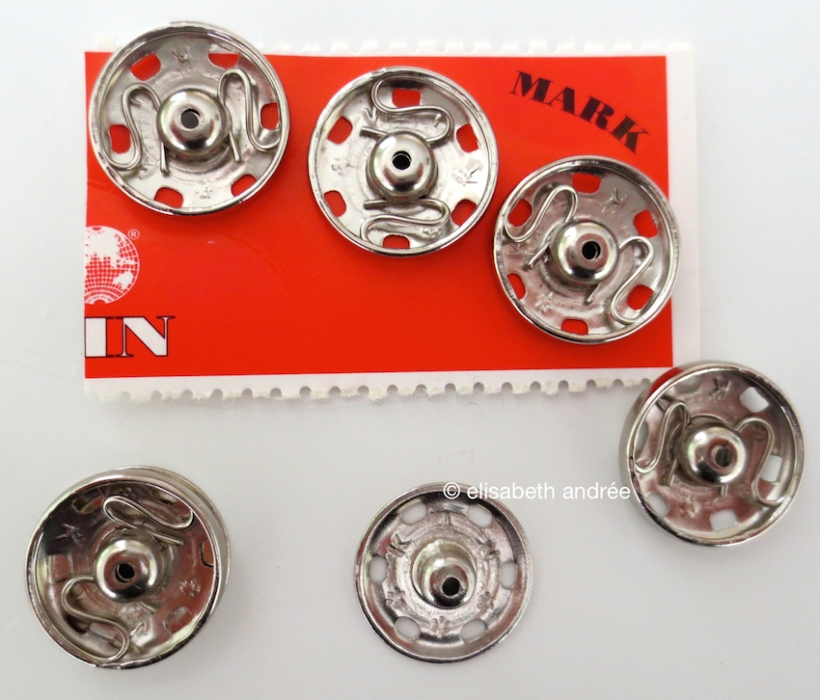
snap buttons

the bag i made is quite small, the dimensions are:
- the bottom: a diameter of about 29-30 cm
- the body: about 23-24 cm, after the top is fold
- the handles from end to end: about 35 cm length.
however, it is easy to make the bag in a larger size, it might not be necessary, but i will indicate below in orange where it is best to increase the sizes.
stitches
used stitches in american english terms:
- ch = chain
- ss = slip stitch
- sc = single crochet
- 2sctog = 2 single crochets together
- hdc = half double crochet
- dc = double crochet
instructions
the pattern for the bottom of the bag is similar as the rows for the doggie toy (also named cuddle cushions), it is only larger.


for the bottom you start with a magic loop.
row:
- 1 ch, 12 sc in ring, ss in first sc
- 1 ch, 1 dc into same stitch as ss, 1 dc into next 11 sc, ss into first dc
- 1 ch, 2 sc in same stitch as ss, 2 sc in each of next 11 dc, ss into first sc
- 1 ch, 2 sc in same stitch as ss, 1 sc in next stitch, *2 sc in next stitch, 1 sc in next stitch*, repeat between * and * until end of row, ss in in first stitch
- 1 ch, 1 dc in same stitch as ss, 1 dc in next stitch, 2 dc in next stitch, *1 dc in next 2 stitches, 2 dc in next stitch*, repeat between * and * until end of row, ss in in first stitch
- 1 ch, 2 sc in same stitch as ss, 1 sc in next 3 stitches, *2 sc in next stitch, 1 sc in next 3 stitches*, repeat between * and * until end of row, ss in in first stitch
- 1 ch, 1 sc in same stitch as ss, 1 sc in all next stitches until end of row, ss in in first stitch
- 1 ch, 1 dc in same stitch as ss, 1 dc in next 3 stitches, 2 dc in next stitch, *1 dc in next 4 stitches, 2 dc in next stitch*, repeat between * and * until end of row, ss in in first stitch
- 1 ch, 2 sc in same stitch as ss, 1 sc in next 5 stitches, *2 sc in next stitch, 1 sc in next 5 stitches*, repeat between * and * until end of row, ss in in first stitch
- 1 ch, 1 sc in same stitch as ss, 1 sc in all next stitches until end of row, ss in in first stitch
- 1 ch, 1 dc in same stitch as ss, 1 dc in next 5 stitches, 2 dc in next stitch, *1 dc in next 6 stitches, 2 dc in next stitch*, repeat between * and * until end of row, ss in in first stitch
- 1 ch, 2 sc in same stitch as ss, 1 sc in next 7 stitches, *2 sc in next stitch, 1 sc in next 7 stitches*, repeat between * and * until end of row, ss in in first stitch
- 1 ch, 1 sc in same stitch as ss, 1 sc in all next stitches until end of row, ss in in first stitch
- 1 ch, 1 dc in same stitch as ss, 1 dc in next 7 stitches, 2 dc in next stitch, *1 dc in next 8 stitches, 2 dc in next stitch*, repeat between * and * until end of row, ss in in first stitch
- 1 ch, 2 sc in same stitch as ss, 1 sc in next 9 stitches, *2 sc in next stitch, 1 sc in next 9 stitches*, repeat between * and * until end of row, ss in in first stitch
- 1 ch, 1 sc in same stitch as ss, 1 sc in all next stitches until end of row, ss in in first stitch
- 1 ch, 1 dc in same stitch as ss, 1 dc in next 9 stitches, 2 dc in next stitch, *1 dc in next 10 stitches, 2 dc in next stitch*, repeat between * and * until end of row, ss in in first stitch
- 1 ch, 2 sc in same stitch as ss, 1 sc in next 11 stitches, *2 sc in next stitch, 1 sc in next 11 stitches*, repeat between * and * until end of row, ss in in first stitch
- 1 ch, 1 sc in same stitch as ss, 1 sc in all next stitches until end of row, ss in in first stitch
- 1 ch, 1 dc in same stitch as ss, 1 dc in next 11 stitches, 2 dc in next stitch, *1 dc in next 12 stitches, 2 dc in next stitch*, repeat between * and * until end of row, ss in in first stitch
- 1 ch, 2 sc in same stitch as ss, 1 sc in next 13 stitches, *2 sc in next stitch, 1 sc in next 13 stitches*, repeat between * and * until end of row, ss in in first stitch
- 1 ch, 1 sc in same stitch as ss, 1 sc in all next stitches until end of row, ss in in first stitch
- 1 ch, 1 dc in same stitch as ss, 1 dc in all next stitches until end of row, ss in in first stitch.
if you want your bag to have a larger bottom, keep repeating this way until you work has the size you like.
body of the bag
- row a. 1 ch, 1 sc in same stitch as ss, 1 sc in all next stitches until end of row, ss in in first stitch
- row b. 1 ch, 1 hdc in same stitch as ss, 1 hdc in all next stitches until end of row, ss in in first stitch
- repeat rows a. and b. until you have 10 rows of each, the last row is a row b.
- if you prefer to increase the height of your bag, keep repeating these two rows
- row c. 1 ch, 1 sc in same stitch as ss, 1 sc in all next stitches until end of row, ss in in first stitch
- repeat row c. until you have 10 rows
- cut yarn and weave in ends.
top and handles


- row 1. attach second yarn and make 1 ch, insert hook into same stitch, draw up a loop, insert hook in next stitch, draw up a loop, yarn over and pull through 3 loops on hook, first 2sctog made, *insert hook in same stitch, draw up a loop, insert hook in next stitch, draw up a loop, yarn over and pull through loops on hook*, repeat between * and * until end op row, end with insert hook in last stitch, draw up a loop, insert hook into the same stitch as first stitch, draw up a loop, yarn over and pull through loop on hook, ss into first 2sctog, 1 ch
- row 2 – 10. insert hook into same stitch as ss, draw up a loop, insert hook in next stitch, draw up a loop, yarn over and pull through 3 loops on hook, first 2sctog made, *insert hook in same stitch, draw up a loop, insert hook in next stitch, draw up a loop, yarn over and pull through loops on hook*, repeat between * and * until end op row, end with insert hook in last stitch, draw up a loop, insert hook into the same stitch as first stitch, draw up a loop, yarn over and pull through loop on hook, ss into first 2sctog, 1 ch
- take hook from loop
- measure where you like to have your handles and mark with a paperclip or a yarn end in another color. take for the startingpoint of the first handle two stitches from the first stitch of the row. it is best to measure between begin and end points of the handles but also the parts at the sides between both handles. correct if necessary
- insert hook back into loop
- row 11. make 1 ch, 1 h dc into the same stitch as ss and 1 hdc into the next stitch, crochet the number of chains to create the desired length for your handle and remember the number for the second handle. i didn’t want very long handles, therefore i crocheted 70 chains
- crochet 1 hdc into the stitch you marked for the end point of the first handle, crochet 1 hdc into all the next stitches until you reach the point you marked for the beginning of the second handle, make the handle the same way as you did the first handle, crochet 1 hdc into all the next stitches until you reach the first stitch of the row and ss into first stitch
- row 12. 1 ch, 1 hdc into same stitch as ss, 1 hdc into all the next stitches and into all the chains of both handles until end of row, ss into first stitch
- row 13 – 19. 1 ch, 1 hdc into same stitch as ss, 1 hdc into all the next stitches until end of row, ss into first stitch
- cut yarn and weave in ends.
finishing and decorating top of the bag
A. fold top of bag and handles in half, pin and sew neatly with same color yarn. see photos for reference.


B. fold the top part of the handles (the part of the handles you hold in your hand) flat with the seam in the middle and sew with yarn in lighter shade basting stitches on both sides of the handles. see photos for reference.


C. attach yarn to first stitch between begin and end point of a handle, ss in same stitch, in next and all subsequent stitches, until end of row, cut yarn, weave in ends. repeat on other side of the bag.
D. and if you like you can also make cross stitches for decoration. on the part of the 2sctog it is easy to do because it looks like embroidery canvas.


closure
mark the place where you like to have the button. also mark on the other side of the bag the 2 stitches in the middle between begin and end points of the handle right beneath the row with the slip stitches. attach yarn with a ss into the right of the 2 marked stitches and crochet the number of chains needed to fit around the button, attach with a ss into the other of the 2 marked stitches. make 1 ch and crochet 1 sc into all the chains, cut yarn and weave in ends. attach button onto the bag.
inside pocket
for the inside pocket i crocheted a lacy with dot square with a row of hdc and 1 row of sc around it, including a button hole and attached it with another smaller size wooden button to the inside of the bag with little stitches on the same side as the loop voor the closure of the bag. this inside pocket acts a bit like a tiny mesh bag.
- row 1. 1 ch, turn, measure and crochet the number of chains you need for the buttonhole, skip the correct number of 1 ch spaces and stitches, 1 hdc in next dc, *1 hdc in 1 ch space, 1 hdc in next dc*, repeat between * and * all around square, except in the treble in the corners, there you make 1 hdc, 1 dc, 1 hdc, at the end of row, 1 ch, turn
- row 2. 1 sc into every stitch, except in the dc in the corners, there you make 1 sc, 1 ch, 1 sc.
- cut yarn, leaving a long piece to sew the pocket with invisible stitches into the bag.


finally weave in the remaining yarn ends and sew buttons onto the bag (snap buttons on left and right sides of the handles on the inside of the bag).

May 7, 2014 at 04:07
This is darling! Love the soft colors 🙂
May 6, 2014 at 19:32
I love all the little extra details you added, the pocket inside, the toggle button, the cross stitch – beautiful.
May 6, 2014 at 15:03
Beautiful bag! Love the colors!
April 16, 2014 at 21:41
Hoi Andrée, bedankt voor je instructies. Misschien ga ik die ook nog maken!
Ik vind het groen-gele garen heel leuk. Jammer dat Phildar het niet meer maakt.
Hoeveel heb je gebruikt?
April 16, 2014 at 22:52
Hoi Estella,
Dank voor je bericht! Ik heb vier bollen gebruikt en ik heb er nog van. Morgen ga ik kijken hoeveel ik nog heb en dan stuur ik je hierover een mailtje, ok?
Groetjes.
April 16, 2014 at 11:44
Thanks for the tutorial! Such a great accessory for the spring!
April 15, 2014 at 14:11
I love this bag and your tutorial is wonderful… I think this would make the perfect beach bag for us… I am off to find some beautiful yarn to make it… thank you so much for sharing… Cathy
April 15, 2014 at 03:07
Love this bag since you made it!!!!!
Thank you for sharing your pattern : I’d love to have a go !!!!!! ;oD
xxxxxxxx Ale
April 14, 2014 at 19:21
I love the colors! And the pocket inside is a great idea…
April 14, 2014 at 19:01
Is this a worsted weight yarn? I’m here in the USA and want to be sure to use the right weight yarn. Is it a stiffer yarn or softer. Four ply? Are you using single or double strands? Sorry, I hate to trouble you.
Thank you so very much.
April 14, 2014 at 19:48
Mimmy, I am not familiar with the terms you use. I think a cotton yarn or a cotton mix (like with acrylic or hemp) which is not to soft or fluffy, but strong and suitable for hook size 4.5 – 5.0 mm, it will be fine. You want to use your bag to carry things in it, I think that is something to keep in mind. If your yarn is firm but somewhat thinner or thicker, just use the required hook size and adjust the number of rows if necessary. I did use a single strand.
Here is some info of the label: hook size EU and UK 4.5-5 mm / US 6-7. 10×10 cm = 26 rows, 19 stitches.
Hope this helps?
April 14, 2014 at 18:22
Oh, die ga ik zeker proberen! Momenteel zit k midden in de verhuisstress dus het moet nog even wachten. Maar dan wordt het inderdaad gewoon een wintertas. 🙂
April 14, 2014 at 15:17
Thanks Mimmy. Success with making your bag(s)!
April 14, 2014 at 15:08
Thank you! I love this bag and can’t wait to make some for gifts! Mother’s Day is soon! Bless you, Elizabeth!
April 14, 2014 at 15:02
I’m so pleased that you have posted the tutorial for this pretty bag! I’ve had my fingers crossed that you would give us the instructions. Thank you very much.
April 14, 2014 at 15:07
You are welcome Deborah!