
![]()
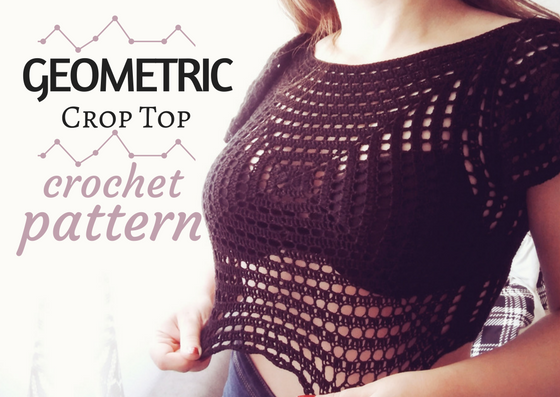
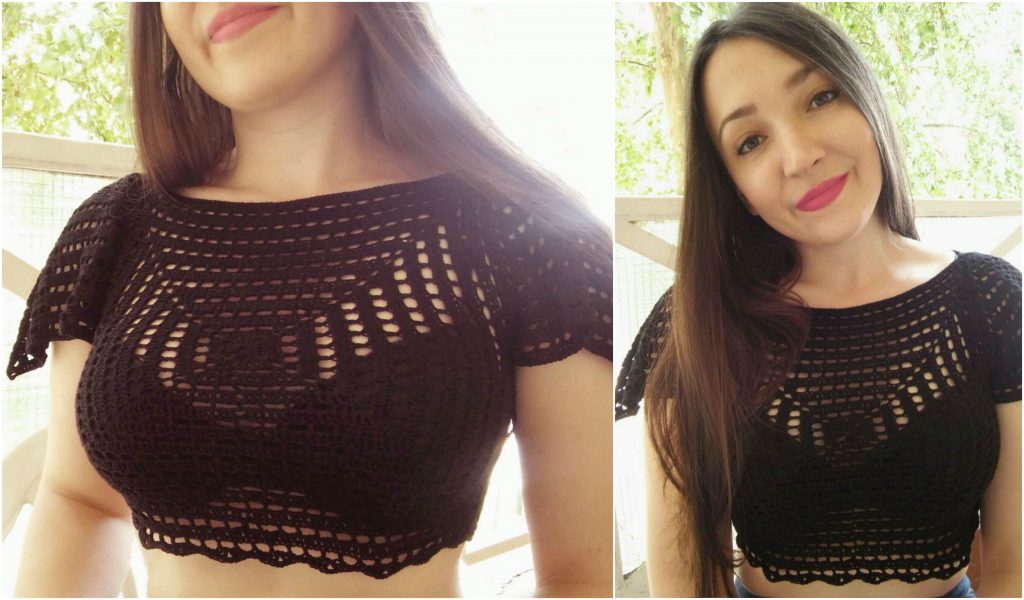
Hook Geometric Crop Top – Free Crochet Pattern on Ravelry here.
If you know how to make a simple granny square, you’ll be able to make this crop top. It’s made with just two granny squares, and two half-squares (triangles). There is a lot of different options for this pattern. If you don’t want your top to be see-trough, just make a basic solid granny square for the front. The pattern is written for the size Medium, but it’s easily adjustable for many other sizes.
(Not recommended for bra sizes larger than DD!)
What you need:
- Crochet hook 3mm [US C(tight) or D(lose)]
- Fingering weight (Super Fine) cotton yarn – around 500m or 550 yards for size medium
- Optional: tapestry needle – if you prefer to sew the pieces together
- Optional: measuring tape – you don’t need it if you can try it on as you go
Note: You can use any yarn weight, just make sure to use appropriate hook size.
This pattern uses US terminology and these abbreviations:
- sc – single crochet
- ch – chain
- slst – slip stitch
- hdc – half double crochet
- dc – double crochet
- ML – magic loop/circle/ring
Let’s start!
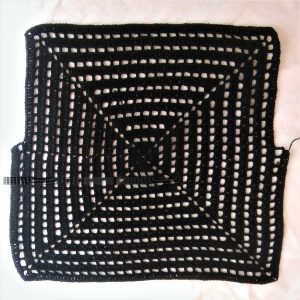
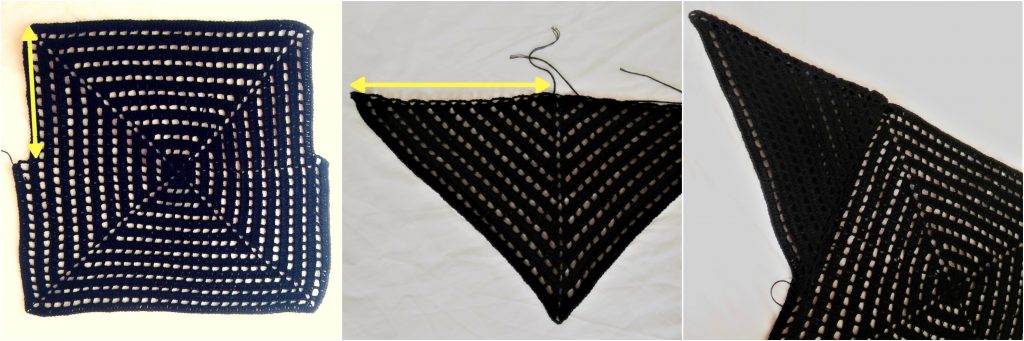
Make two granny squares as described below or as seen on the graph number 1. They should be the same size. Start from the center and work flat in the rounds.
- In ML – ch3 (stands for the first dc), 3dc, (ch3, 4dc) x 3, ch3
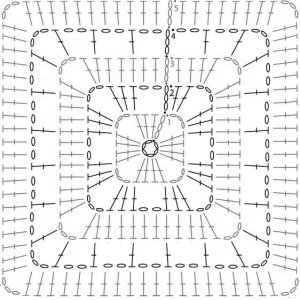 and join with 1slst in the top chain of the first ch3.
 - ch5, (skip 2 stitches, 1dc, [on the corner chain: 2dc, ch3, 2dc], 1dc, ch2) x 3, skip 2, 1dc, [on the corner chain: 2dc, ch3, 2dc] , 1slst in 3rd chain of ch5.
- ch3, 5dc, ([on the corner chain: 2dc, ch3, 2dc], 8dc) x 3, [on the corner chain: 2dc, ch3, 2dc], 2dc, 1slst in top chain of the first ch3.
- ch5, skip 2 stitches, 1dc, ch2, skip 2, 1dc, ch2, skip 1[on the corner chain: 1dc, ch3, 1dc], skip 1, 1dc, ch2,
{skip 2 stitches, (1dc, ch2, skip 2) x 3, [on the corner chain: 1dc, ch3, 1dc], skip 1, 1dc, ch2} x 3.
Rows 1, 3, 5, etc., are solid rows – 1dc in every stitch and on every corner chain: 2dc, ch3, 2dc.
Rows 2, 4, 6, etc. – skipping 2 stitches, ch2, 1dc.
- If there’s one stitch left before the corner chain, skip it, ch2 and work 1dc, ch3, 1dc on the corner chain, ch2, skip 1, and continue.
- If there is no stitches left before the corner chain, work 2dc, ch3, 2dc.
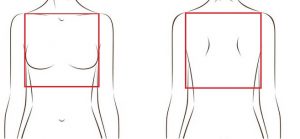
Keep doing rounds until you reach the size shown on the drawing below(marked with red squares). It should be wide enough to completely cower your breasts. If they are covered if you stretch the square it will be tight-fitting as mine is.
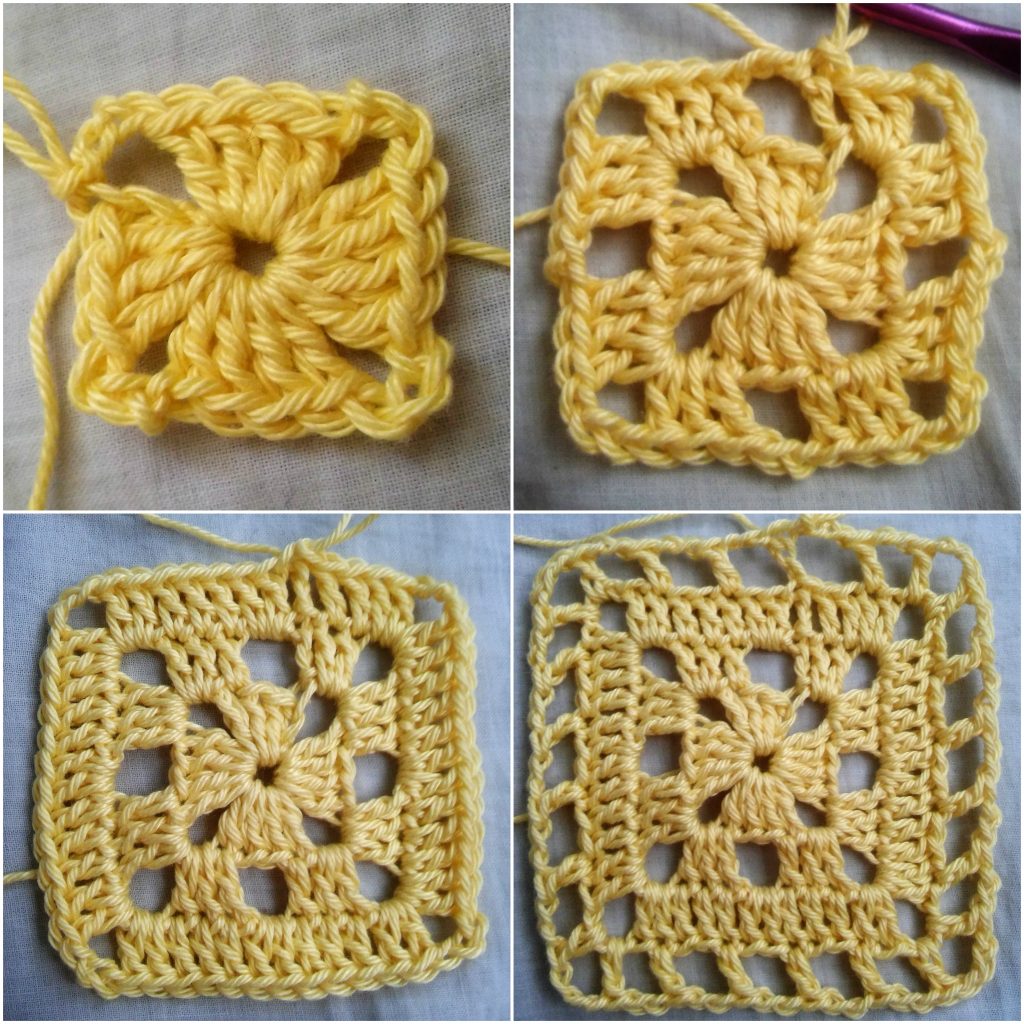
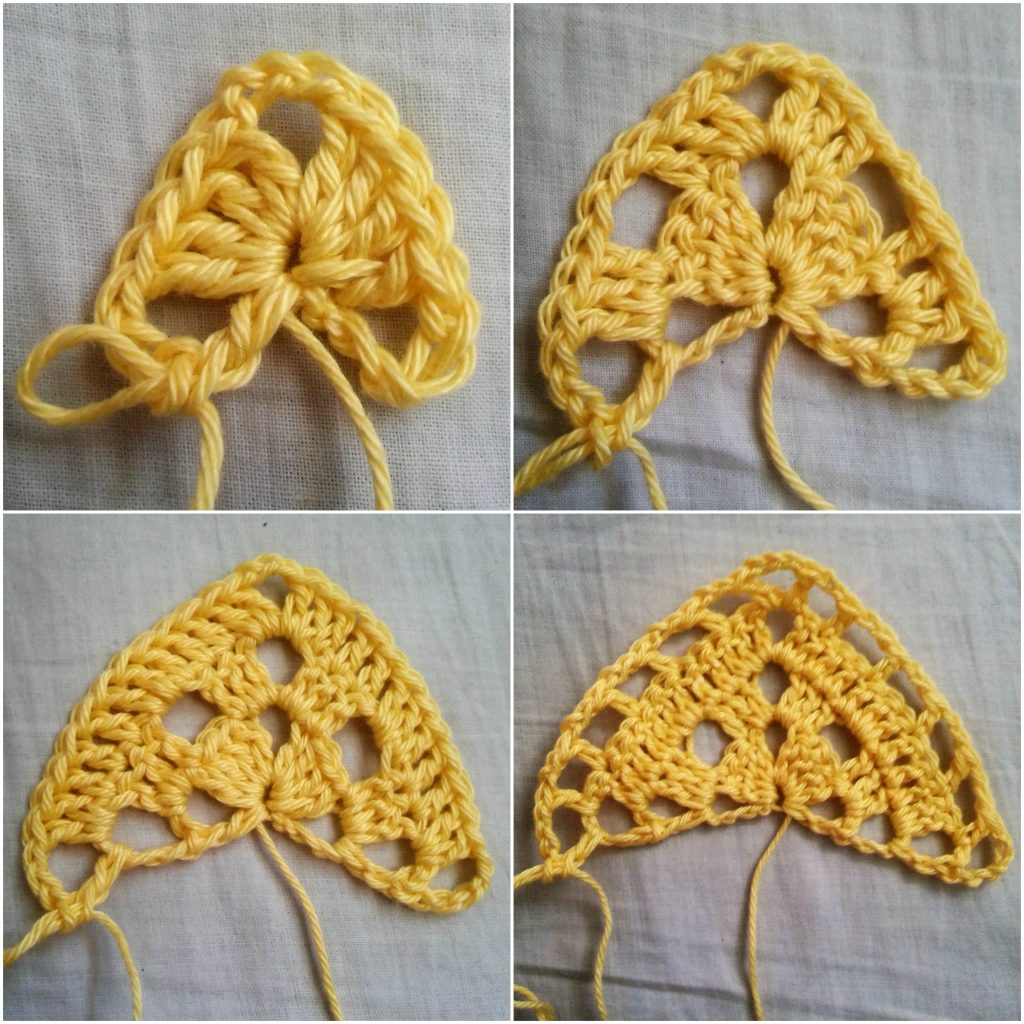
Now fasten off and attach yarn in the middle of one side of your square and continue working the round until you reach the middle of the opposite side. Turn your work, and add one more (half) row. Check the picture on the right!
Do the same for both squares.
The Sleeves
The sleeves are basically half-squares of the same granny square. Make the same number of rows for the sleeves as you made for the front and back squares. On the end of every row, turn your work.
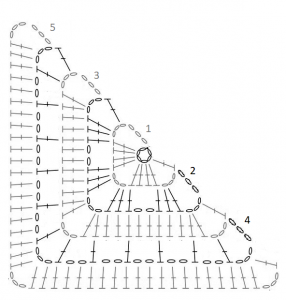
- In ML ch6, 4dc, ch3, 4dc, ch3, 1dc, turn!
- ch6, (2dc on the chain, 1dc, ch2, skip 2, 1dc, 2dc on the corner chain, ch3) x 2, dc1, turn.
- ch6, (2 dc on the chain, 8dc, 2dc on the corner chain, ch3) x 2, dc1, turn.
- ch6, (1dc on the corner chain, skip 1, ch2, [1dc, ch2, skip 2] x 3, 1dc, skip 1, 1dc on the corner chain, ch3) x 2, 1dc, turn.
Rows 1, 3, 5, etc., are solid rows – 1dc in every stitch and on evry corner chain: 2dc, ch3, 2dc.
Rows 2, 4, 6, etc. – skipping 2 stitches, ch2, 1dc.
- If there’s one stitch left before the corner chain, skip it, ch2 and work 1dc, ch3, 1dc on the corner chain, ch2, skip 1, and continue.
- If there is no stitches left before the corner chain, work 2dc, ch3, 2dc.
Assembling
First align front and back of the top one on top of the other. Make sure front sides of both parts are facing each other. Join them by sewing or crocheting them together, as shown on the picture below.
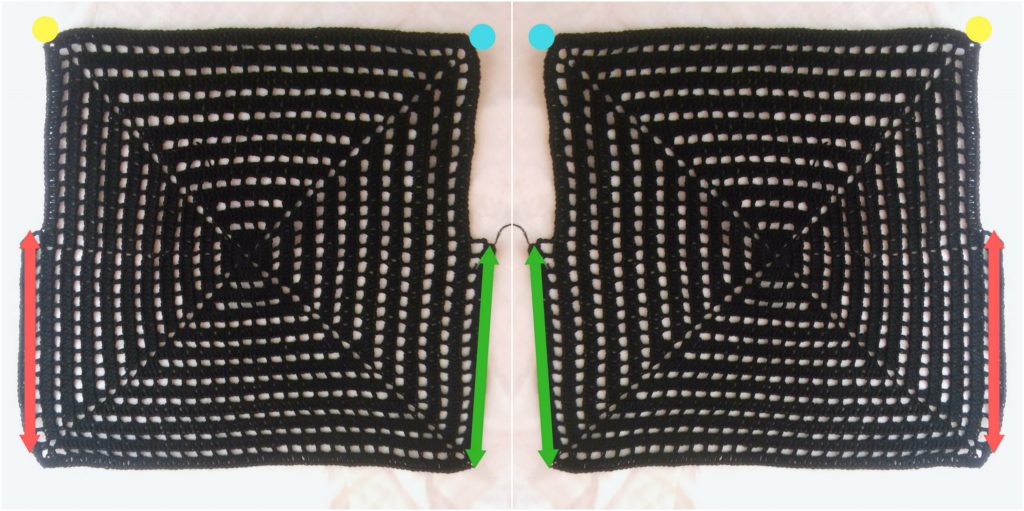
Add the sleeves as shown on the pictures below.
Edging – optional
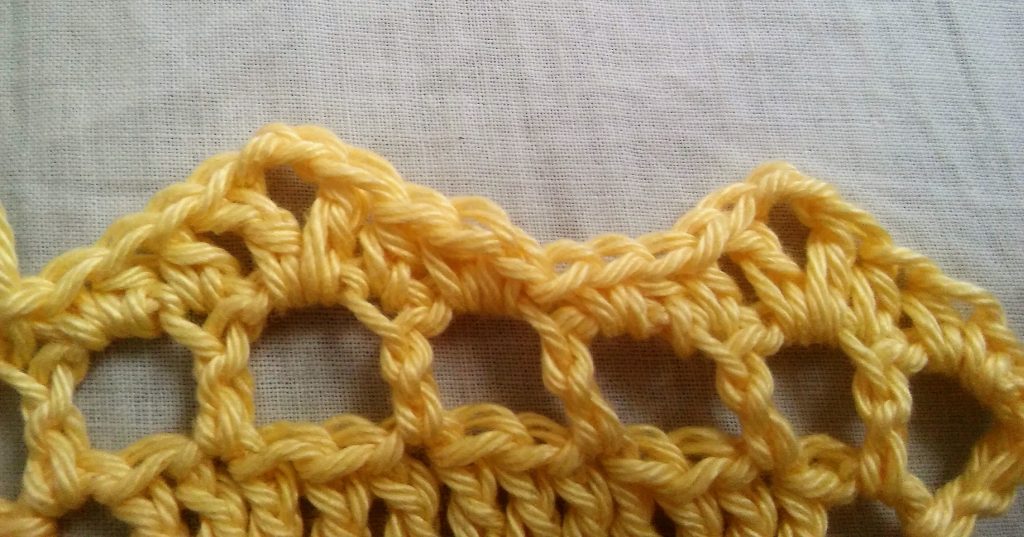
Add one row of (1dc, ch2, skip 2) on the bottom edge of the top. Than, repeat the combination of 1sc, 2hdc, 1dc, ch2, 1dc, 2hdc, 1sc, 1slst. Make sure the slip stitch is always in the dc stitch from the previous row.
If you have any questions or comments, feel free to contact me in comments section of this post, on my Facebook page, or by e-mail [email protected]. Also, if you make Geometric Crop Top, send me some pictures, I’ll publish them on my Facebook page. You can tag me on Instagram @barbarapecek.
You can support me by sharing this post or by buying my other patterns on Etsy or Ravelry. 🙂
This pattern is copyright of Barbara Peček / TheMagicLoop.com . Please do not claim this pattern as your own. If you wish to share this pattern, you may link to this pattern but please do not reprint it on your site. Do not sell this pattern or parts of this pattern. You may sell finished items made from this pattern, but please clearly credit the design to me and provide a link to my blog www.themagicloop.com.


4 Comments